Using an ordinary Gmail email address is fine if you’re going to send some photos from the family reunion to your aunt. Yet, in email marketing, you need to have a professional-looking email address to communicate with your audience. Even if your database isn’t big-brand massive, take the effort to set up your business email address and reach your subscribers from your company domain. It shows you’re serious about your brand, your message, and the relationship you’re building.
In this guide, we’ll walk you through how to create a business email address from scratch, explain why it matters beyond just “looking professional,” and show you how to do it using tools like Google Workspace, Zoho Mail, and Bluehost without overspending or overcomplicating things.
What is a business email address?
Wondering what’s a business email and why it matters? A business email address uses your company’s domain instead of a free email provider. A sender like info@brand.com looks trustworthy, but brandname@gmail.com does not. It’s a small change that signals professionalism, credibility, and consistency.
The format helps people instantly recognize who’s contacting them. Whether it’s support@, sales@, or press@, your email address sets the tone before recipients even open the message.
Here are a few common types:
| Email format |
Purpose |
| support@yourdomain.com |
customer questions, ticketing, issue resolution |
| sales@yourdomain.com |
outreach, demos, lead nurturing |
| name@yourdomain.com |
direct communication from your team |
| press@yourdomain.com |
media and PR inquiries |
The clearer your business email address, the easier it is to trust and respond to.
Benefits of a business email address
A business email address does more than make you look polished. It impacts how your emails perform and how your brand is perceived. Here’s why switching to a custom domain isn’t optional if you take your email marketing seriously.
It grows trust and recognition
Subscribers are more likely to open an email from newsletter@yourbrand.com than from a random Gmail or Yahoo email address. Your domain is your calling card; it tells people, “This is official.” The moment your audience sees your brand in the sender line, you reinforce consistency and legitimacy.
For example, a campaign from offers@brand.com looks like a real promotion. The same message from brand1234@gmail.com? It’s an easy skip or, worse, a spam report.
It improves deliverability by design
Using a domain-based email address allows you to configure DNS records like SPF and DKIM that tell inbox providers you’re a verified sender. Most free email clients don’t let you set these up, which makes your campaigns vulnerable to spam filters.
Many email marketing platforms, including SendPulse, require a custom sender address to ensure your emails actually land in the inbox.
It gives you control over your sending identity
With a business email address set up, you’re not tied to a third-party service you don’t control. You can create, remove, or delegate inboxes as your team grows. Want to revoke access, reset a password, or redirect replies to another team member? All of that is possible instantly.
Instead of asking an ex-employee to hand over access to their Gmail account, you simply disable alex@yourcompany.com and create a new one for their replacement.
It adds a layer of security
Custom domain email addresses often come with admin-level controls, two-factor authentication, and encryption settings, which are essential if you’re handling customer data or payment-related conversations.
Public email accounts get breached all the time. Owning your email infrastructure means fewer surprises and better compliance with privacy standards.
It lets you organize communication by role or purpose
With a domain email address, you can segment communication by function: support@, sales@, billing@, and so on. It keeps your inboxes lean, your workflows cleaner, and your team accountable.
Even solopreneurs benefit. You might be a one-person team, but using support@yourdomain.com for customer issues and admin@yourdomain.com for business tasks still makes your brand feel structured and serious.
A few wise choices when setting up a business email address can save you time, prevent technical issues, and improve how your emails perform. Let’s go over some practical tips to help you get it right from the start.
Best practices for setting up a professional business email address
A business email address can work for your brand or work against it. Set it up the right way, and it becomes a trusted communication channel. Set it up poorly, and you risk looking unprofessional, getting flagged as spam, or leaking data. Here’s how to do it right.
Stick to simplicity and clarity in naming
Your company email address isn’t the place to be clever. Avoid usernames like bizgrowthengine2024@yourdomain.com. Go with clean, predictable formats.
| Type |
Recommended email formats |
| Personal |
anna@yourdomain.com, m.lewis@yourdomain.com |
| Departmental |
support@yourdomain.com, sales@yourdomain.com, billing@yourdomain.com, hr@yourdomain.com |
| General inquiries |
info@yourdomain.com, contact@yourdomain.com, hello@yourdomain.com |
| Marketing and PR |
press@yourdomain.com, media@yourdomain.com, marketing@yourdomain.com |
| Leadership / executives |
ceo@yourdomain.com, founder@yourdomain.com, leadership@yourdomain.com |
| Projects and events |
projectx@yourdomain.com, summit2024@yourdomain.com, launch@yourdomain.com |
If it takes more than a second to understand who’s writing, it’s too complex.
Avoid shared mailboxes for personal communication
One inbox for a team might seem efficient (marketing@yourdomain.com), but it leads to confusion, especially when multiple people respond without identifying themselves. If someone’s doing outreach or handling customers, they need their own name on the email address.
For example, julia@yourdomain.com feels more personal than a generic department inbox, and it may earn more replies.
Separate internal and external email channels
Don’t mix internal staff communication and customer-facing messaging in the same inboxes. You don’t want HR updates sitting next to refund requests. Create clear boundaries:
| Purpose |
Recommended email format |
| Customer communication |
Use addresses under @yourdomain.com (e.g., support@yourdomain.com, sales@yourdomain.com) |
| Internal staff communication |
Use a subdomain like @internal.yourdomain.com (e.g., hr@internal.yourdomain.com, it@internal.yourdomain.com) |
Set up authentication from the start
If you skip SPF, DKIM, or DMARC, expect deliverability issues. These records verify that your domain is authorized to send emails and help prevent spoofing:
- SPF defines who’s allowed to send on your behalf;
- DKIM cryptographically signs your emails;
- DMARC tells inbox providers how to treat unauthenticated mail.
Create a naming convention and stick to it
Inconsistent email addresses confuse your audience and clutter your system. Decide early whether your team will use first@, first.last@, or initial.last@. Use the same format across departments and regions.
For example, don’t mix andrew@yourdomain.com and a.smith@yourdomain.com. It makes team email addresses harder to manage and easier to spoof.
Don’t rely on one inbox to do everything
It might be tempting to route all communication to hello@yourdomain.com, but this leads to a messy inbox and missed emails. Break things out by function, even if you’re a small team. Use aliases or separate email addresses like:
| Function |
Recommended email format |
| Media and PR |
press@yourdomain.com |
| Partnerships |
partners@yourdomain.com |
| Billing and invoices |
invoices@yourdomain.com |
Structure scales and helps outsiders know where to go.
Secure access like you would your bank account
Use strong passwords, enable two-factor authentication, and monitor access logs. Assign admin privileges selectively. Most breaches aren’t sophisticated; they happen because someone reused a password or didn’t update credentials after a role change.
A compromised support@ inbox is worse than no inbox at all, as you risk data exposure, phishing, and lost customer trust.
Use a branded signature and keep it functional
Your signature is the bridge between your email and your wider presence. Keep it consistent:
- full name and role;
- company name and website;
- one relevant link (calendar booking, latest offer, support hub).
Avoid oversized logos and banners as they can trigger spam filters and get stripped on mobile.
Test your email address before using it in campaigns
Send test emails to different providers like Gmail, Outlook, Yahoo, and mobile apps. Check for the following aspects:
- display name accuracy;
- spam or warning banners;
- signature formatting;
- broken links.
It’s your digital storefront, so make sure it’s presentable.
Now, let’s break down how to set up a business email address using different services.
How to set up a business email address with Google Suite
If you’re already using Gmail for your personal inbox, Google Workspace is a natural next step. It lets you keep the familiar interface while switching to a branded email address like yourname@yourcompany.com. You get Gmail, Calendar, Drive, Meet, and admin controls under your domain.
Plans start at around $8 per user per month, depending on your region. For that, you get a secure, ad-free inbox with up to 30 GB of storage per account, plus mobile access and built-in spam filtering.
Email domain setup is straightforward, but it’s not instant. You’ll need to connect your domain, verify ownership, and update DNS records. Google guides you through every step, and once it’s done, you’ll be able to manage your business email address from the same inbox you’re already comfortable with.
Here’s how to set up a company email address using Google Suite.
Step 1. Specify your business details
Go to Google Workspace. Click “Get started.”
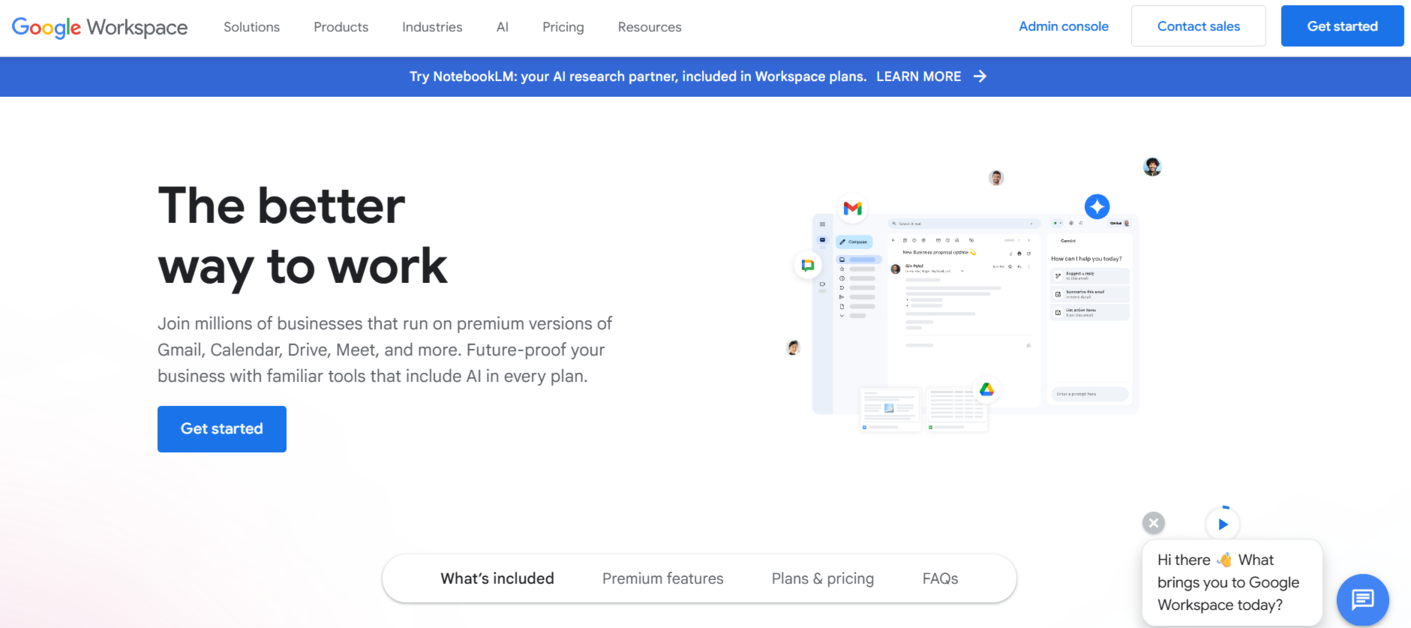 The Google Workspace homepage
You’ll be asked a few basic questions about your business — its name, number of employees, and region.
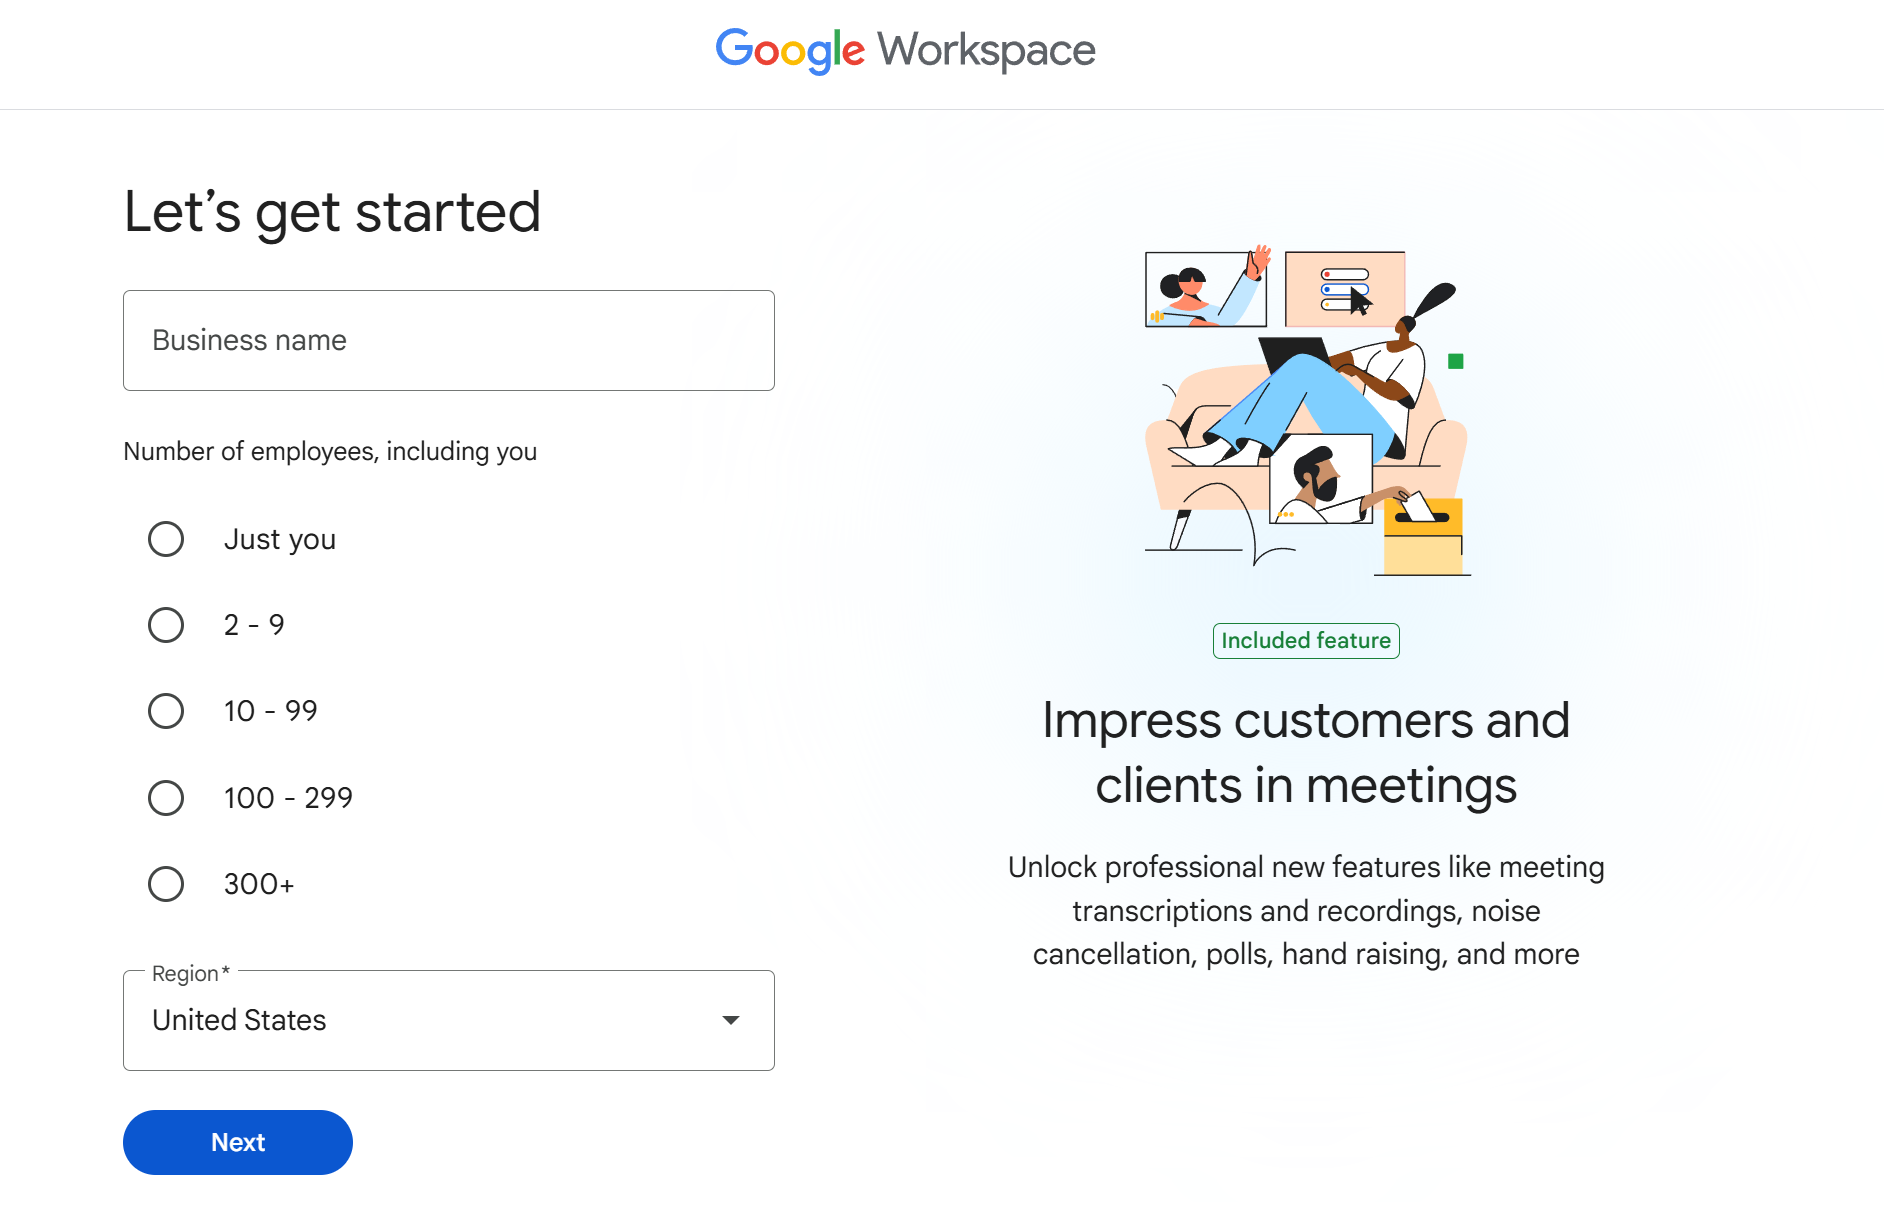 Business details required to set up a company email address with Google
Then, fill in your first and last name and your current email address. This helps Google personalize your setup.
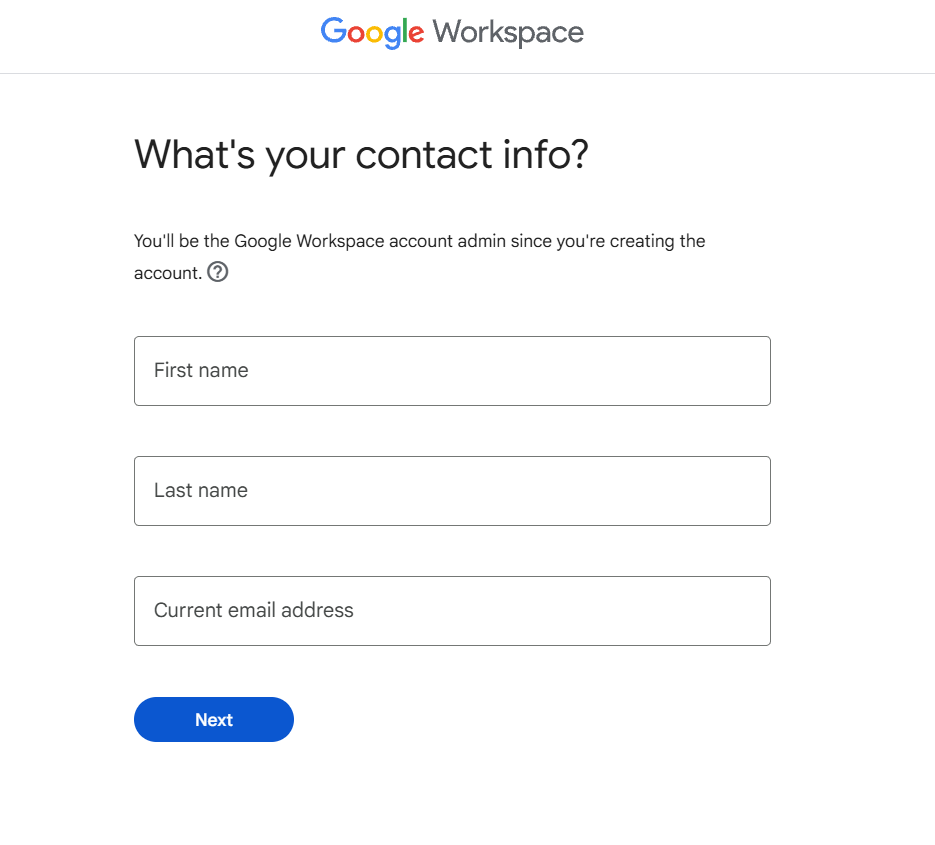 Contact info required for admins
Step 2. Connect your domain
At this step, you can either use a domain you already own or purchase one through Google.
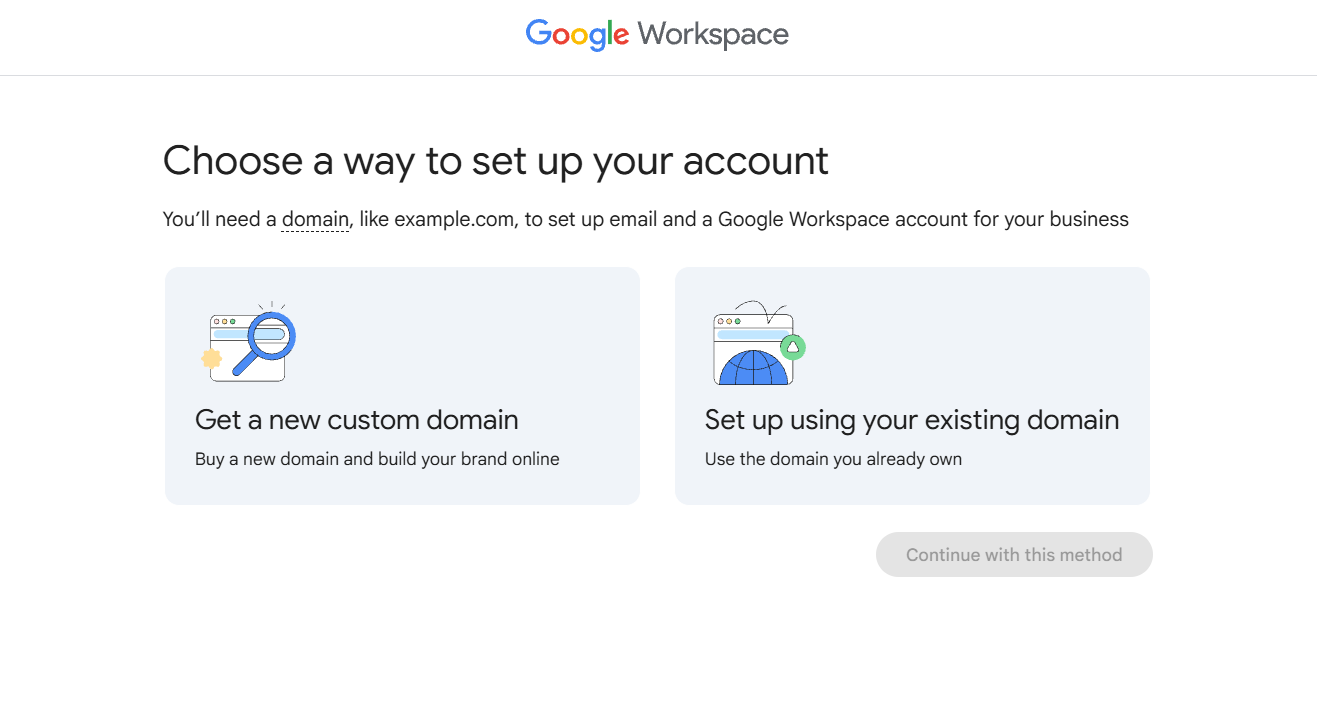 Choosing a way to set up a Google Workspace account
If you already have a domain, type it in and confirm that it belongs to you.
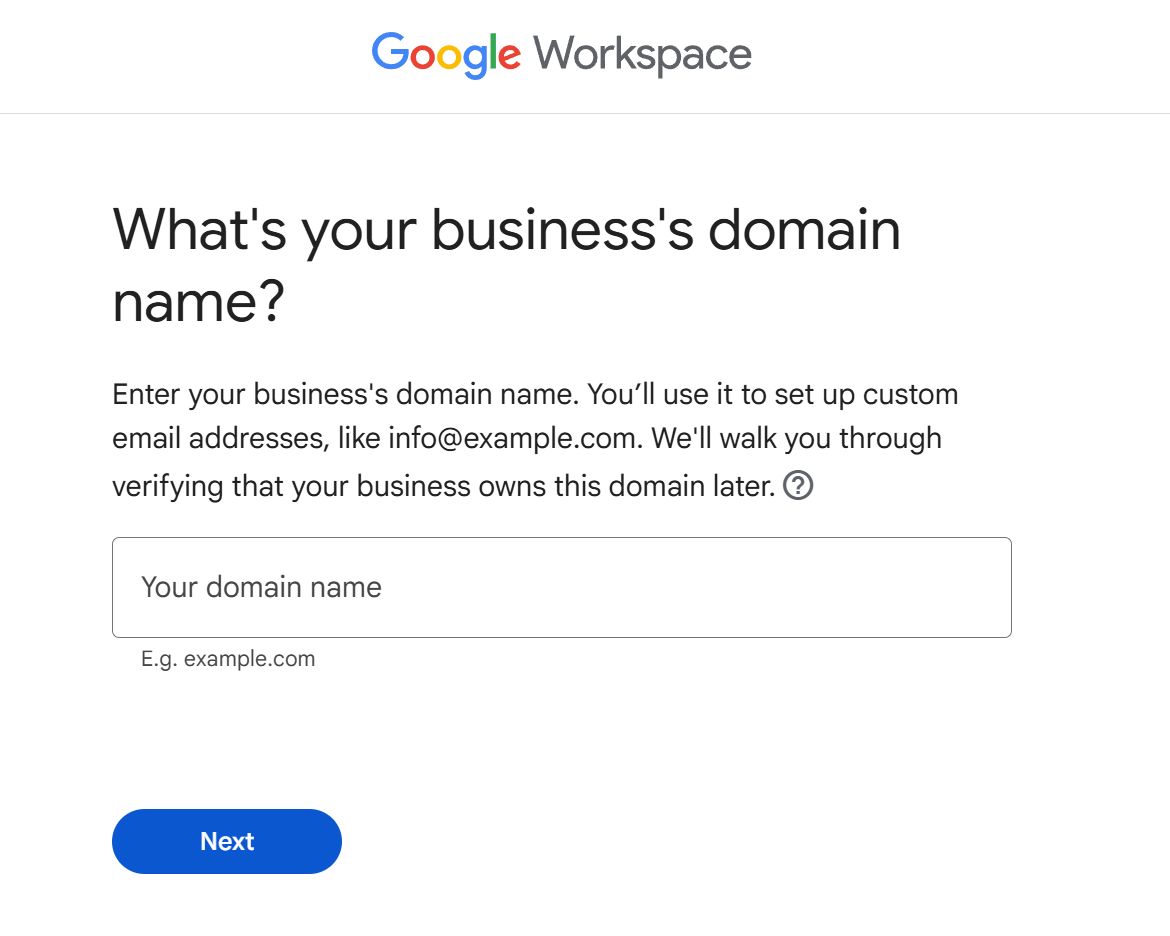 To set up a custom email address, indicate your business domain name
Step 3. Create your business email address
Choose your username — this will be your new professional email address (e.g., alex@yourcompany.com). Set a secure password and continue.
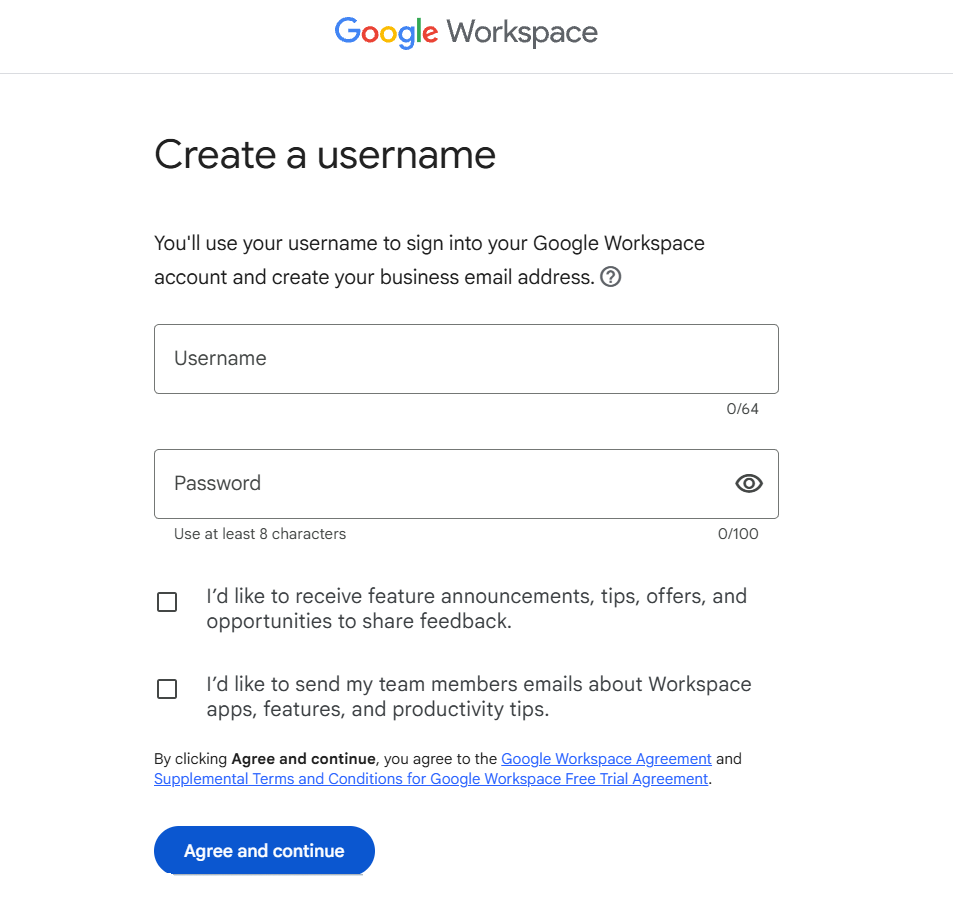 A username is required to set up a business email address
Step 4. Verify your domain
Google will now prompt you to verify domain ownership. You’ll receive a TXT record to add to your domain’s DNS settings.
Go to your domain registrar (e.g., Namecheap, GoDaddy), open DNS settings, and paste the TXT record exactly as provided.
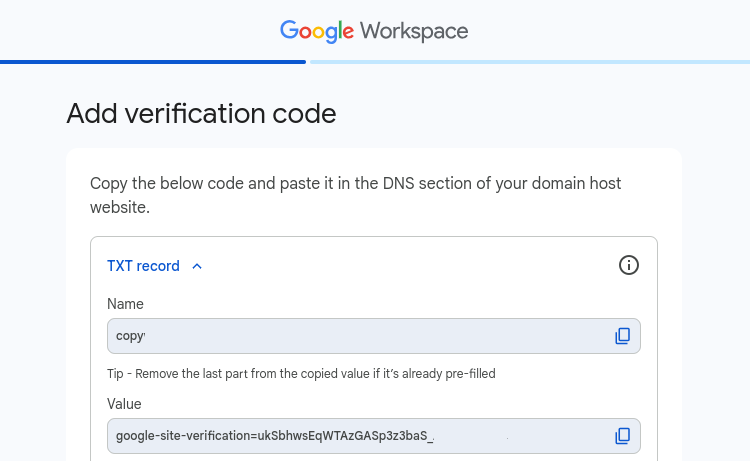 A verification code from Google
Once added, return to Google Workspace and confirm.
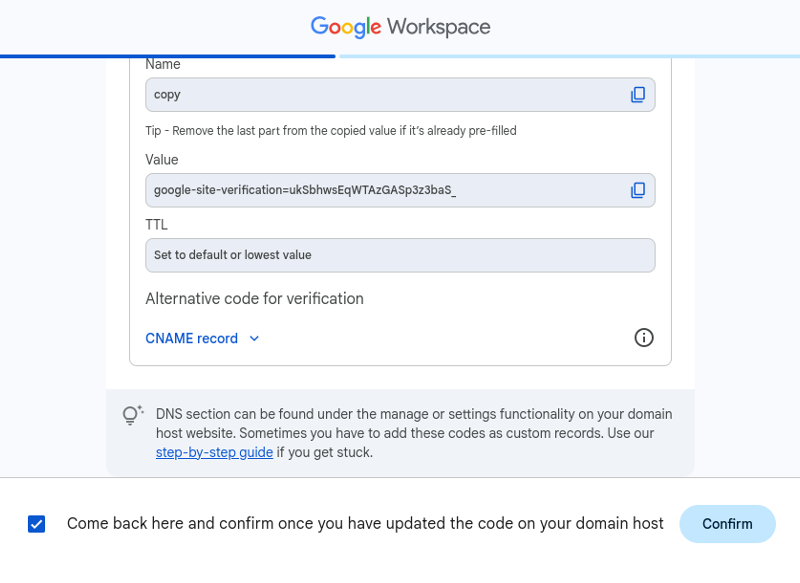 Final step of the domain verification process
Step 5. Set up MX records
Next, update your domain’s MX records to direct emails to Google’s servers. Google provides a list of records; just copy and paste them into your DNS panel.
This step is crucial. Without it, your business email address won’t receive incoming messages.
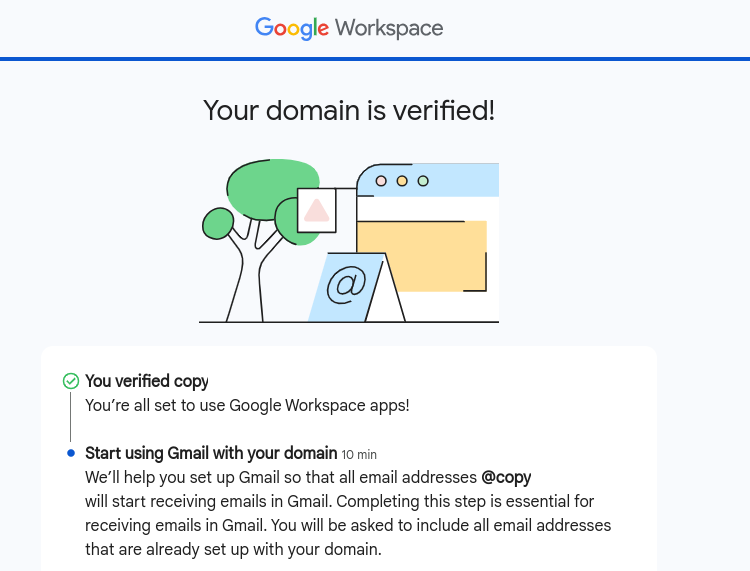 Google’s notification about a successful domain verification
After the records are updated and confirmed, your setup is complete. Log in at mail.google.com using your new email address and password. You’ll now be sending and receiving emails from yourname@yourcompany.com via the familiar Gmail interface.
How to set up a business email address with Zoho Mail
Zoho Mail is a solid choice if you want a professional email address without the higher costs of Google Workspace. It offers a forever-free plan for up to five users, with 5 GB storage per inbox. It’s enough to get started if you’re a small team or solopreneur.
Here’s how to set it up using your own domain.
Step 1. Create a Zoho Mail account
Head to Zoho Mail and select “Sign up” under the “Business email” option.
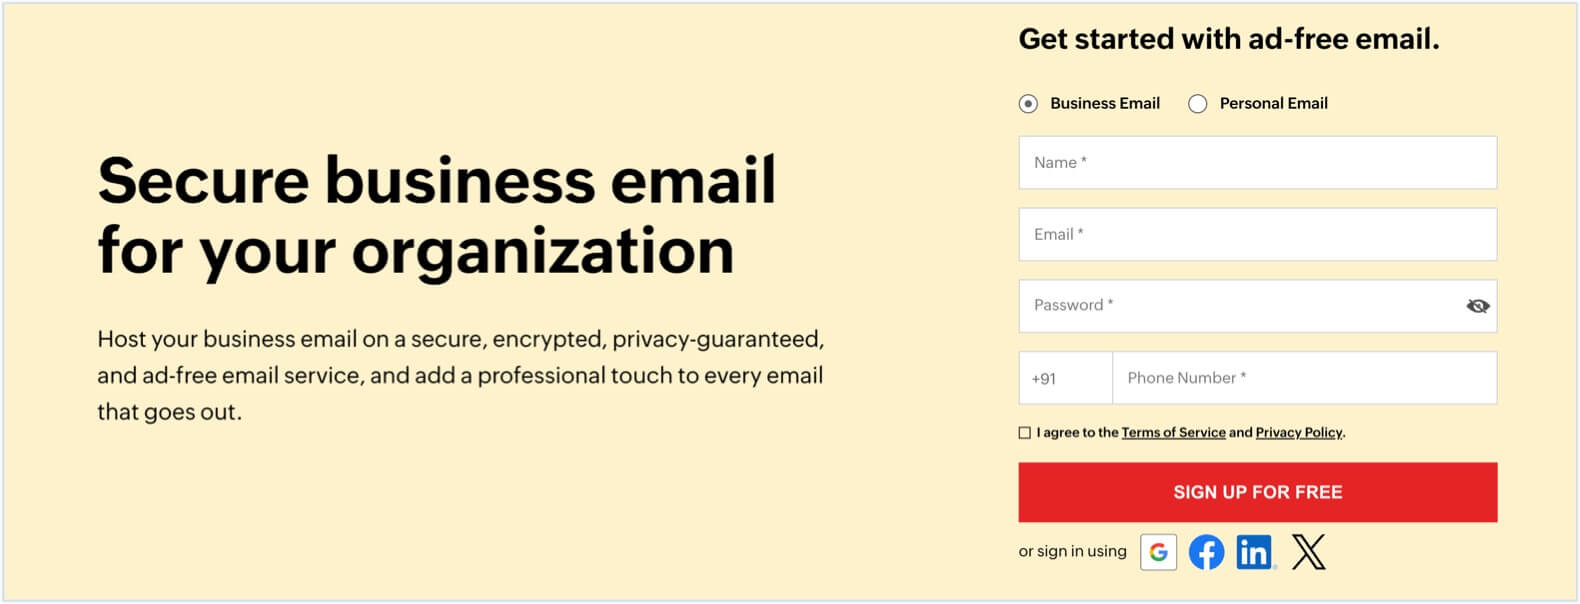 Signing up for Zoho Mail
Step 2. Add your domain
Once you’ve created your account, Zoho will prompt you to enter your domain name (e.g., yourcompany.com). If you don’t have a domain yet, you can buy one through Zoho and register it.
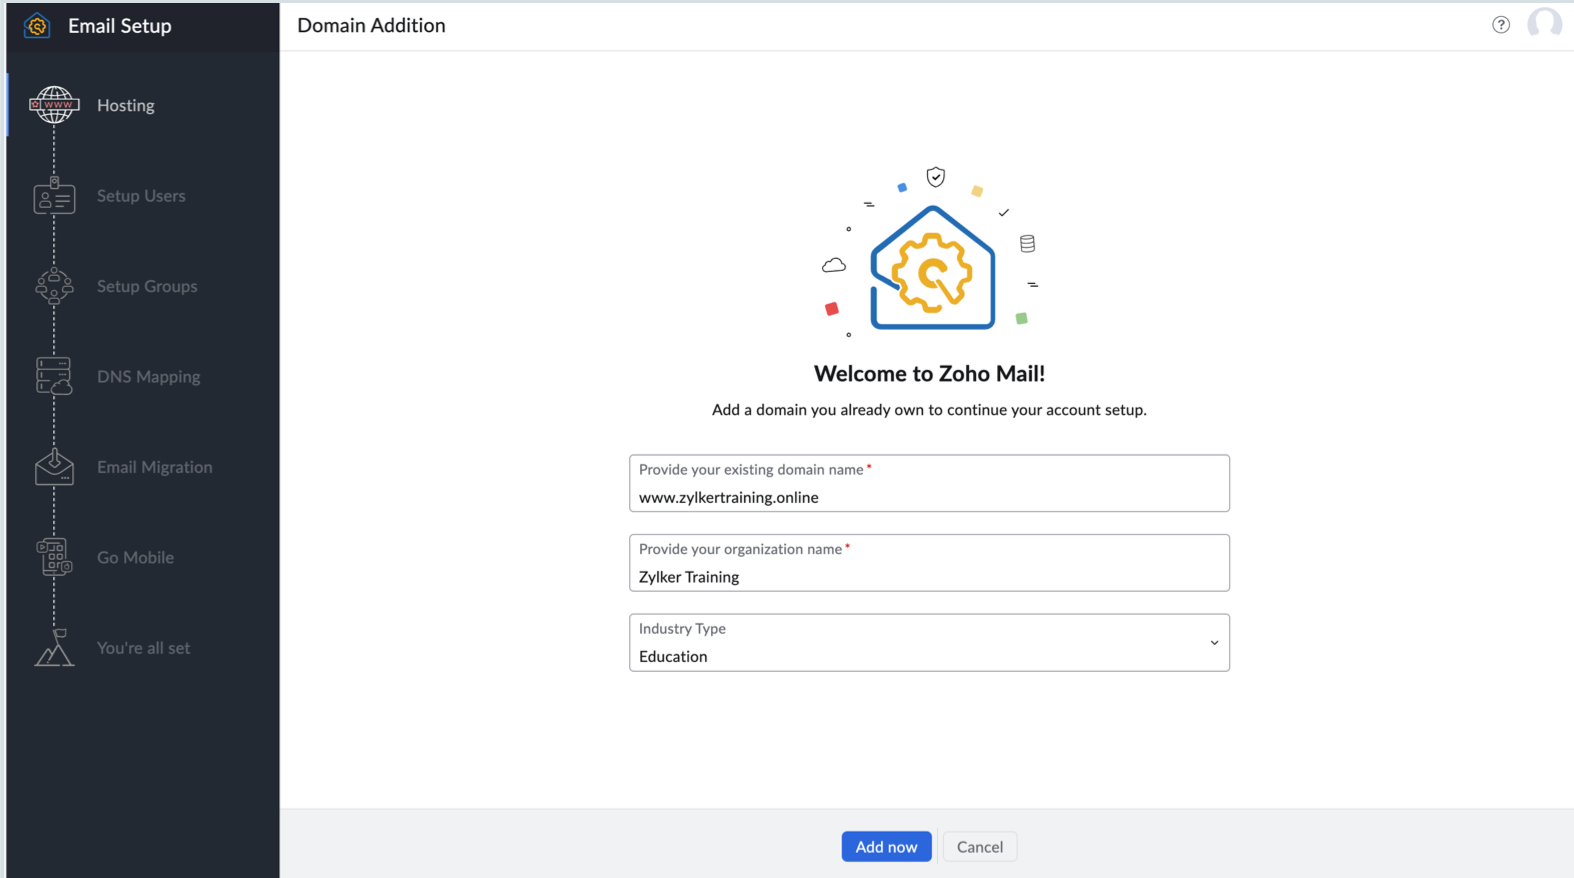 Adding an existing domain to Zoho; source: Zoho
Step 3. Verify your domain ownership
To confirm you own the domain, Zoho provides several verification options: TXT, CNAME, or HTML.
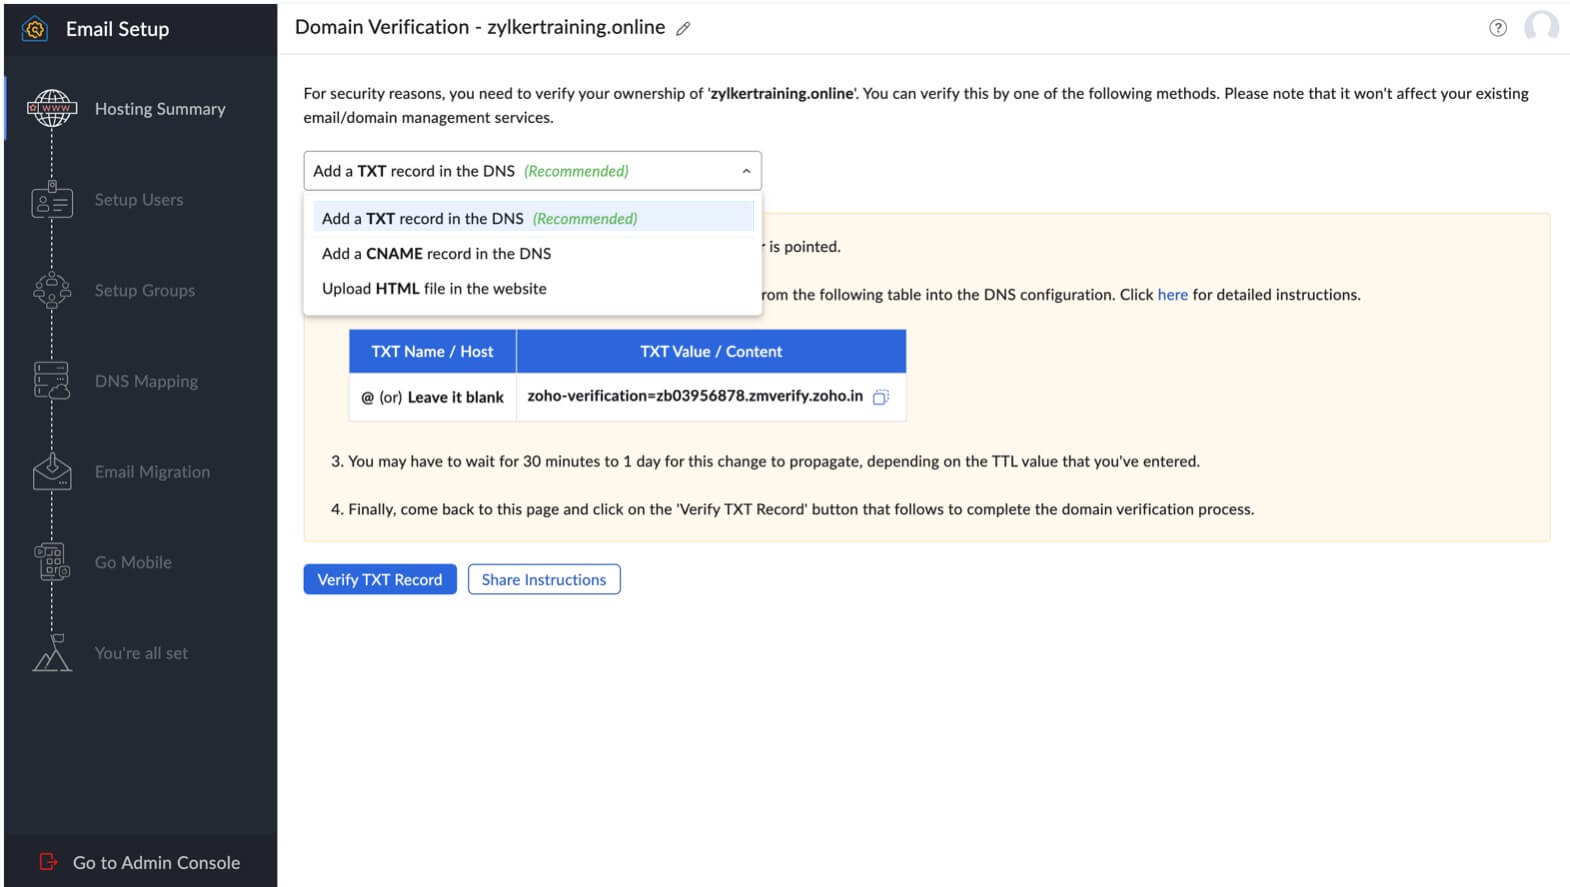 Domain ownership verification in Zoho
Here are the key steps to take for each verification method:
- To verify your domain with the TXT method, copy the unique TXT value from your Zoho Mail Admin Console and add it as a TXT record in your domain’s DNS settings. Once saved, allow some time for the record to propagate. Then, return to Zoho Mail Admin Console and click the verify button to confirm ownership.
- To verify your domain with the CNAME method, copy the unique CNAME value from your Zoho Mail Admin Console and add it as a CNAME record in your domain’s DNS settings. After saving and allowing time for propagation, return to the Admin Console and click verify. If the record is correct, your domain ownership will be confirmed.
- To verify your domain with the HTML method, download the unique HTML file from your Zoho Mail Admin Console and upload it to a new zohoverify folder in your web host’s root directory. Once the file is live at
yourdomain.com/zohoverify/verifyforzoho.html, return to the Admin Console and click verify to complete domain ownership confirmation.
Step 4. Create user accounts (your email addresses)
Once your domain is verified, it’s time to create custom email addresses for you and your team. The first user you create automatically becomes the super admin with full access and control over all other users.
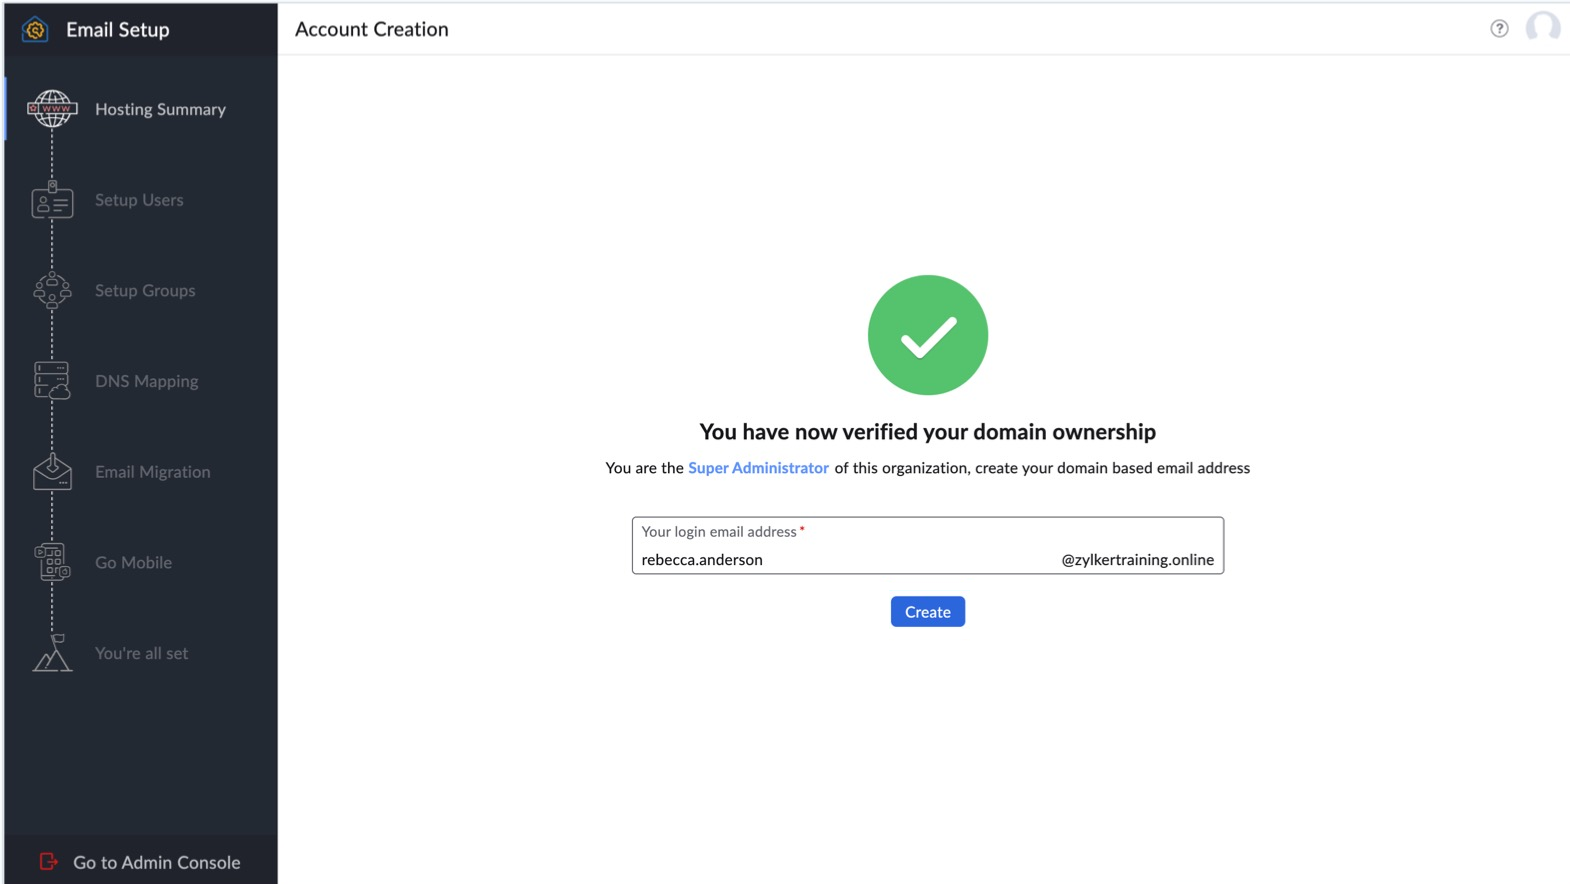 After successful domain verification, create domain-based email addresses
You can add new users anytime from the admin panel. Each one will get a unique professional email address and password to log in and manage their account.
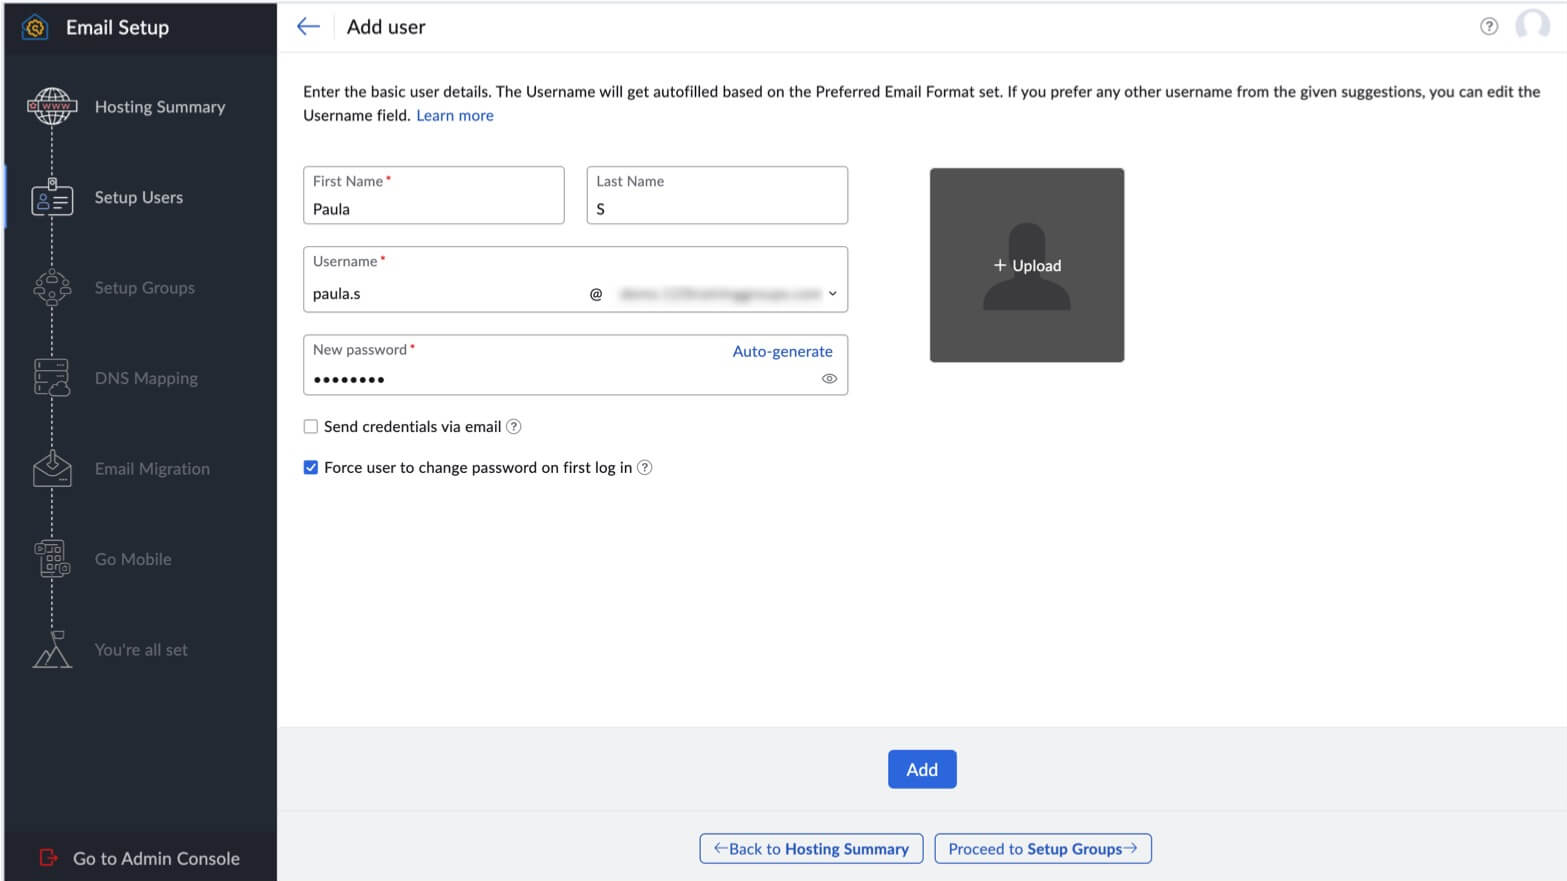 Creating an individual user account in Zoho
Step 5. Configure DNS records for email delivery
To make Zoho Mail the email service for your domain, configure your domain’s MX records in the DNS manager and remove any old entries. Add all three Zoho MX records with the correct priorities, then set up SPF, DKIM, and DMARC records to improve deliverability and prevent spoofing. Once the records propagate, return to Zoho Mail to verify them.
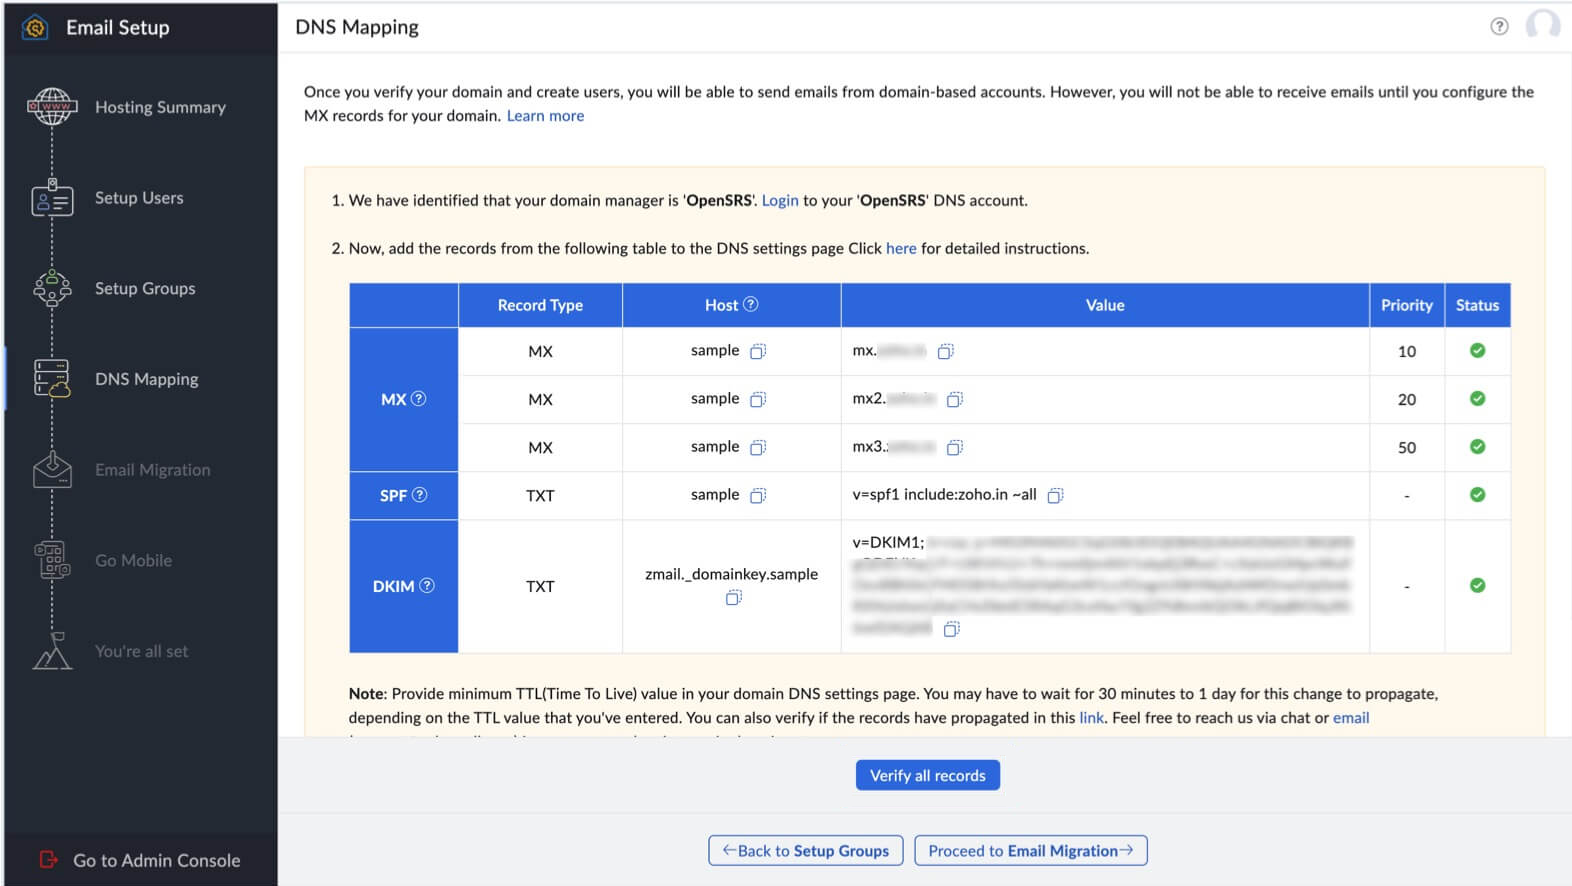 DNS mapping is crucial to start receiving emails
Once DNS settings are verified (it can take up to 24 hours), you’ll be able to send and receive emails from your new professional email addresses.
How to set up a business email address with Bluehost
If you’re already hosting your website with Bluehost, creating a business email is fast, affordable, and built into your hosting plan. No need to pay extra for email hosting — it’s included.
Step 1. Sign in to your Bluehost account
Go to bluehost.com and log in using your credentials. This gives you access to your hosting control panel and domain settings.
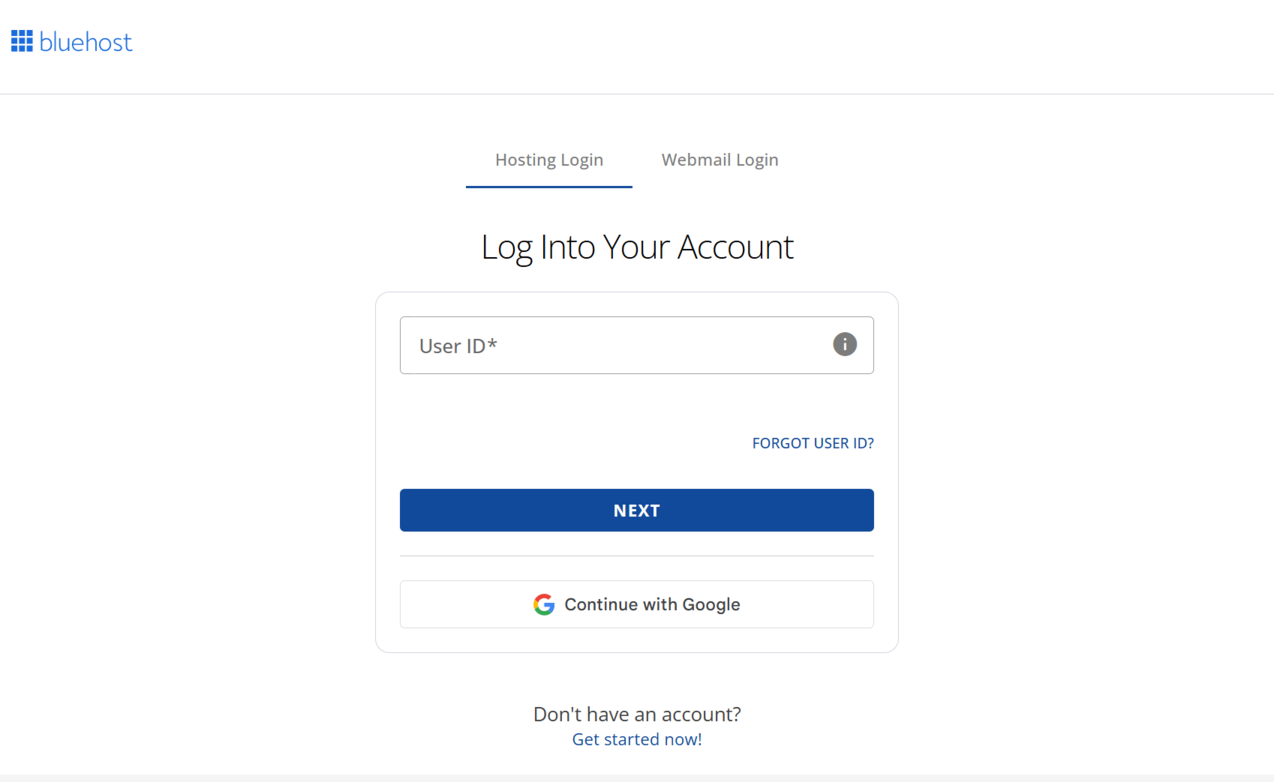 Log in to your Bluehost Account Manager
Step 2. Navigate to the Email section
In the main dashboard (or cPanel, depending on your interface), find the “Email accounts” option. This is where you’ll manage all email addresses tied to your domains.
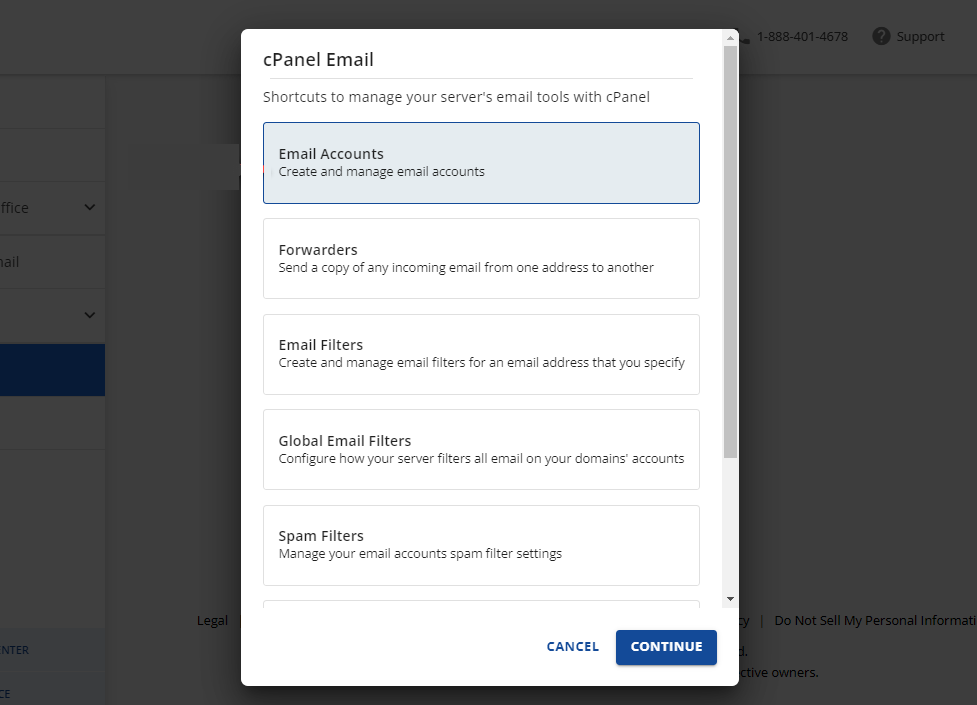 A section where you create and manage domain-based email accounts; source: Bluehost
Step 3. Create a new email account
Click “Create” to start setting up a new account.
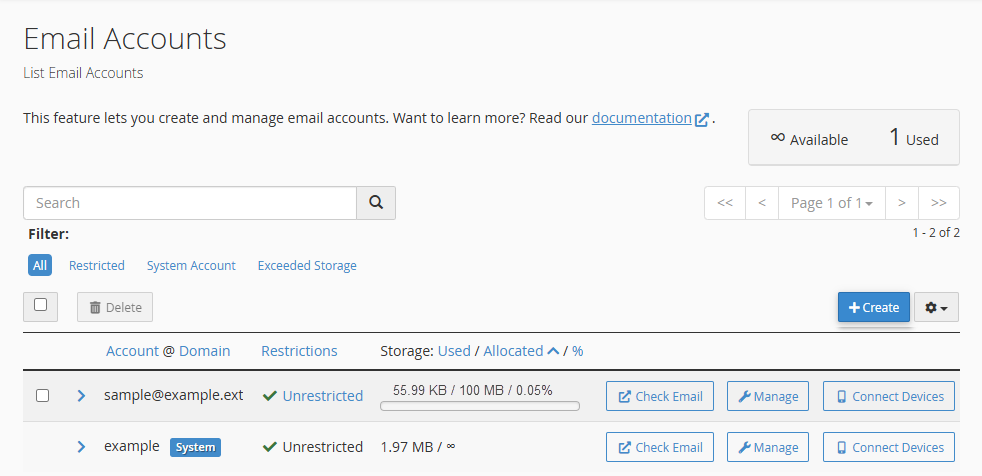 The “Email accounts” page
Select the domain you want to associate with your business email address. Enter a username (like hello@yourdomain.com), set a strong password, and choose optional settings like mailbox storage limits. Once you’re done, click “Create” to finalize.
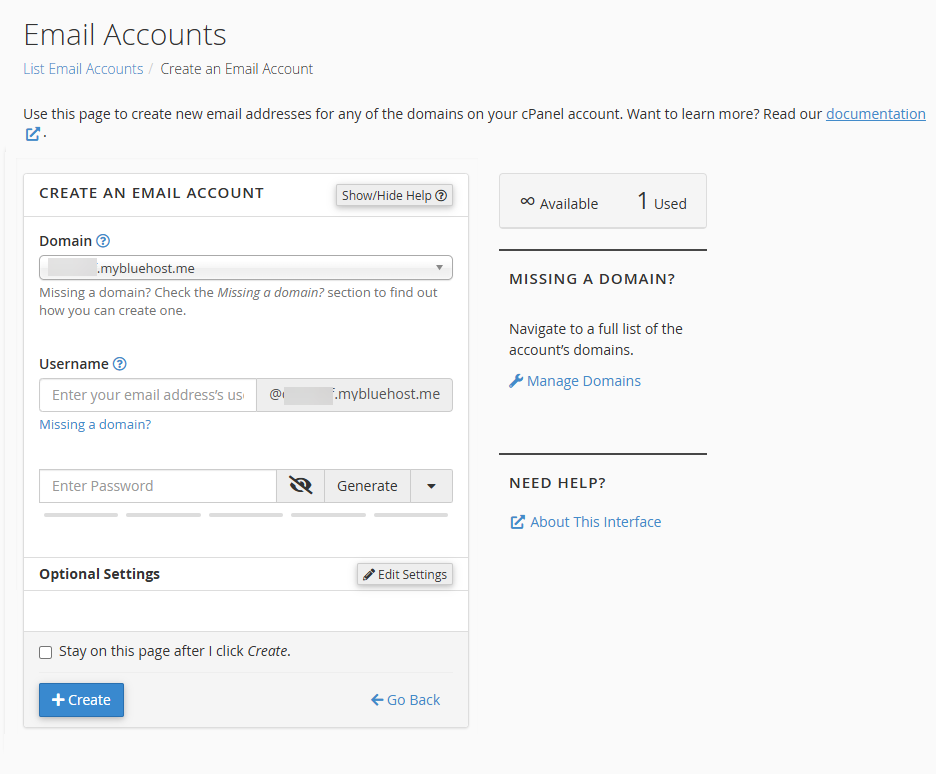 Account details to set up
Step 4. Access your email
You can check your new business email address through Webmail. Just go to yourdomain.com/webmail and log in with your new credentials. Or, set it up in your preferred email client (like Outlook or Gmail) using the server settings provided in your account.
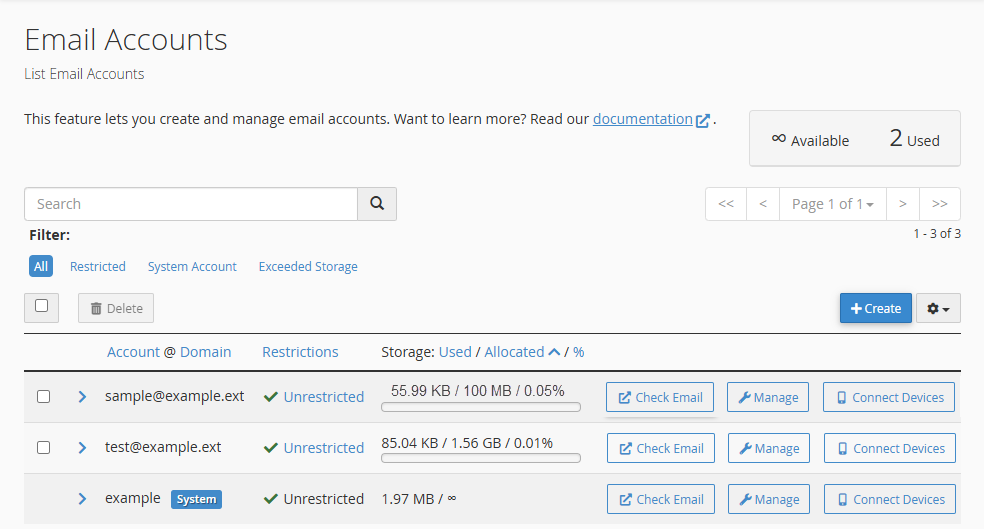 Log in to your new email inbox
Step 5. Manage email features
From the same dashboard, you can set up email forwarding, autoresponders, or spam filters to help streamline communication and reduce inbox clutter.
Wrapping up
If you’re wondering how to get a business email address, here’s a simplified path to follow:
- Pick a provider that fits your team’s needs — intuitive interface, scalable features, and reasonable pricing should guide your decision.
- Connect and verify your domain to prove ownership.
- Set up MX records to route your emails correctly.
- Add an SPF record to reduce the risk of spoofing.
- Generate a DKIM record to improve inbox placement and trust.
A business email helps you streamline internal workflows with role-based inboxes, reinforce brand identity with every message, and improve deliverability for your campaigns.
With SendPulse, you can go far beyond sending basic emails. Automate welcome series, segment contacts by behavior, trigger sales flows, and track performance — all in one place. You’ll get enterprise-level email and automation tools without the bloat.
Connect your new business email address and start building smarter campaigns with our all-in-one marketing platform.