Manage a team
Creating teams in the CRM system helps you distribute the workload among your employees evenly and give users access to data and tools based on their roles. This allows you to access different teams’ workspaces from your account easily.
In this article, we will overview how to create and manage teams.
How to create a team
Every SendPulse account has its own team. By default, it includes only the account owner with full access rights. To create a team, you need to add other users and manage their access to SendPulse tools and data.
Read more: How to invite a user to your team.
Once users accept your invitation, they will have access to your account data as per their assigned roles.
How to switch between teams
Once users accept your invitation, they will be able to switch between their accounts and your team without logging in. To do this, they need to click their profile picture in the upper right corner and select a team in the Teams section.

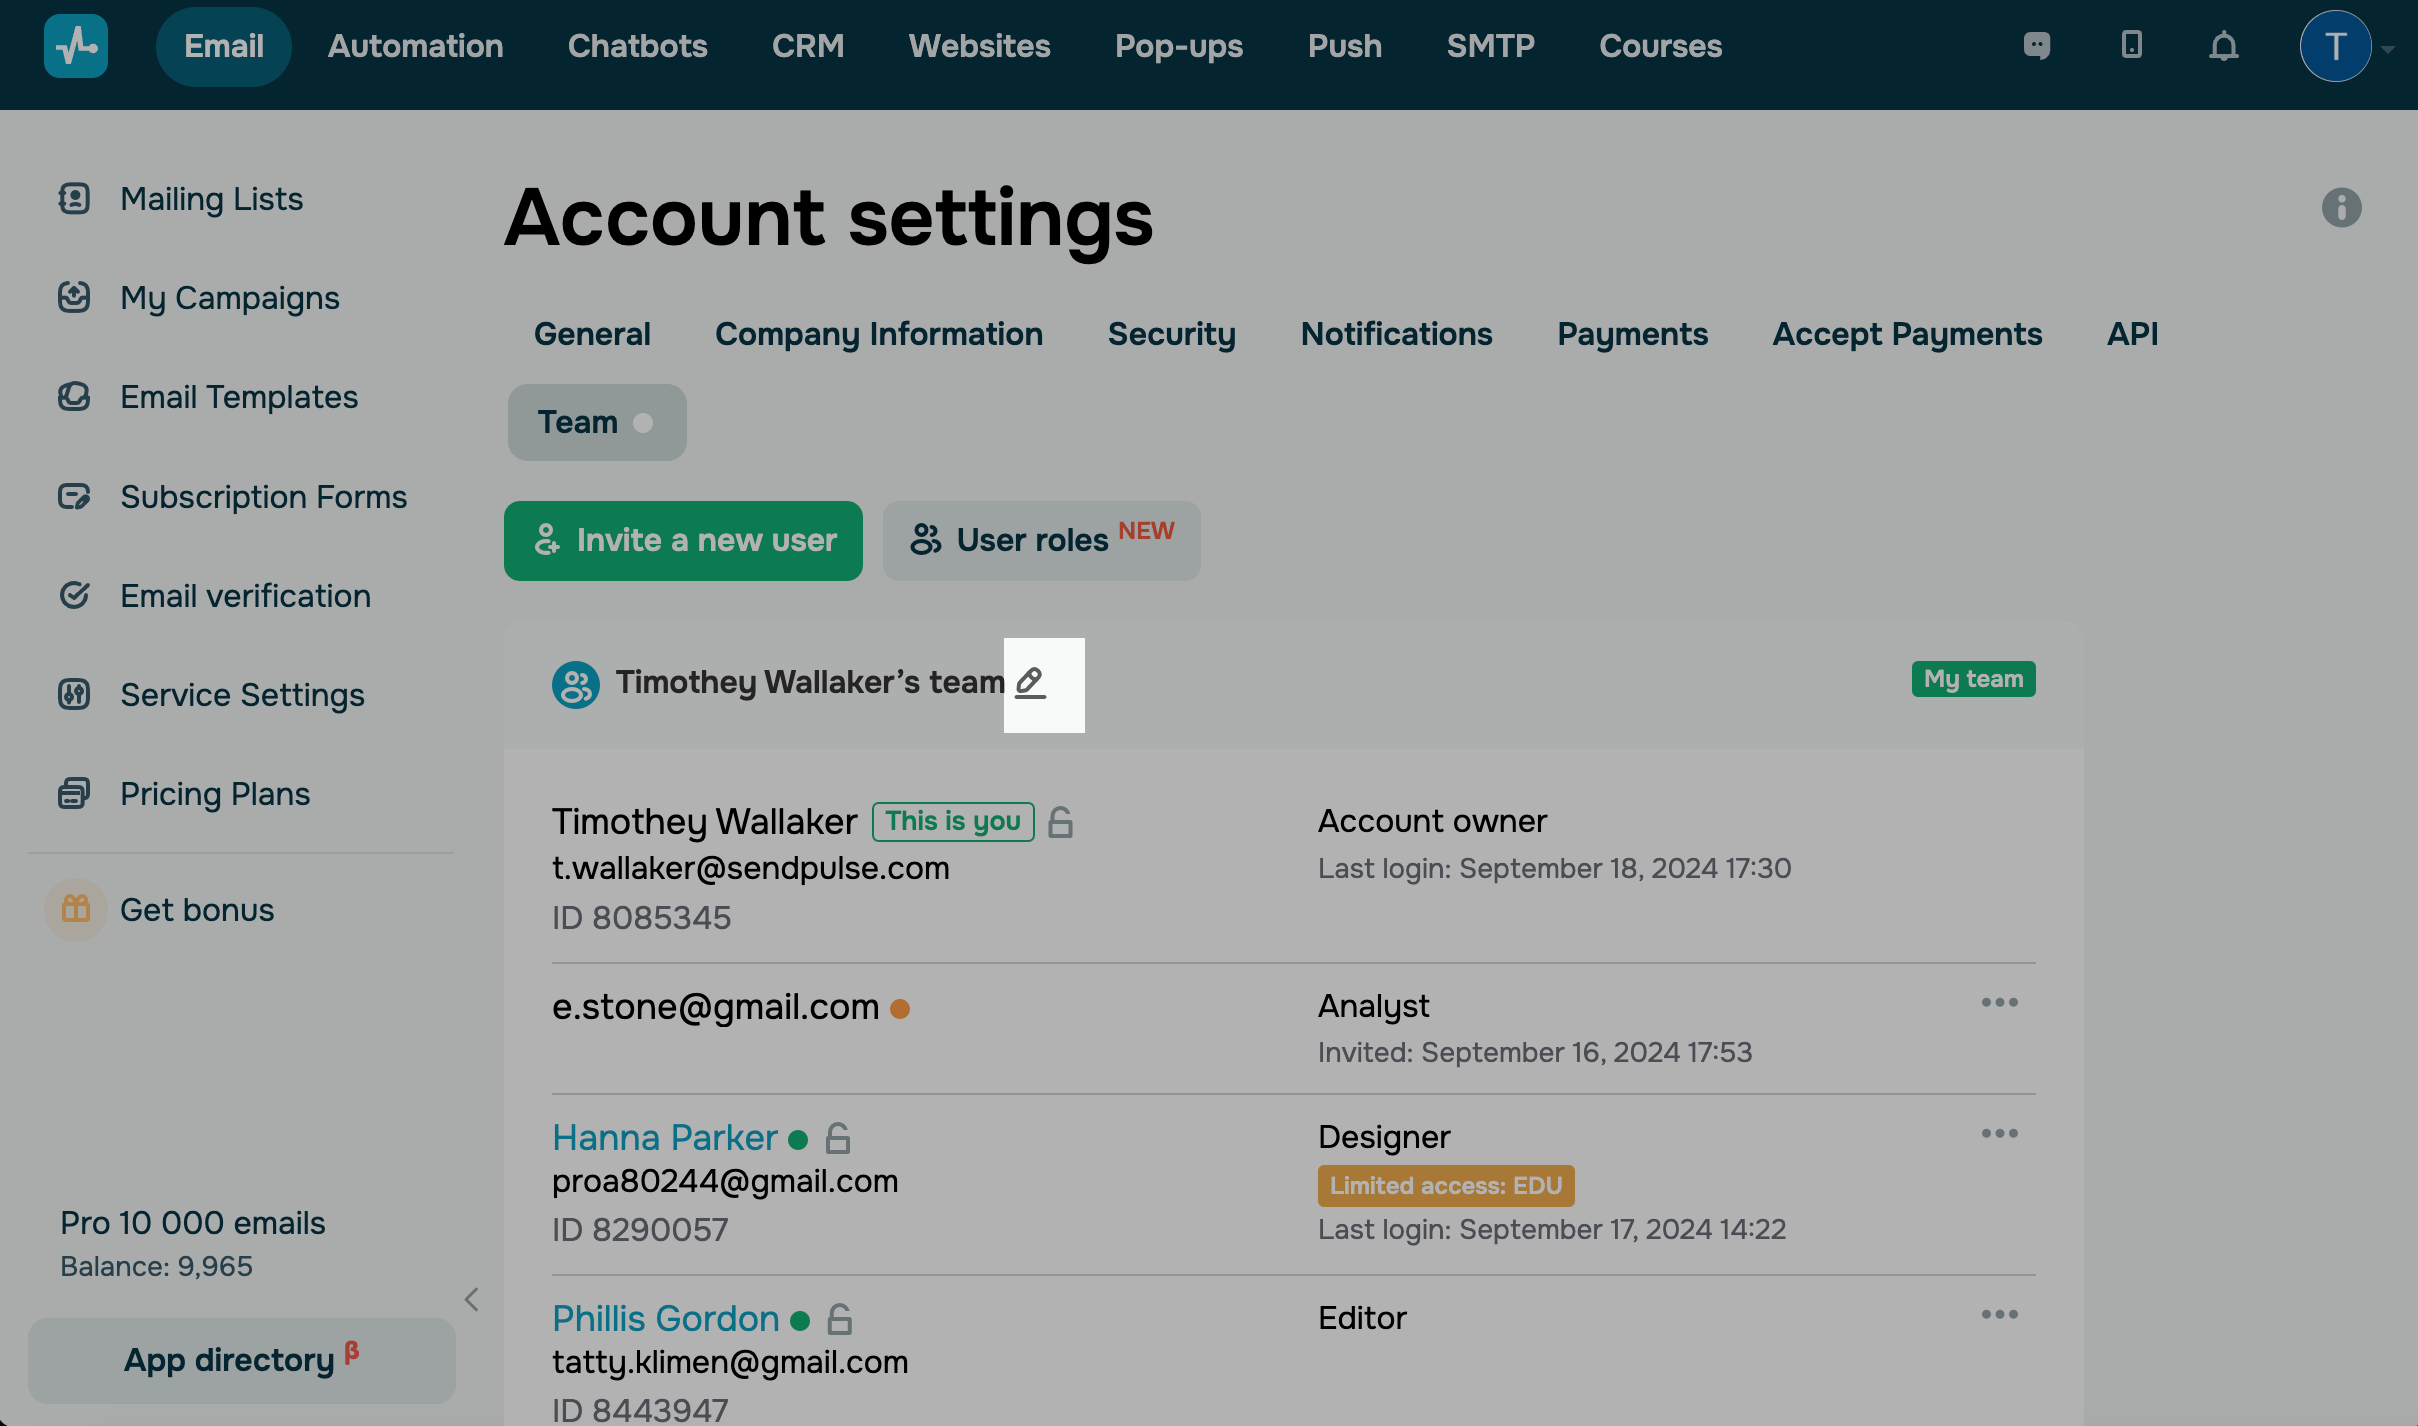
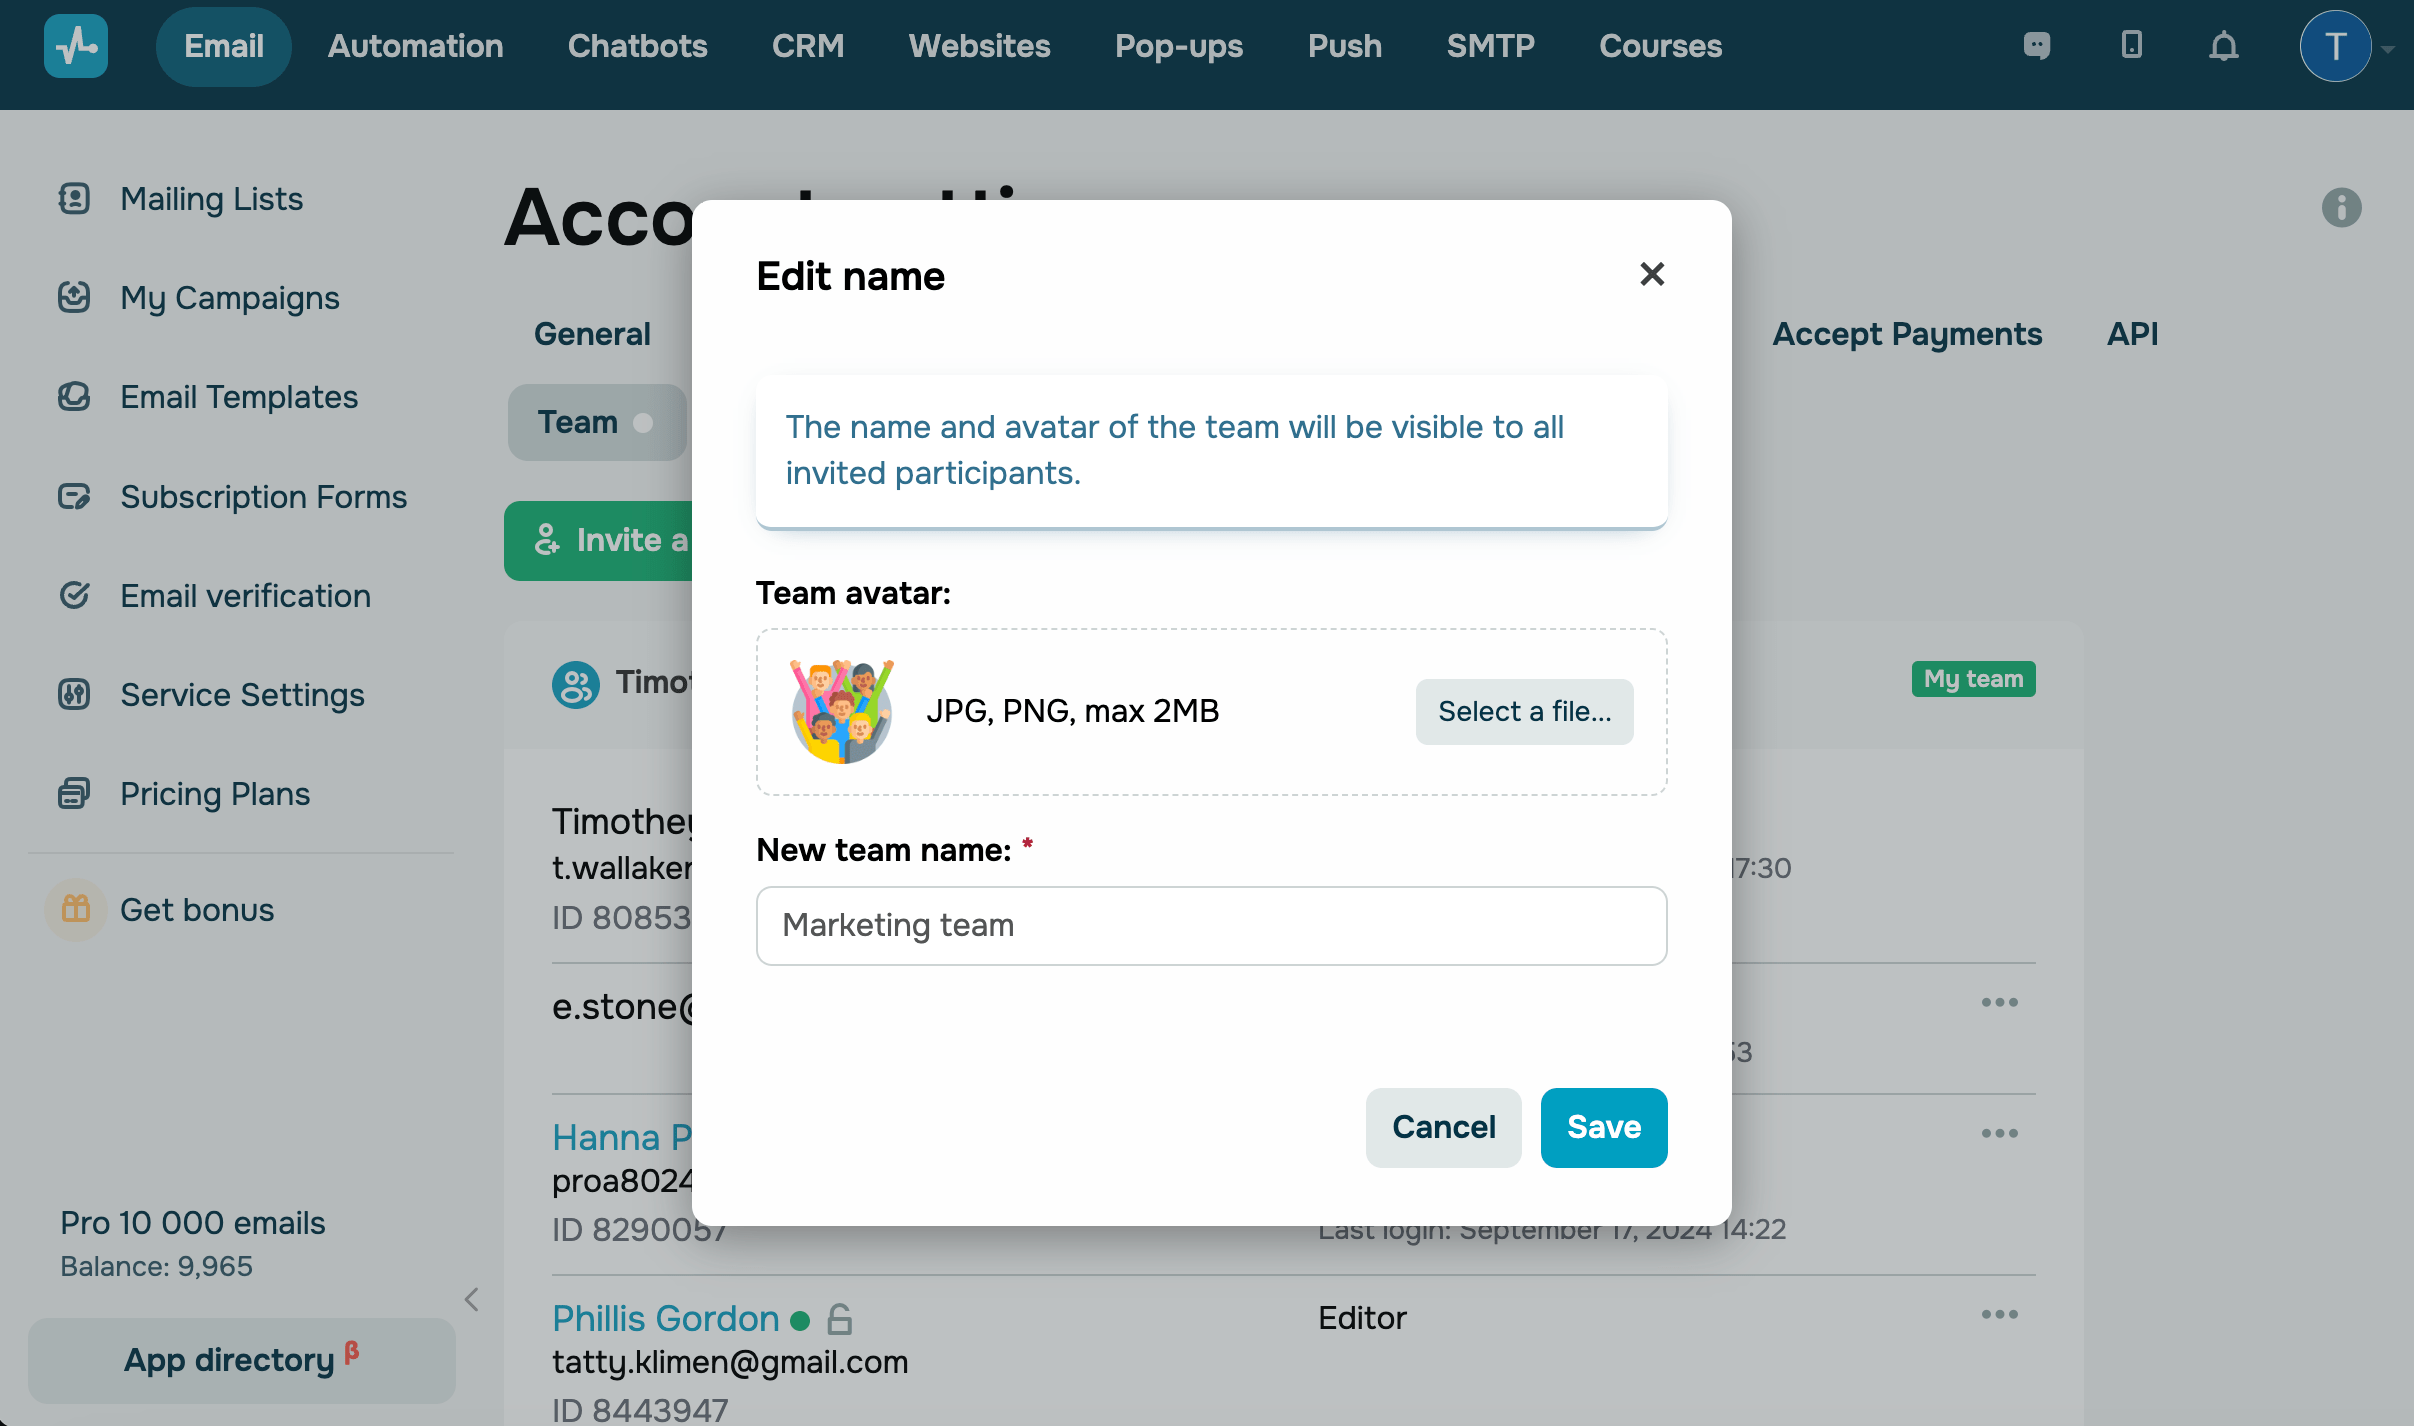
How to edit team data
You can customize your team data visible to all team members.
Click the pencil icon next to your team’s name.
You can edit the following data:
| Team avatar | Click Select a file… and upload an image from your device.
Supported file formats: JPG and PNG. Maximum file size: 2 МВ. |
| New team name | Enter your team’s name. |
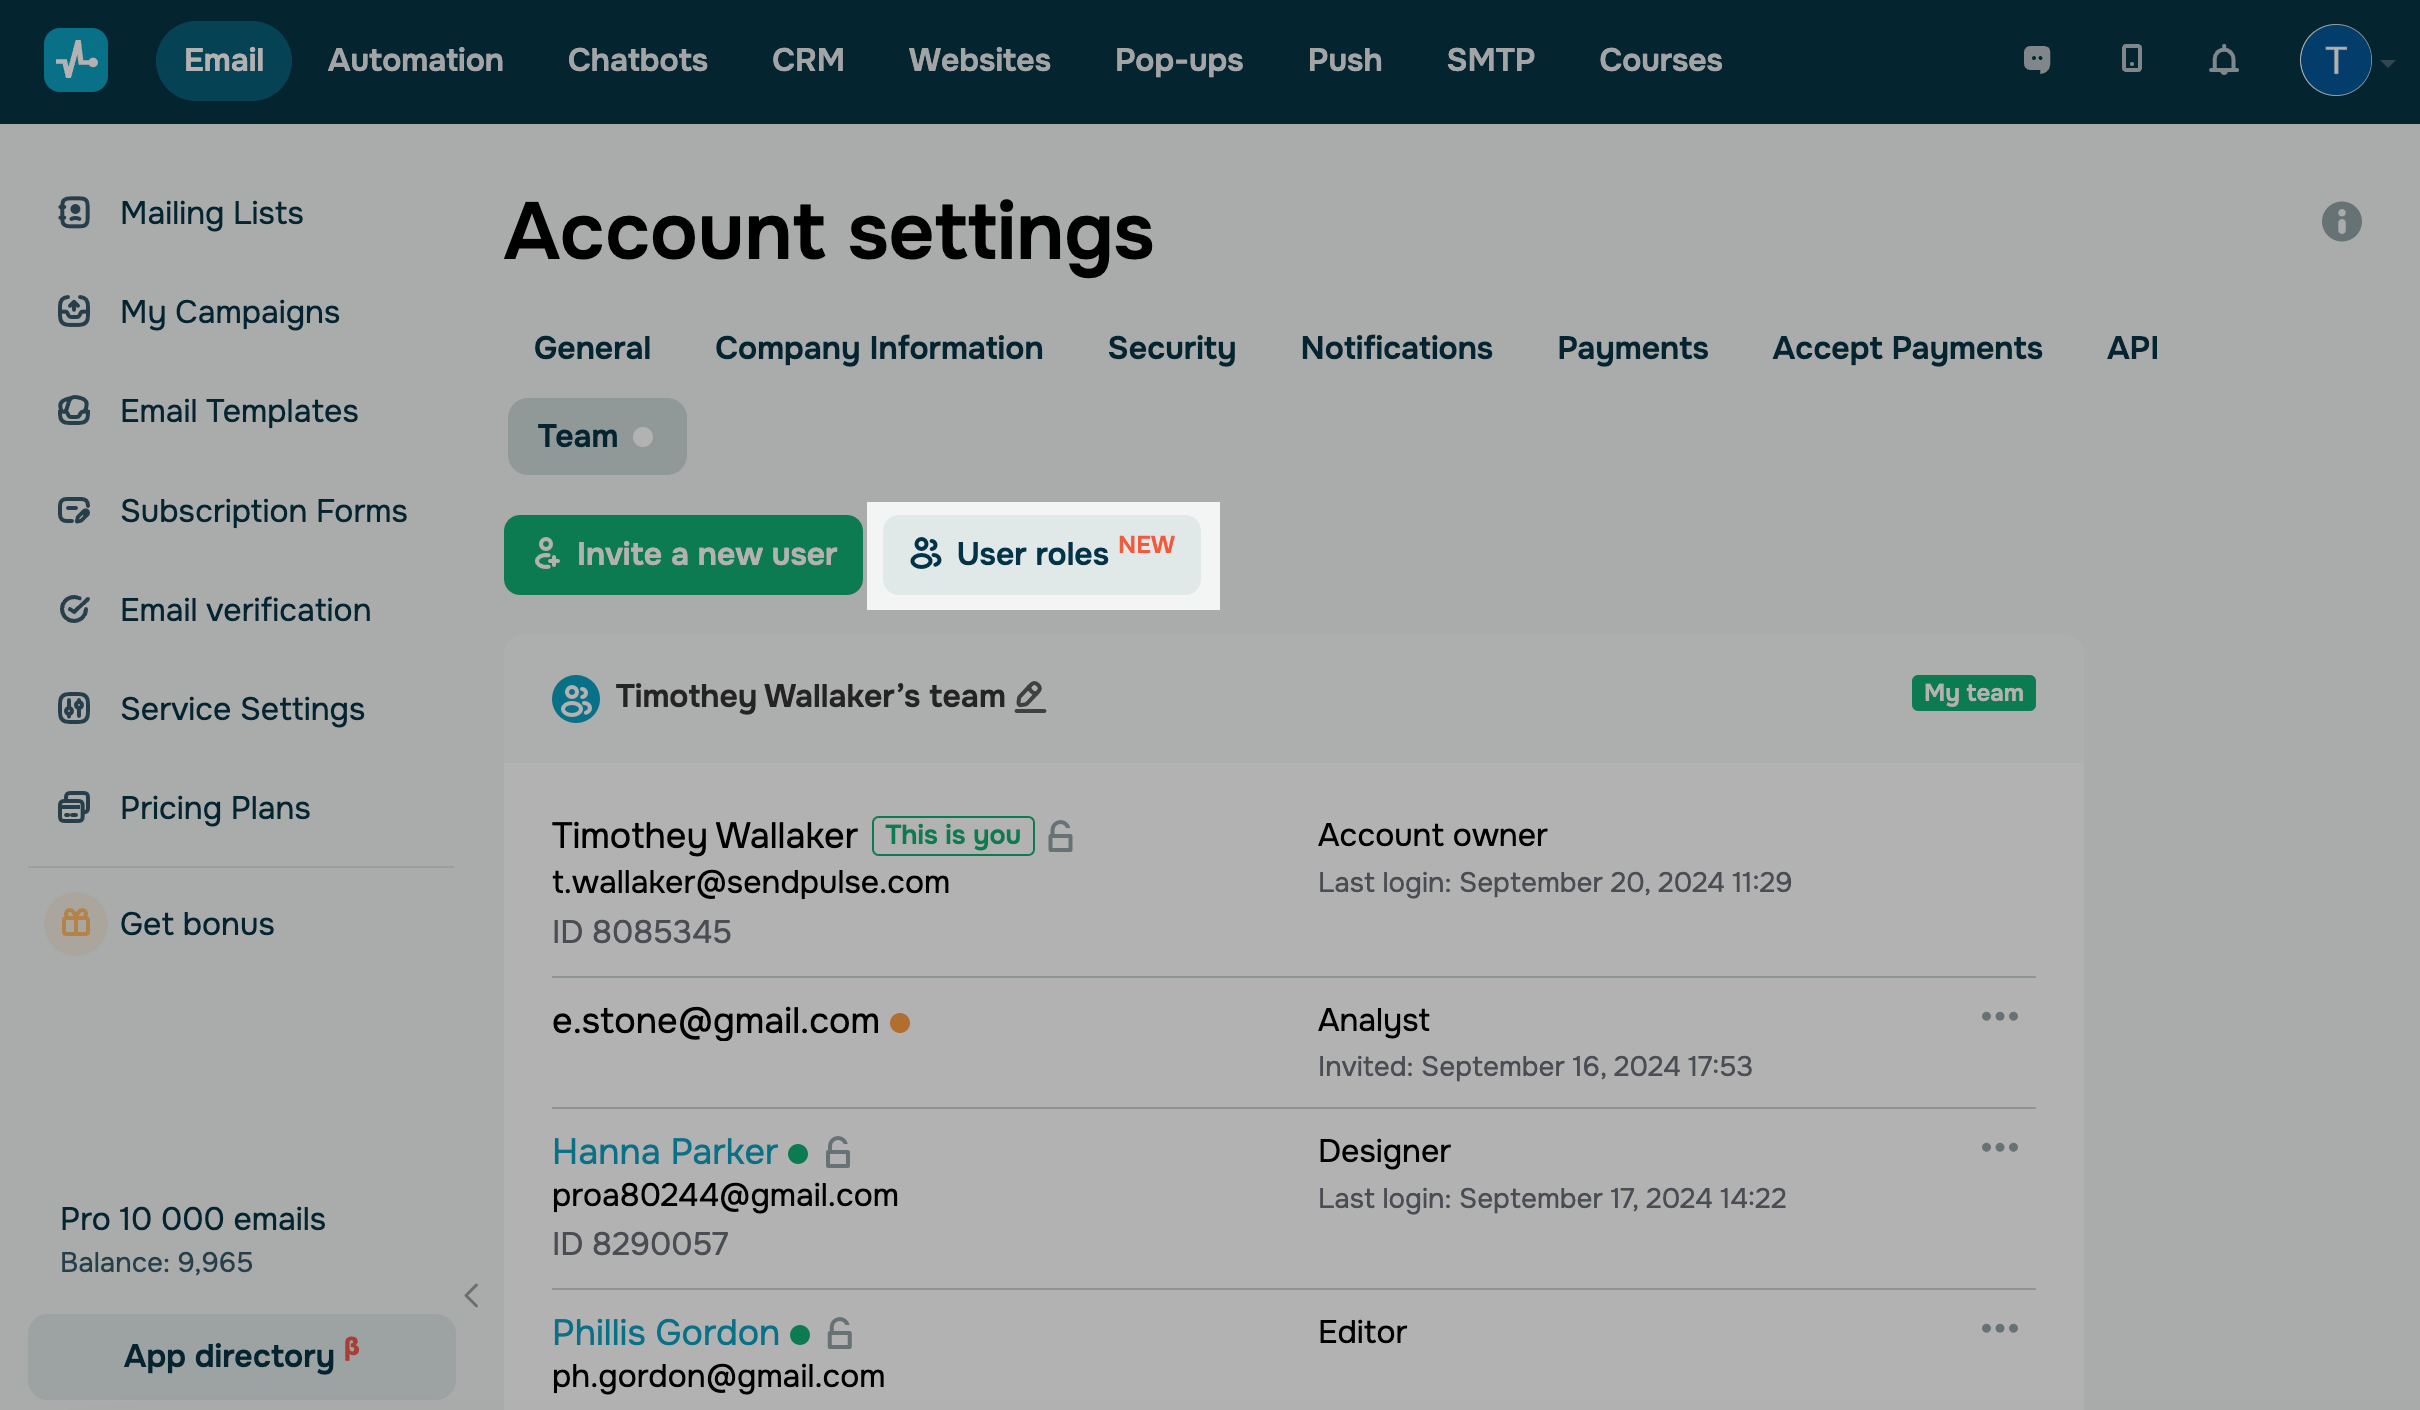
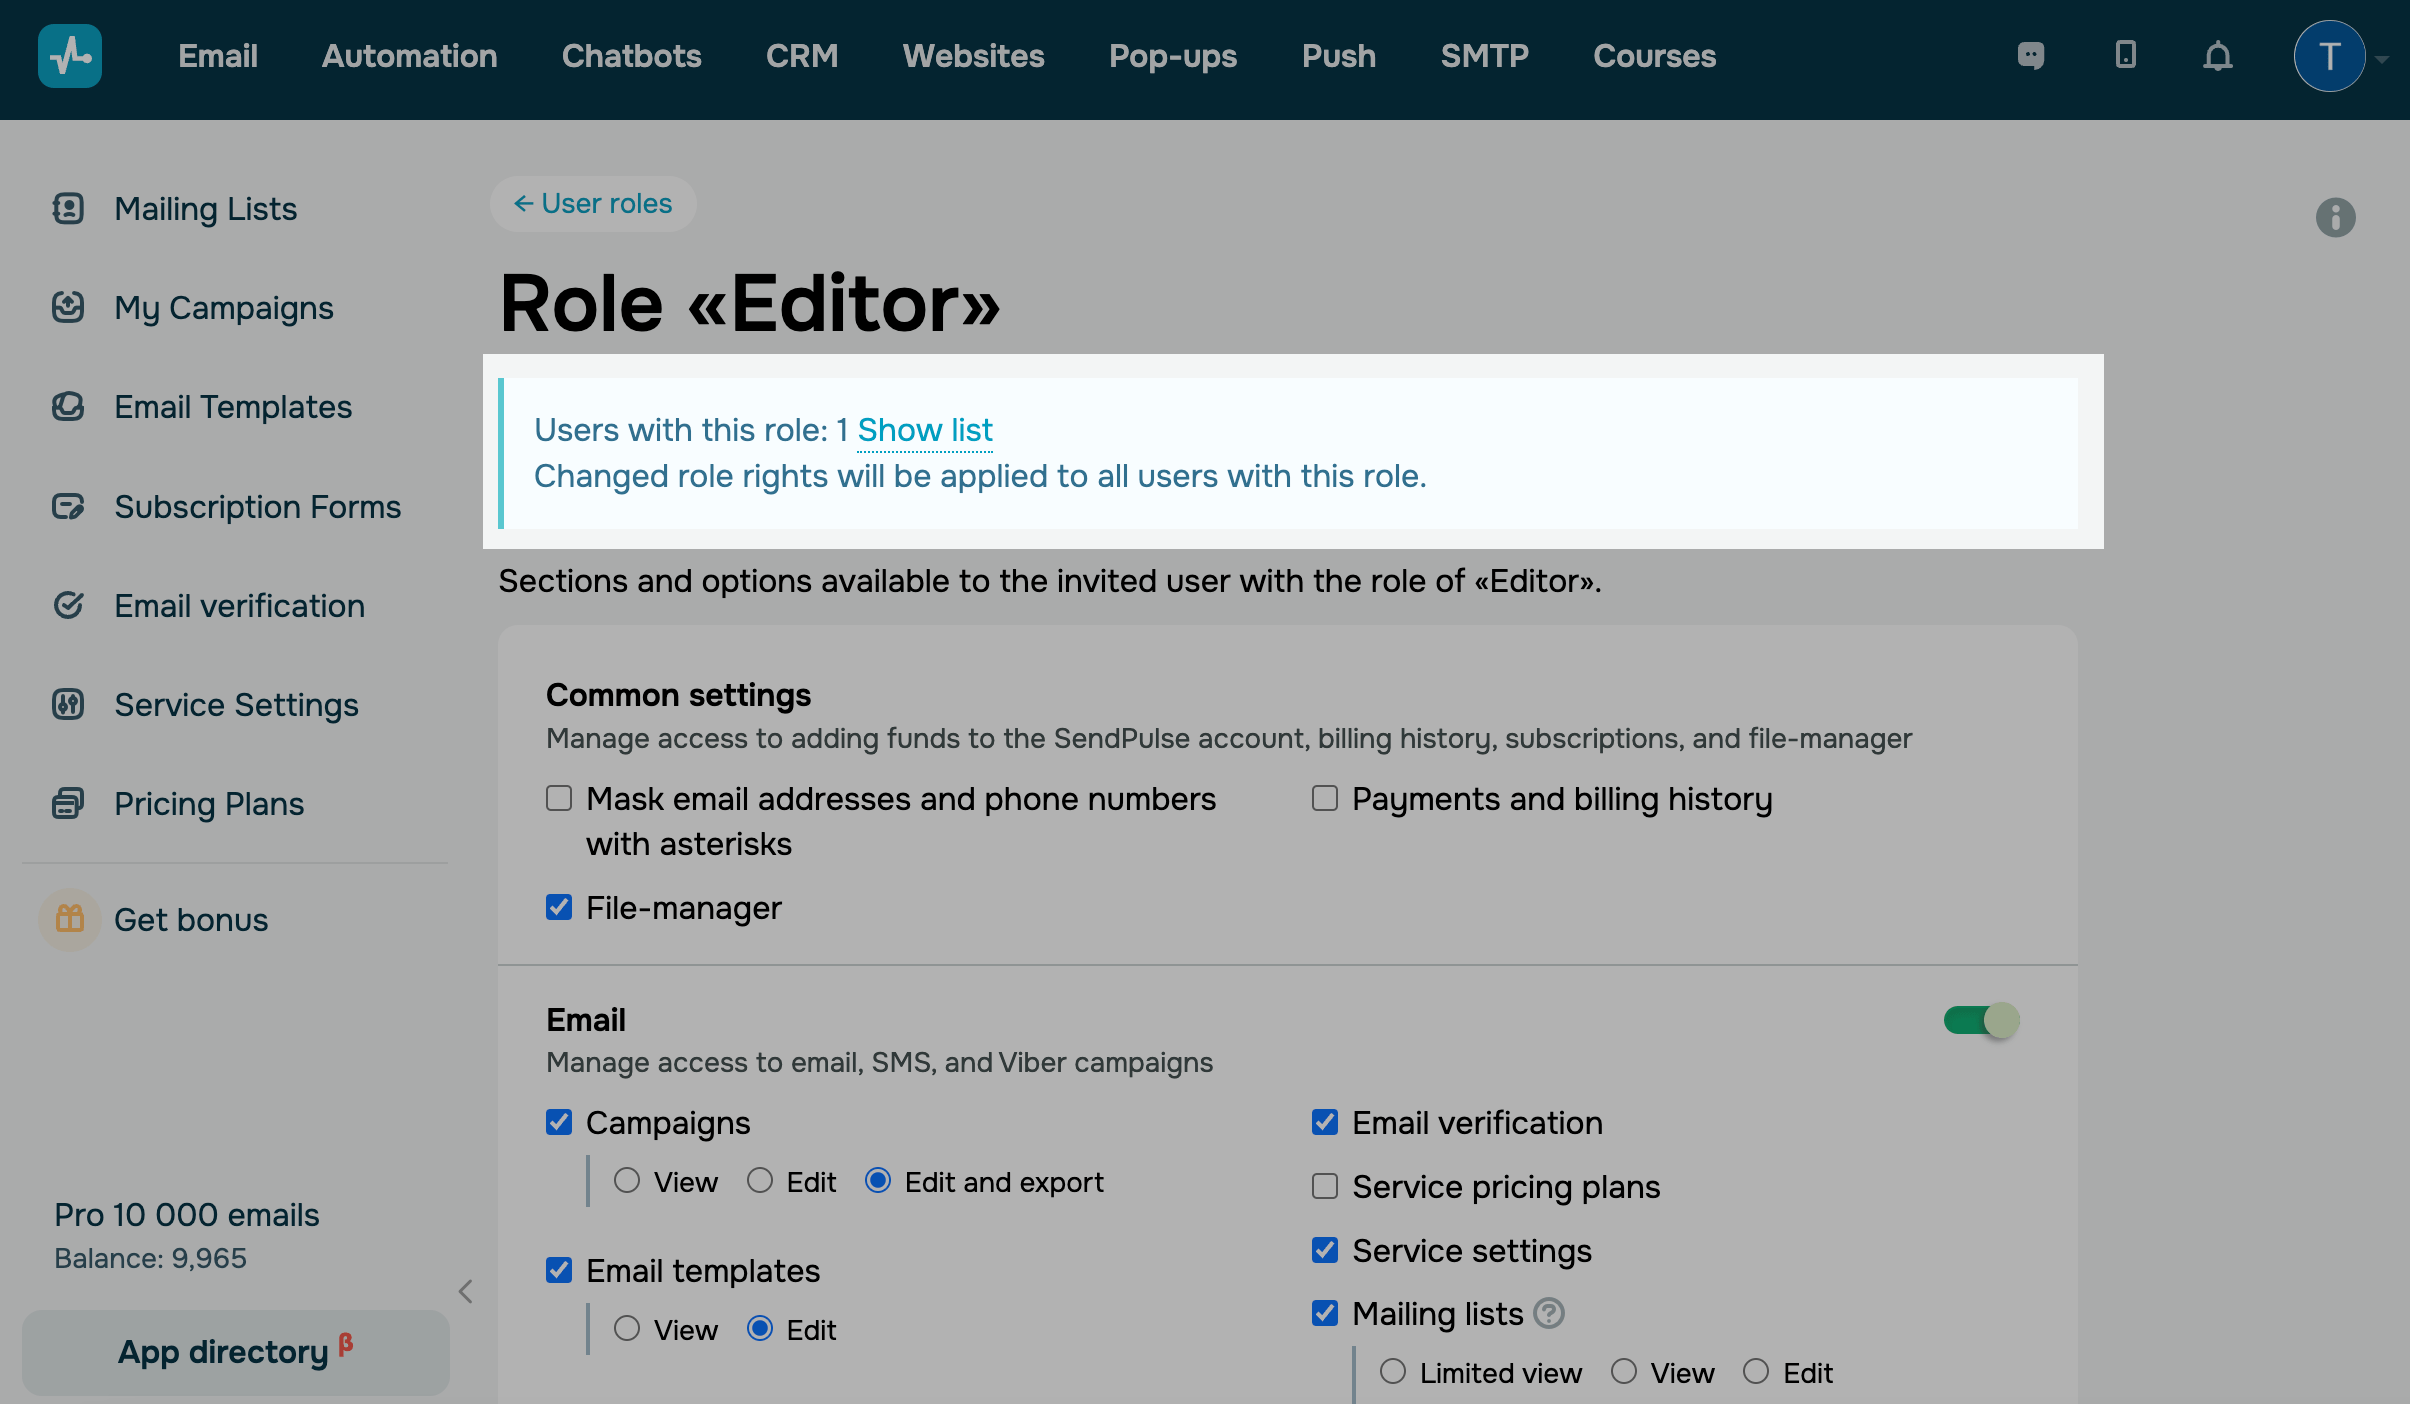
Hot to view user roles
To view the list of standard and custom roles, go to User roles.
To view specific role access rights, select the role, click the three dots next to it, and select Check.
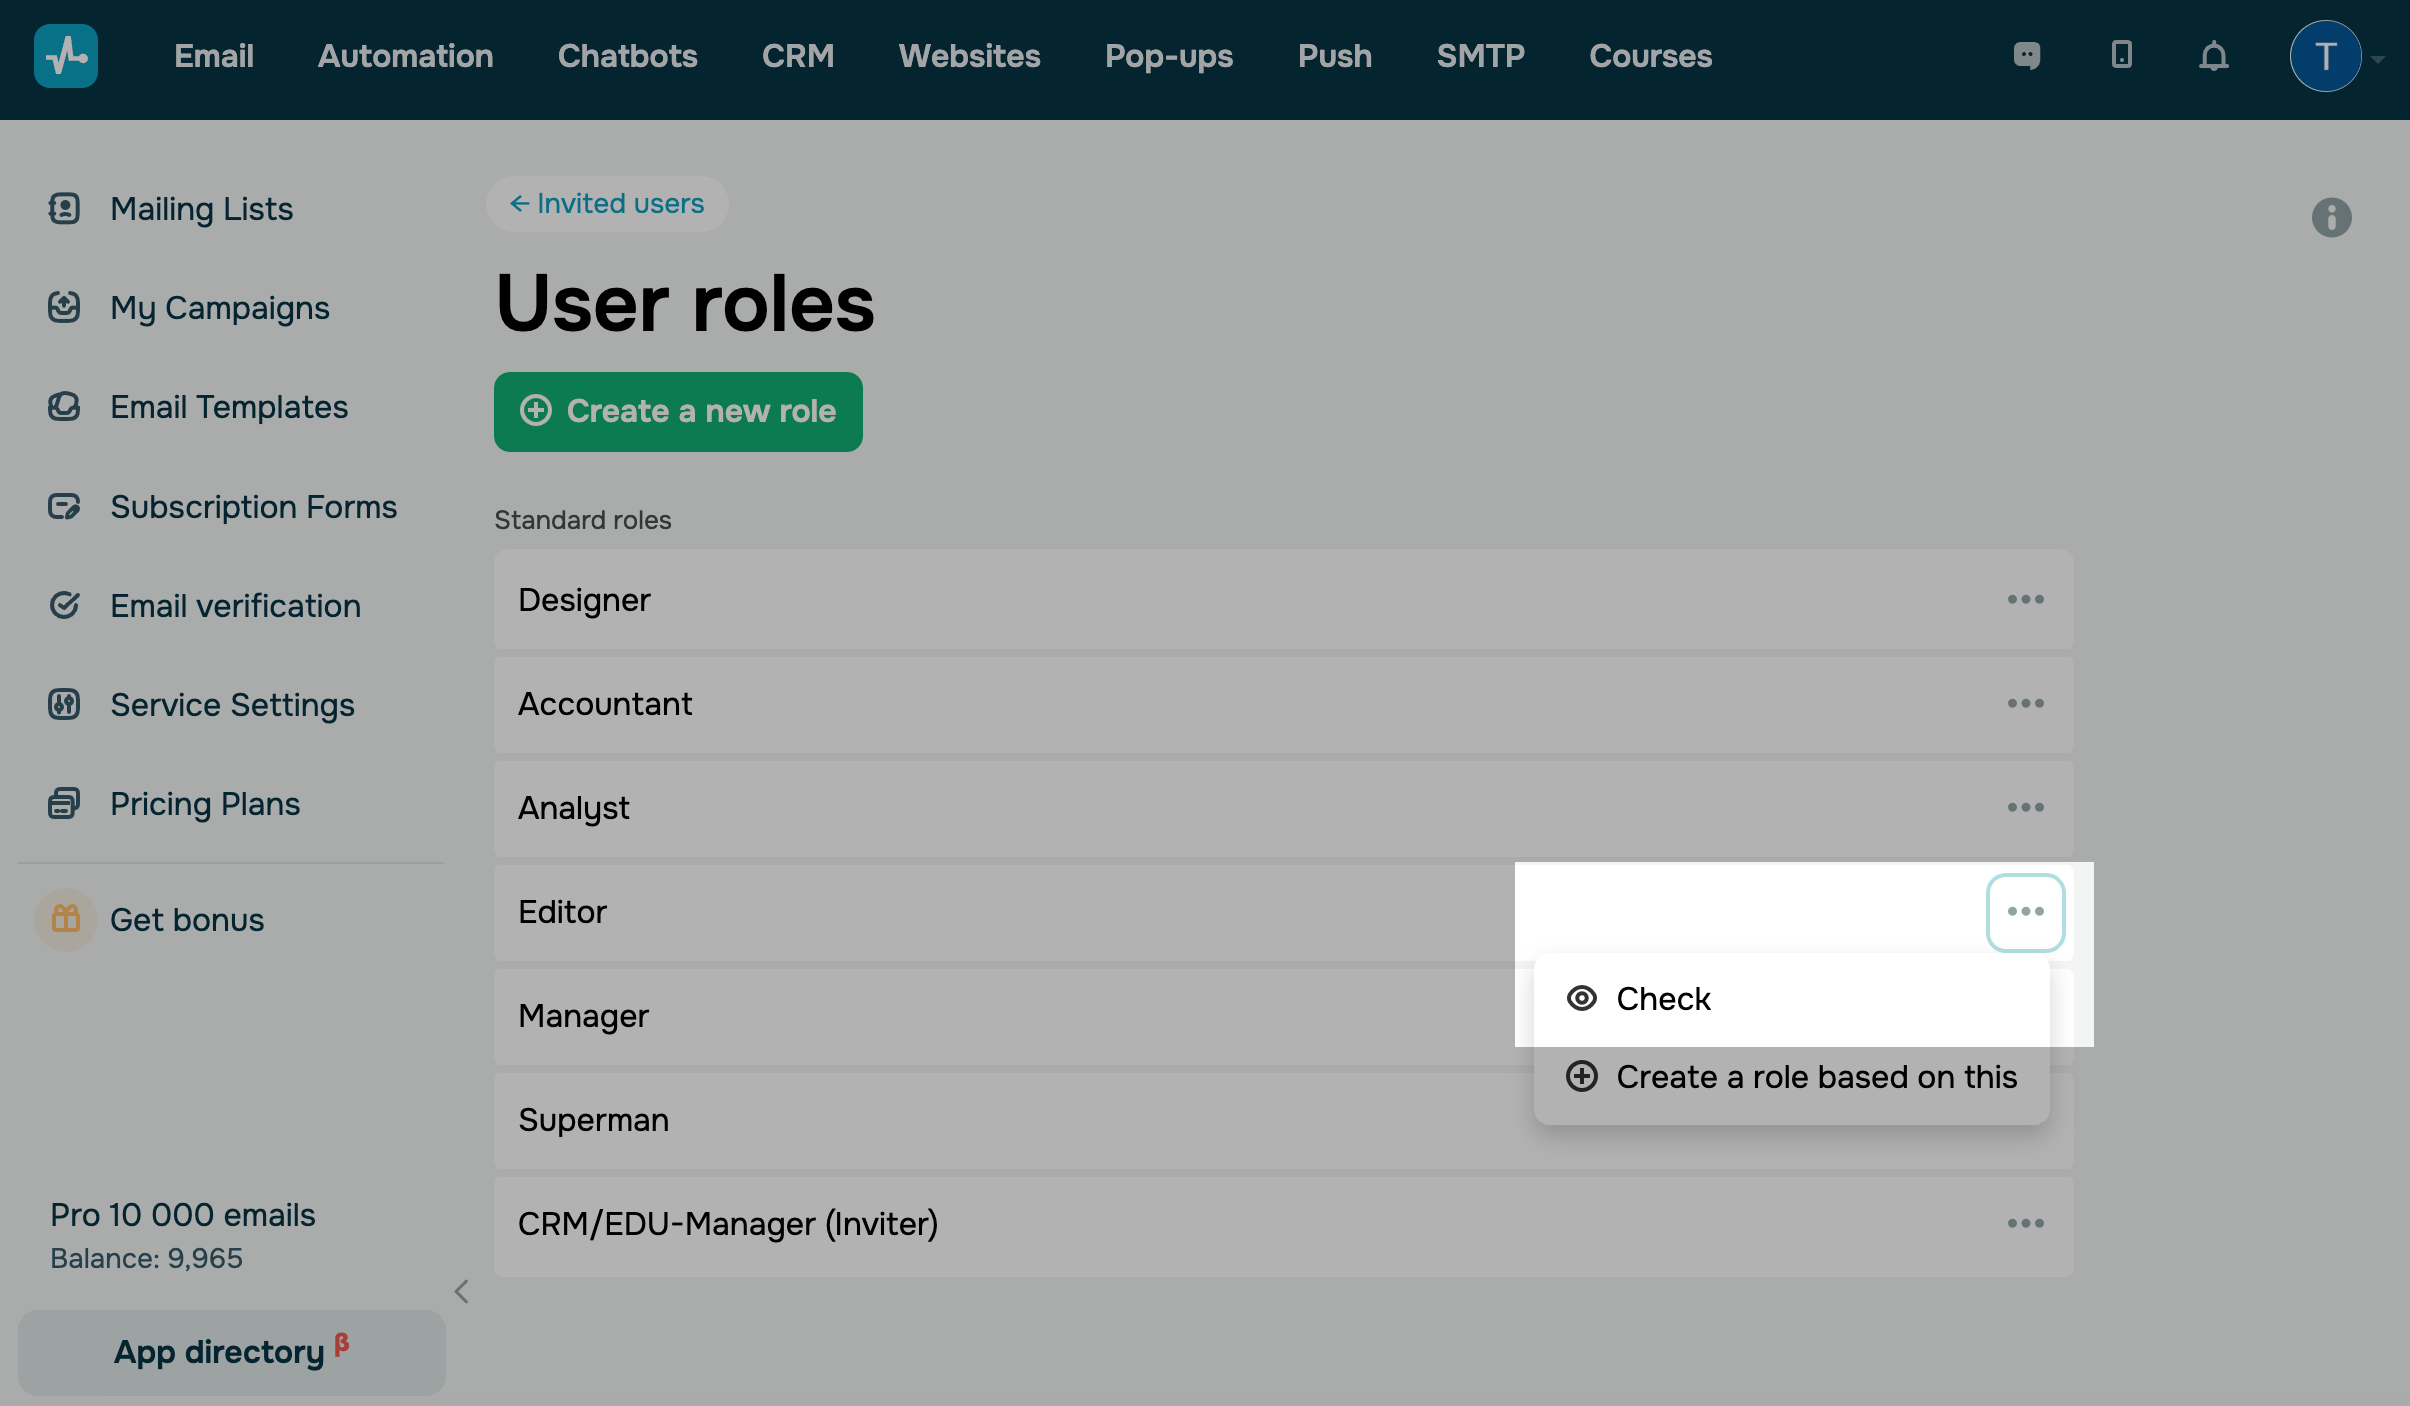
Standard roles cannot be edited, but you can select Create a role based on this to build a custom role.
When viewing role settings, you will see the number of users assigned to that role in the upper row. Click Show list to see the list of names.
If you edit a certain role's settings, changes will apply to all users with that role.
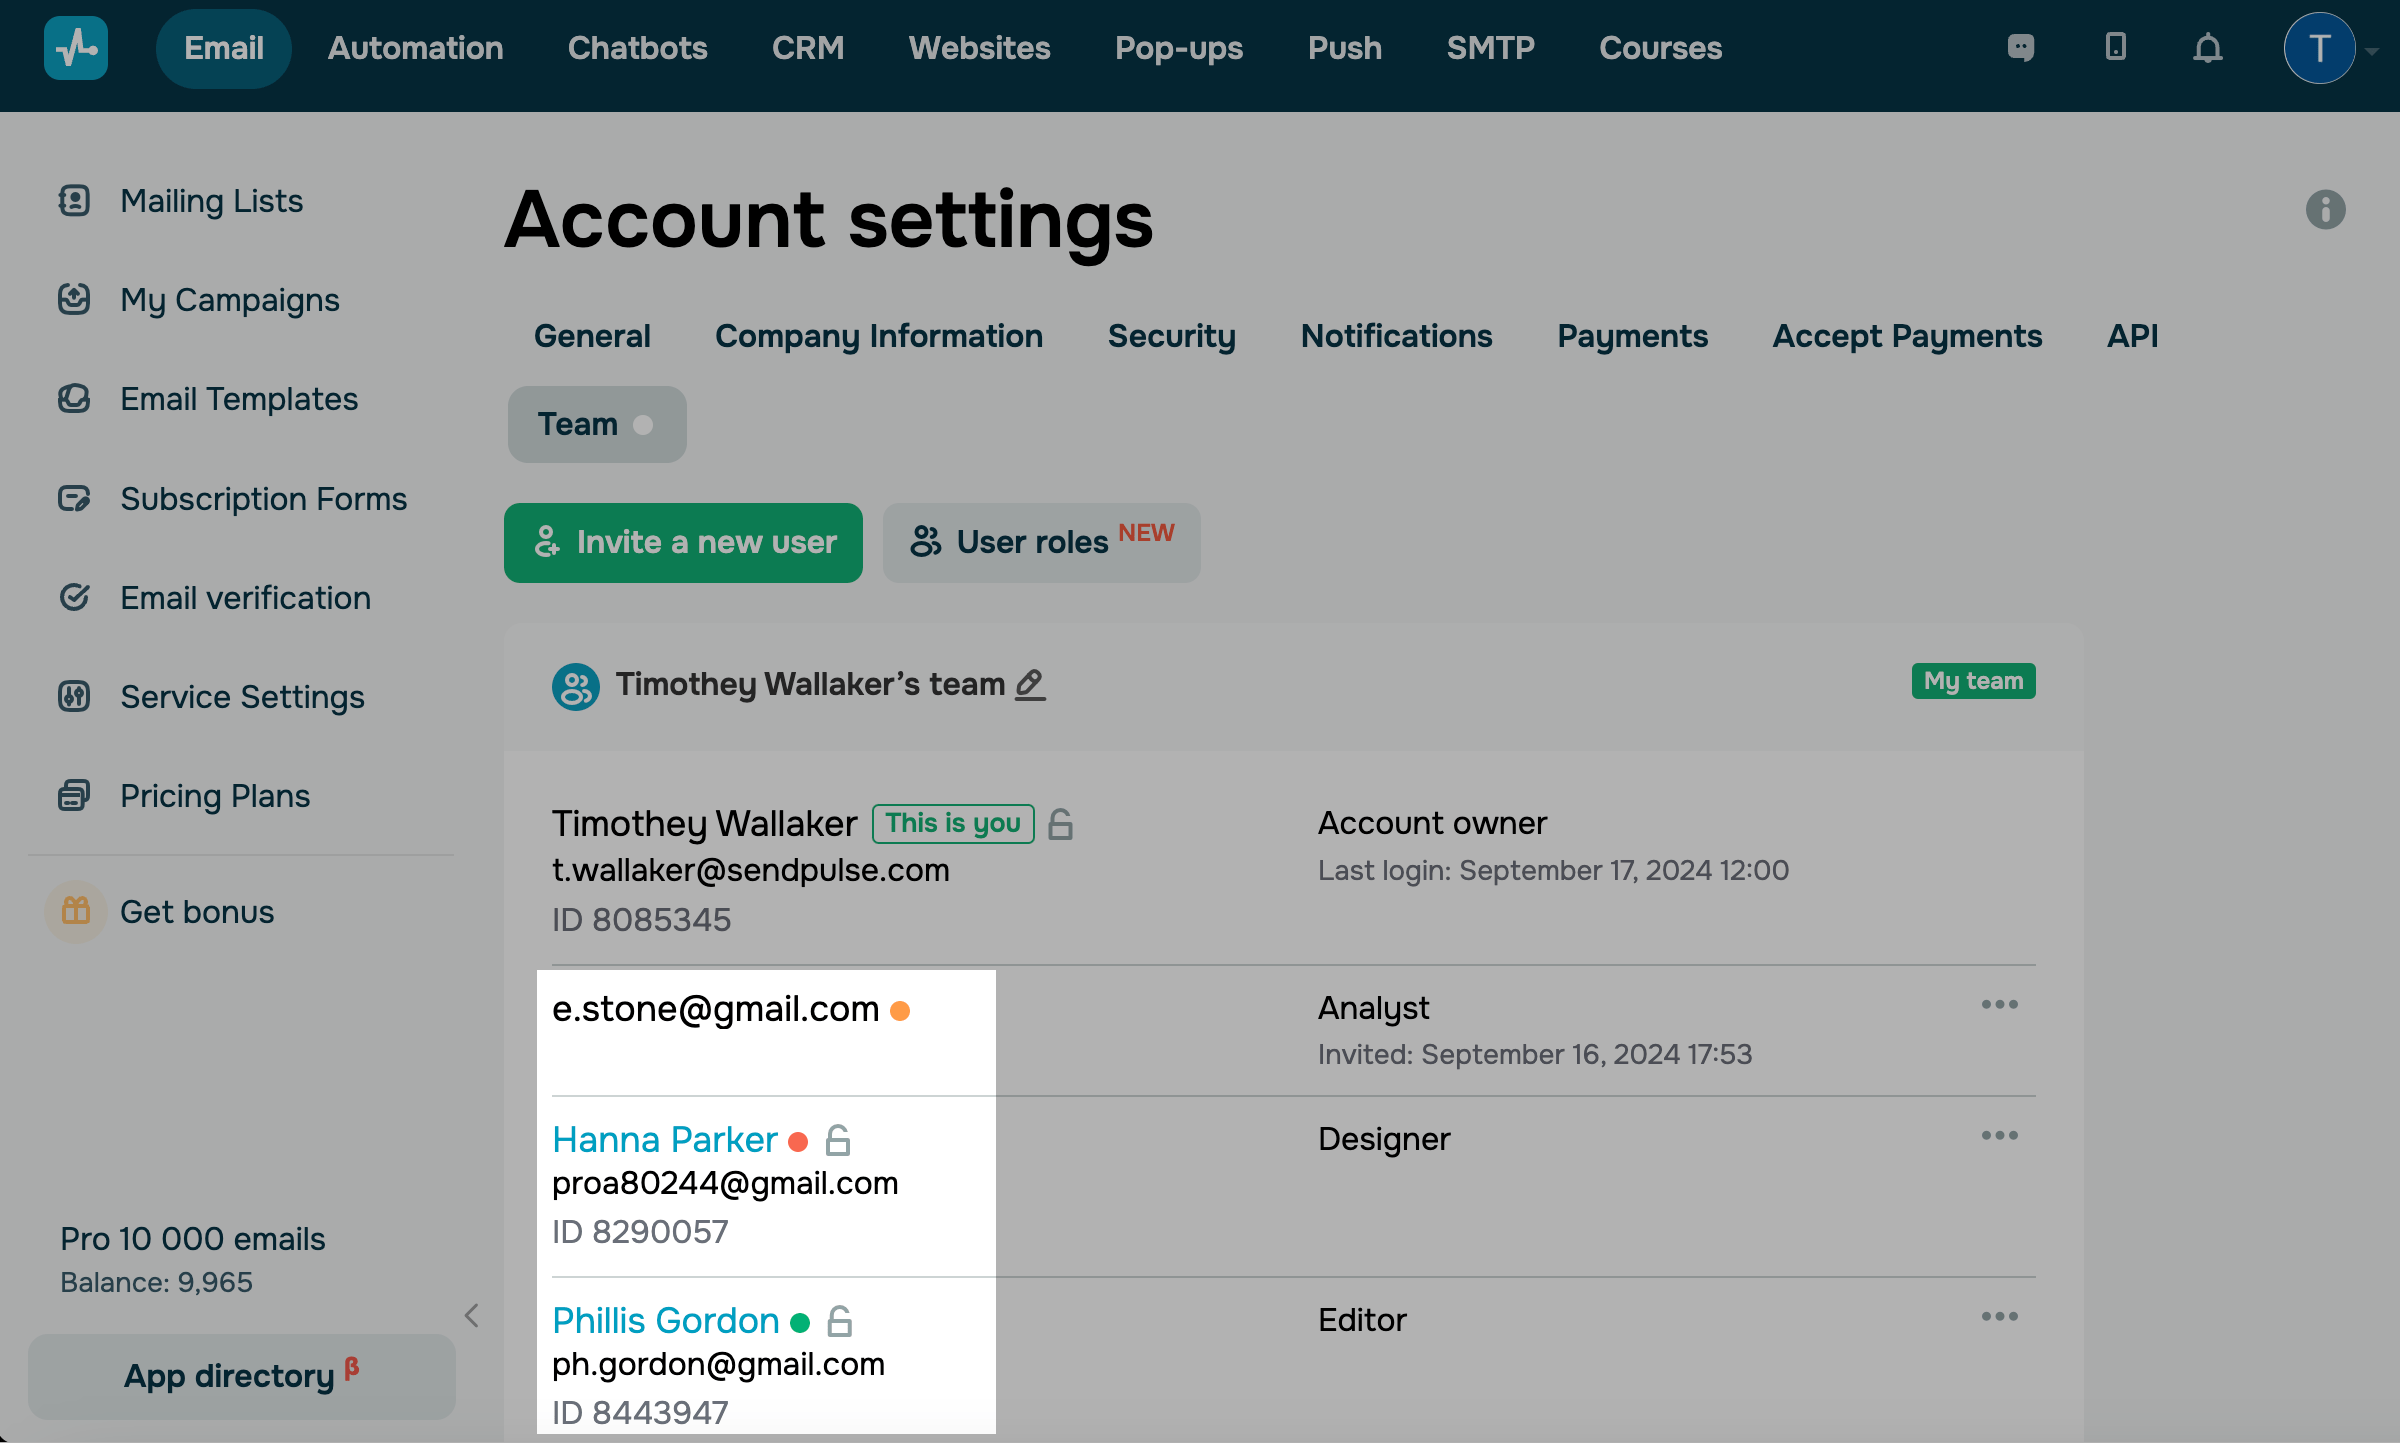
How to view your team members
You can view the list of all users in Account settings > Team.
All invited users are color-coded based on their status.
| Green | An active user who has accepted your invitation. You will see their account name and email address. |
| Orange | A user who has not yet accepted your invitation. You will see their email address you used to send the invitation. |
| Red | A blocked user. |
If a user clicks Leave the team in the Team section of their account, their data will be removed from the list.
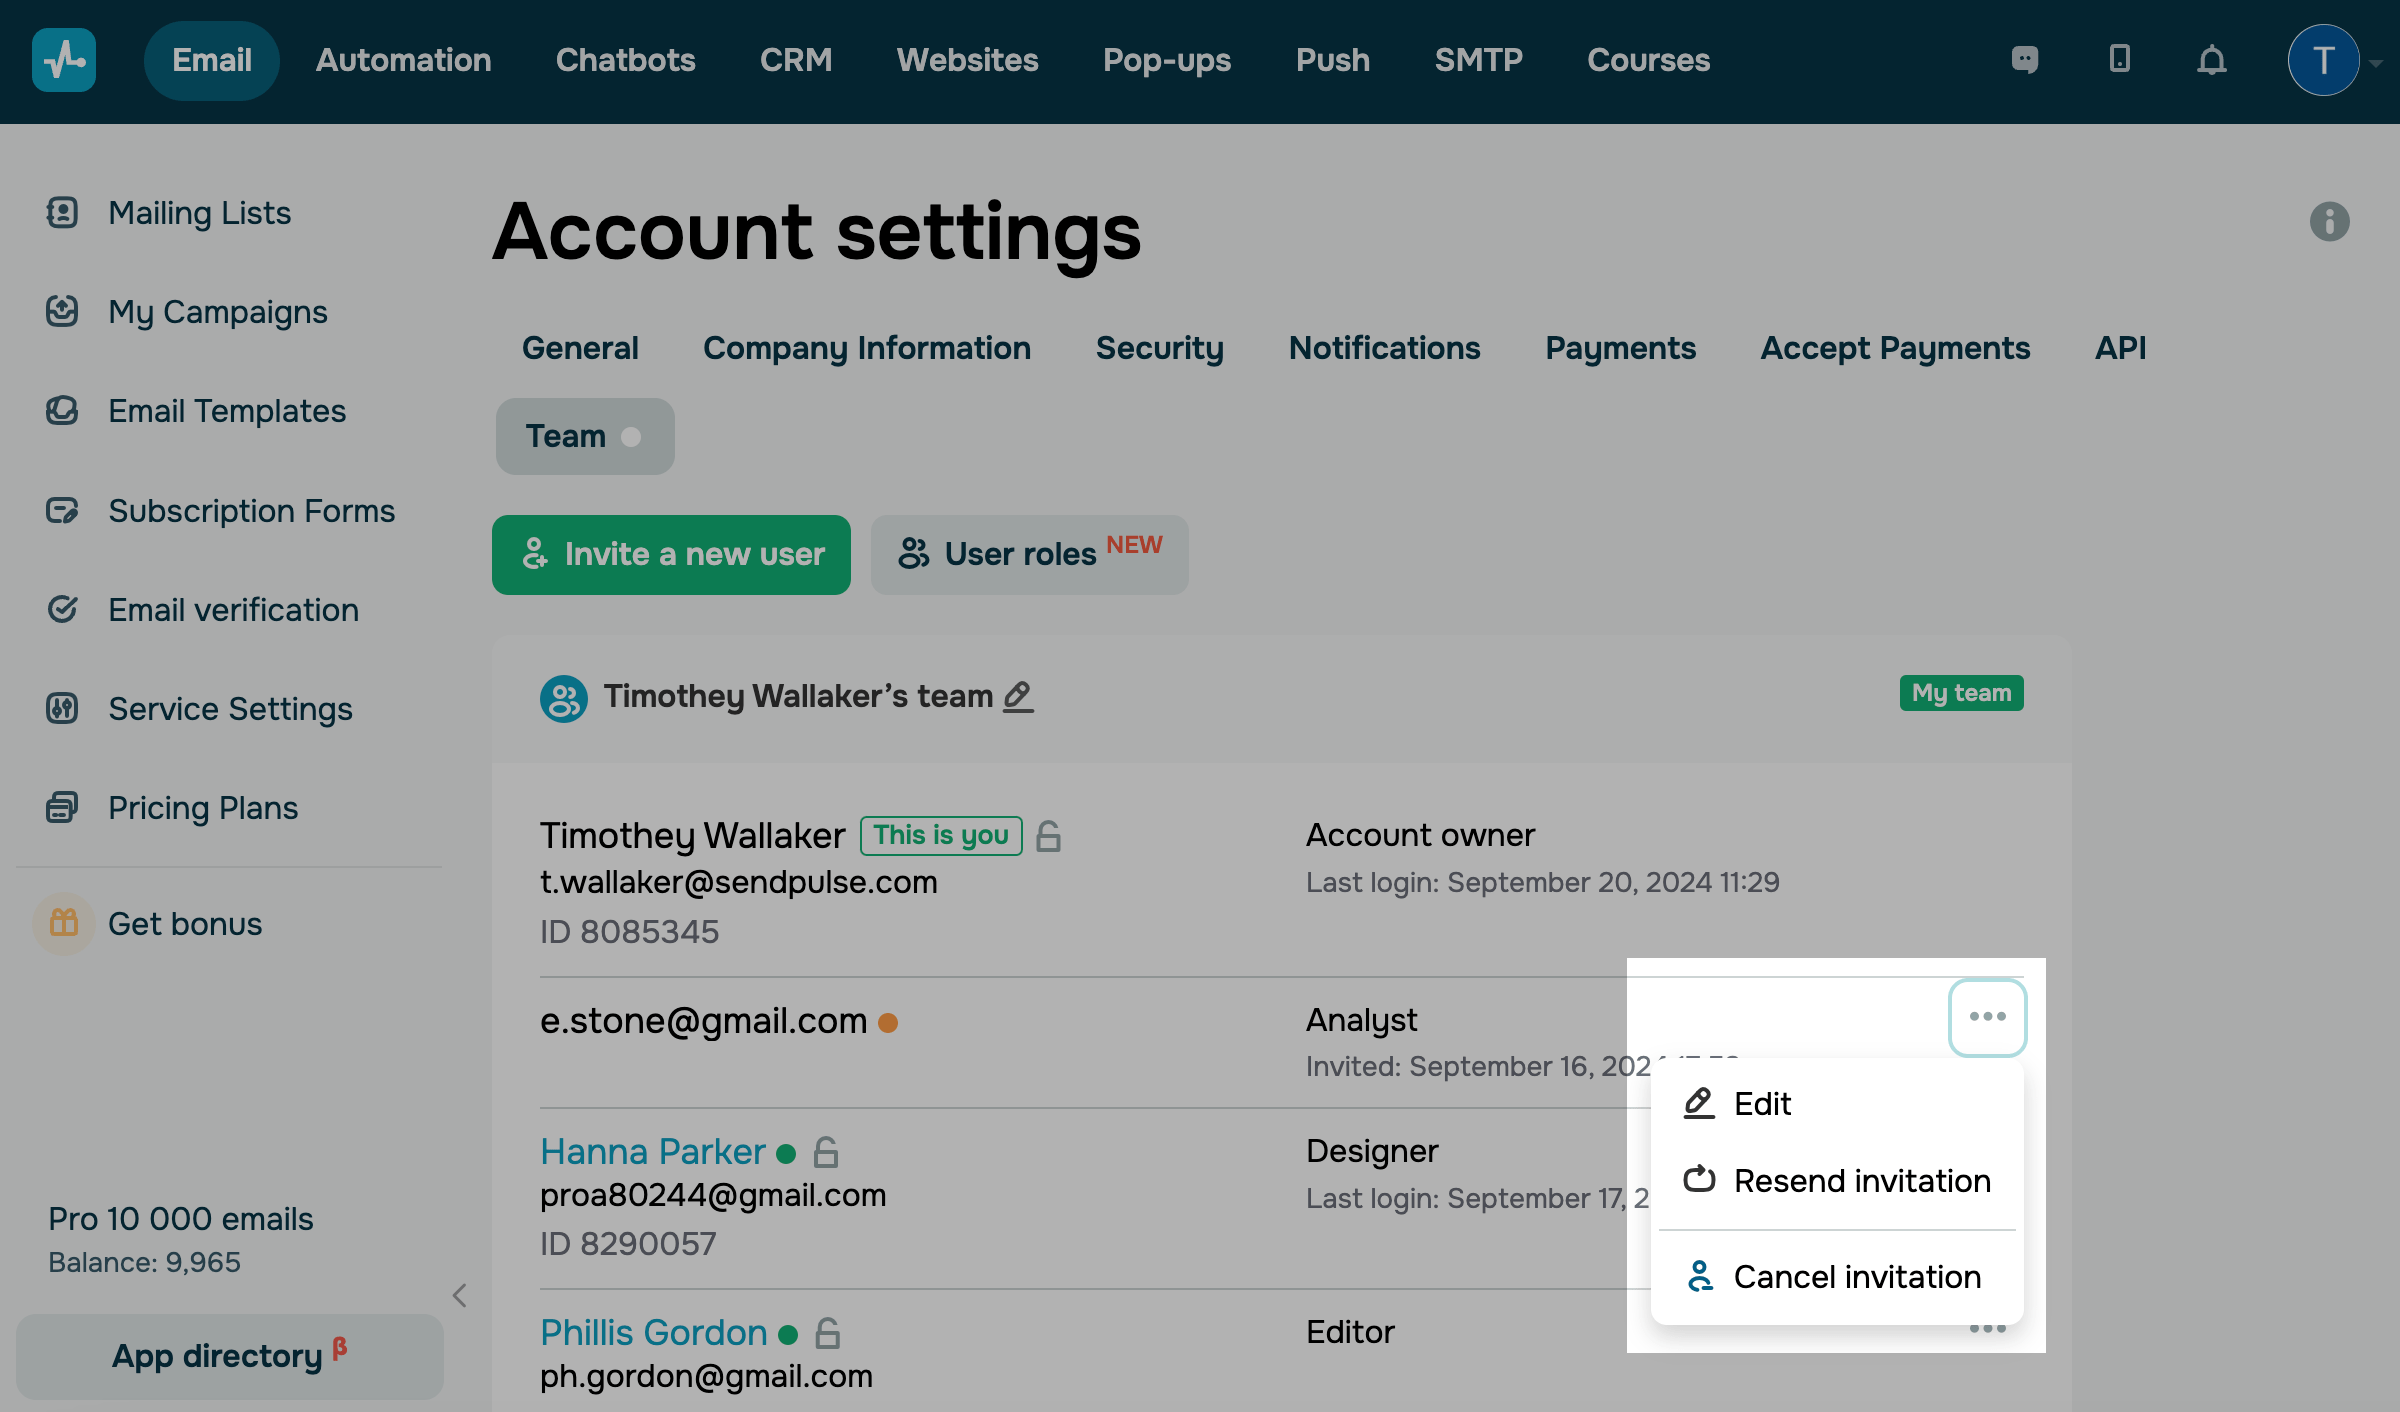
How to manage invited users
Click the three dots next to a user’s name, and select an action.
Active users can take the following actions:
| Edit | Select another role or access rights. |
| Block user | Keep the user on your team and remove their access to your account data. |
| Delete user | Remove the user and their data from your team. |
Invited users who have not yet confirmed their email addresses can take the following actions:
| Edit | Select another role or access rights. |
| Resend invitation | Send an invitation to the specified email address again. |
| Cancel invitation | Prevent a user from joining your team. |
Last Updated: 03.10.2024
or