Set up a Live chat
With live chats, you can establish communication with your website visitors, attract new customers, and increase your sales. Add a live chat to your website, invite live chat agents, and automate communication using auto-replies.
Let's talk about how to add a live chat to your website and customize its appearance.
Live chat features
Automated interactions. Live chat is a tool that allows users to communicate in real time. Website visitors send messages via widgets on your site, and live chat agents or bots reply to users. Create flows with your preferred commands.
Personalization. Use the Filter element to branch your chatbot flow based on variables, subscriber countries, or subscription sources. You can also add personal data to messages and reply based on a subscriber’s previous actions.
Flow triggers. Set a specific trigger to launch your flow, for example, when a user messages you for the first time or places an order through your WhatsApp catalog.
AI-powered features. Integrate ChatGPT or other AI models so that your chatbot can answer free-form questions, not just scripted ones. The AI Agent element in your flow can guide the conversation along various branches depending on the context.
External queries and integrations. Your chatbot can make API calls to your system, retrieve data points, and generate replies based on them.
Create and set up a live chat
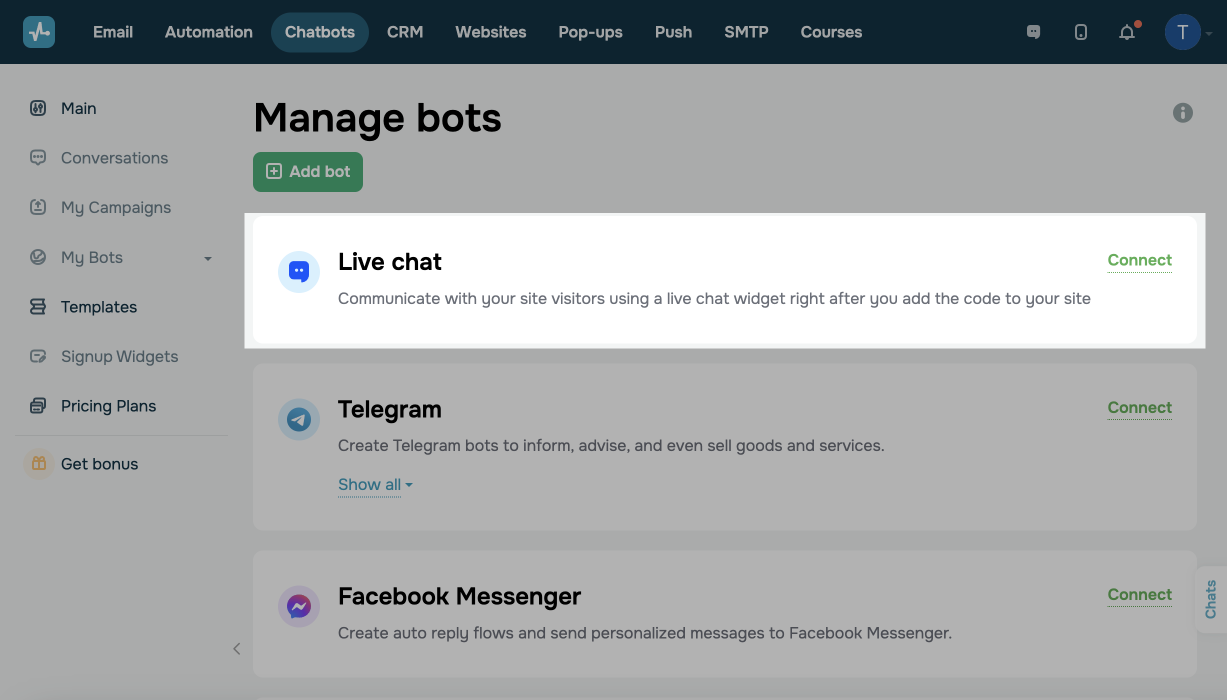
Go to the Chatbots section in your SendPulse account. If you have not connected any channels before, click Connect.
If you already have connected bots, go to the Manage bots section, and click Add bot. You can also click Connect next to Live chat.
Connect a website
You can add a live chat to a site created with SendPulse or a third-party builder.
| Install a live chat widget on a site created with SendPulse |
Enter your project name, and select your website, landing page, or course registration page developed with SendPulse. Your project code will be automatically added to your site settings. |
| Install a live chat widget on a third-party site |
Enter your project name and a link to a site where you want to add your widget. You can copy the installation code after you customize the widget appearance. Learn more: How to add a live chat widget to a third-party website. |
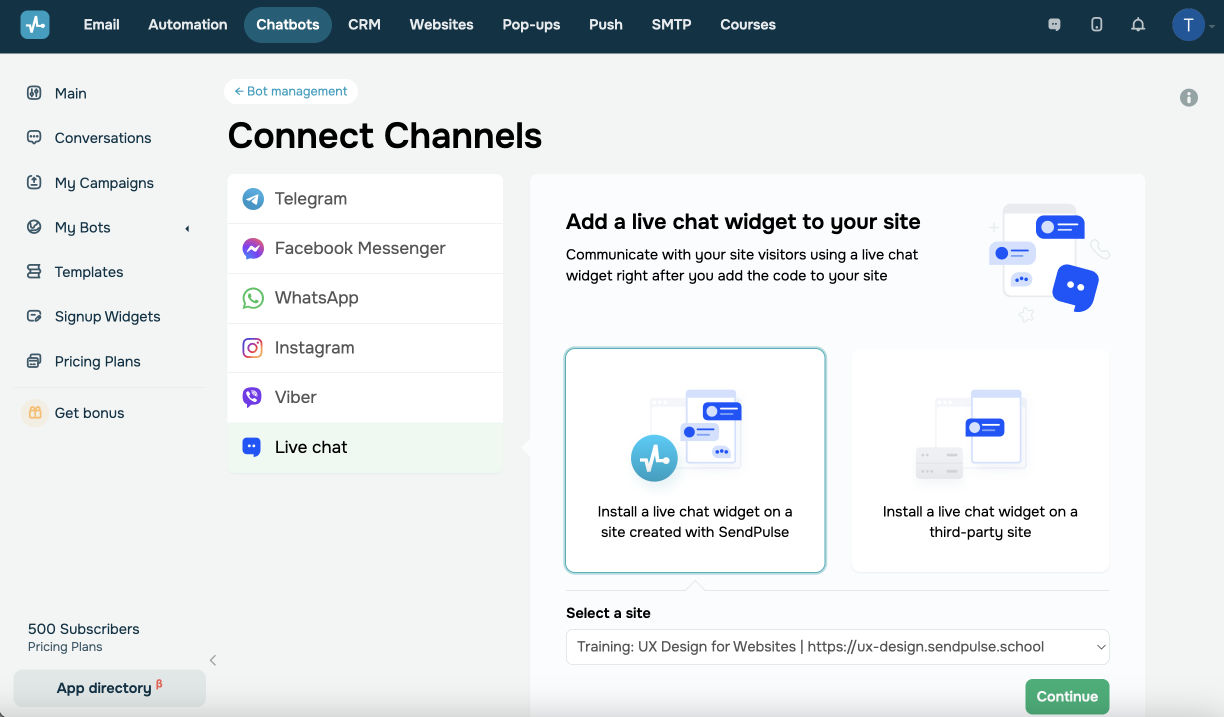
Next, click Continue.
Customize your Live chat appearance
This step is the same for both SendPulse-based and external websites.
Choose how your live chat widget will be displayed to site visitors. Select your alignment – left or right. Select a color scheme that suits your brand style and website colors. Enter a title that will be displayed in your live chat header.
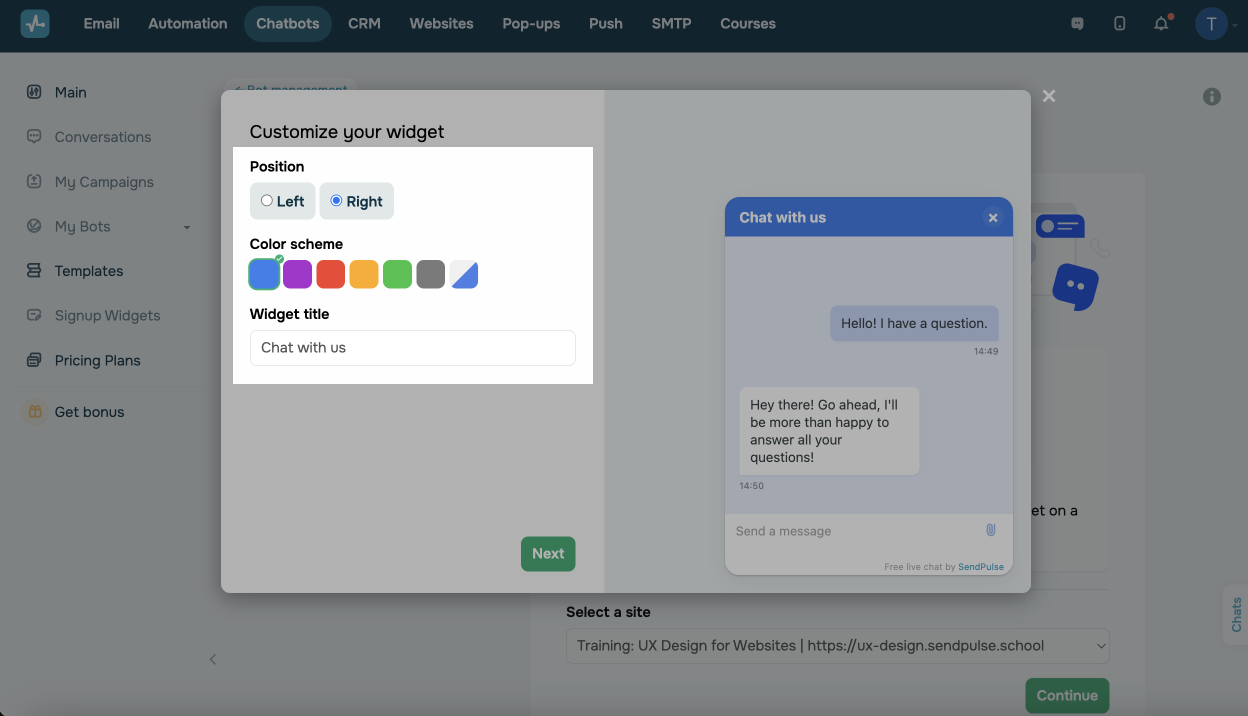
On the right, you can view what the expanded chat will look like. The widget will be displayed as a launcher to your site visitors. If a user revisits your website using the same browser and clicks the widget, they will see their live chat history.
You can configure your live chat to match your website’s design and enhance user experience using JavaScript.
Learn more: How to customize the widget using JavaScript.
You can also add a live chat description and a link to your privacy policy.
Once you finish customizing your widget appearance, click Next.
If you’re adding a live chat to a SendPulse-based website, you will be redirected to the main bot setup page and will be able to test your live chat and proceed to creating auto-replies.
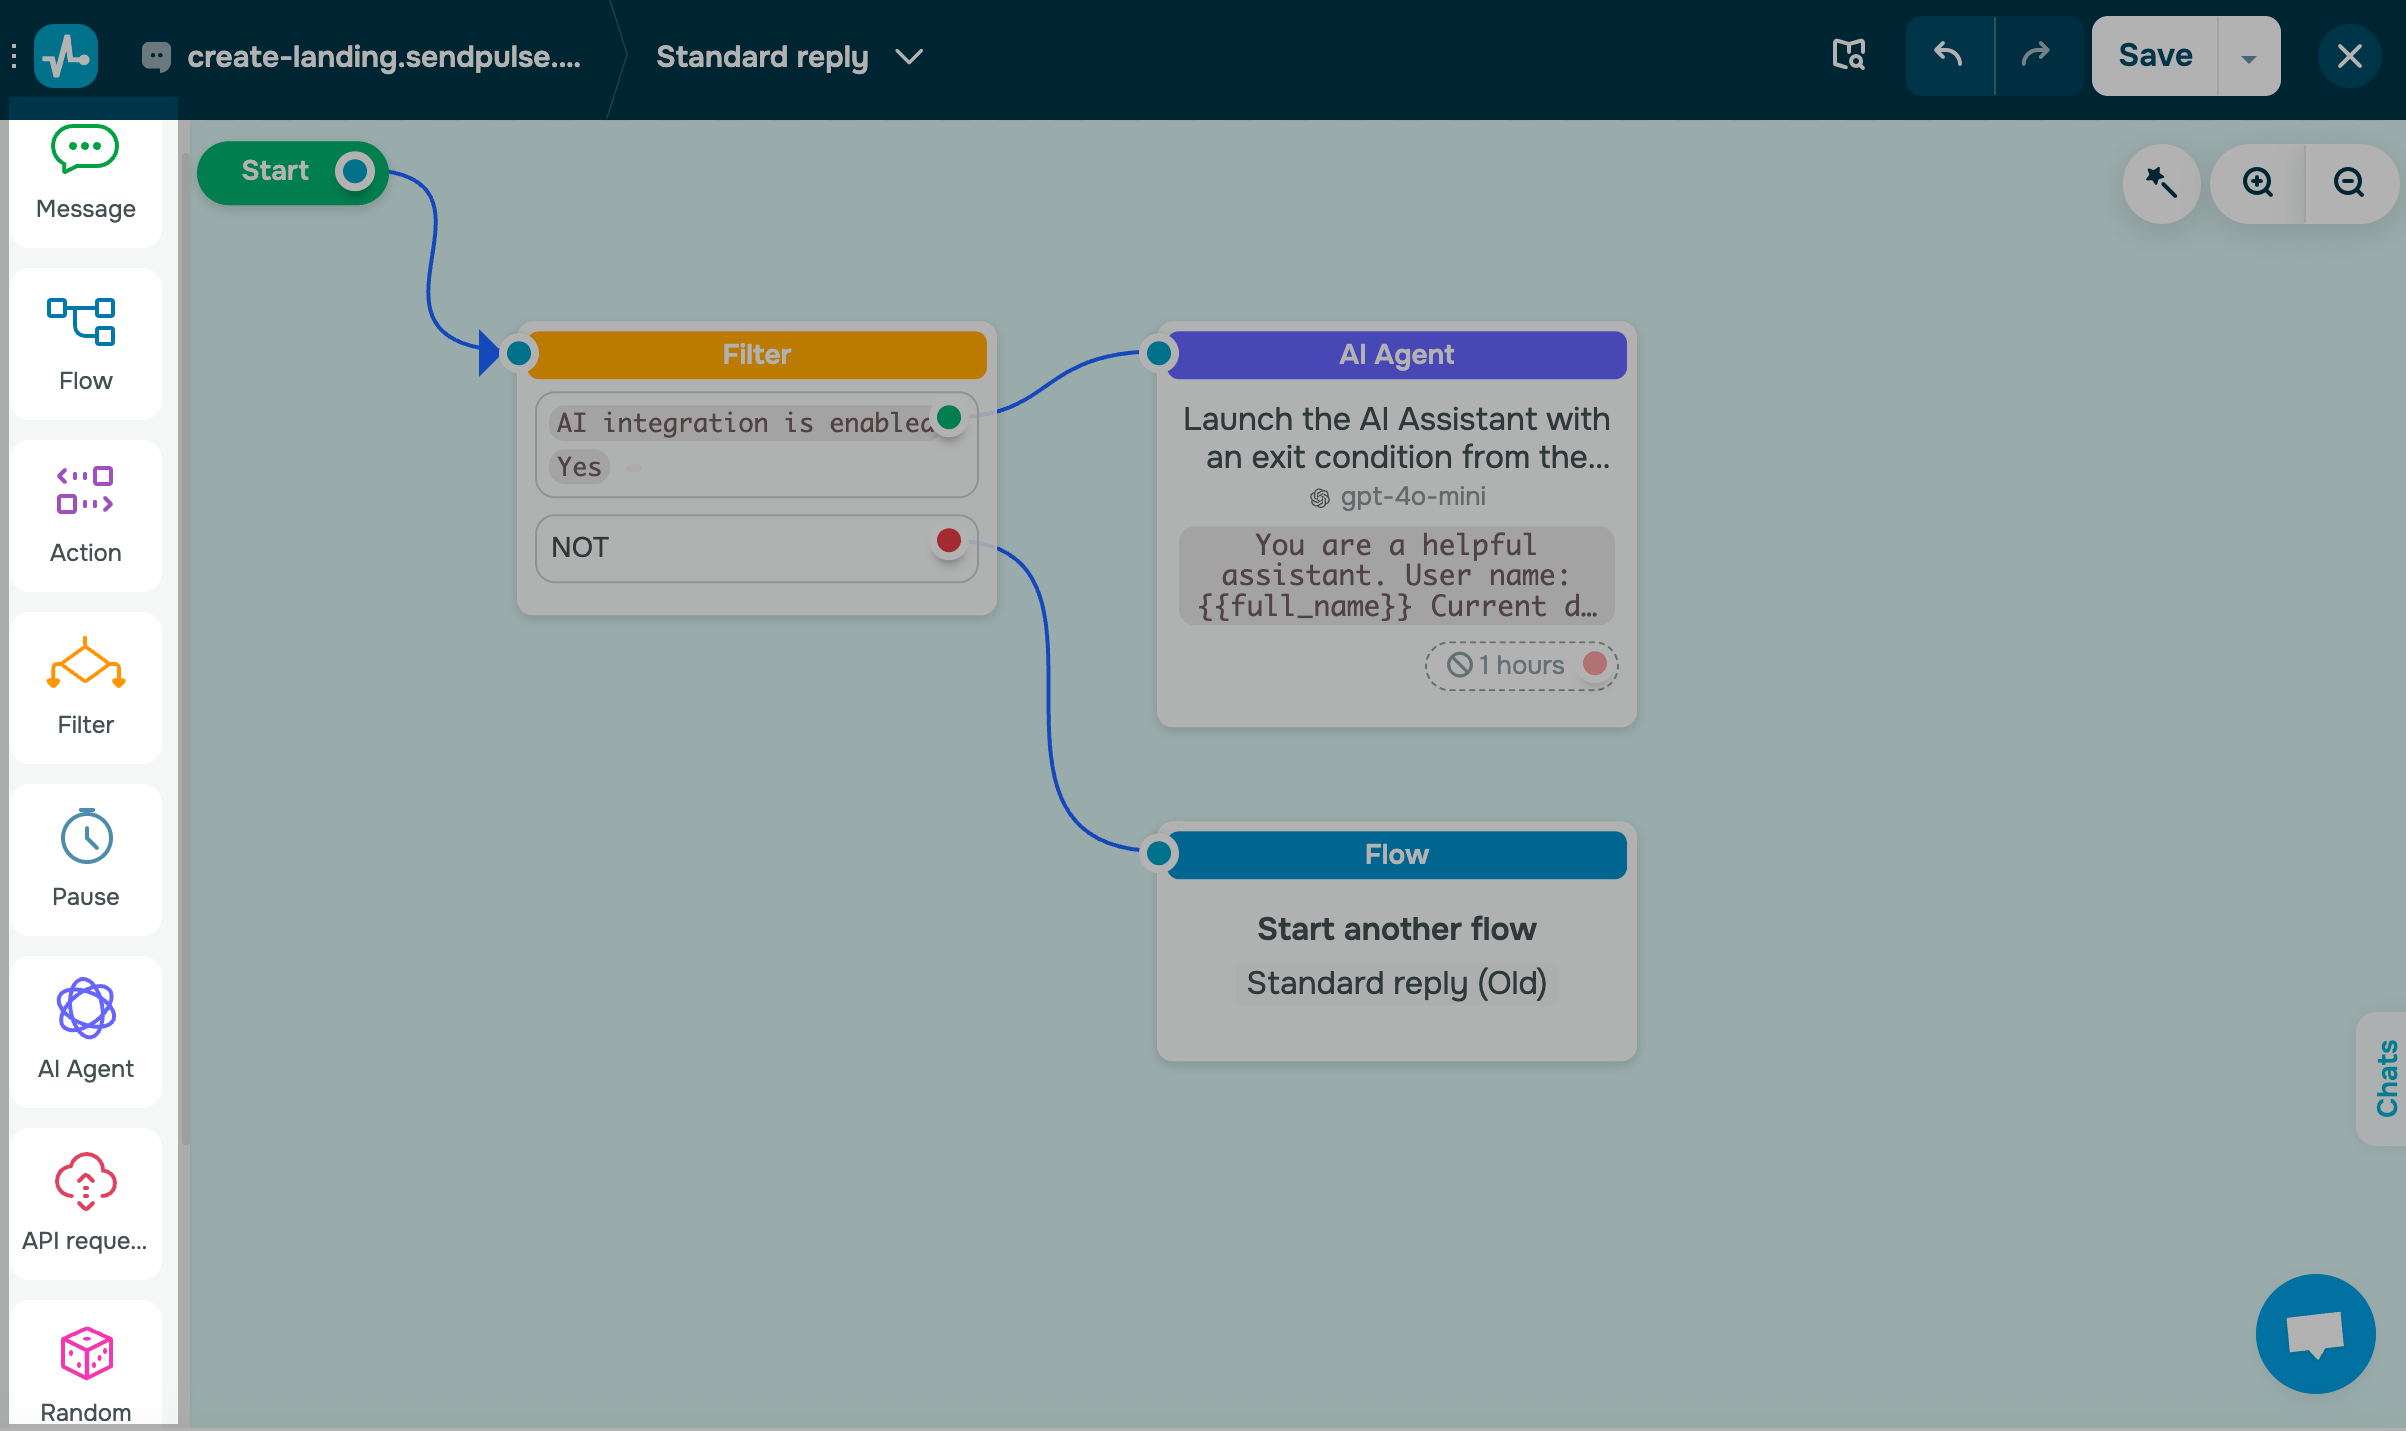
Continue building your chatbot
The Welcome message, Standard reply, and Unsubscribe from flows are available by default. You can also create your own triggers and flows.
Plan out key conversations your chatbot should support, then build dedicated flows using chatbot builder elements. You can also manage flow branches based on user behavior using the Button, Filter, and AI Agent elements.
Read more: Create a chatbot structure and Tips on chatbot flow design.
You can also use AI to generate flows or apply ready-made templates that match your goals. This can significantly reduce the time spent on brainstorming and flow planning.
Once you’ve set up your chatbot and flows, you can add chatbot links to your website or pop-ups. If you have a list of subscriber IDs (8–10 digits each), you can import it.
You can also track your chatbot's behavior in your account statistics and chats with subscribers to analyze the user journey and improve user experience.
Last Updated: 10.10.2025
or