Customize your academy website
Every academy has its own website that you can customize to fit your brand style and business needs.
You can create a dedicated page for every course. These pages will use your academy’s website domain. In the settings, you can set up your course website URL, add a favicon, and track analytics.
Let's take a look at the settings available for your academy site.
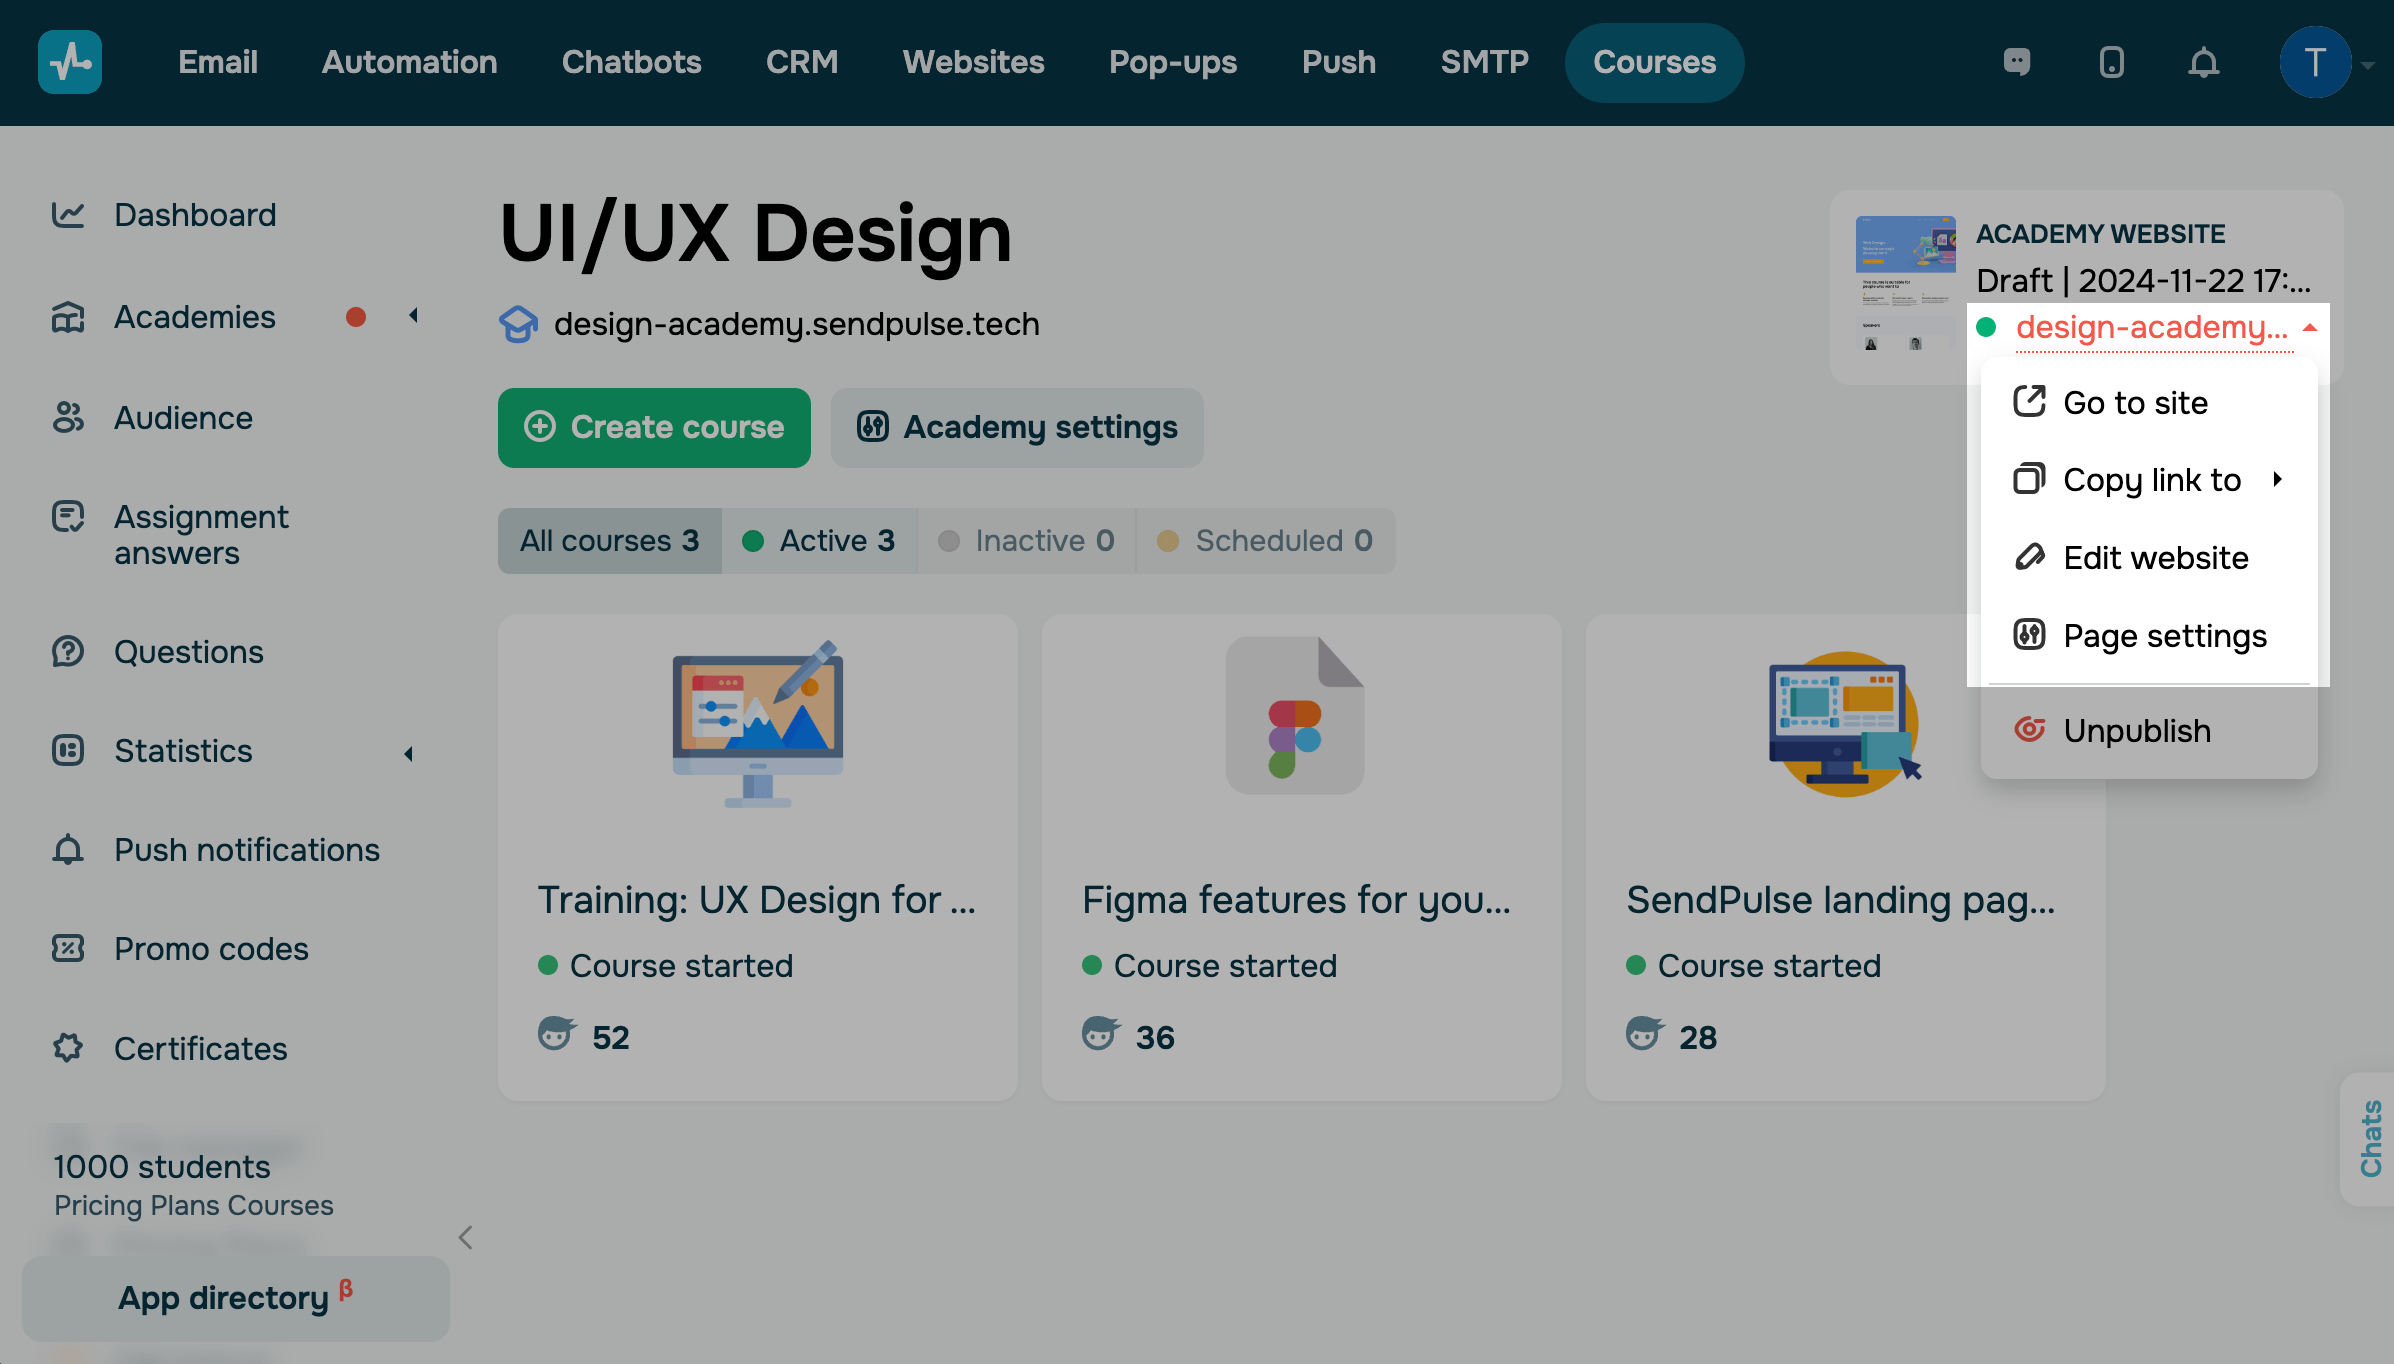
How to find your site settings
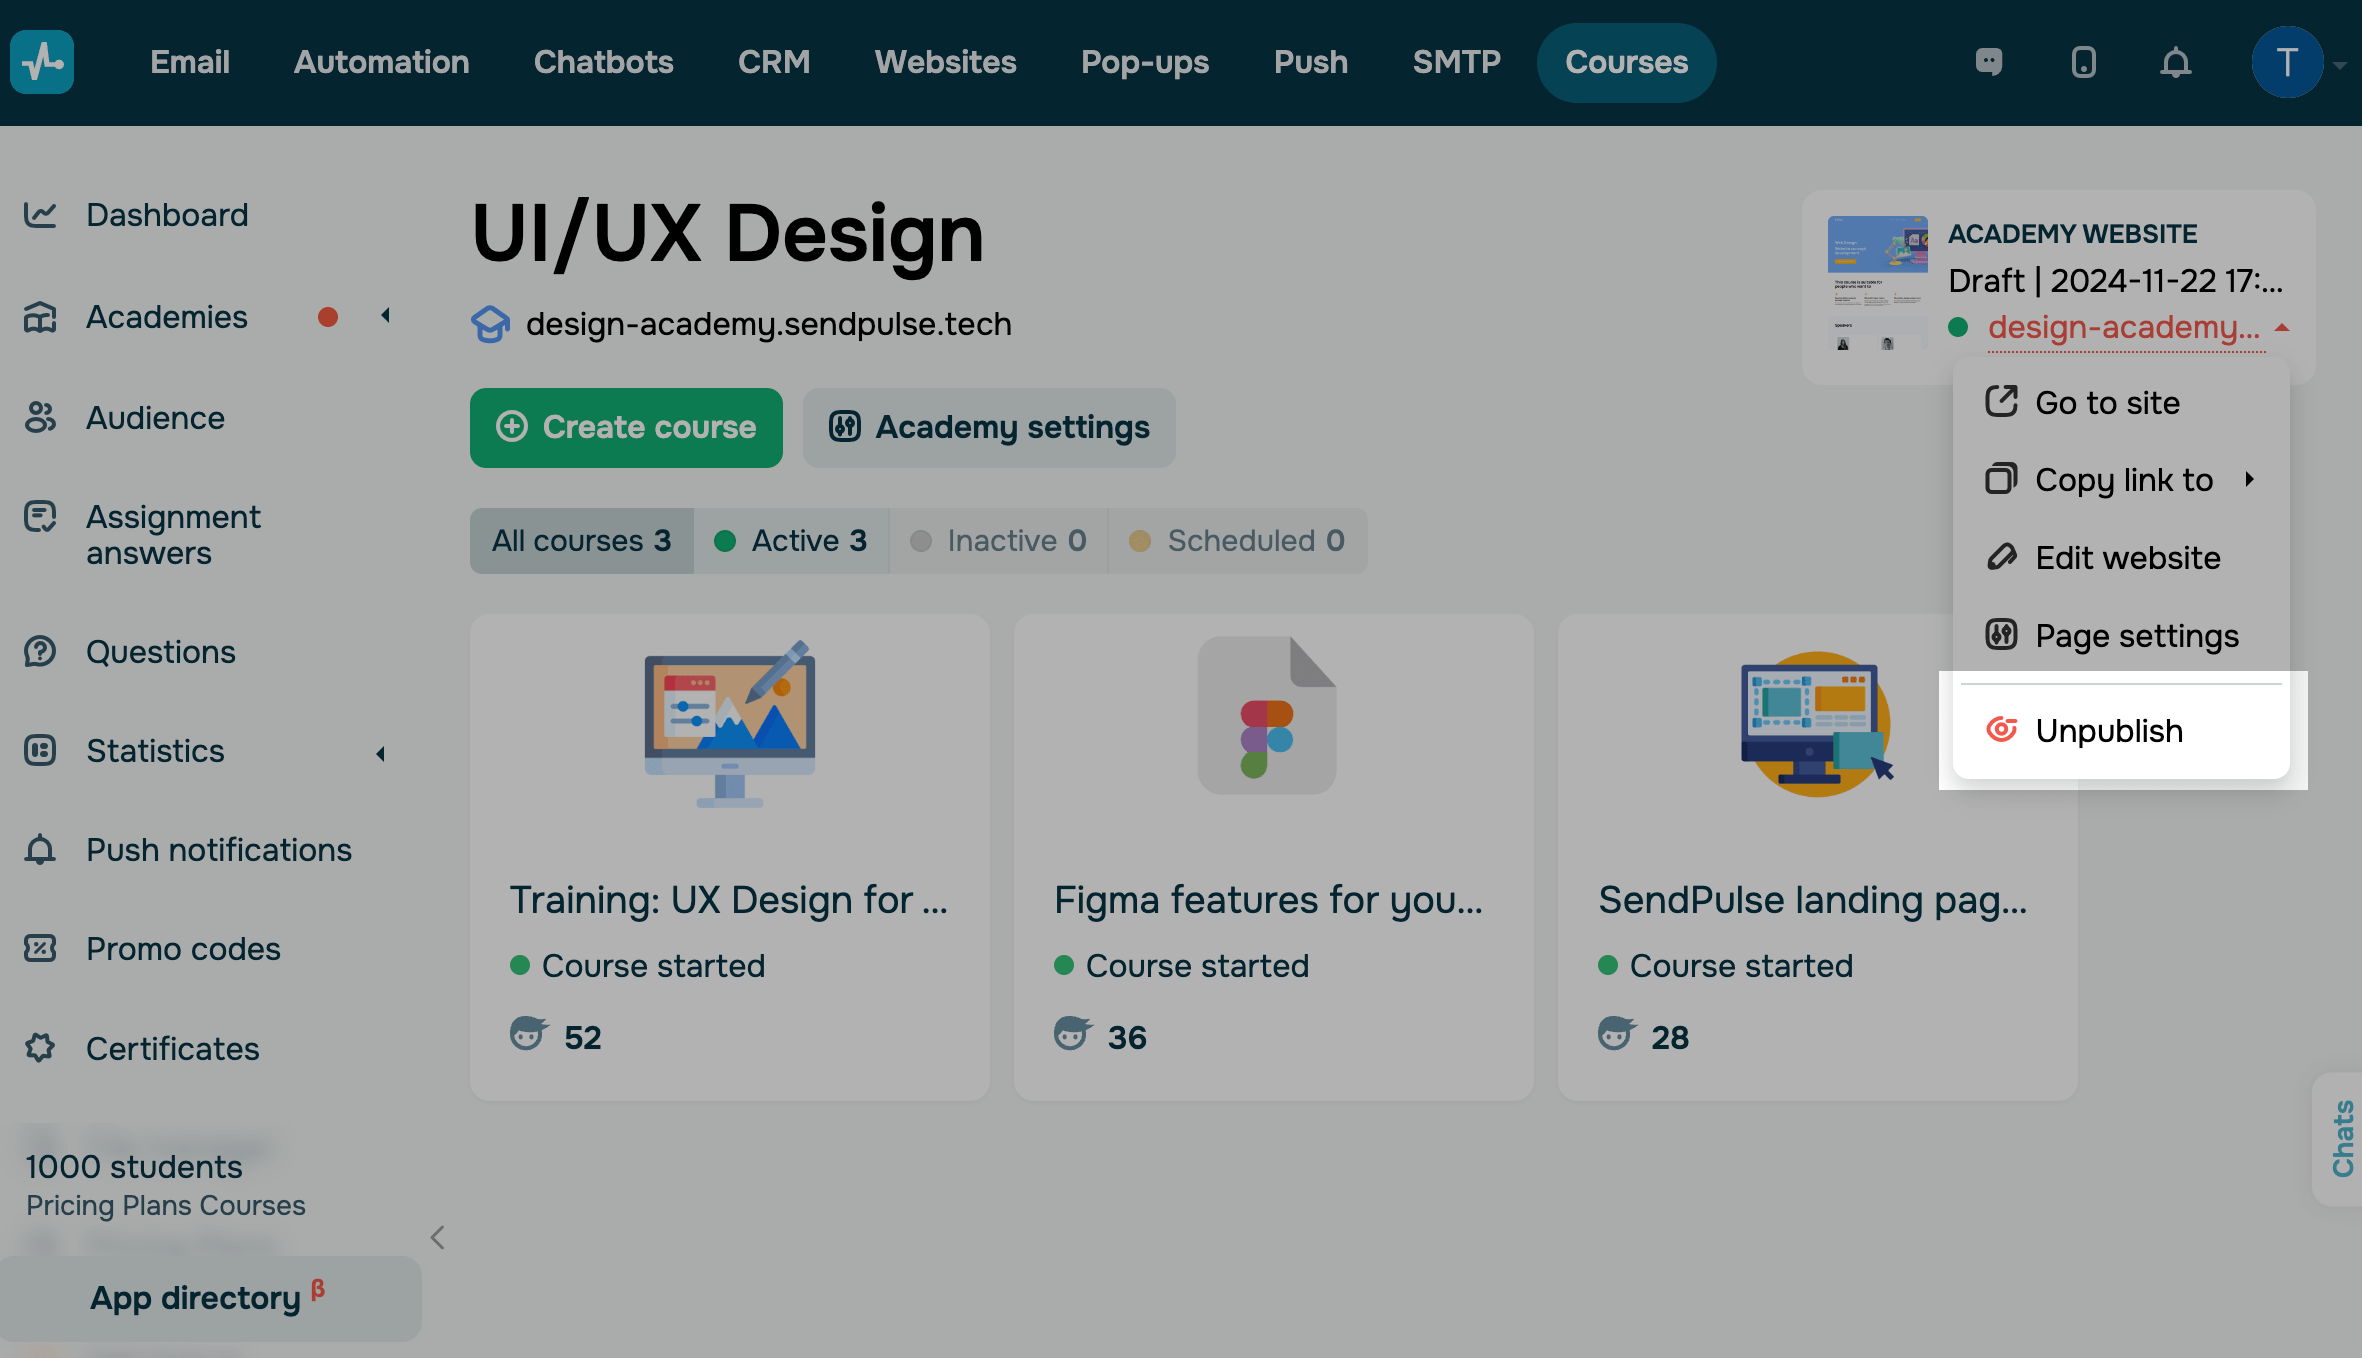
To access your academy’s website settings, go to the relevant academy in the Courses section. In the upper right corner, click the arrow, and select an action.
| Go to site | Go to your course registration page. |
| Copy link to | Get a link to your course registration page or login page. |
| Edit website | Go to the page builder in the Websites section. You can edit your academy website by adding elements or adjusting its layout. |
| Page settings | Go to your website’s settings in the Website section to customize its name and favicon, connect analytics, and add custom code. |
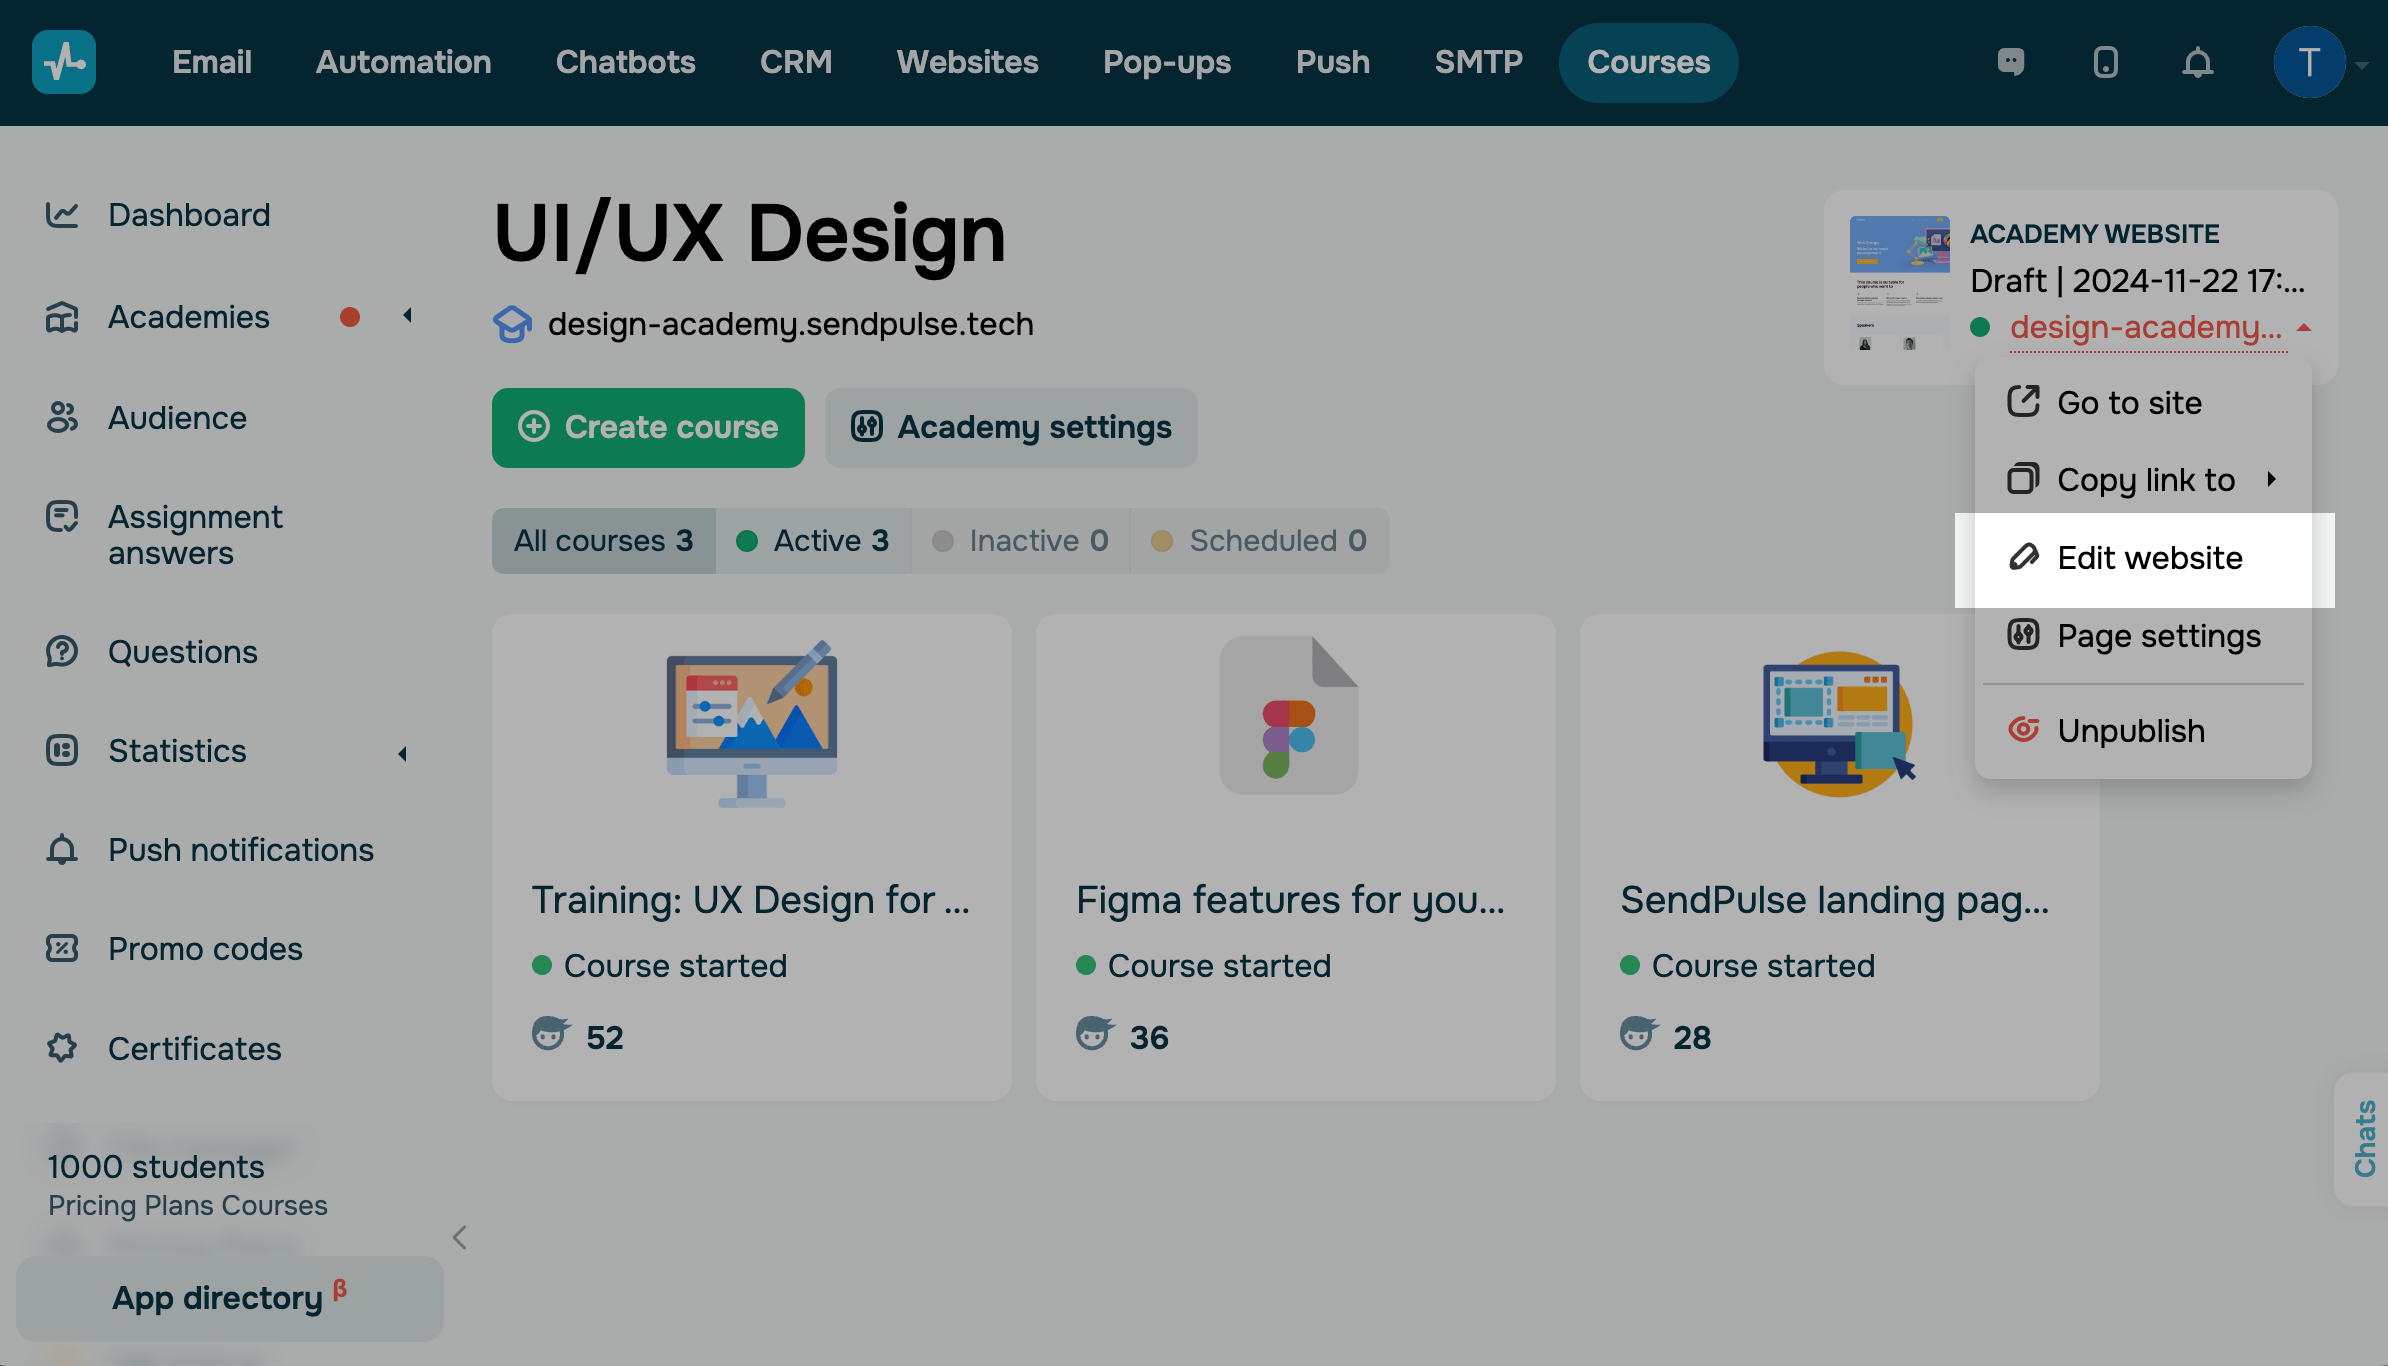
How to edit your site page
To edit page content in the website builder, click Edit website.
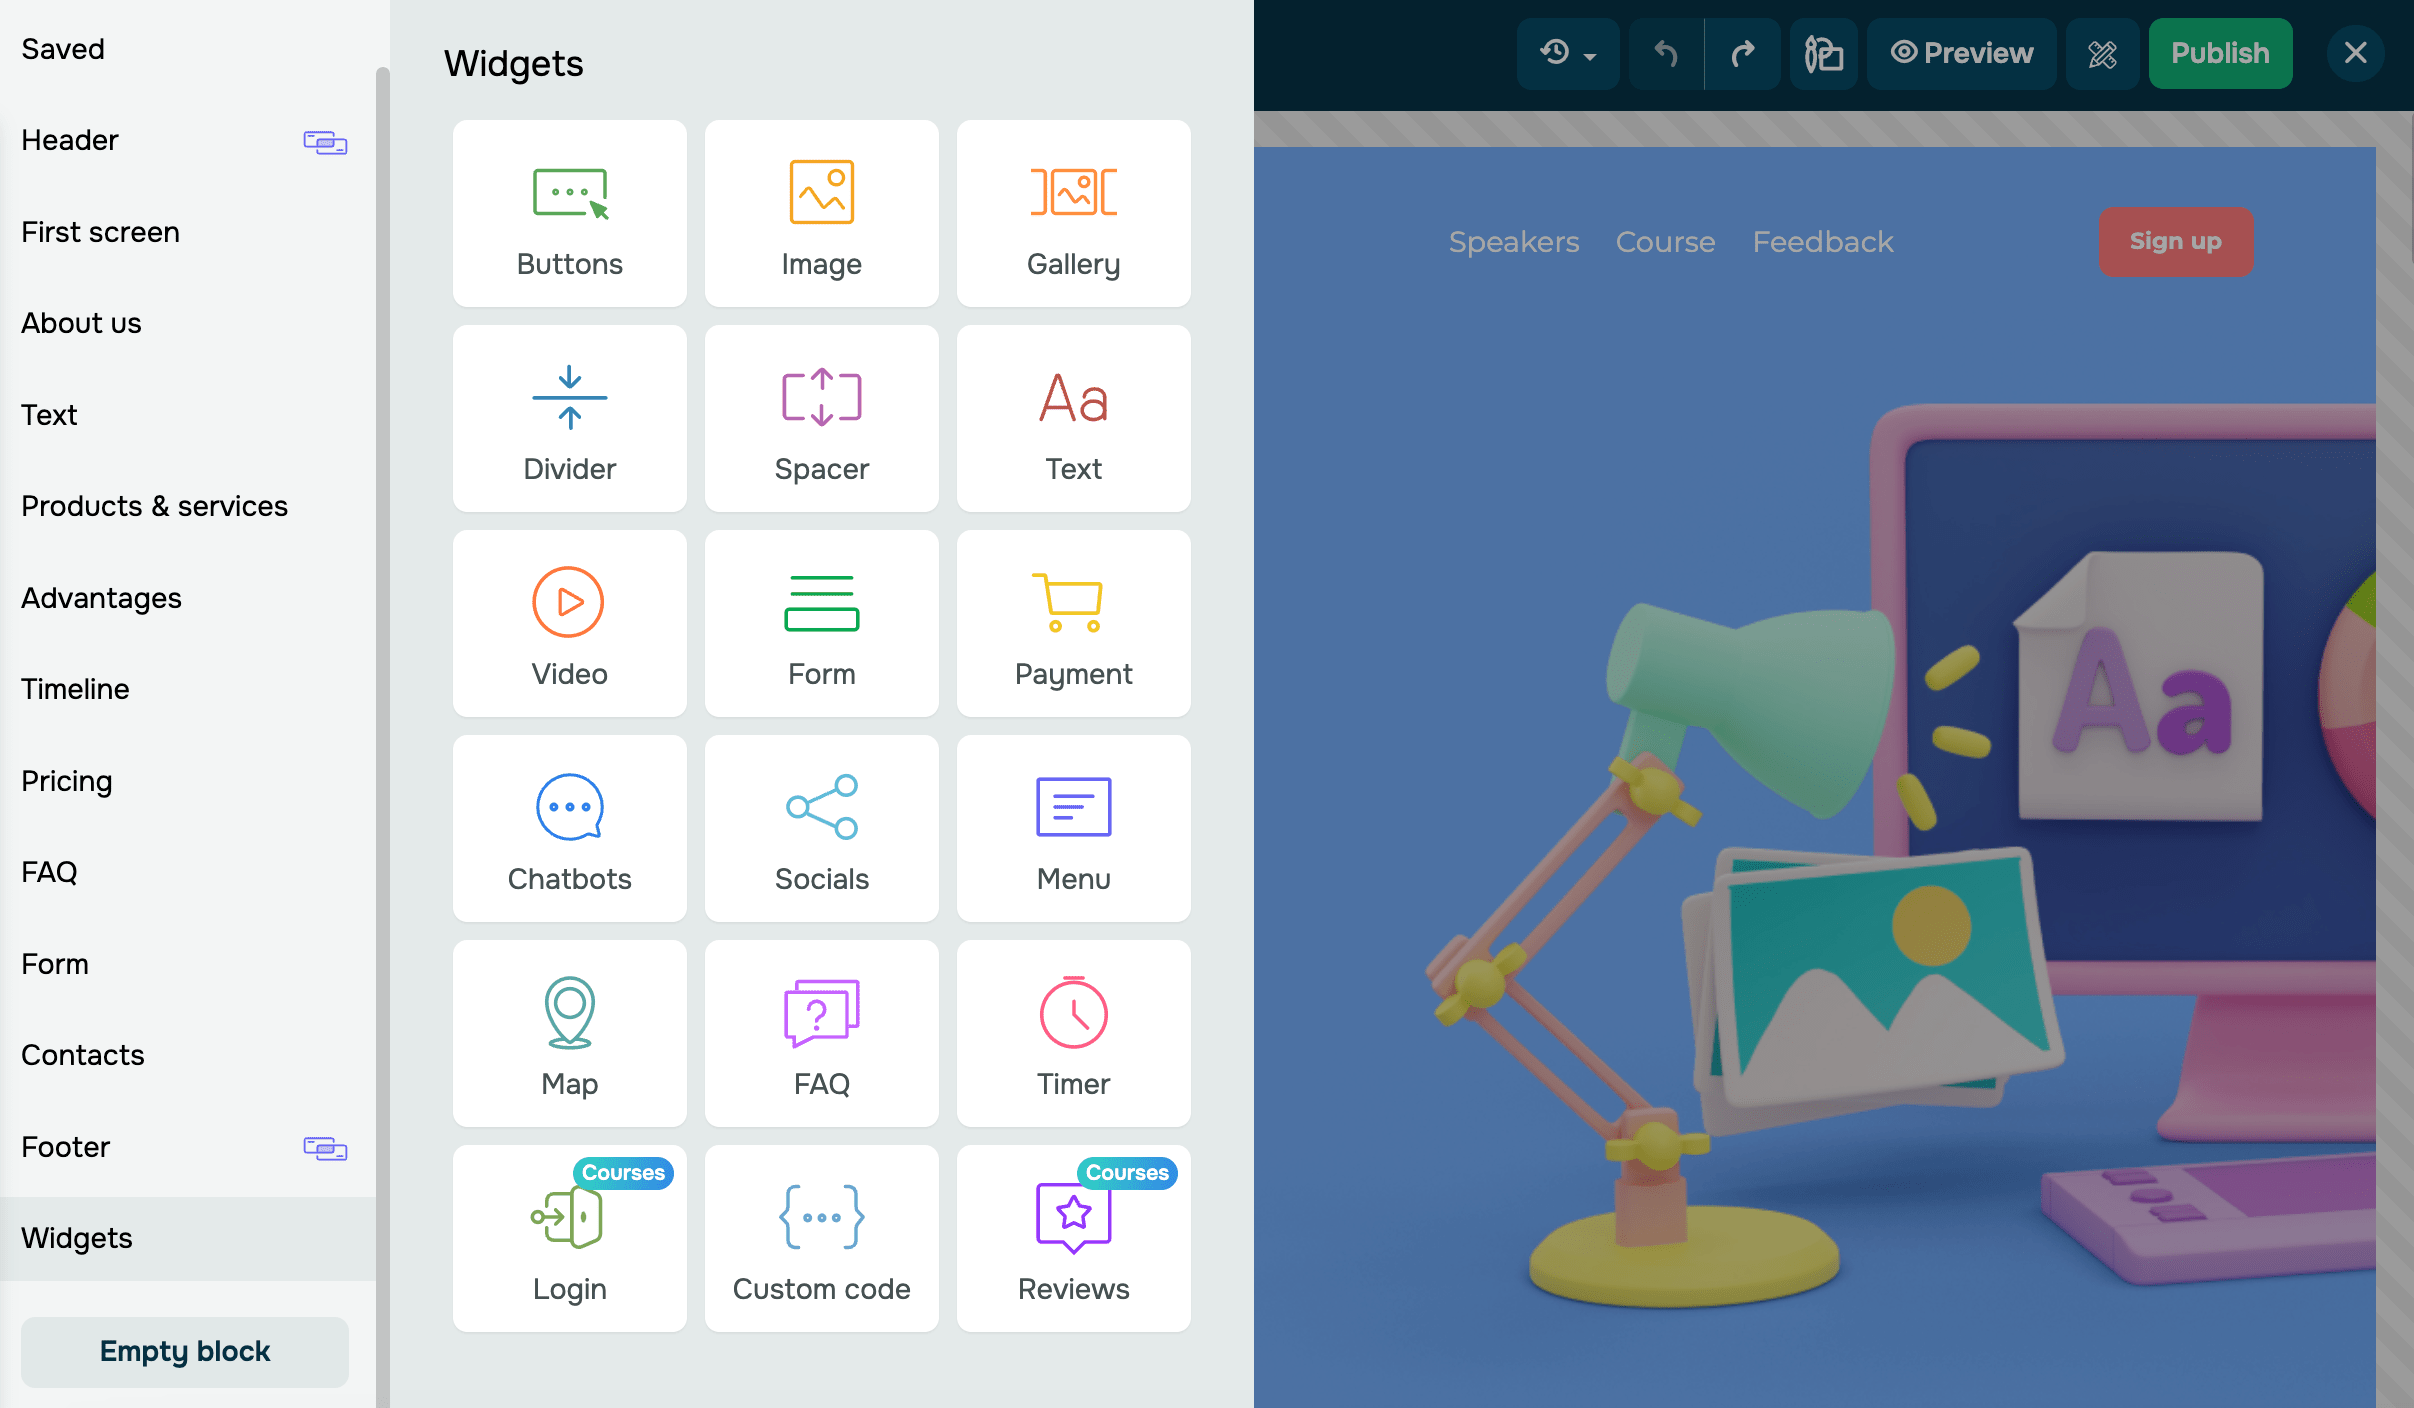
You will be redirected to the website editor in the Websites section. You can edit the page you made when creating an academy using a ready-made template or from scratch.
With Block, Section, and Column elements, you can edit your page layout. Widgets help you add functional elements that visitors can interact with.
For example, using the Text element, you can add your course name and program. With Text and Image elements, you can introduce the instructors or tell more about your course.
To edit an element, hover over it, and select an action (edit, delete, or move). To add a new element, hover over a part of your website, and click +. Then, select a block or widget.
Read more: How to work with site elements and Add widgets.
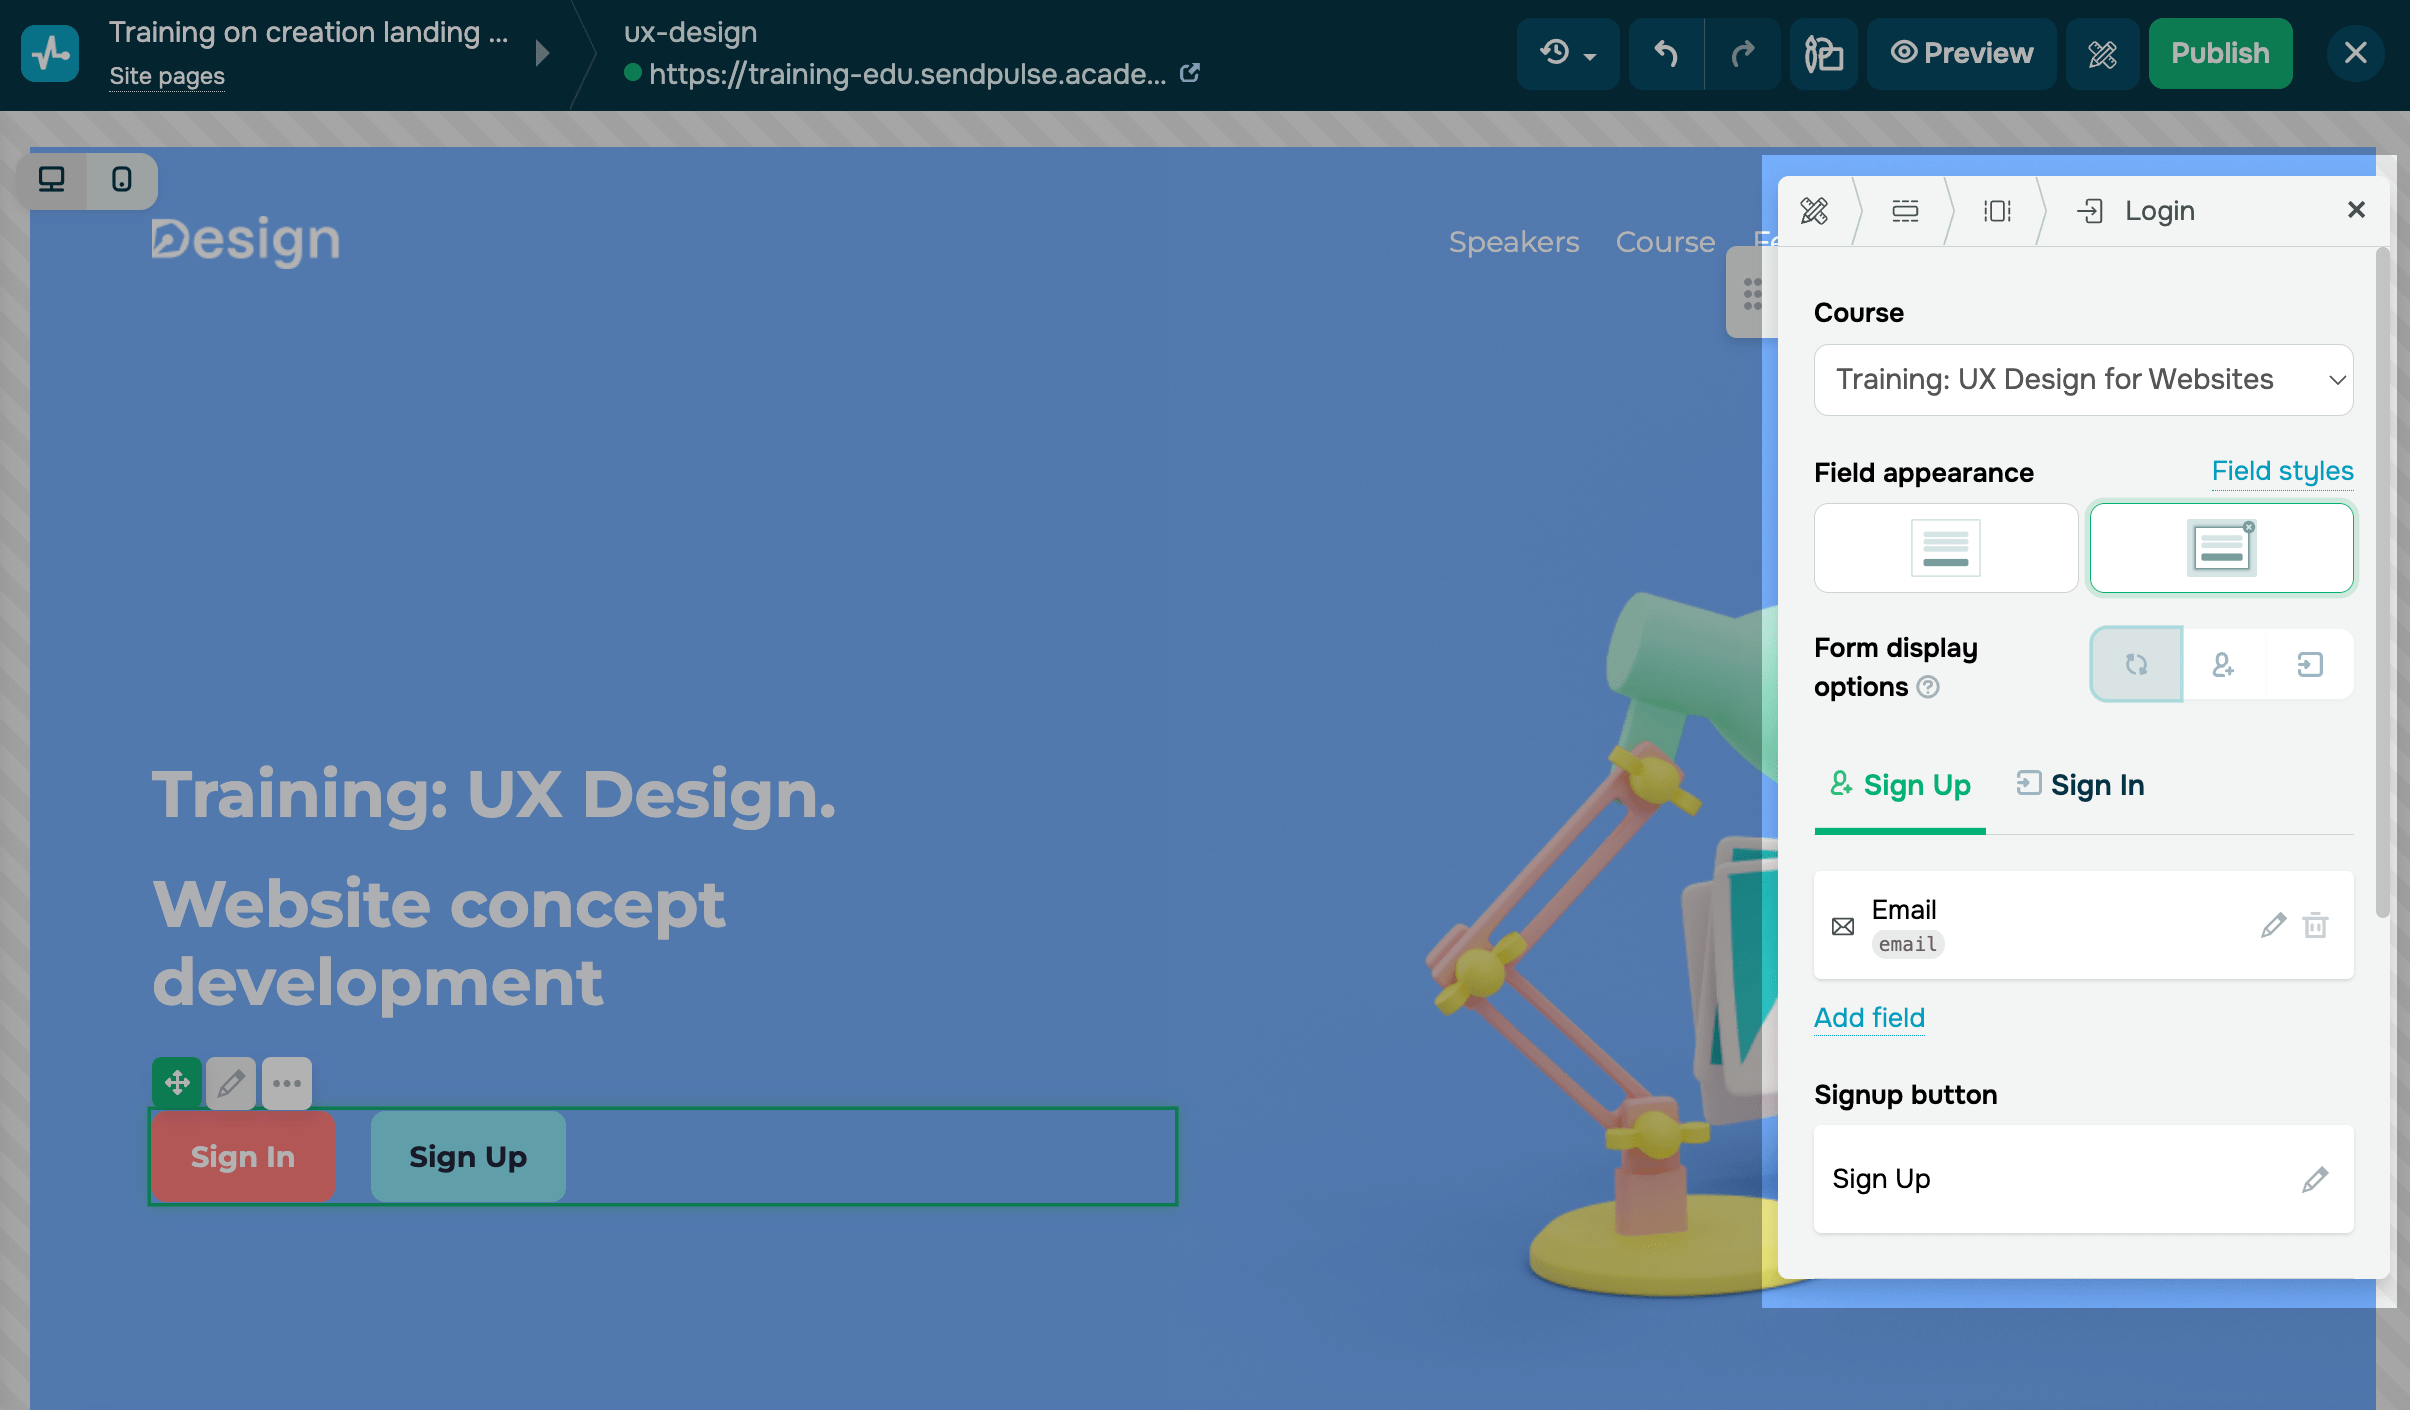
Your site should have a course registration and login widget. If you created your site using a template, it is already included. If not, then you need to add it. Read more: How to add a widget for course registration and student account login.
You can also display student reviews on this page. Read more: How to add a review widget to your curse website.
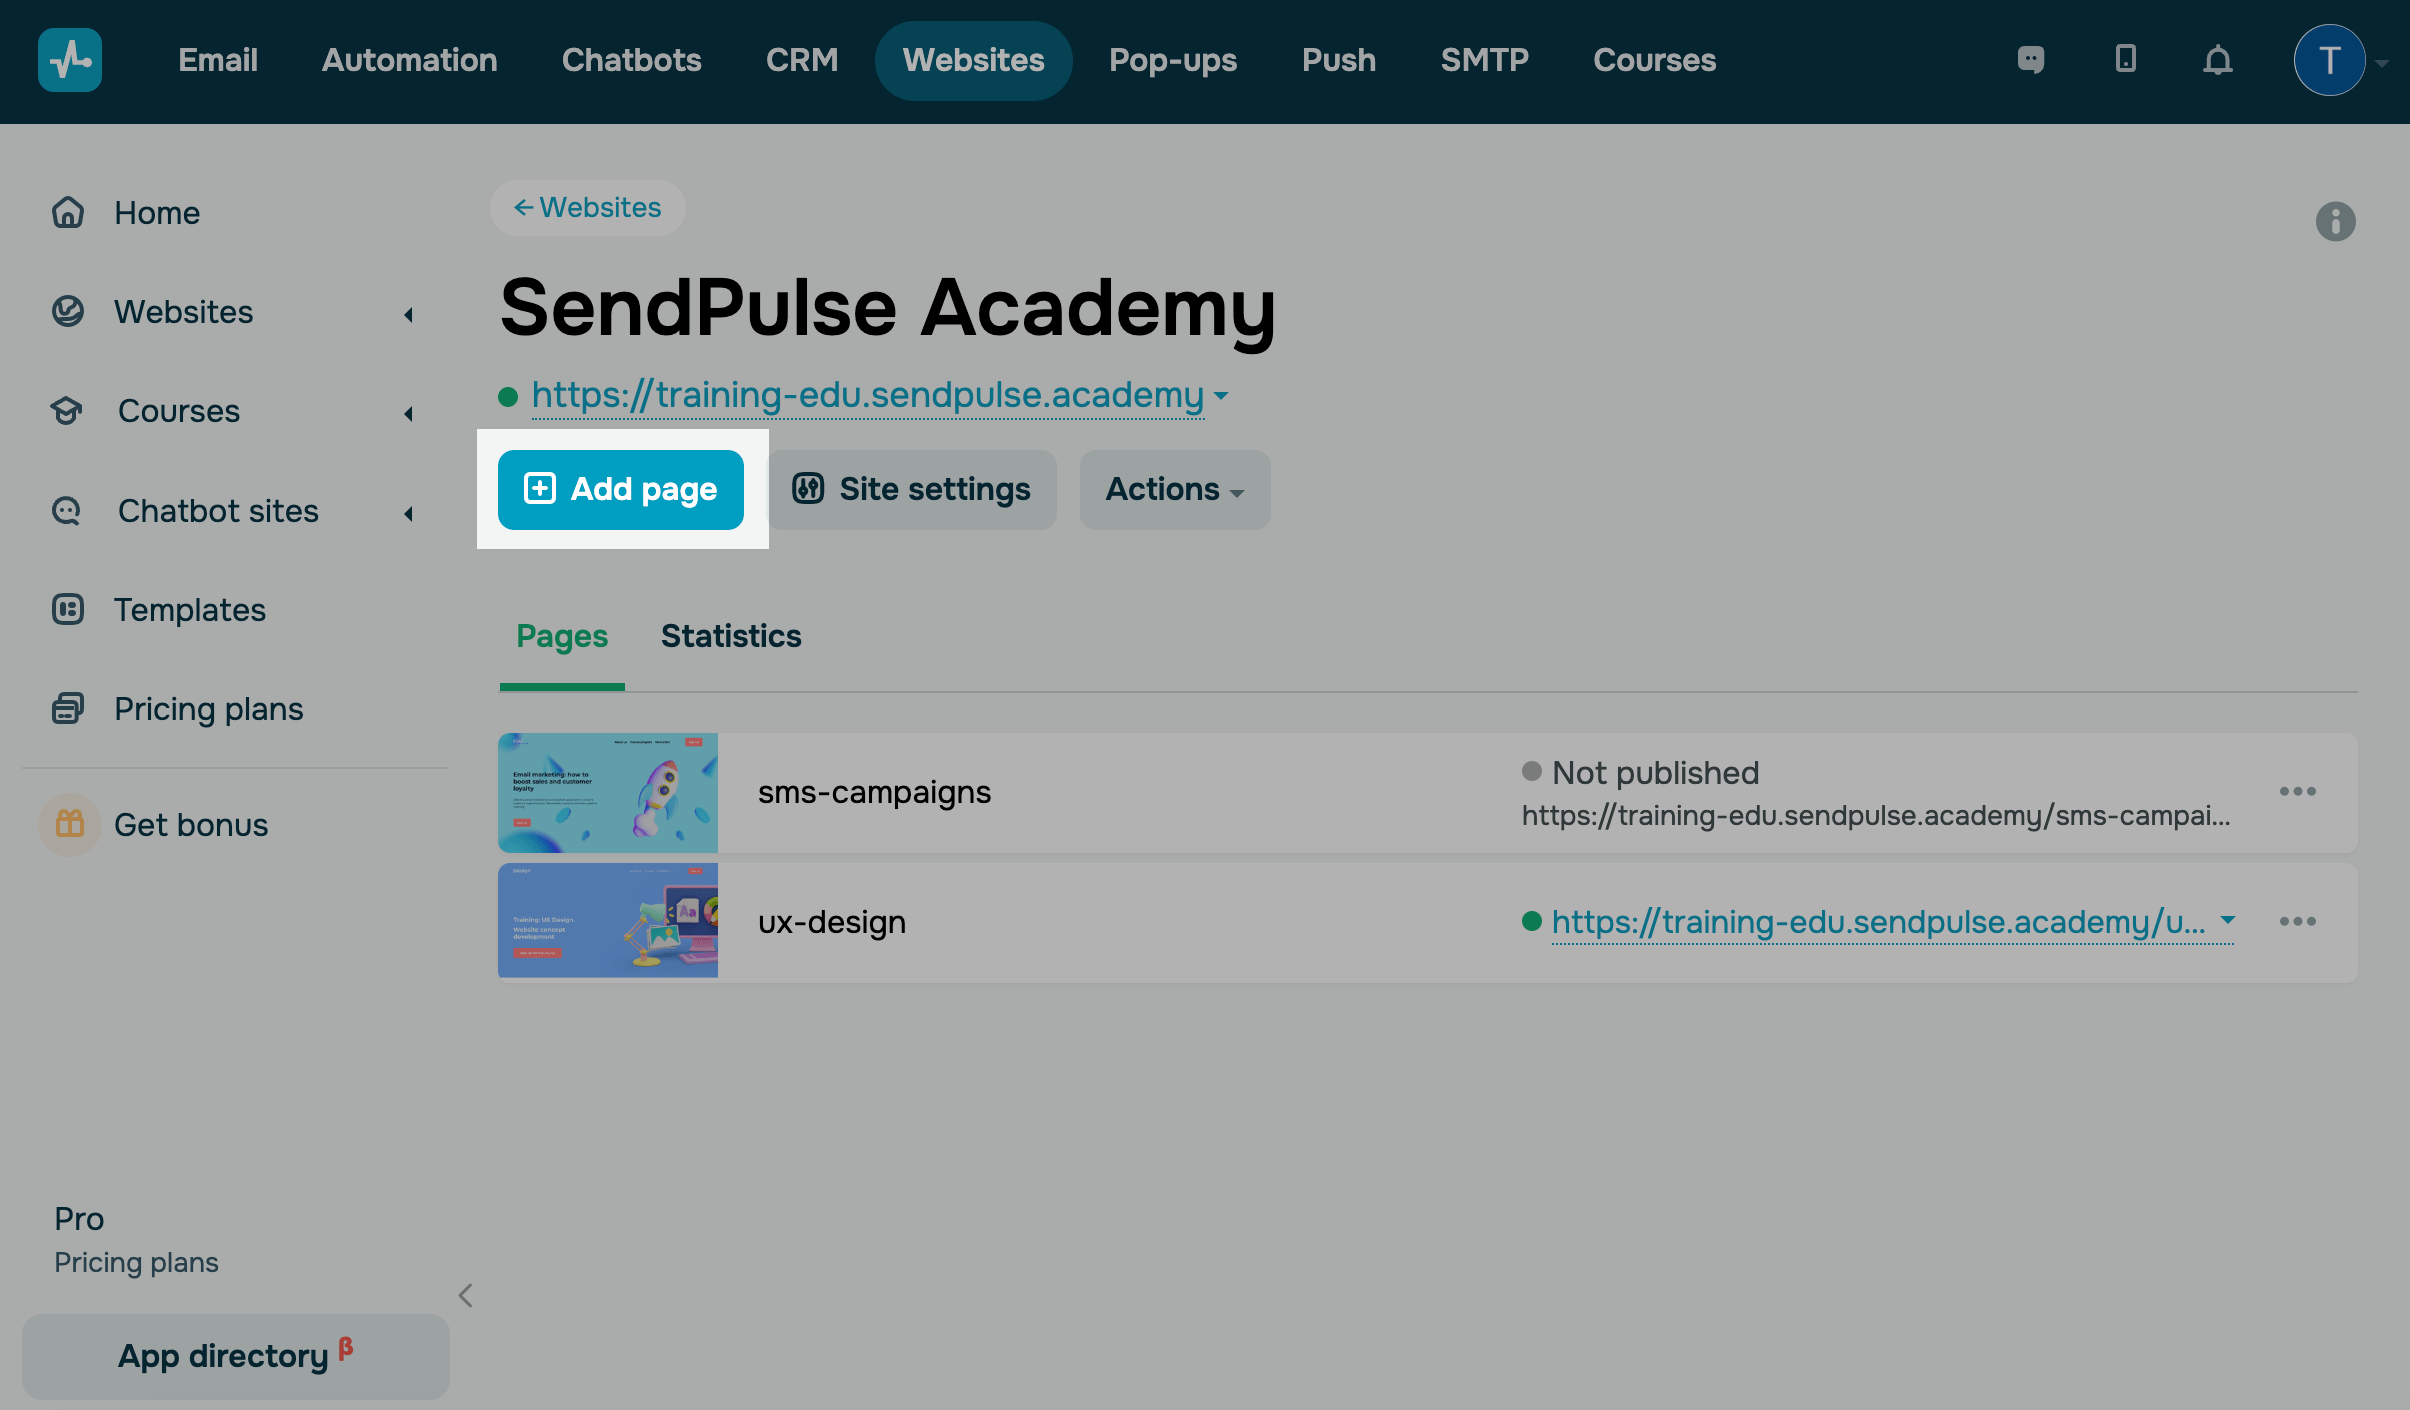
How to add a page to your site
Optionally, you can create a dedicated page for any course in your academy. This page can introduce your instructors, outline the course program, and showcase student reviews.
In the list of website pages, click Add page, create your site layout, and add elements.
How to customize your site
To go to the site settings, and select Page settings.

You will be redirected to the Websites section, and you will see your site settings in the General tab.
| General | In this tab, you can edit the site name displayed in your account, add a domain, include a site favicon, include a website favicon, enable indexing, add web push notifications, and remove the logo. |
| Analytics | In this tab, you can connect Google Analytics and add Facebook pixel and meta tag for additional analysis of your website performance data. |
| Custom Code | In this tab, you can add code to embed analytics or other scripts in your website. |
To set the created page as your academy's main page, go to your page settings and select it from the list in the Main page field.
How to edit your site domain
You can edit the domain of your website, where users can sign up for your course and access their student accounts.
To do this, go to Site Settings > General, and click the dropdown menu in the Domain Name field. Select Edit. Edit the first or second subdomain. You can also add another domain to your course website.
Make sure to unpublish your course website before editing its domain. Read more: How to add a custom domain to your course.
How to delete your site
You cannot delete a site of your existing course without deleting the course itself, but you can unpublish it in the Courses or Sites section to prevent new users from registering.
To delete a site, you need to delete its course in the Courses section. Go to your course, click Action under your course name, and select Delete.
Last Updated: 27.11.2024
or