The Message element in chatbots
This element is used to create messages of any type or collect data.
Unlike the invisible elements that help segment users, request their data, and apply actions, the Message element is always visible to users.
Create a message
By default, every flow already has the first Message element set up. To add more messages, drag the Message element from the right panel to the workspace, and link it to other elements.
Before the Message element, you can add other elements to receive real-time data, segment users, and direct them to a more personalized flow.
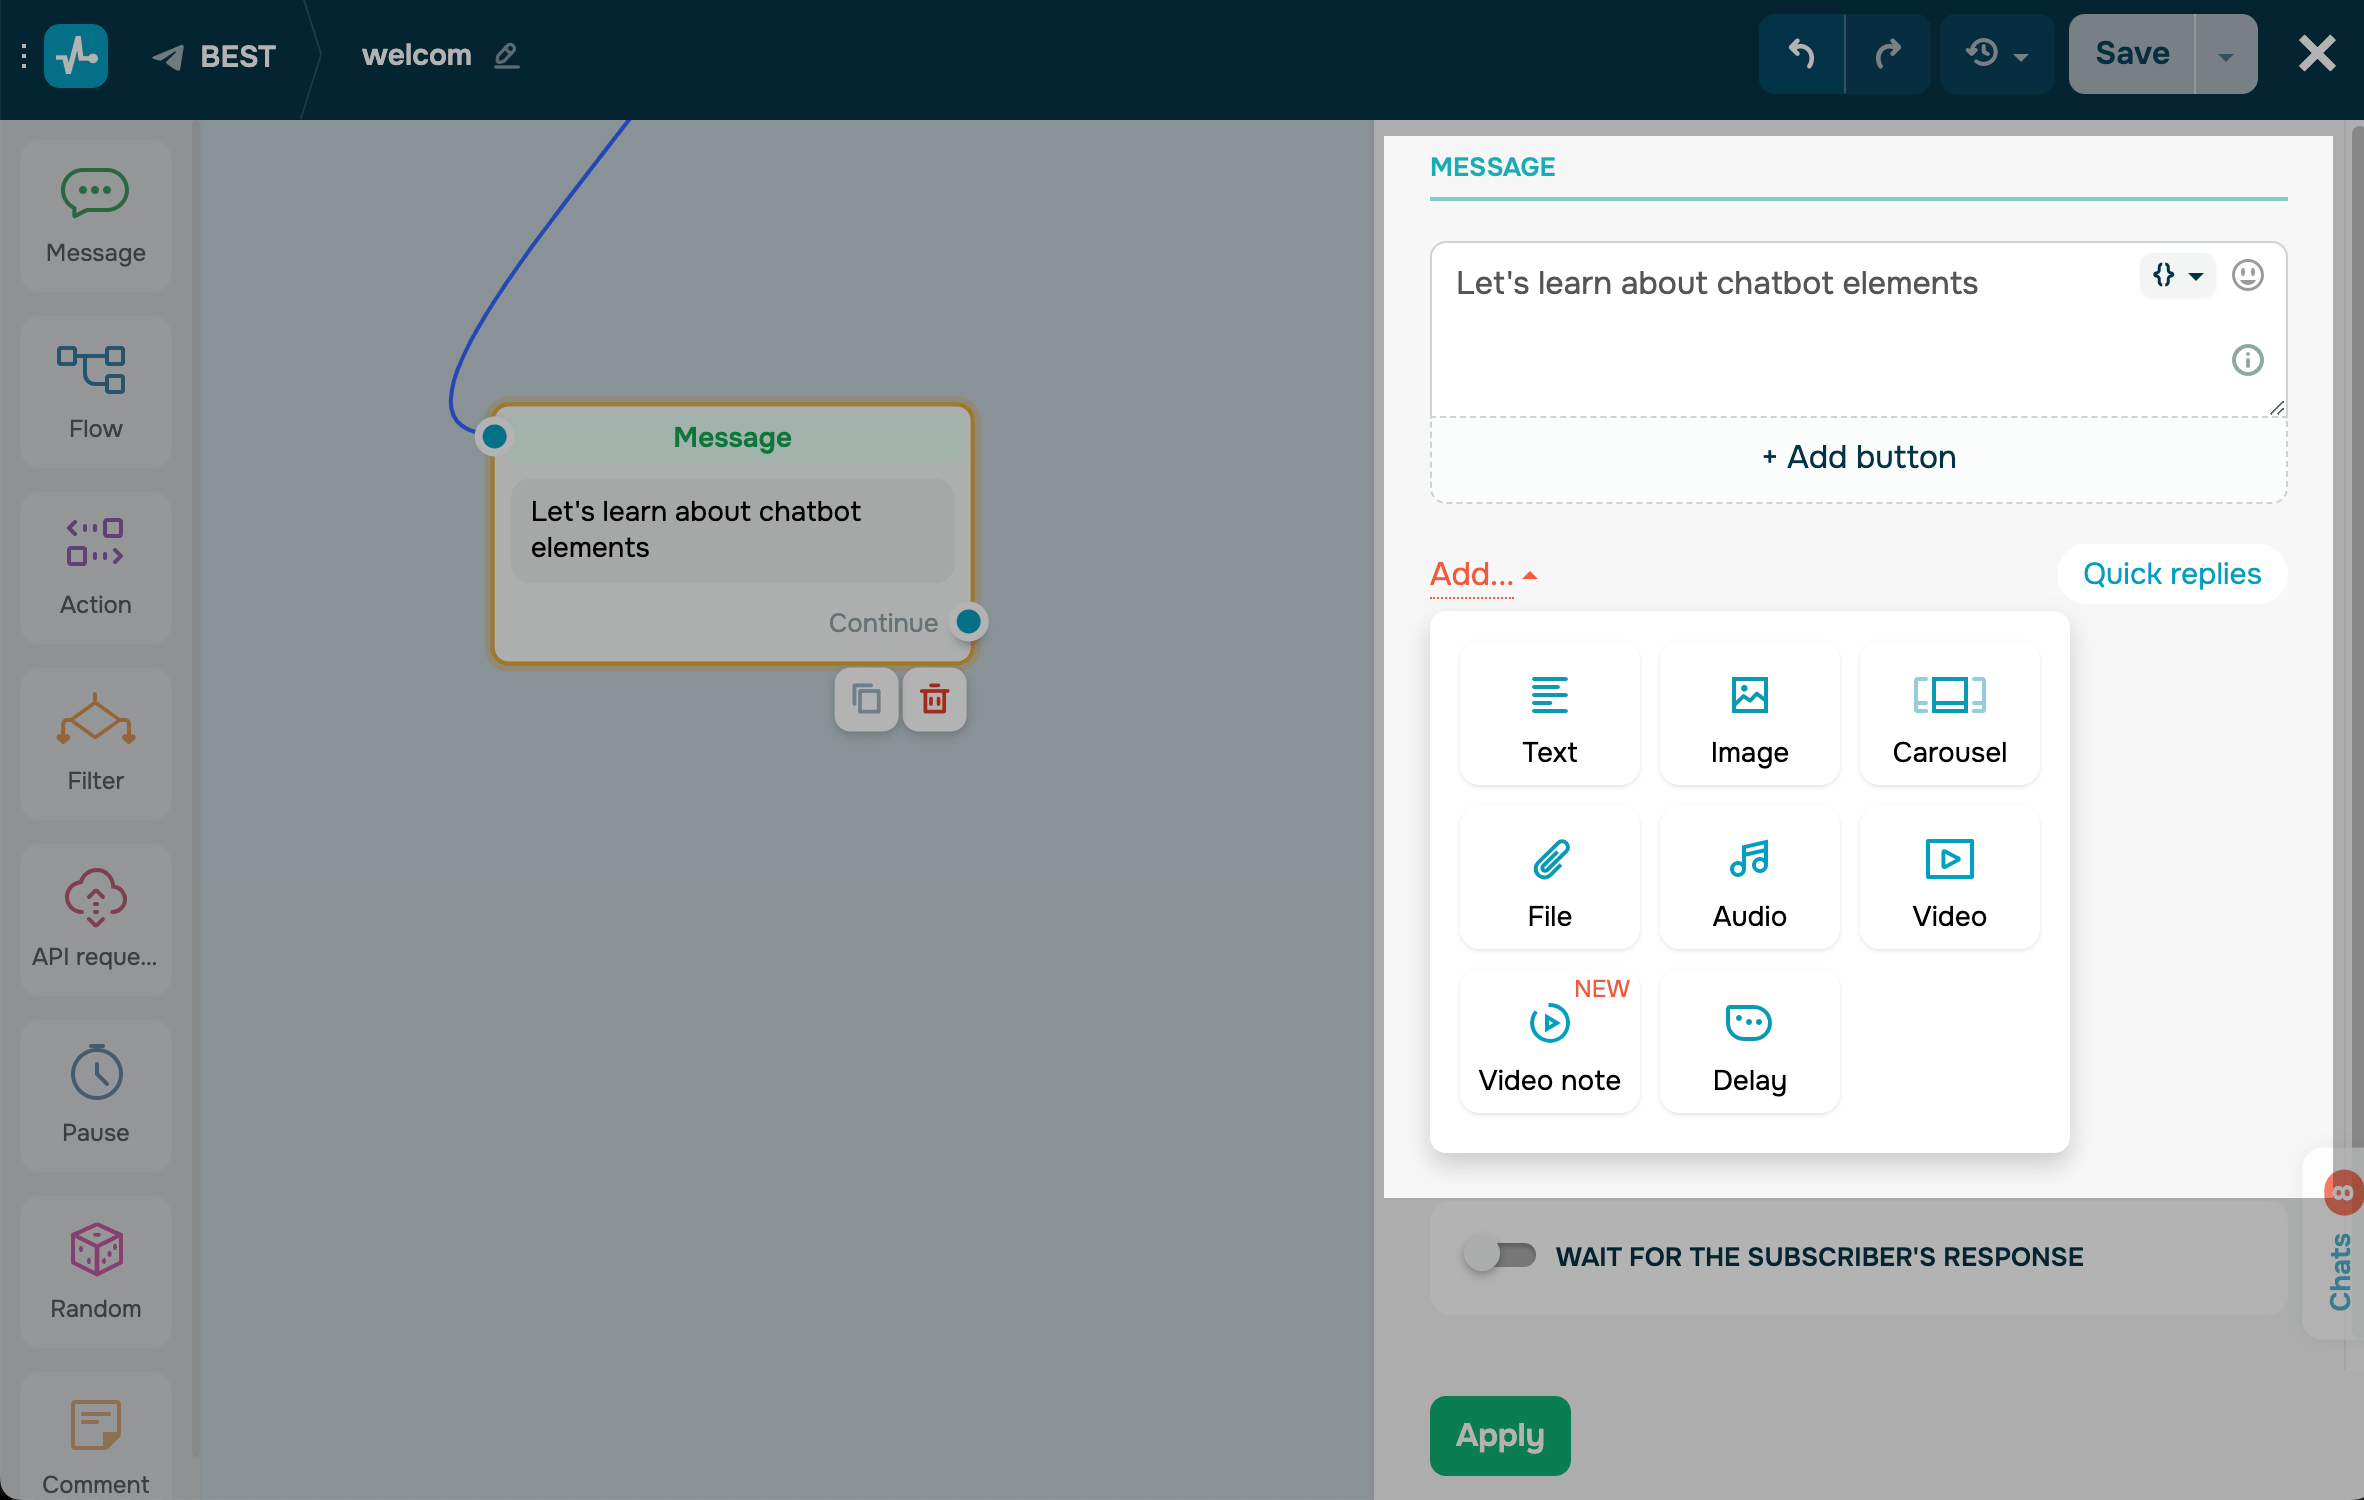
By default, the Message element already includes the Text element. To add more elements, click + Add.
Let's explore the elements you can use to create a message:
| Text | Used to add text to your message. You can also add emoji and variables. |
| Media files (Image, Audio, Video, File) | Used to add visual content and attach documents.
Not all messaging platforms and communication channels support media elements. For more information, refer to the article on media elements. |
| Carousel | Used to show up to 10 products that users can browse within one message, which is similar to a catalog. You can add an image, title, description, and button to this element. |
| Typing | Used to break down large text into small paragraphs. The pause gives users time to read your message before getting the next one. You can set the delay time to be between 1 and 60 seconds. |
| CRM Product | Used to add CRM products and subscriptions to your message as product cards and accept payments. |
Learn more: List of supported elements.
To direct users to other elements, you can use the following:
| Buttons |
Used to configure user interaction with your chatbot and branch your flow scenario. You can also accept payments and direct users to external resources using buttons. You can add up to 3 buttons to WhatsApp, Instagram, and Facebook Messenger chatbots. With Telegram chatbots, you can add 13 buttons. To add a button, click + Add under any element in your Message except Delay. |
| Quick replies |
Used to add more user interaction elements. You can add up to 10 quick replies. Unlike regular buttons, quick replies disappear when clicked. To add a quick reply, click Quick Replies on the right of the + Add button. Read more about the differences between quick replies and buttons in the article about Quick replies. |
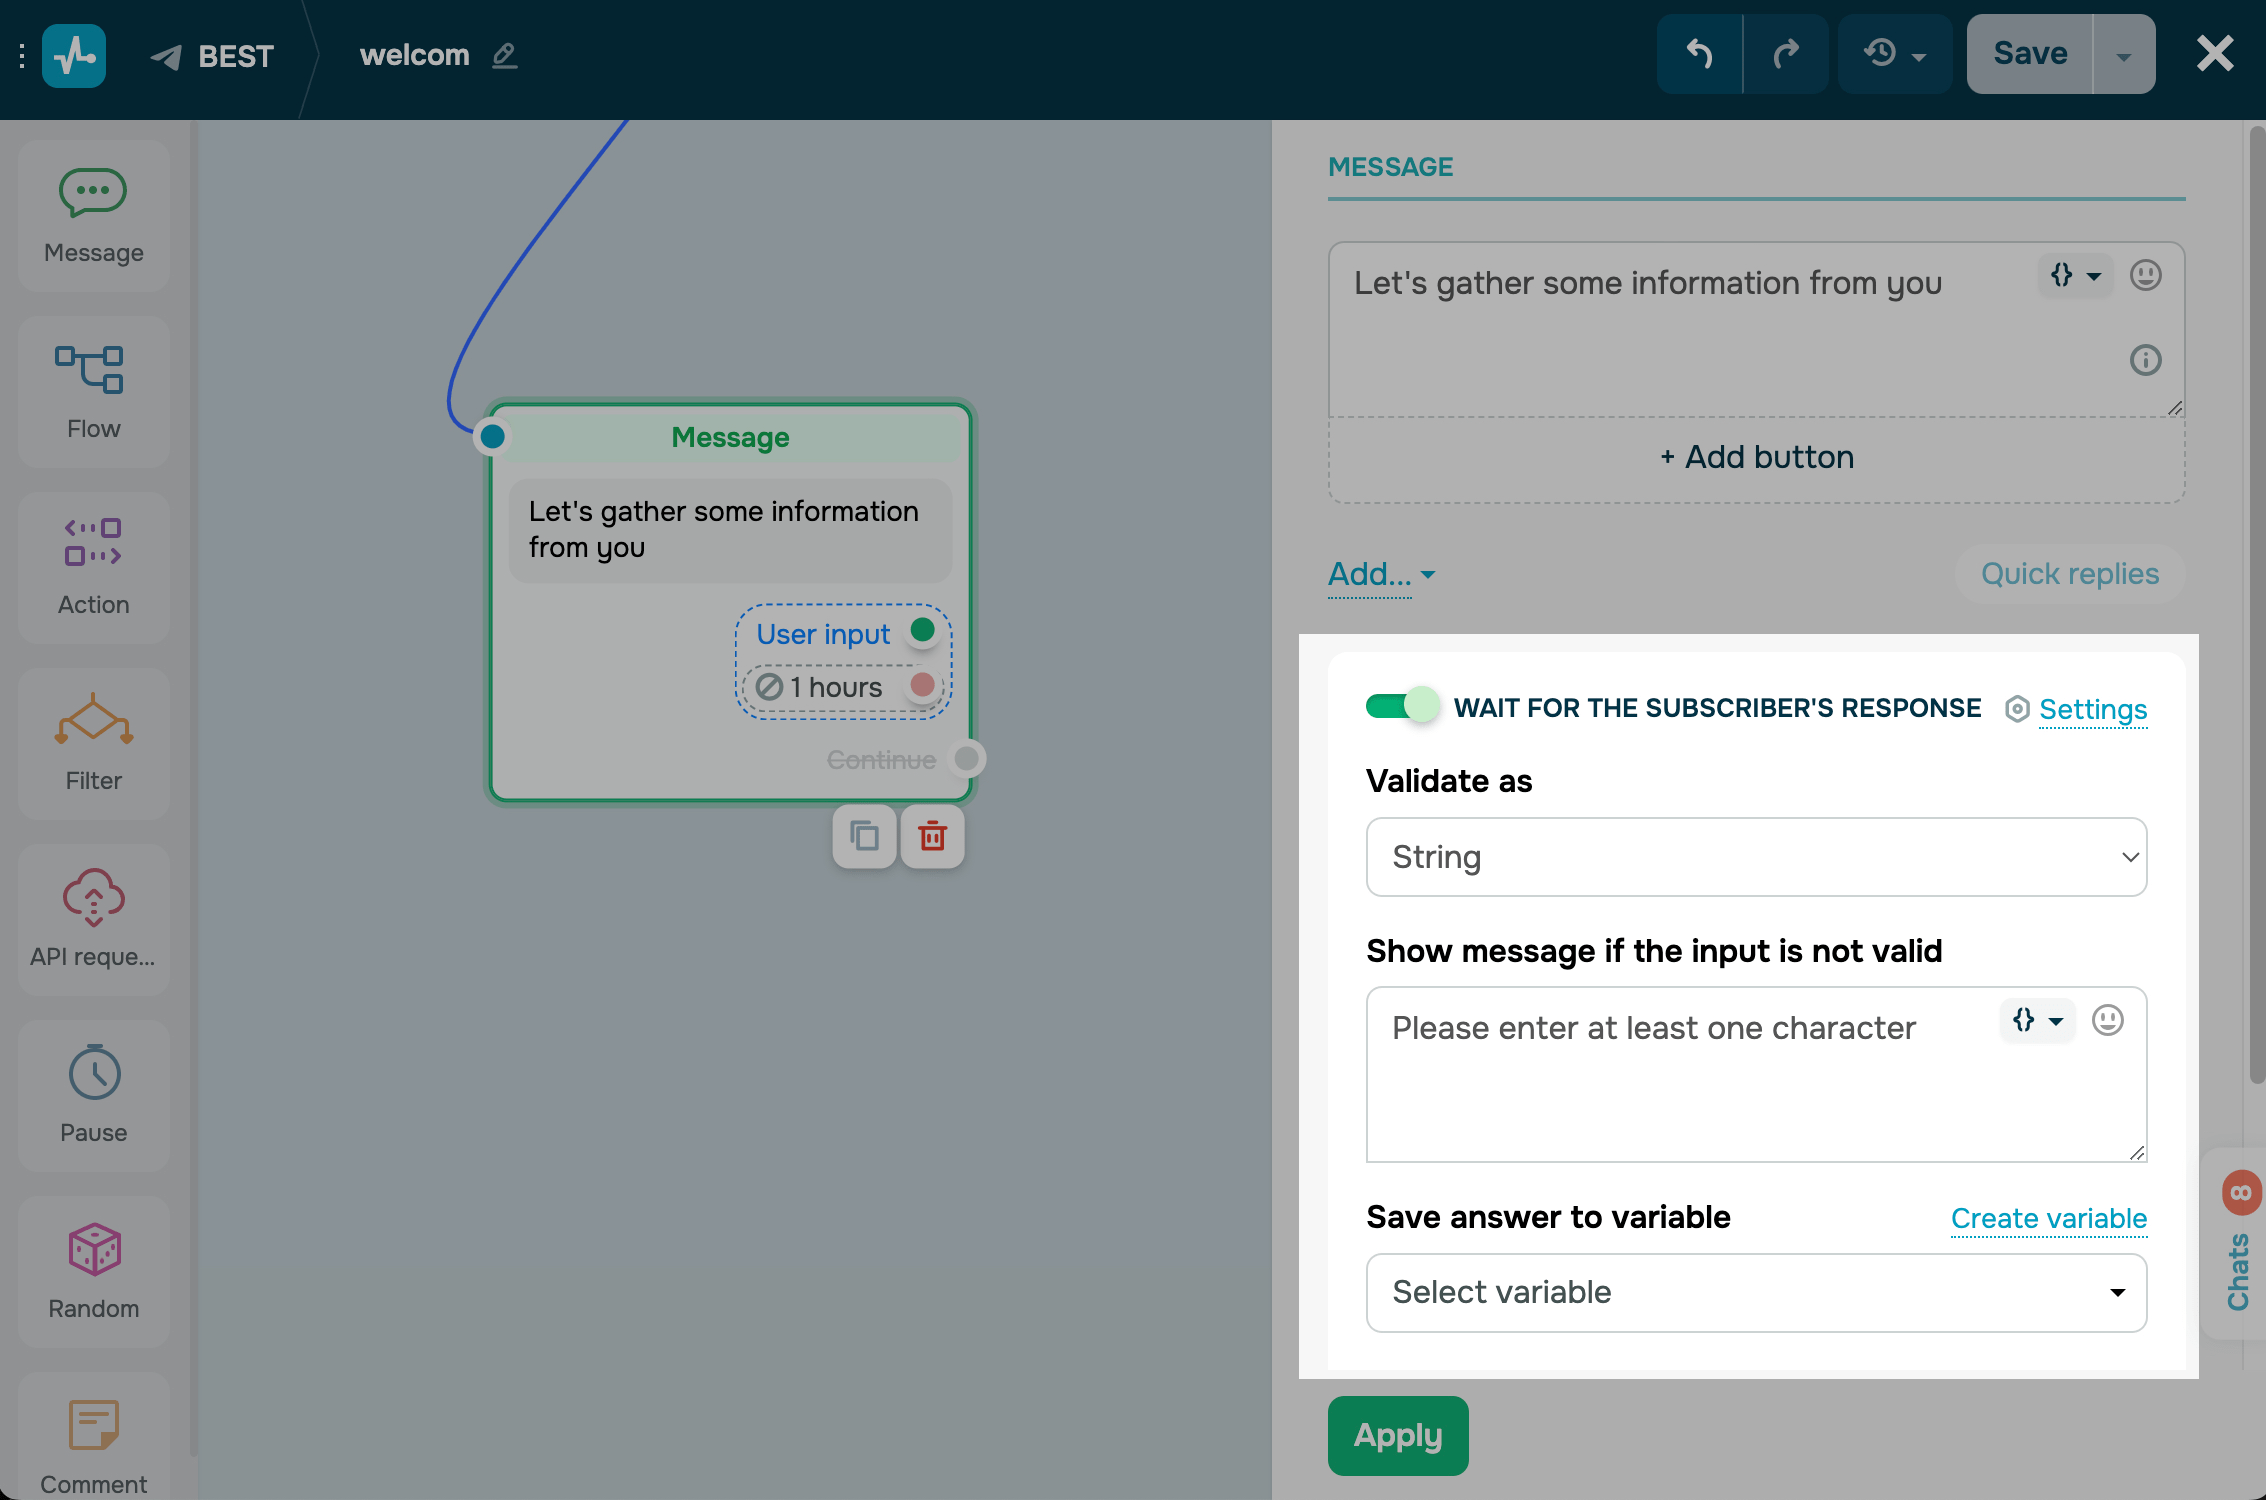
User input
This element is used to collect subscriber data.
In the Text element, type in a prompt explaining what kind of data users need to share. Then, turn on the Waiting for Subscriber's Response toggle. Select a validation type, type in your invalid input message, and select a variable to which you want to save data.
You can also create quick replies so that users select from the options you offer instead of entering their own values.
Learn more: How to add a user input element.
Continue your flow
To link your Message to other elements, you can use the following:
- Buttons of the Continue flow type (with the blue dot).
- Buttons of the URL type (with the blue dot; you can link to these buttons if tracking is enabled in the settings).
- Buttons of the Payment type (with the green dot in the Successful Payment branch).
- Quick replies (with the blue dot).
- Successful user data input (with the green dot).
- Absence of user data input (with the red dot).
- The Continue connector in case of user inaction (with the blue dot).
When planning a flow scenario, keep in mind that you cannot both continue your flow using the Continue connector and quick replies.
If you turn on the Wait for the subscriber’s response toggle, your unlinked quick replies will be disabled. You can use quick replies only once — as user input prompts or as buttons.
Last Updated: 23.06.2025
or