Integrate SendPulse with Horoshop (Cartum)
Horoshop (Cartum) is a tool that helps you create, customize, and manage an online store easily and efficiently, track customer data, and make your interactions with clients more dynamic.
The Horoshop integration allows you to:
- Manually export contacts and order data to your mailing list.
- Automatically export contacts to your mailing list when new users sign up or place orders;
- Automatically start flows when new users sign up or place orders.
You can integrate Horoshop with SendPulse to efficiently export customer and order data to SendPulse mailing lists, send personalized emails and SMS campaigns, and customize flows for various scenarios.
In this article, we will overview how to install Horoshop, create automations, and export your data manually.
Install Horoshop
Horoshop users can access API integrations with a paid pricing plan. To integrate with SendPulse, upgrade your pricing plan, and contact Horoshop's customer support team.
Go to App directory > Apps, and search for Horoshop. Next to the app, click Install. You can also click Preview to open the app page and click Install.
Configure app settings
To manage the app, go to its page by clicking Preview. You will see information about the app category, developer, and tags. You can also install or uninstall it.
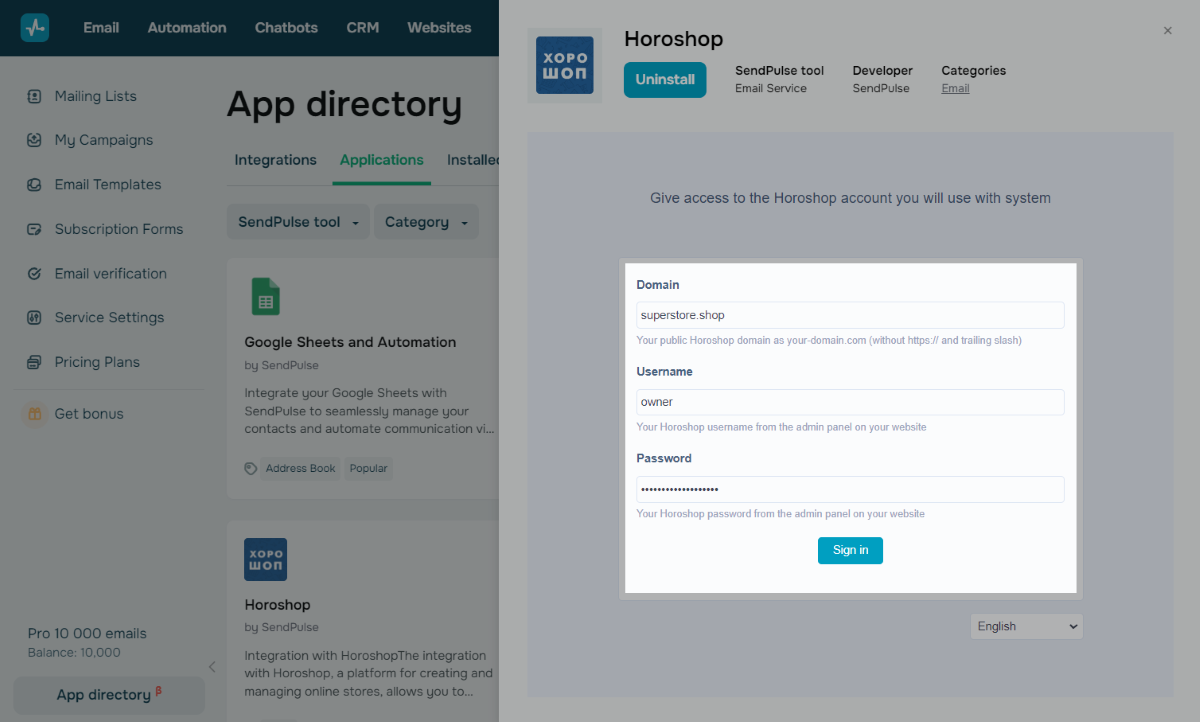
Log in to your Horoshop account
Enter your Horoshop account's public domain and your control panel login and password. Click Sign in.
Next, click Connect SendPulse user, and in the next window, enter your SendPulse account login and password.
Create an automation
You can automatically send contact data to SendPulse or trigger Automation 360 using Horoshop events. You can create up to six customized automations at a time.
Add an automation
Go to the Automations tab and click Add automation.
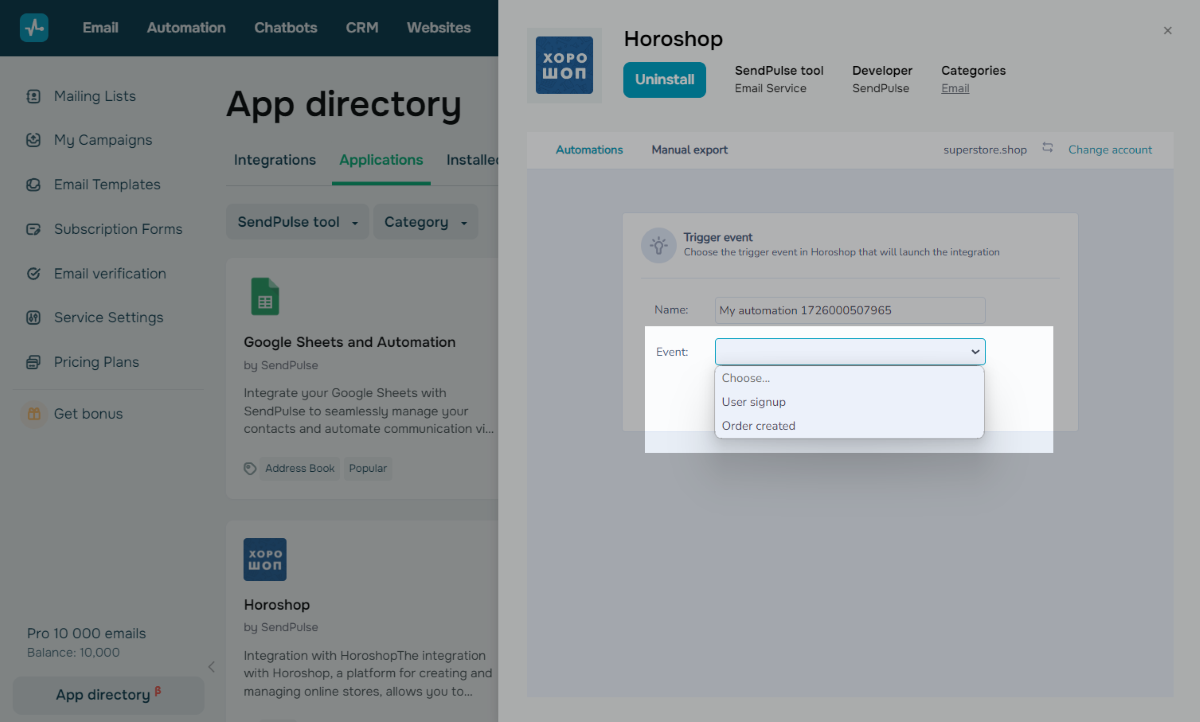
Select an event
Enter an automation name, and select the event that will trigger it.
| User signup | Tracks user signup events in your online store. |
| Order created | Tracks purchase events (clicking the Buy button). |
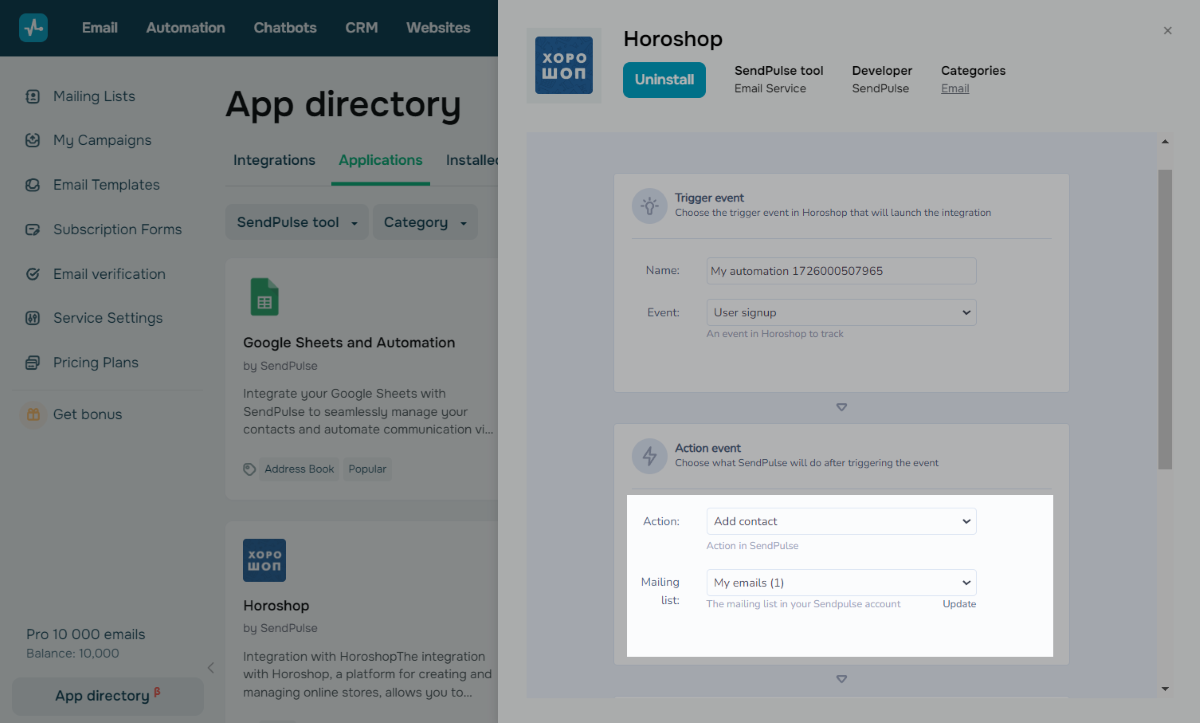
Select an action
Select an action (add a contact or launch an event).
Add contact
This action adds or updates contact data in your selected mailing list in the Email section when users sign up or place an order.
To use the Add contact action, select the mailing list to save contacts to.
If you created a mailing list while setting up your automation, you can click Update to refresh your available mailing lists.
Once you select a mailing list, select a value list from your Horoshop account that matches your user values in SendPulse.
Moving contacts to SendPulse mailing lists allows you to send campaigns, share your store's news and promotions, and trigger automated flows when new subscribers join your selected mailing lists.
Read more:
How to create an automation that starts when a subscriber is added to a mailing list
Launch event
This action adds a contact to a flow start in the Automation section and runs it when users sign up or place orders.
To use the Launch event action, select the event that will trigger your automated flow.
Read more: How to create events.
If you created an event while setting up your automation, you can click Update to refresh your available events.
How to run an event-based flow
When sending events to Automation 360, you can run flows with emails, SMS messages, web push notifications, and in-app messages to welcome new users or send order information.
To create an automated campaign, go to Automation, click Create new automation, and select the event linked to your Horoshop integration as a flow start.
Automated flows allow you to filter contacts by your received variables, monitor subscriber behavior, and create multiple scenarios based on values and actions.
Read more:
How to create dynamic emails triggered by events using pre-made SendPulse templates
How to send an order status SMS with Automation 360
If a user has subscribed to your SendPulse-powered chatbot, you can send them an event-based message through that chatbot.
Read more: Messenger element in Automation 360.
If a user has subscribed to your web push campaigns, you can send them an event-based web push notification.
Read more: How to send push notifications in Automations.
Configure field mapping
In the SendPulse column, select the mailing list variable or SendPulse event variable that will receive your Horoshop variable values. In the Horoshop column, select the Horoshop contact field to transfer values from.
All variable types are supported. To pass more variables, click Add variable.
If you select the Add contact action, you can create an integration variable of the String type. If you need a variable of a different type, create it in your mailing list.
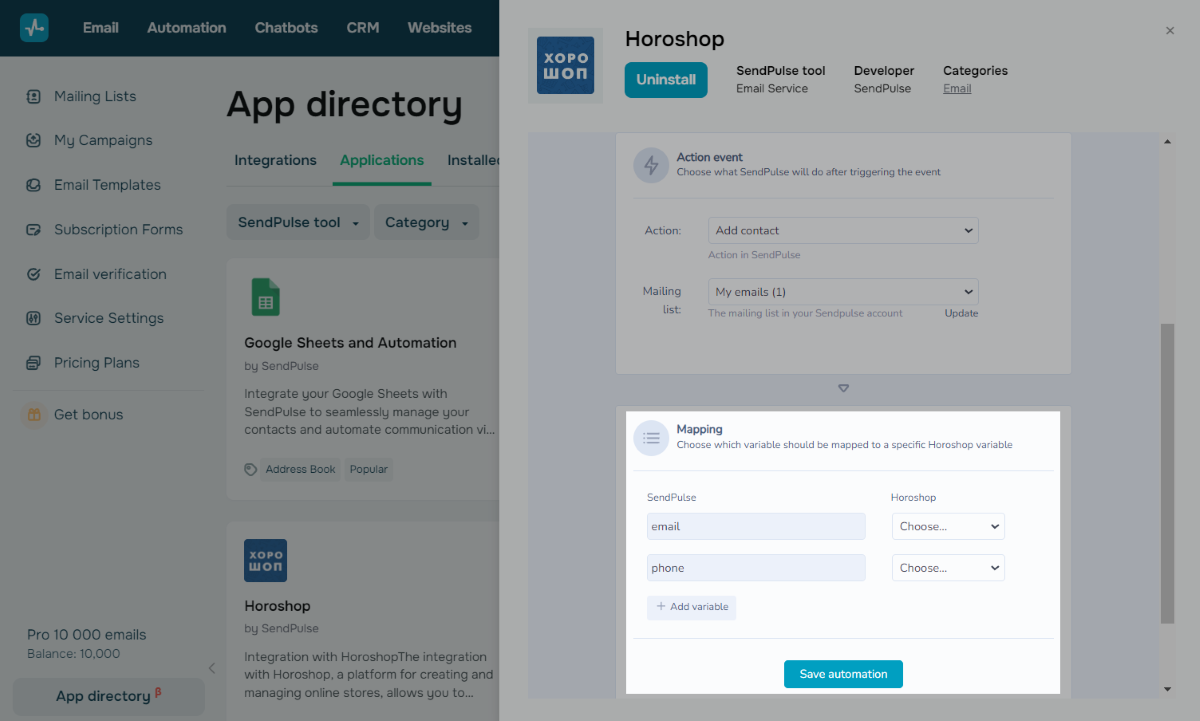
Once you map the fields, click Save automation.
Export contact data manually
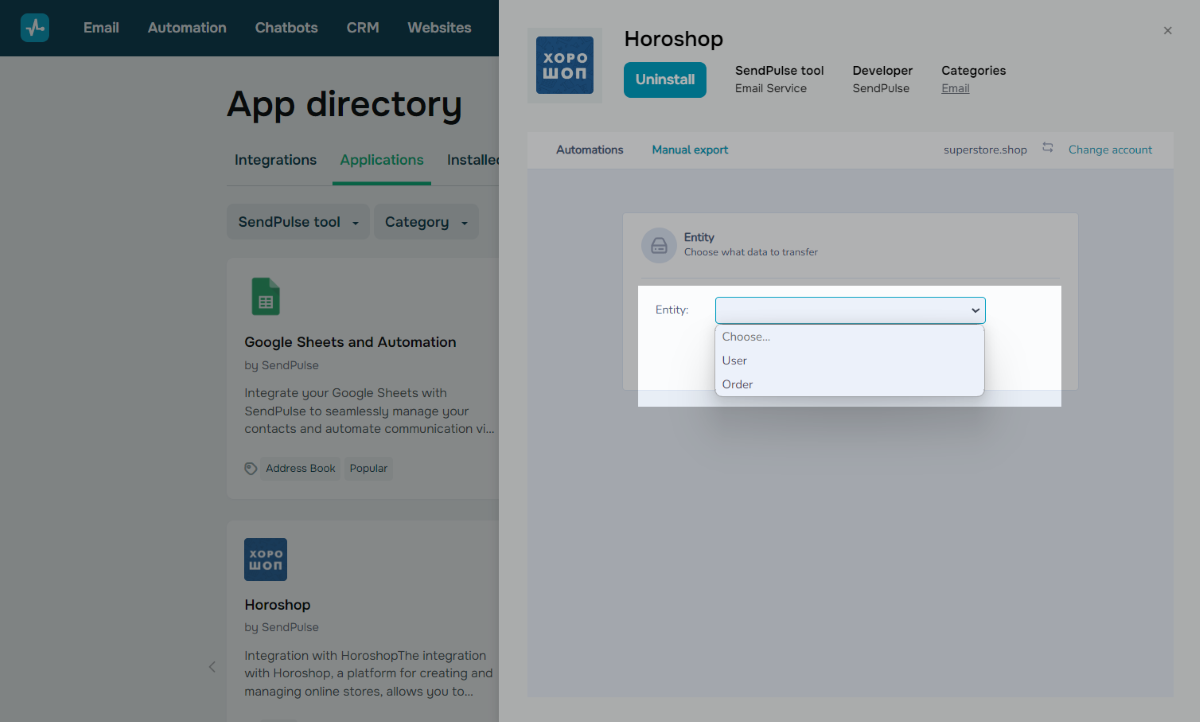
To export existing data to your mailing list, go to the Manual export tab.
Select registered users or order data you want to export from your Horoshop account database.
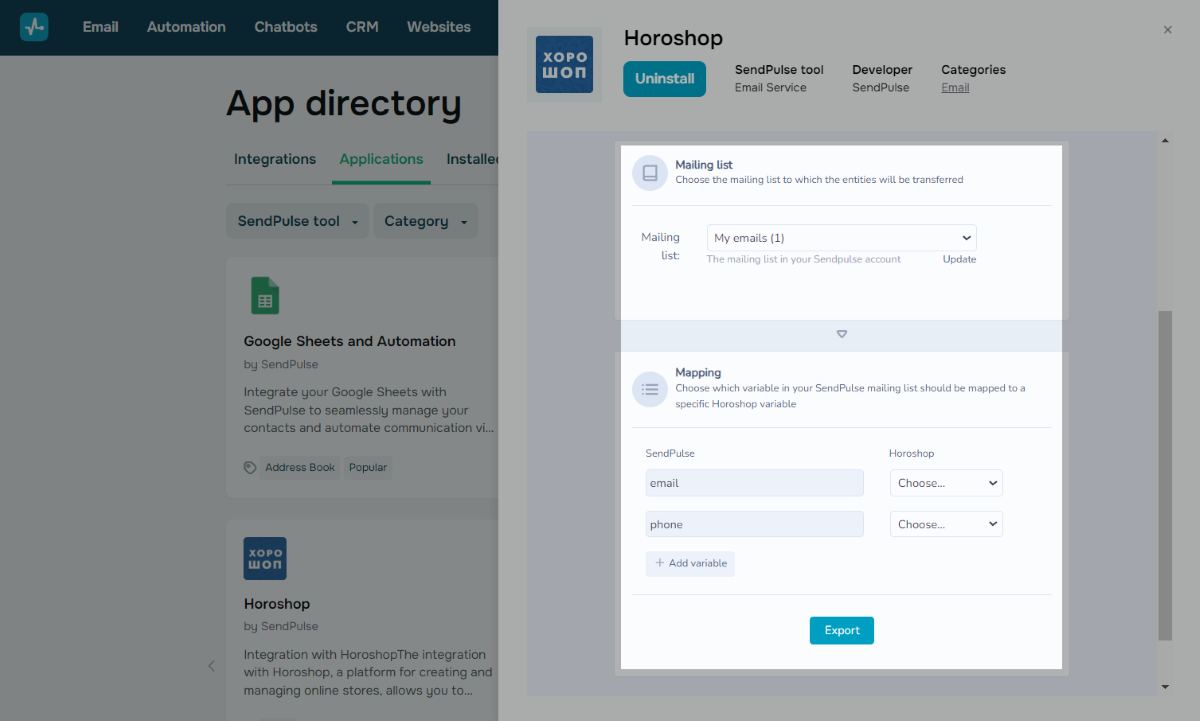
In the Mailing list field, select the mailing list to which you want to export data.
In Mapping > SendPulse, select the mailing list variable to transfer your Horoshop variable to. In the Horoshop column, select the Horoshop contact field to transfer values from.
Once you map the fields, click Export.
Once your export is complete, you can start another one.
Manage your automations
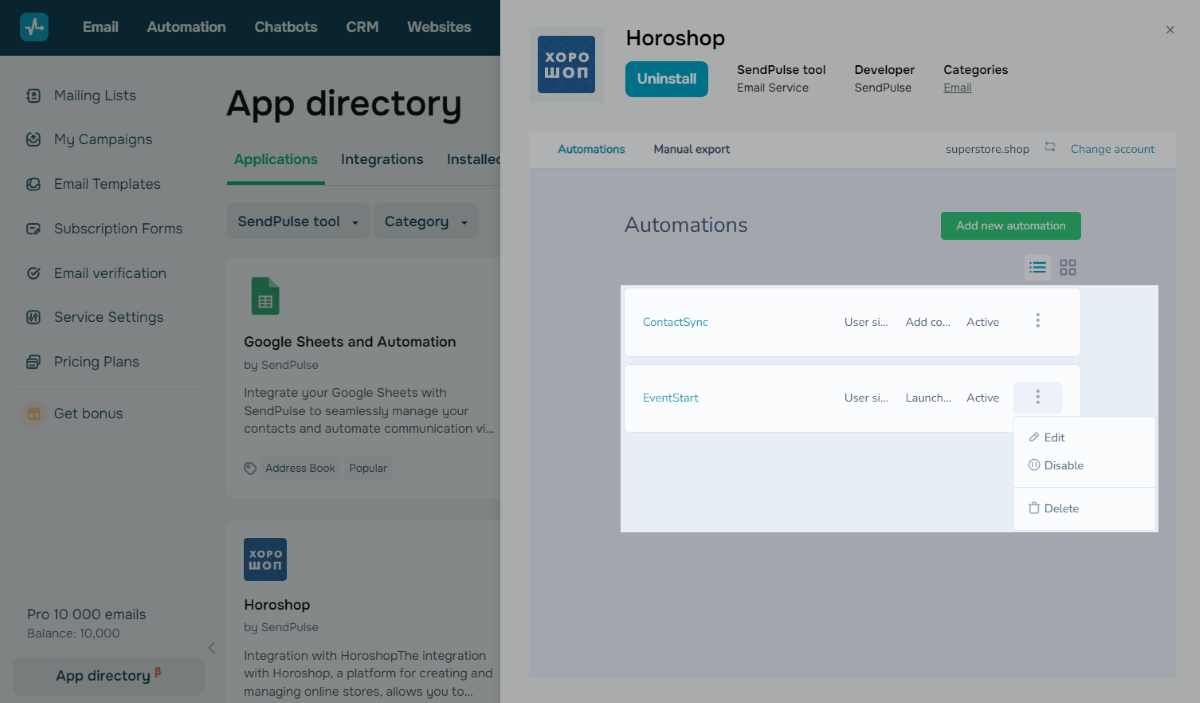
To view your automations, expand the app page. You can view your automation triggers, actions, and statuses.
You can also pause, edit, and delete automations.
To manage an automation, go to the Automations tab, select an automation from the list, and select an action.
If you need to switch accounts, click Change account. In the next window, confirm the action, and follow the steps outlined in Manage the app.
To remove the app, click Uninstall. All automations you have configured will be deleted, but your previously transferred data will remain in your SendPulse account.
Last Updated: 03.10.2024
or