Assign tags to chatbot subscribers
You can attach tags to your subscribers when they click on the necessary button or go through a certain flow branch scenario. As a result, you can filter your subscribers based on a particular tag and send them a message. Let's take a look at how to work with tags.
Tag use case
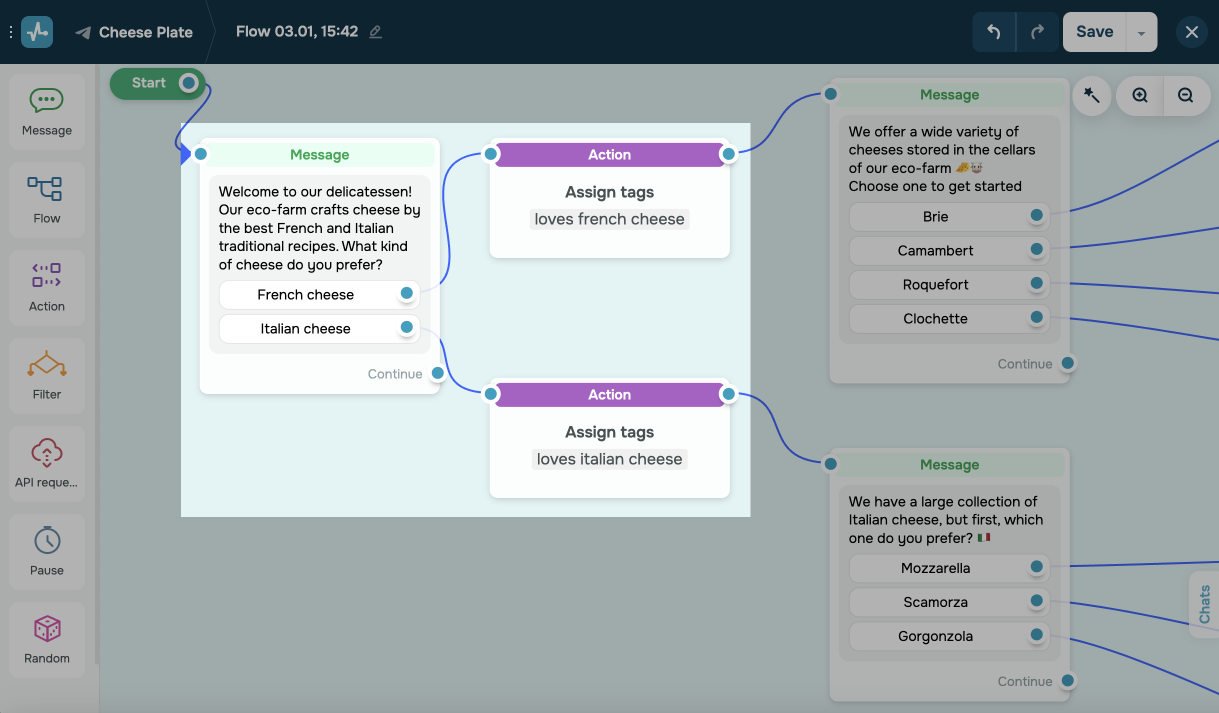
Let’s imagine that you are a delicatessen owner, and you ask subscribers about the products or services that interest them in your chatbot flow. Their possible answers are shown as buttons.
For example, your chatbot asks: "What kind of cheese do you prefer?" and shows the "French cheese" and "Italian cheese" reply options. If users click "French cheese," you can assign them the "French cheese lover" tag.
The user has shown their interest in particular products by clicking on the buttons. You can take advantage of this interest by adding a unique tag. Then you can filter your users by tag and send them relevant messages.
Assigning tags to subscribers
In the flow
You can create a tag using the flow editing mode so that you are able to configure adding the variable value automatically for each contact that has passed through that flow element. The maximum number of tags per contact is 100.
Go to the flow editing mode, drag the Action element to the workspace, and link it with your button.
In our case, we link the Action element with the “French cheese” button, so the bot would assign this user a corresponding tag each time they click on the “French cheese” button.
Now you can see the settings panel on the right. Select the Add a tag option. Enter a tag name that’s no longer than 32 characters, and click Apply.
You can continue building your chatbot messages and add the necessary tags to your buttons. When your chatbot flow is done, click Save.
You can also add the Delete tag action by analogy, so the bot would delete the tag with no relevant user information.
In the Audience tab
You can also assign tags manually in the contact list. Go to the Audience tab, and enter your tag name next to your contact name.
You can also filter and mark several contacts to assign tags to them.
In the Conversations section
If during personal communication you have identified your client’s certain preferences, you can assign specific tags related to their preferences in the Conversations section. Assign a tag to the user in the Specify a tag field on the right.
Managing tags
You can also view the list of your subscribers along with their assigned tags and edit or delete all of them.
Read also: How to manage tags.
Go to the Bot settings section of the Tag tab.
To edit a tag name, click on the pencil icon next to the tag. To delete a tag from all your subscribers, click on the Delete icon.
Filtering users by tags
Use the filter to segment your users who have or have not been assigned certain tags when communicating with your chatbot.
Go to the Audience tab, set your filter conditions (by tag), and click Apply.
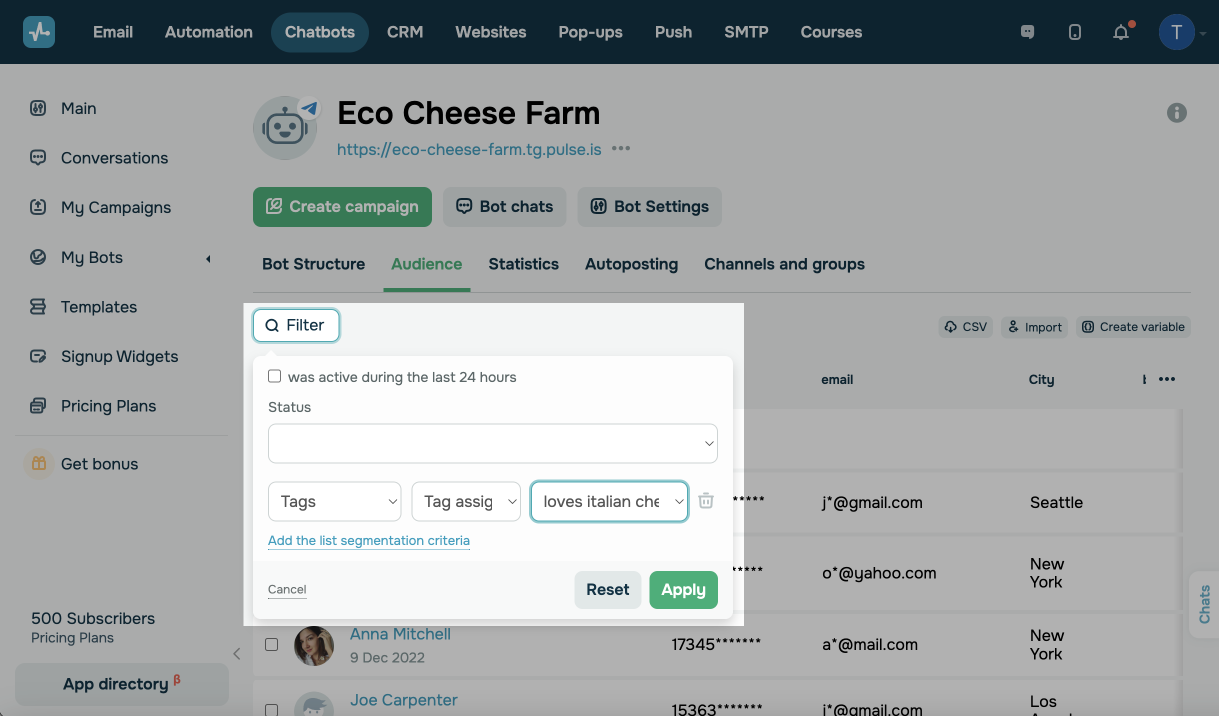
The system will find your chatbot subscribers who were assigned this tag.
Creating a campaign with tag filters
To send a campaign to subscribers who were assigned a certain tag, click New campaign.
Select a bot from the list if you have several chatbots connected, and enable the Segment recipients option.
Set the criteria to filter your subscribers who were assigned the necessary tag, and click Apply. In our case, we sent a message to French cheese lovers.
The system will filter the audience to find all of the subscribers who were assigned the French cheese lover tag. Write a message, and click Next.
Read also: How to send a Facebook campaign, How to create a Telegram chatbot campaign, How to send a campaign to a Telegram channel or group, How to send an Instagram chatbot campaign, How to create a WhatsApp campaign.
Then you can schedule a message for later or send it immediately.
Last Updated: 22.06.2024
or