Edit your chatbot landing page
Every chatbot you create has an automatically generated bio link page where users can go to the corresponding messaging platform and subscribe to your bot. You can customize this page to fit your business goals.
In this article, we will talk about the benefits of chatbot landing pages and how to adjust them based on your needs.
What is a chatbot landing page?
A chatbot landing page is a bio link page where website visitors can subscribe to a chatbot and start a conversation with it based on a selected flow scenario.
To increase user conversion, you can add useful information about your company, product, or chatbot. You can also customize your chatbot landing page to fit your corporate design style for better recognition.
How to set up a landing page
Your automatically generated landing page contains your chatbot name, avatar, and subscription button. For Viber, a QR code is also provided to allow visitors to easily subscribe to your bot using the mobile application.
You can add any other information or elements to this page.
All edits apply only to your chatbot landing page. To change the appearance of the chatbot itself, go to its settings on the corresponding messaging platform.
Start editing your chatbot landing page
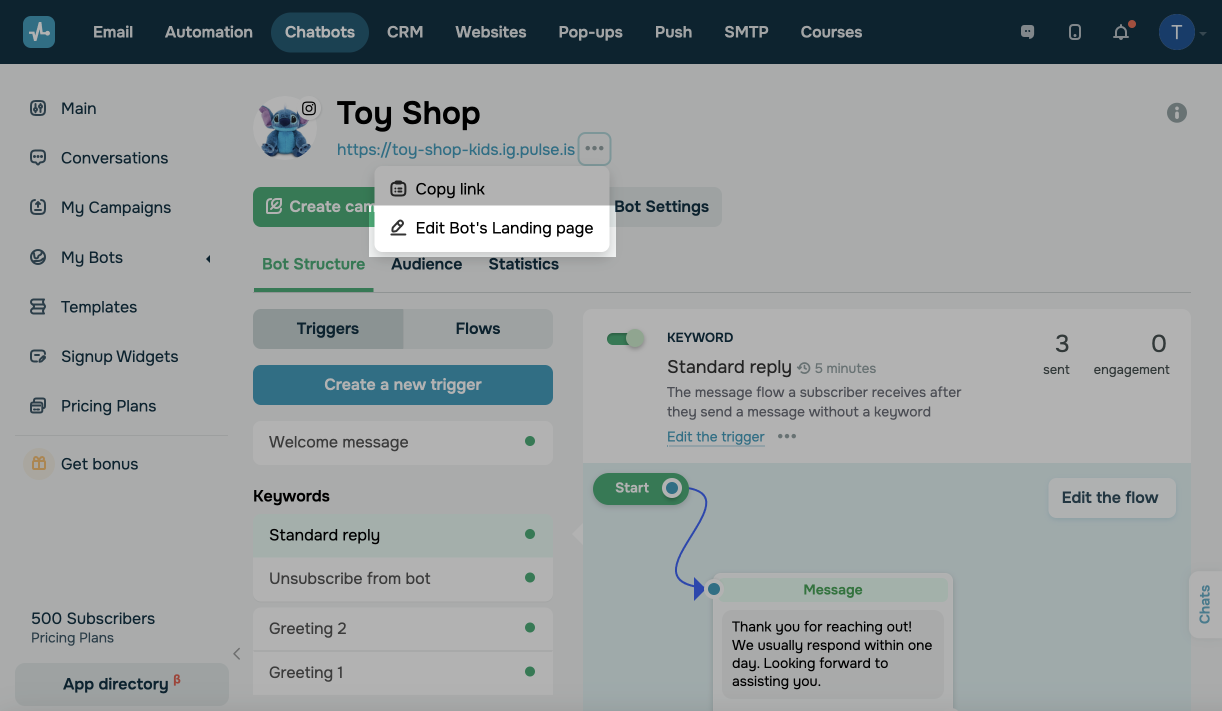
In the Chatbots section, go to your bot, click the three dots under its name, and select Edit Bot’s Landing page.
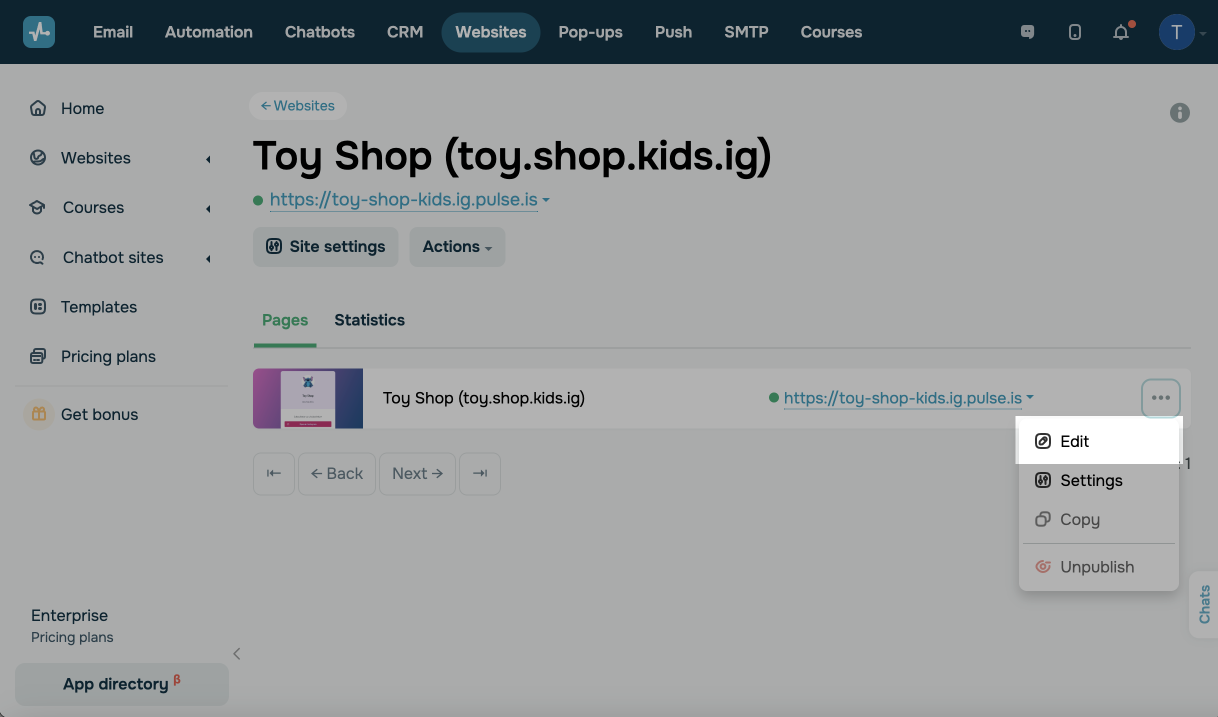
You can also edit your chatbot landing page in the Websites section. On the left panel, find the page by your chatbot name, click the three dots, and select Edit.
Add content in the bio link page builder
In the builder, you can select additional elements, drag them to the workspace, and customize their style. The elements described in the table below are available in the builder.
| Cover | Adds your hero image and text. By default, it consists of your chatbot avatar and name. |
| Menu | Provides navigation on your bio link page. You can add a menu for quick navigation. |
| Text | Adds a text element. You can choose your text font, color, and background. |
| Gallery | Allows you to add images, videos, and carousels (cards with descriptions). |
| Button | Allows you to create buttons of the link, phone, and email types. You can also customize your button style and text. |
| Socials | Adds links to social media platforms with their logos. |
| Chatbots | Starts your selected flow using social media buttons. |
| Separators | The Spacer and Divider elements visually break up your bio link page content. |
| Form | Collects subscriber data, for example, phone numbers and email addresses, via a form and saves them to your selected mailing list. |
| Payments | Allows visitors to pay for a product or service directly on your bio link page. |
| Countdown | Displays a countdown until a certain event.
Available with the Pro website builder pricing plan. |
| FAQ | Adds a list of detailed answers to frequently asked questions.
Available with the Pro website builder pricing plan. |
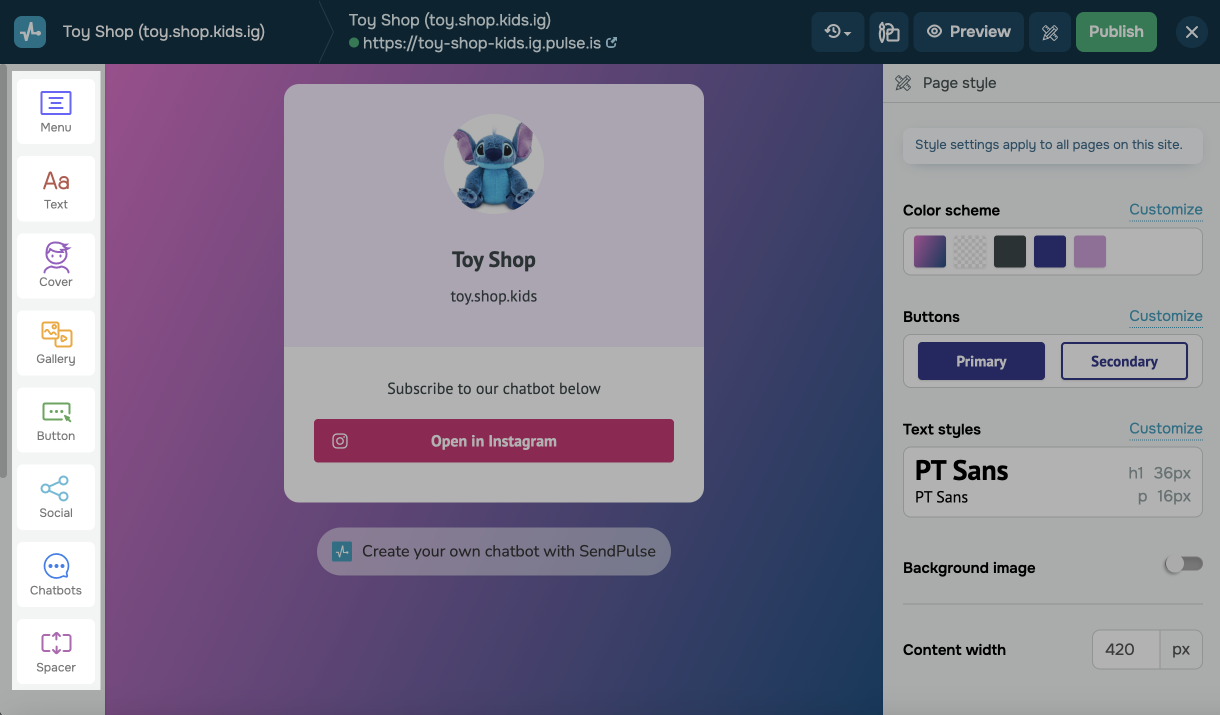
On the right panel, you can edit the style of your entire page or each element individually.
Read more about bio link pages and their elements: How to create a bio link page.
Once you finish editing your chatbot landing page, click Save.
You can share a link to this page and grow your chatbot audience with it.
If you delete your chatbot, the system will automatically take down its chatbot landing page.
Set up analytics
You can transfer goals from the Payments, Button, and Form elements to Facebook Pixel and Google Analytics to get comprehensive analytics.
To do this, you need to get a Google Analytics ID or a Facebook Pixel and save them to the fields in your landing page settings.
Read also: How to connect Google Analytics to your site and How to connect Facebook pixel to your site.
You can also use your landing page to advertise on Facebook and Instagram and view conversion statistics. To do this, you need to get a Facebook meta tag and save it to the settings.
Read also: How to add a meta tag and verify a domain on Facebook.
Last Updated: 27.12.2024
or