Set up a chatbot launch
With SendPulse, you can create automated message flows for your chatbots that will be launched by triggers and communicate with subscribers according to your premade scenario.
In this article, we will talk about how to launch a chatbot.
Read also: Who is a Chatbot Subscriber.
How to set up an automated launch
A chatbot can be launched automatically using a trigger or subscription widgets within other services.
Using a trigger
An automated chatbot launch can occur when a selected trigger is fired. You can choose a standard trigger or create your own custom trigger that will start a flow once you receive a keyword from a subscriber, an A360 event, or an Instagram action.
Trigger action
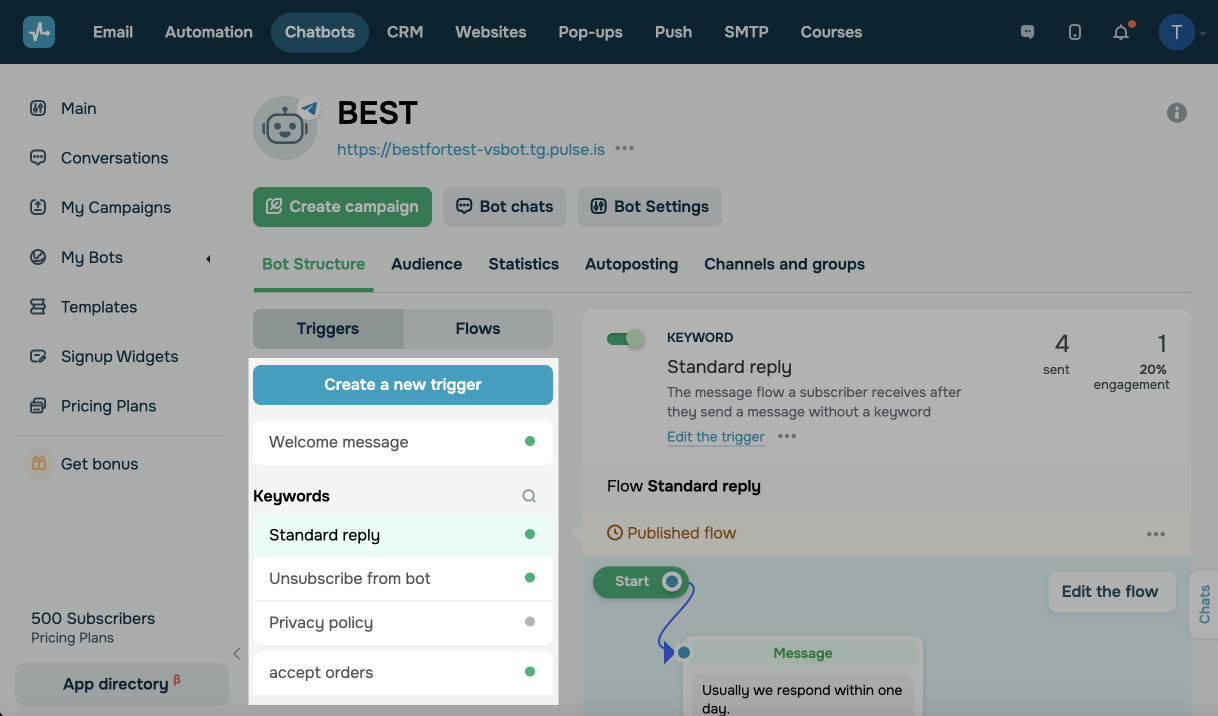
A trigger is a certain subscriber action that prompts a chatbot launch. You can create standard triggers or add your own.
Each chatbot has three standard triggers for which you can create different flows: welcome message, standard reply, and unsubscribe from bot.
Read more: Trigger types.
Instagram chatbots have additional triggers that launch flows according to subscribers’ actions, including a Story mention, a comment under a post, and a live video comment.
To set up your own trigger, click Create a new trigger, and select an event or keyword that will trigger your chatbot.
Read more: How to manage chatbot flow triggers.
Once you create the trigger, you need to link it to your flow. To do this, click Bind existing, and select the flow that will fire your trigger from the list. Use the search bar to quickly find your flow.
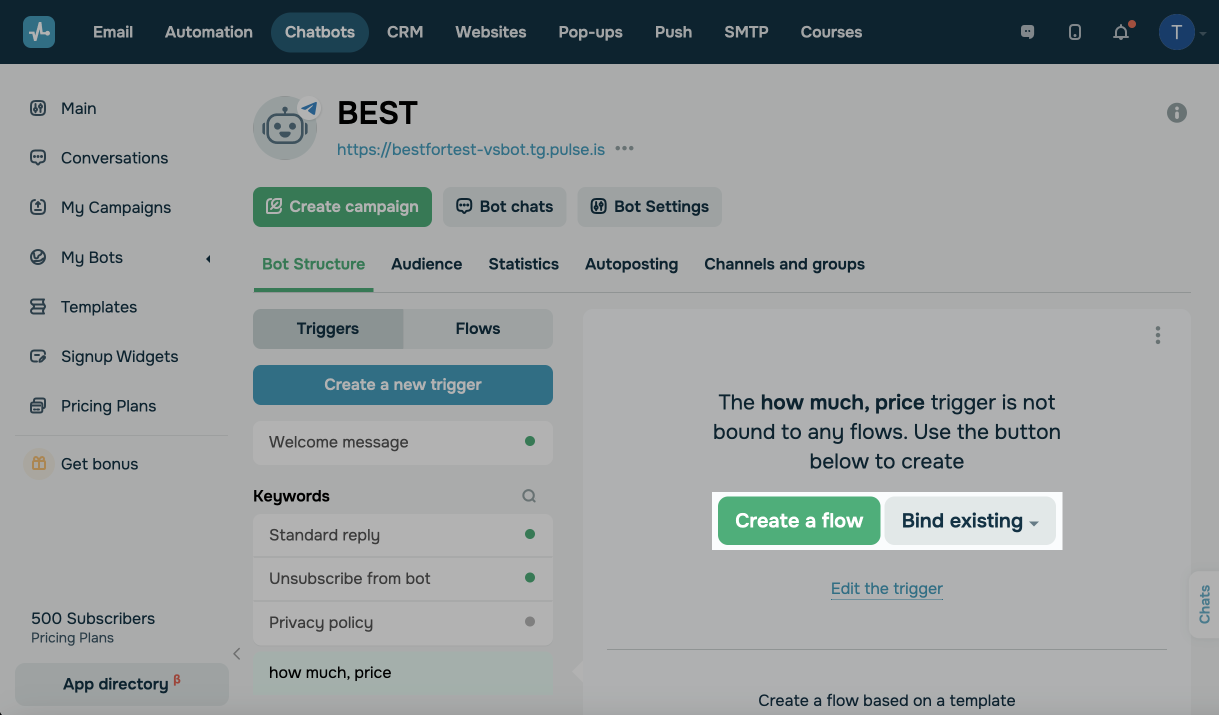
You can also create a flow scenario from scratch. To do this, click Create flow, and create a new flow in the builder.
Keyword
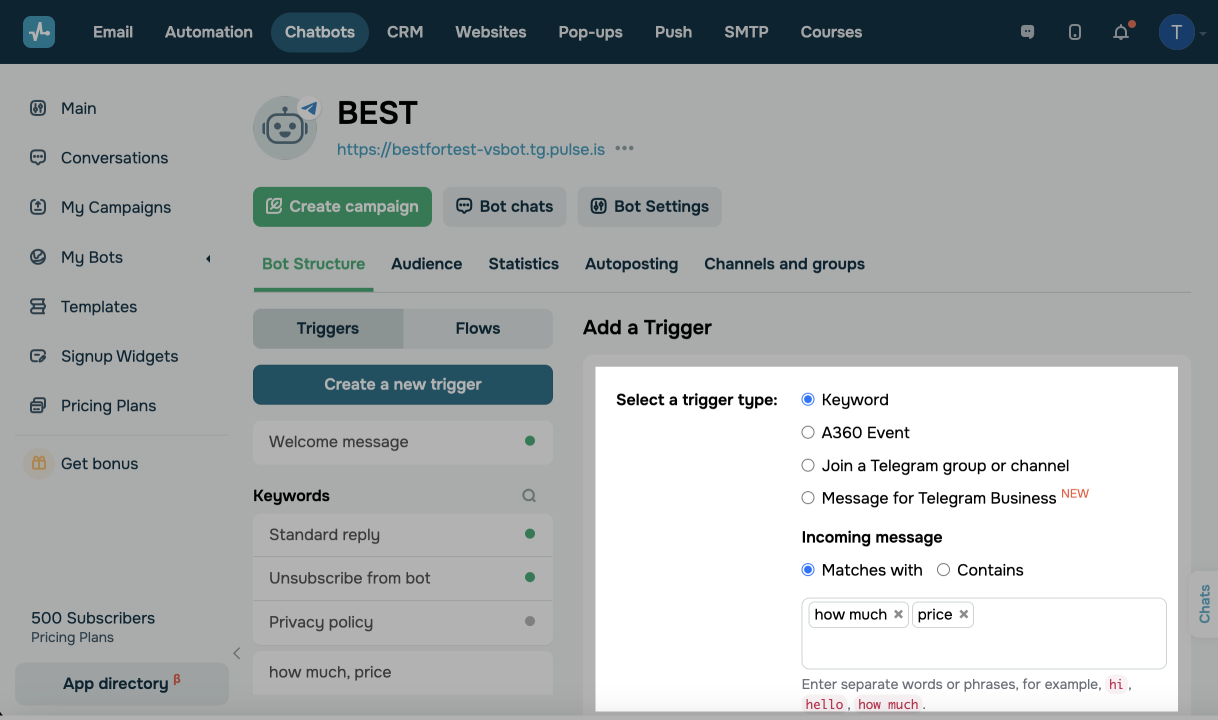
You can set up a chatbot launch to be triggered by a specific word or phrase. To do this, create a trigger that starts a flow once you receive a keyword from a subscriber.
Click Create a new trigger, and select a keyword type. Specify your keywords and trigger recognition option: Matches with or Contains.
The system recognizes words and phrases as commands, for example, price and how much. The maximum keyword size is 32 characters.
Read more: Select a trigger type.
Using landing page
Every chatbot you create has an automatically generated bio link page with your chatbot name, avatar and subscription button. Page visitors are redirected to your chatbot in the corresponding messaging app or its web version. You can customize your landing page based on your requirements and add more elements.
Read more: How to edit your chatbot landing page.
Using a subscription widget
You can add a required widget to your website, add a chatbot in the SendPulse website builder, or add a button to your bio link page.
In the chatbot service
You can launch a chatbot via your website. To do this, you can create a chatbot widget and add it to your website page.
Go to the Signup Widgets section, and click Add widget. Customize your design, add a link to your chatbot, and copy the widget code that you want to add to your website.
Read more: How to create a chat widget for a website.
In the Website service
You can also add a chatbot to your SendPulse-based website right in the builder. To do this, go to the Websites section, and start editing or creating a website. Add the Chatbots widget, and in the settings, select a messaging platform, and add the required chatbot and the flow.
Read more: How to add a chatbot subscription element to your website.
In the Bio Link Page service
If you create a bio link page using SendPulse, you can add a chatbot to it. To do this, start editing or creating a bio link page, and add a button in the builder. In the settings, select a messaging app, add a chatbot, and select a flow.
Read more: How to Add a Chatbot Subscription Element to Your Bio Link Page.
In the Email service
You can add a chatbot to a multichannel subscription form and place it on your website page or blog. Go to the Email section, open the Subscription Forms tab, and click Create subscription form. In the form builder, add the Messenger element, then select a messaging platform and chatbot.
Read more: Messenger.
In the Pop-up service
You can add a pop-up to your website with social media buttons so that users can launch your chatbot. To do this, go to the Pop-up section, and create a Social media subscription pop-up. In the settings, select a messaging platform, chatbot, and flow.
Read more: How to create a socials widget.
Using an Automation in A360
Set your chatbot to launch once a certain event occurs or using an A360 flow.
Event
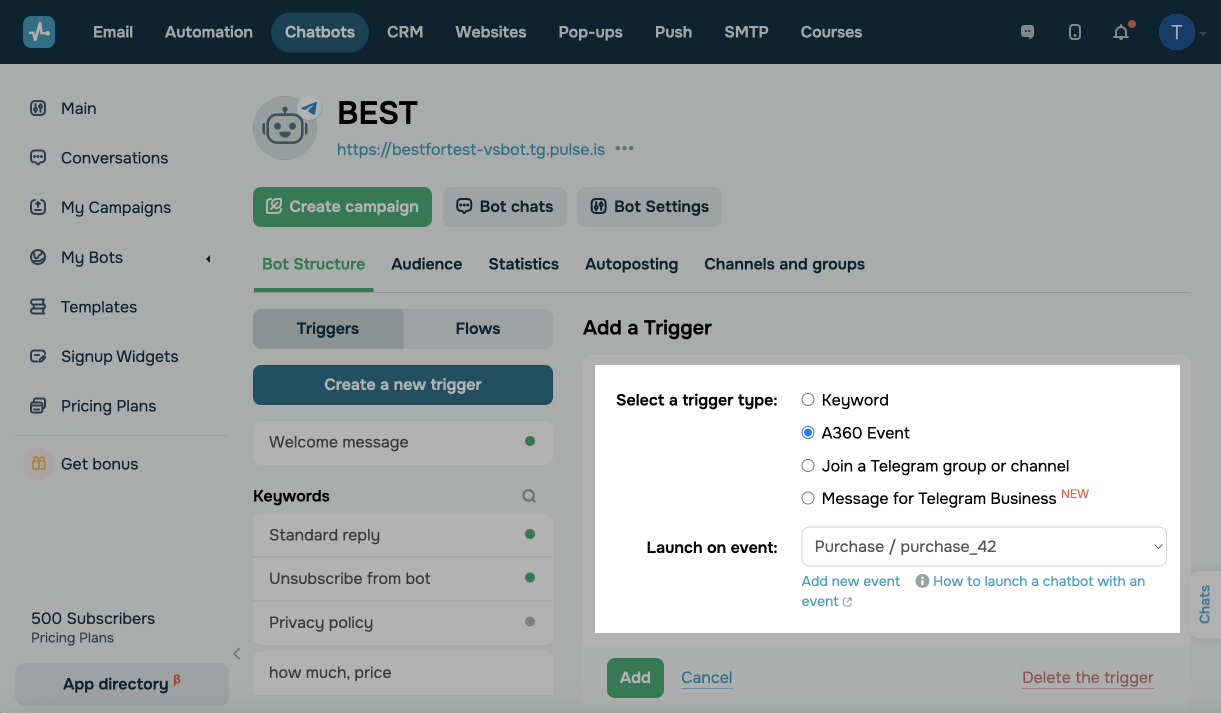
An event is a piece of information about a user action that can trigger a flow. For example, a website visitor signs up for your newsletter by entering their data — receiving this information is an event that will trigger a certain flow.
Open the required chatbot. Click Create a new trigger, select the A360 Event trigger type, and specify the event you want to monitor.
You can create an event in the A360 event manager. To do this, identify subscribers by email or phone and bot_id.
Read more: How to create an event and How to launch a bot with an A360 event.
Flow
You can add a chatbot launch directly to your A360 flow scripts. For example, you can add it to a flow scenario branch for users who have paid for your online course and reached the Filter element. To do this, go to the A360 section, open or create a flow, and add the Messenger element in the builder.
If you want to launch a chatbot using an A360 flow, your recipient must be subscribed to your chatbot and have a phone number or email address in your chatbot audience.
How to get a link or QR Code to launch a chatbot
You can create a link to your chatbot or a QR code your prospects can use to subscribe. You can add it to your promotional materials, website content, or documentation.
To generate a link, click the three dots, and select the Link to launch a flow option. Next, select an option: a link, link with parameters that will be sent to your chatbot audience, or QR code.
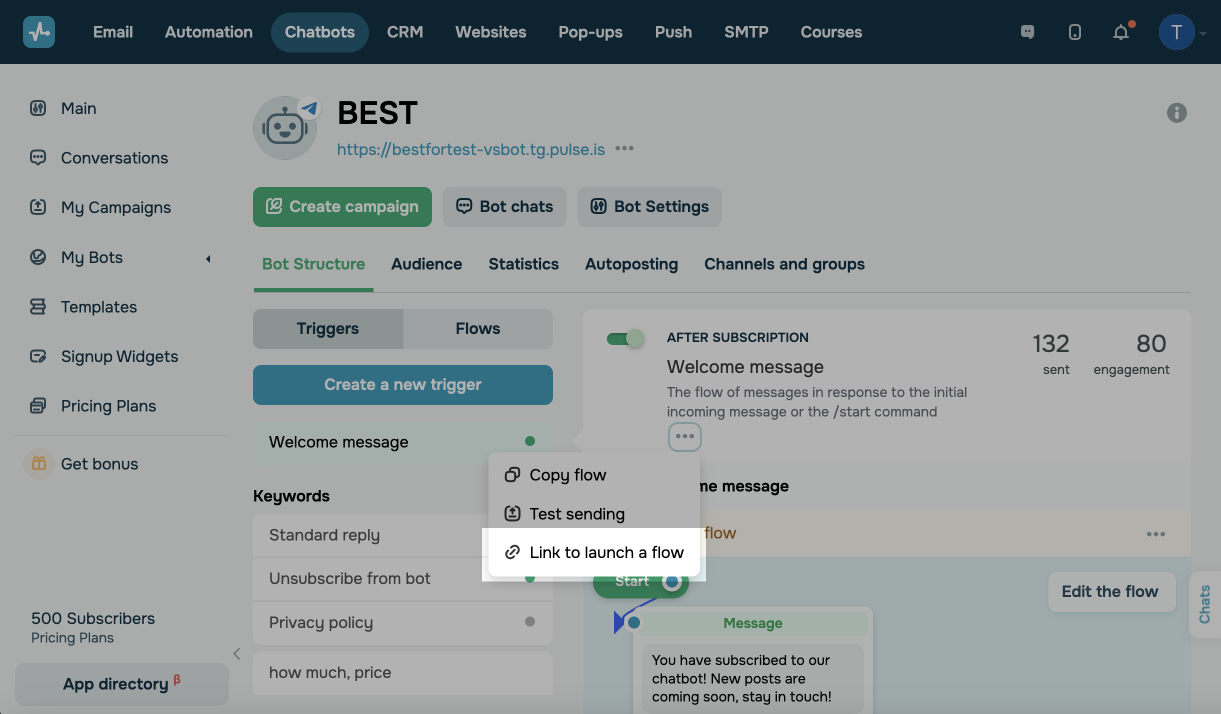
When a user clicks your link, they will be redirected to your chatbot for subscription. Depending on the messaging platform, users may see the START button, your account page, or a prompt to enter a command.
Read more: How to launch a bot via a link or QR code.
How to launch a chatbot manually
If a user subscribes to a chatbot using the methods described above, your chatbot will be launched automatically. You can also launch a specific chatbot flow manually for your entire audience or for each subscriber individually.
For Facebook, Instagram, and WhatsApp chatbots, manual launches will only work if your 24-hour support window has not expired yet (the support window timer is reset every time you receive a message from a customer).
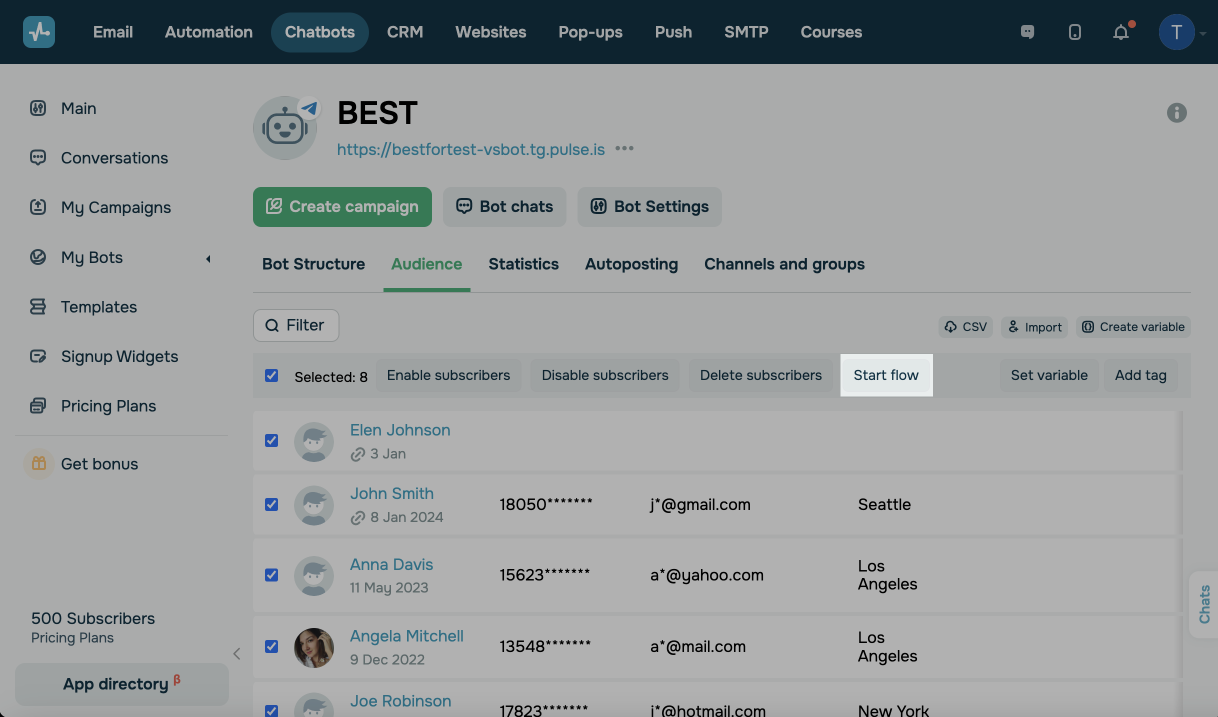
In the Audience Tab
Go to the Audience tab, and select subscribers for whom you want to launch your bot. Click Start flow, and select a flow from the drop-down list. Use the search bar to quickly find your flow.
In the Chat
Go to the Conversations tab, open the chat, and select the flow you want to start.
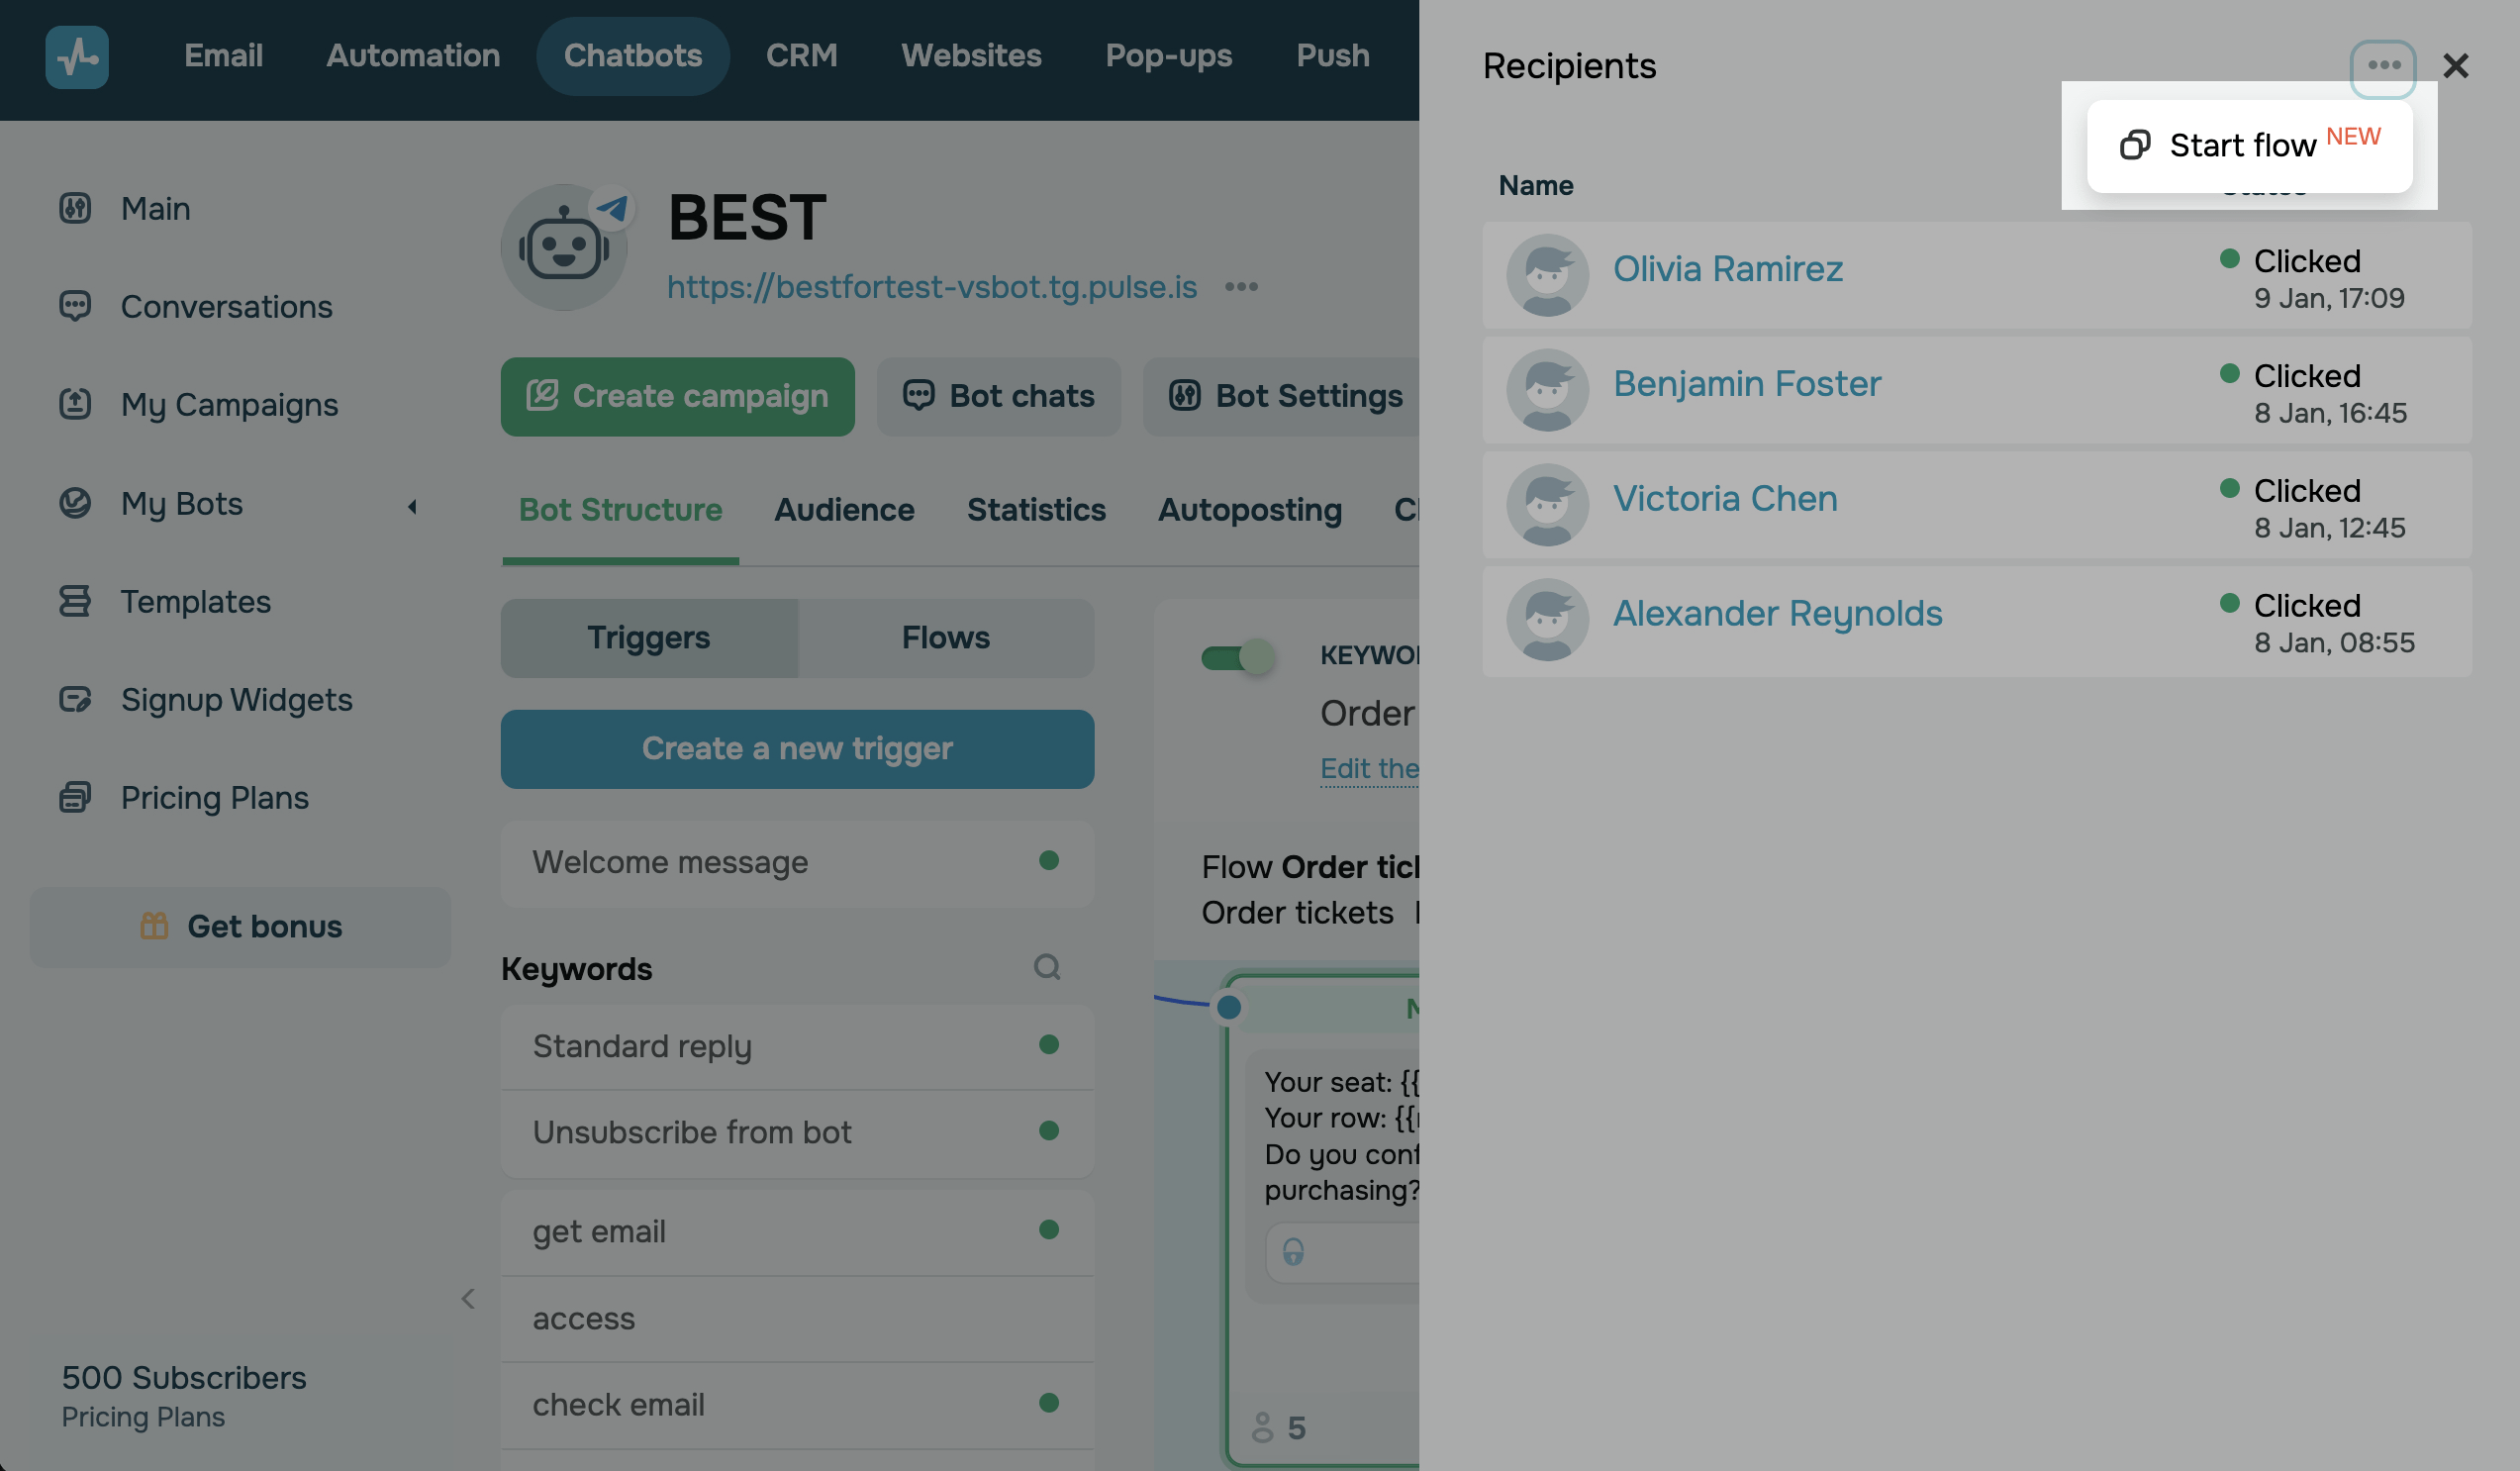
In the element recipients list
Go to the Bot structure tab, and in the flow preview area, click the number below the element. Click the three dots, and select Start flow. Select the flow you want to start. You can select your current flow or another custom flow.
If your element has buttons, you can click the number within a button to restart your flow based on a user's choice.
You can run a flow only for users who have already gone through your flow using this element.
Let’s say you selected an incorrect payment method. To fix this, you can select the correct one and restart your flow. This way, users will receive your updated flow from the start element.
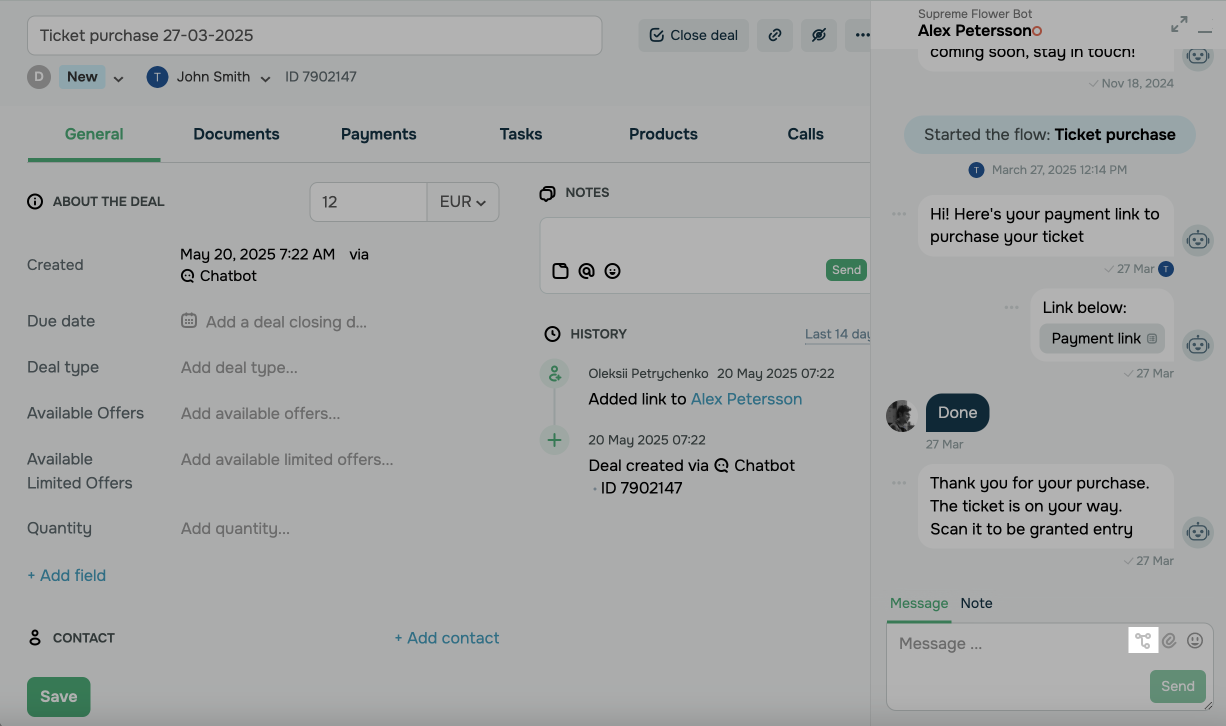
In the CRM card
You can launch chatbot flows for subscribers directly from their contact or deal cards in the CRM system. To do this, go to the CRM section and select a deal from a pipeline or a contact. The subscriber’s conversation with your chatbot will appear within the relevant card.
Conversations appear only if deals or contacts were created through your chatbot.
In the input field, click the flow icon and choose the flow you want to launch. You can also use the Chats button on the right to access all conversations with subscribers.
Last Updated: 27.12.2024
or