Install the SendPulse pixel on your website
To start tracking user actions, add the SendPulse pixel to your website. You can install it on SendPulse-powered websites or third-party websites.
In this article, you’ll find step-by-step instructions for both setup options.
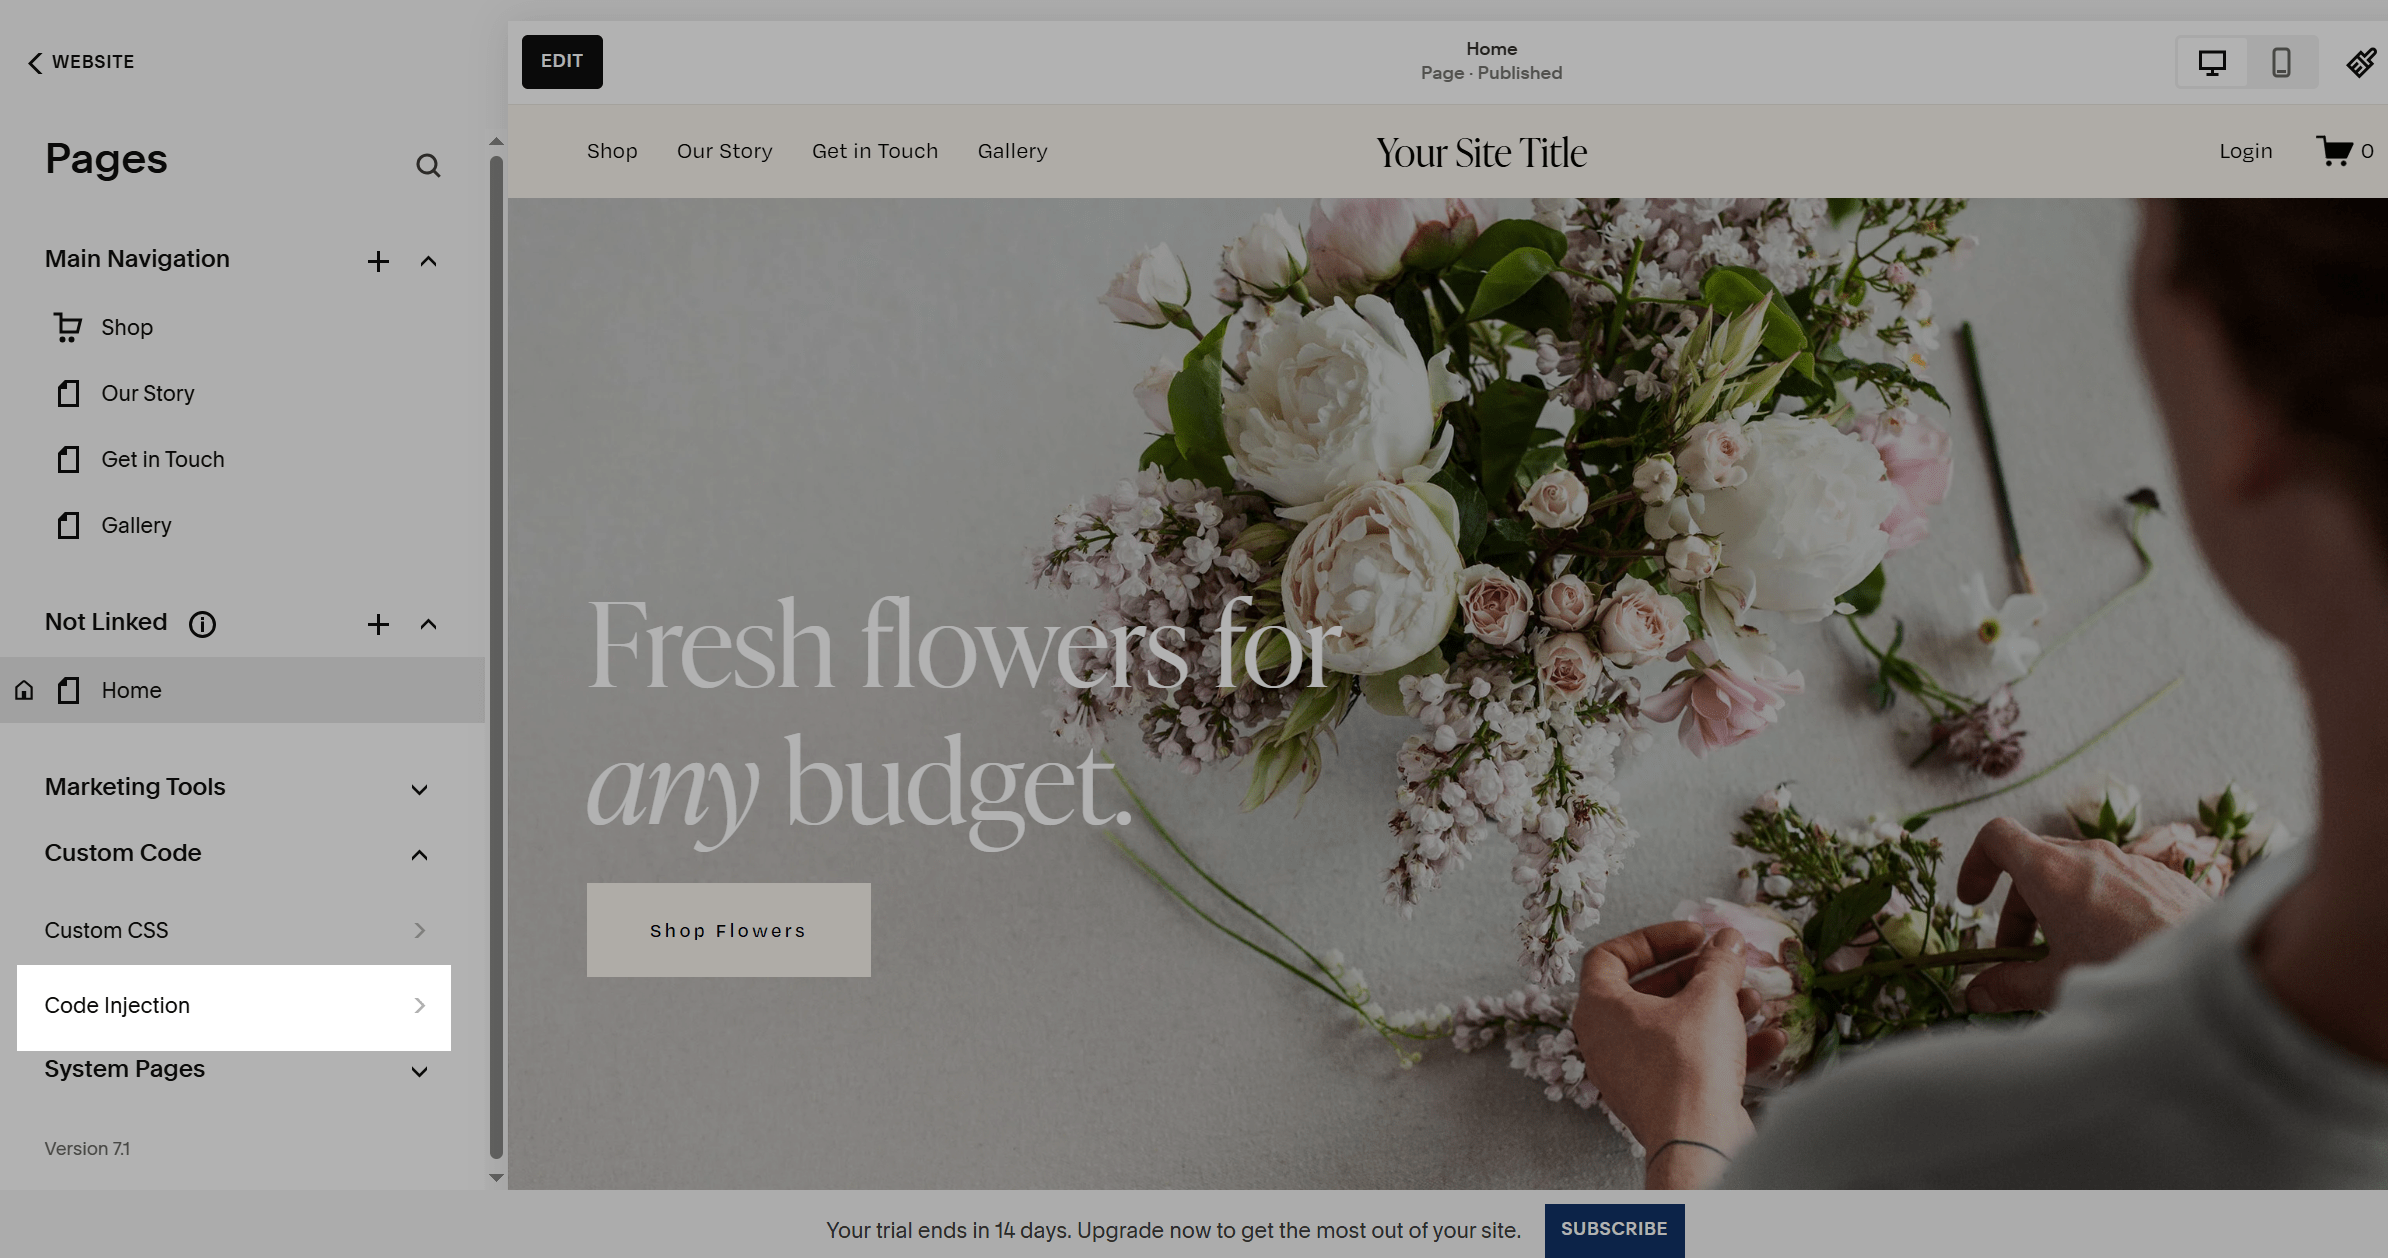
To get started, go to Automation > Pixel and click Add website.
SendPulse-powered website
In the modal window, select Powered by SendPulse. In the Select website section, choose your website from the drop-down list. Click Add.
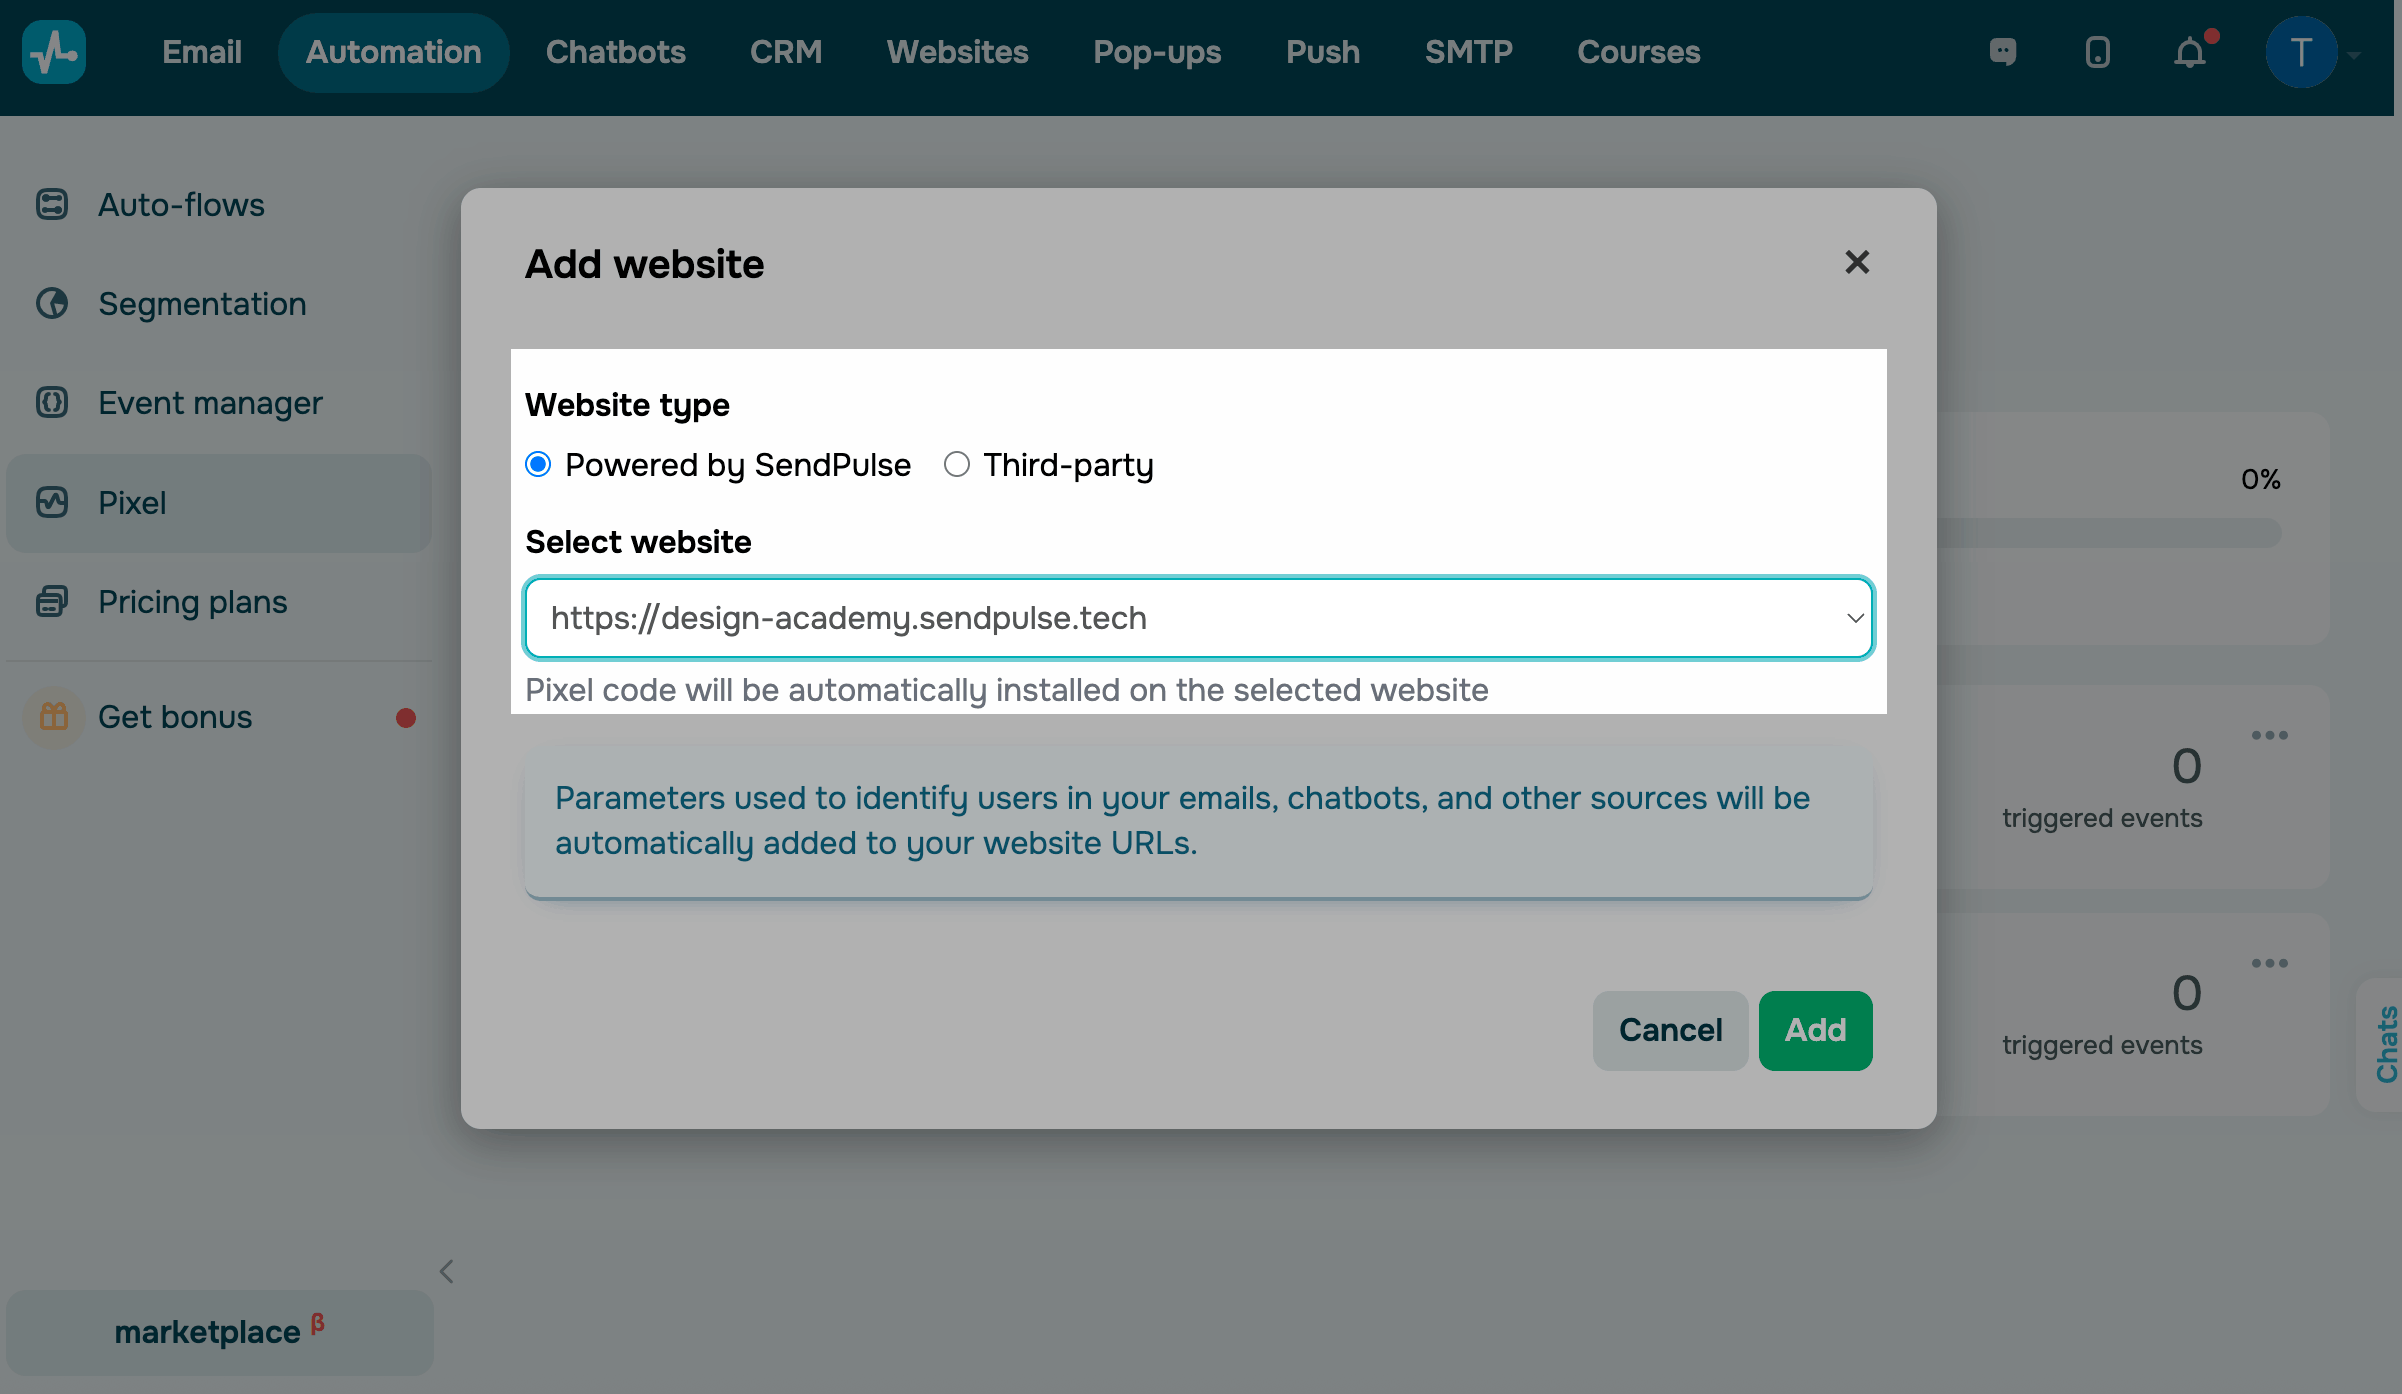
The integration code will be added to your website settings automatically. You don’t need to take any extra steps.
Third-party website
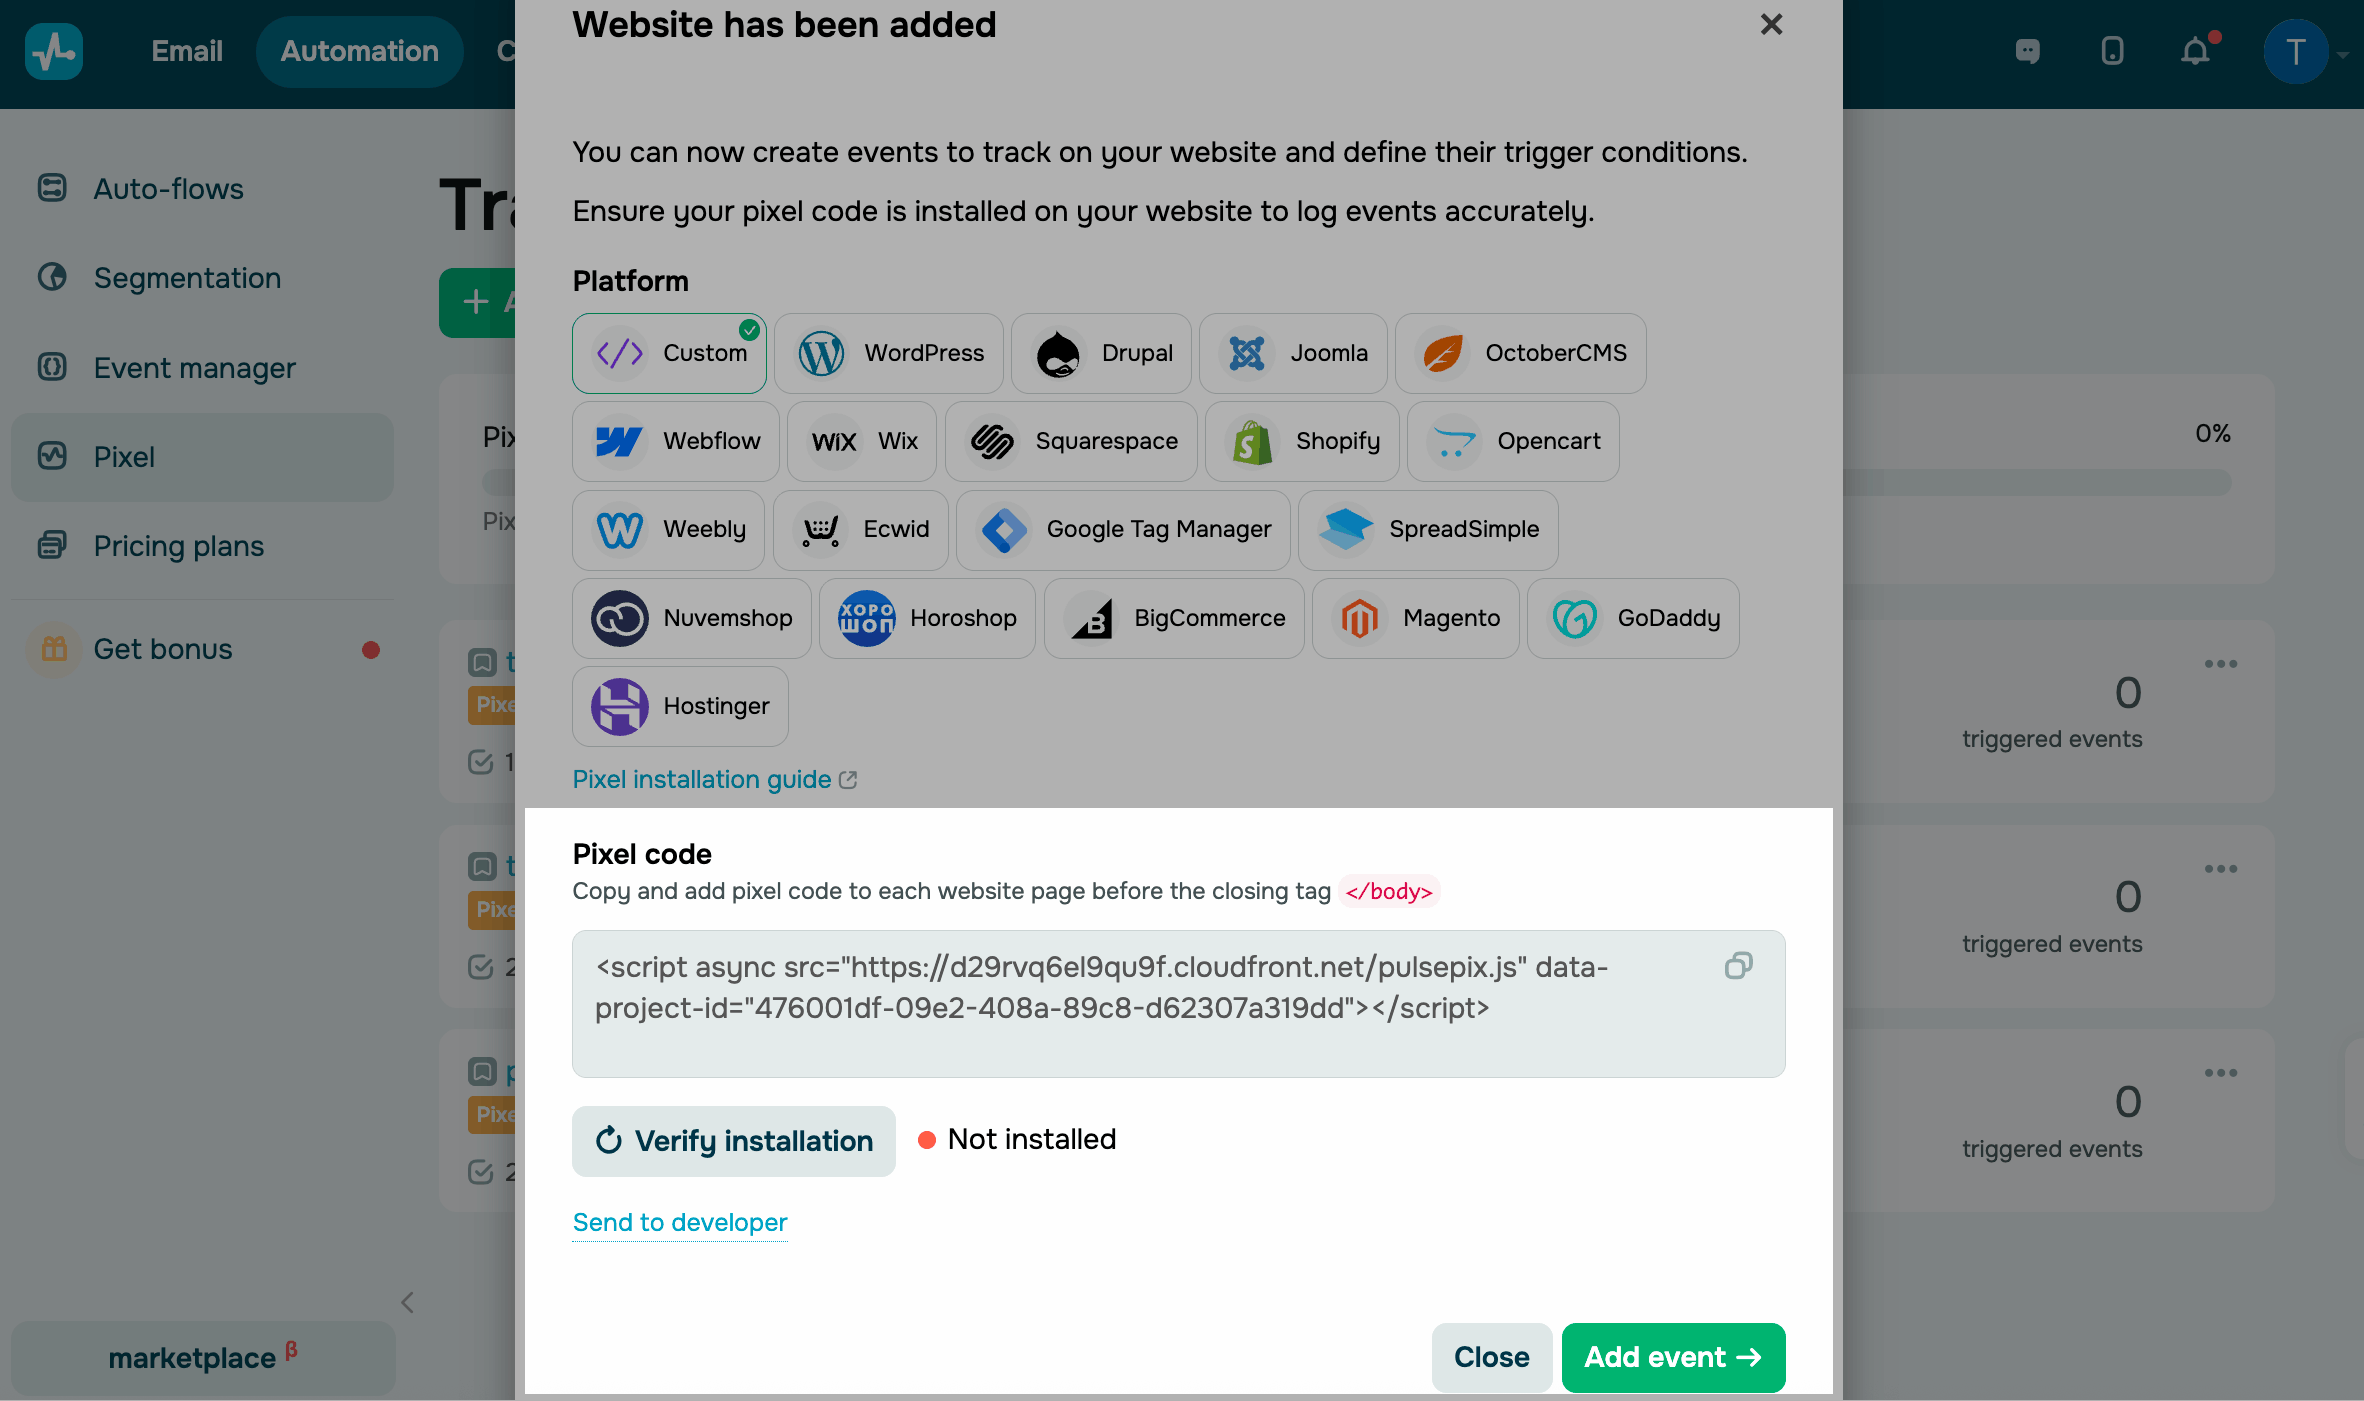
In the modal window, select Third-party site. In the Website URL section, paste your website link and click Add. Copy the installation code and add it to your website before the closing </body> tag.
The generated code is specific to the website you’ve selected when creating the pixel. To track a different website, create a dedicated pixel and use its unique code.
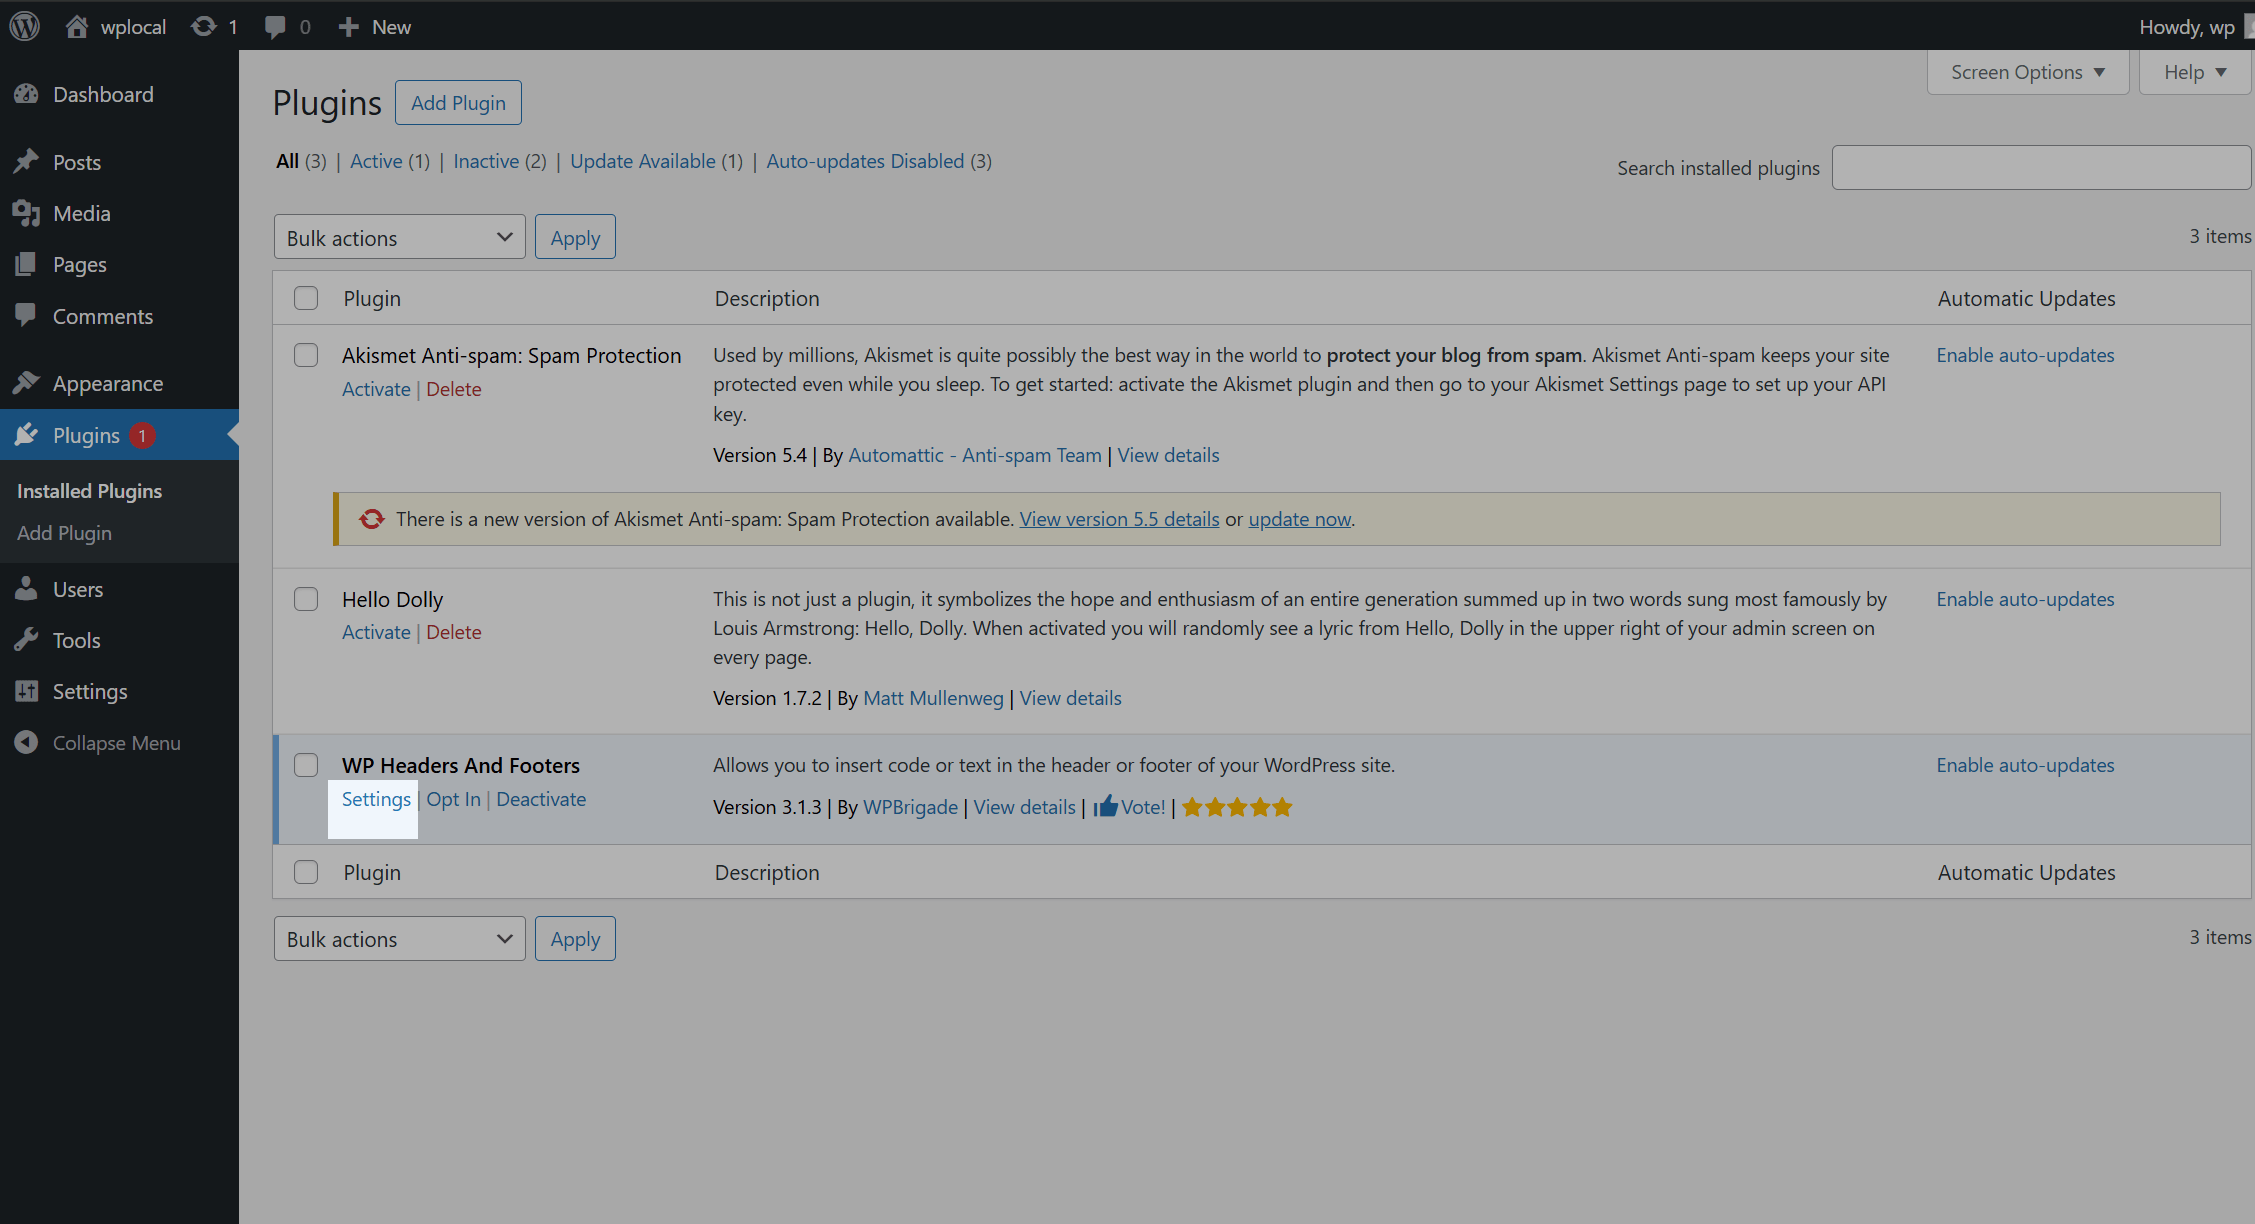
WordPress
Go to Plugins > Add plugin.
Use the search bar to find the Insert Headers and Footers plugin, then click Install Now. Once you install it, click Activate.
Go back to Plugins. In WP Headers and Footers, go to Settings > Insert Headers and Footers.
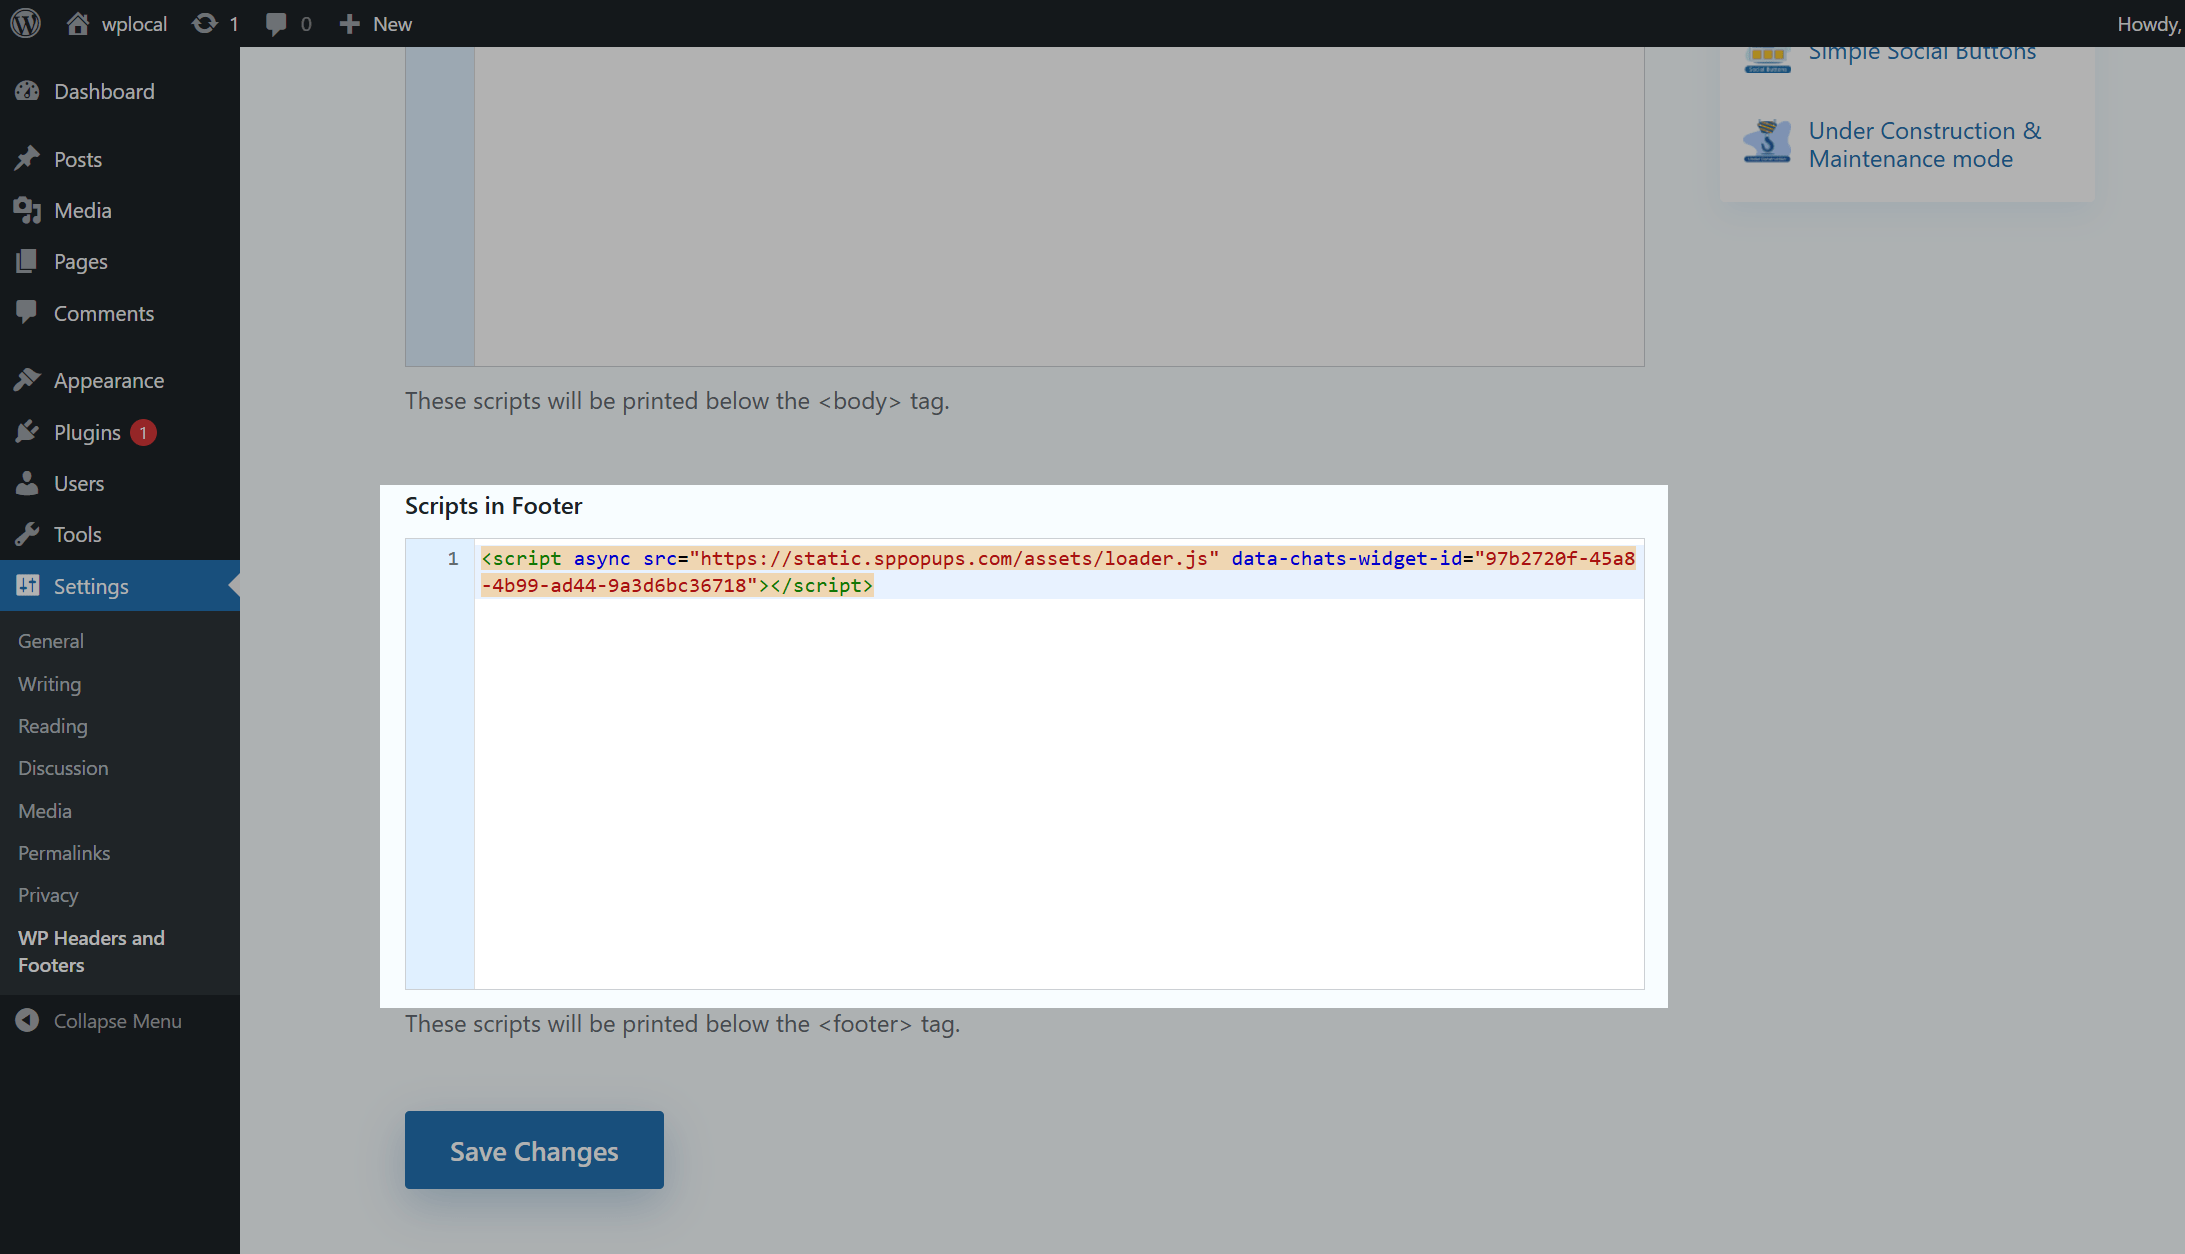
In the Scripts in Footer field, add your pixel installation code.
Joomla
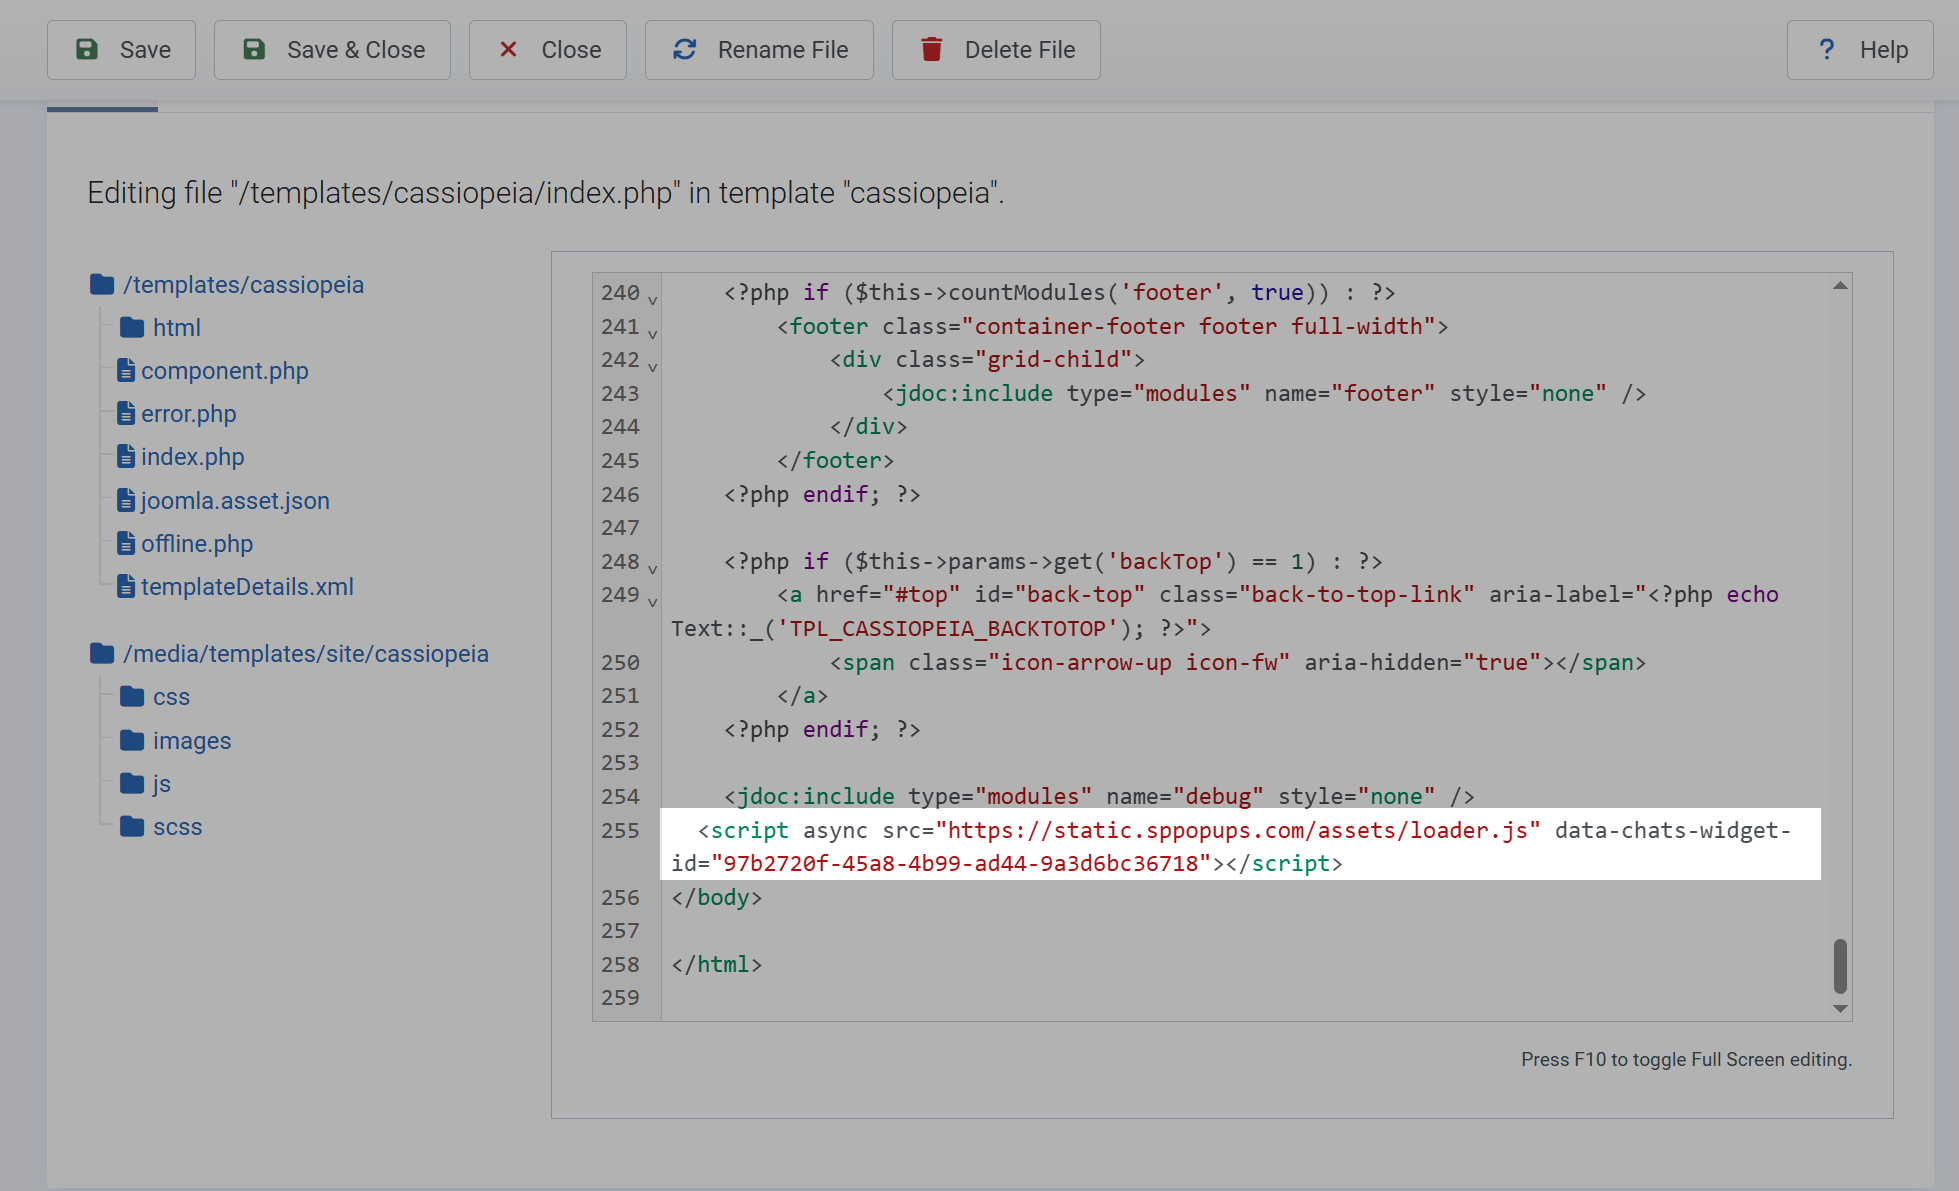
Go to your Joomla dashboard and select System > Templates > Site Templates.
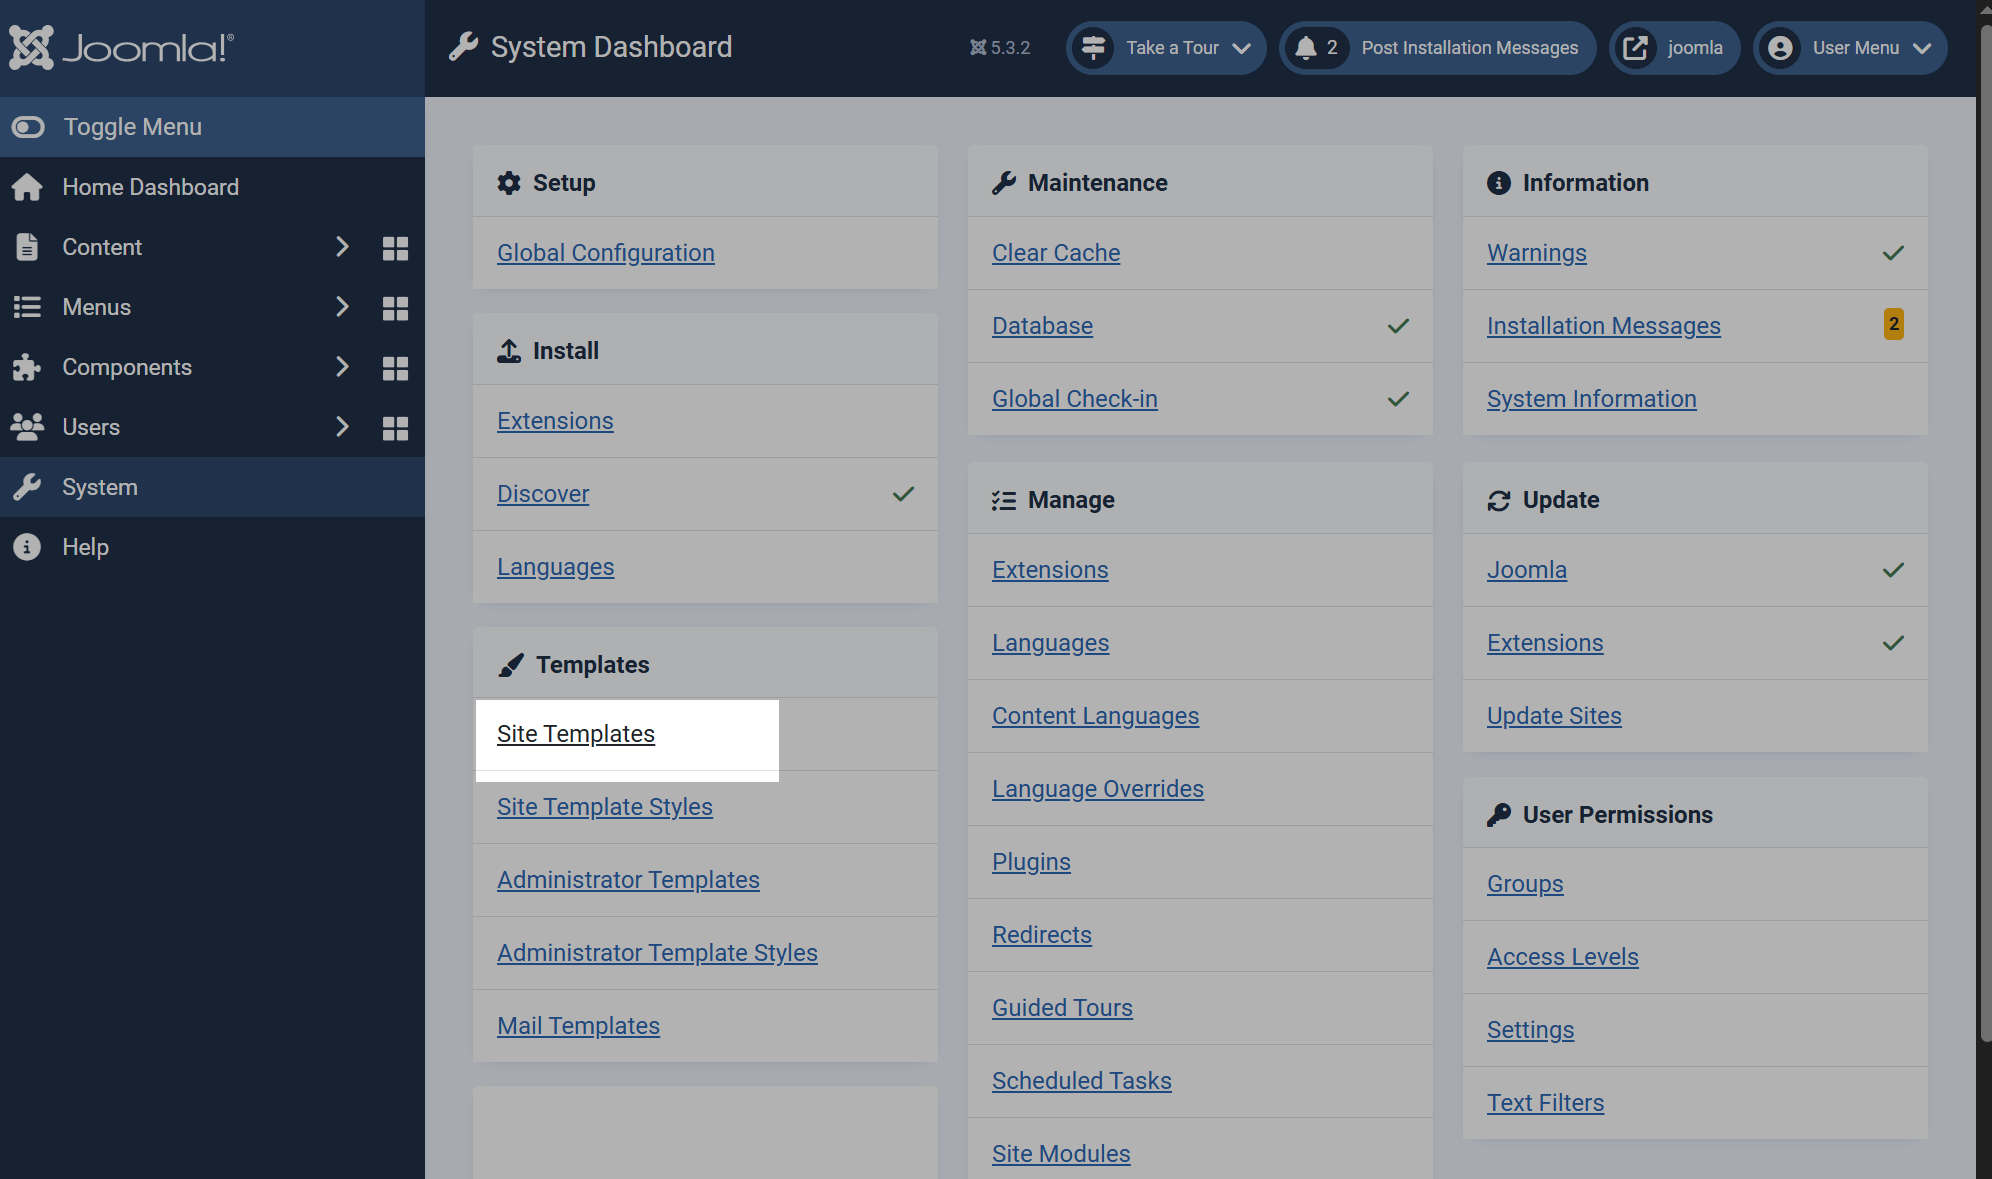
Find your website and click its name. In the left sidebar, select the index.php file. Scroll down to the bottom of the file and paste the copied pixel installation code just before the closing </body> tag.
Click Save.
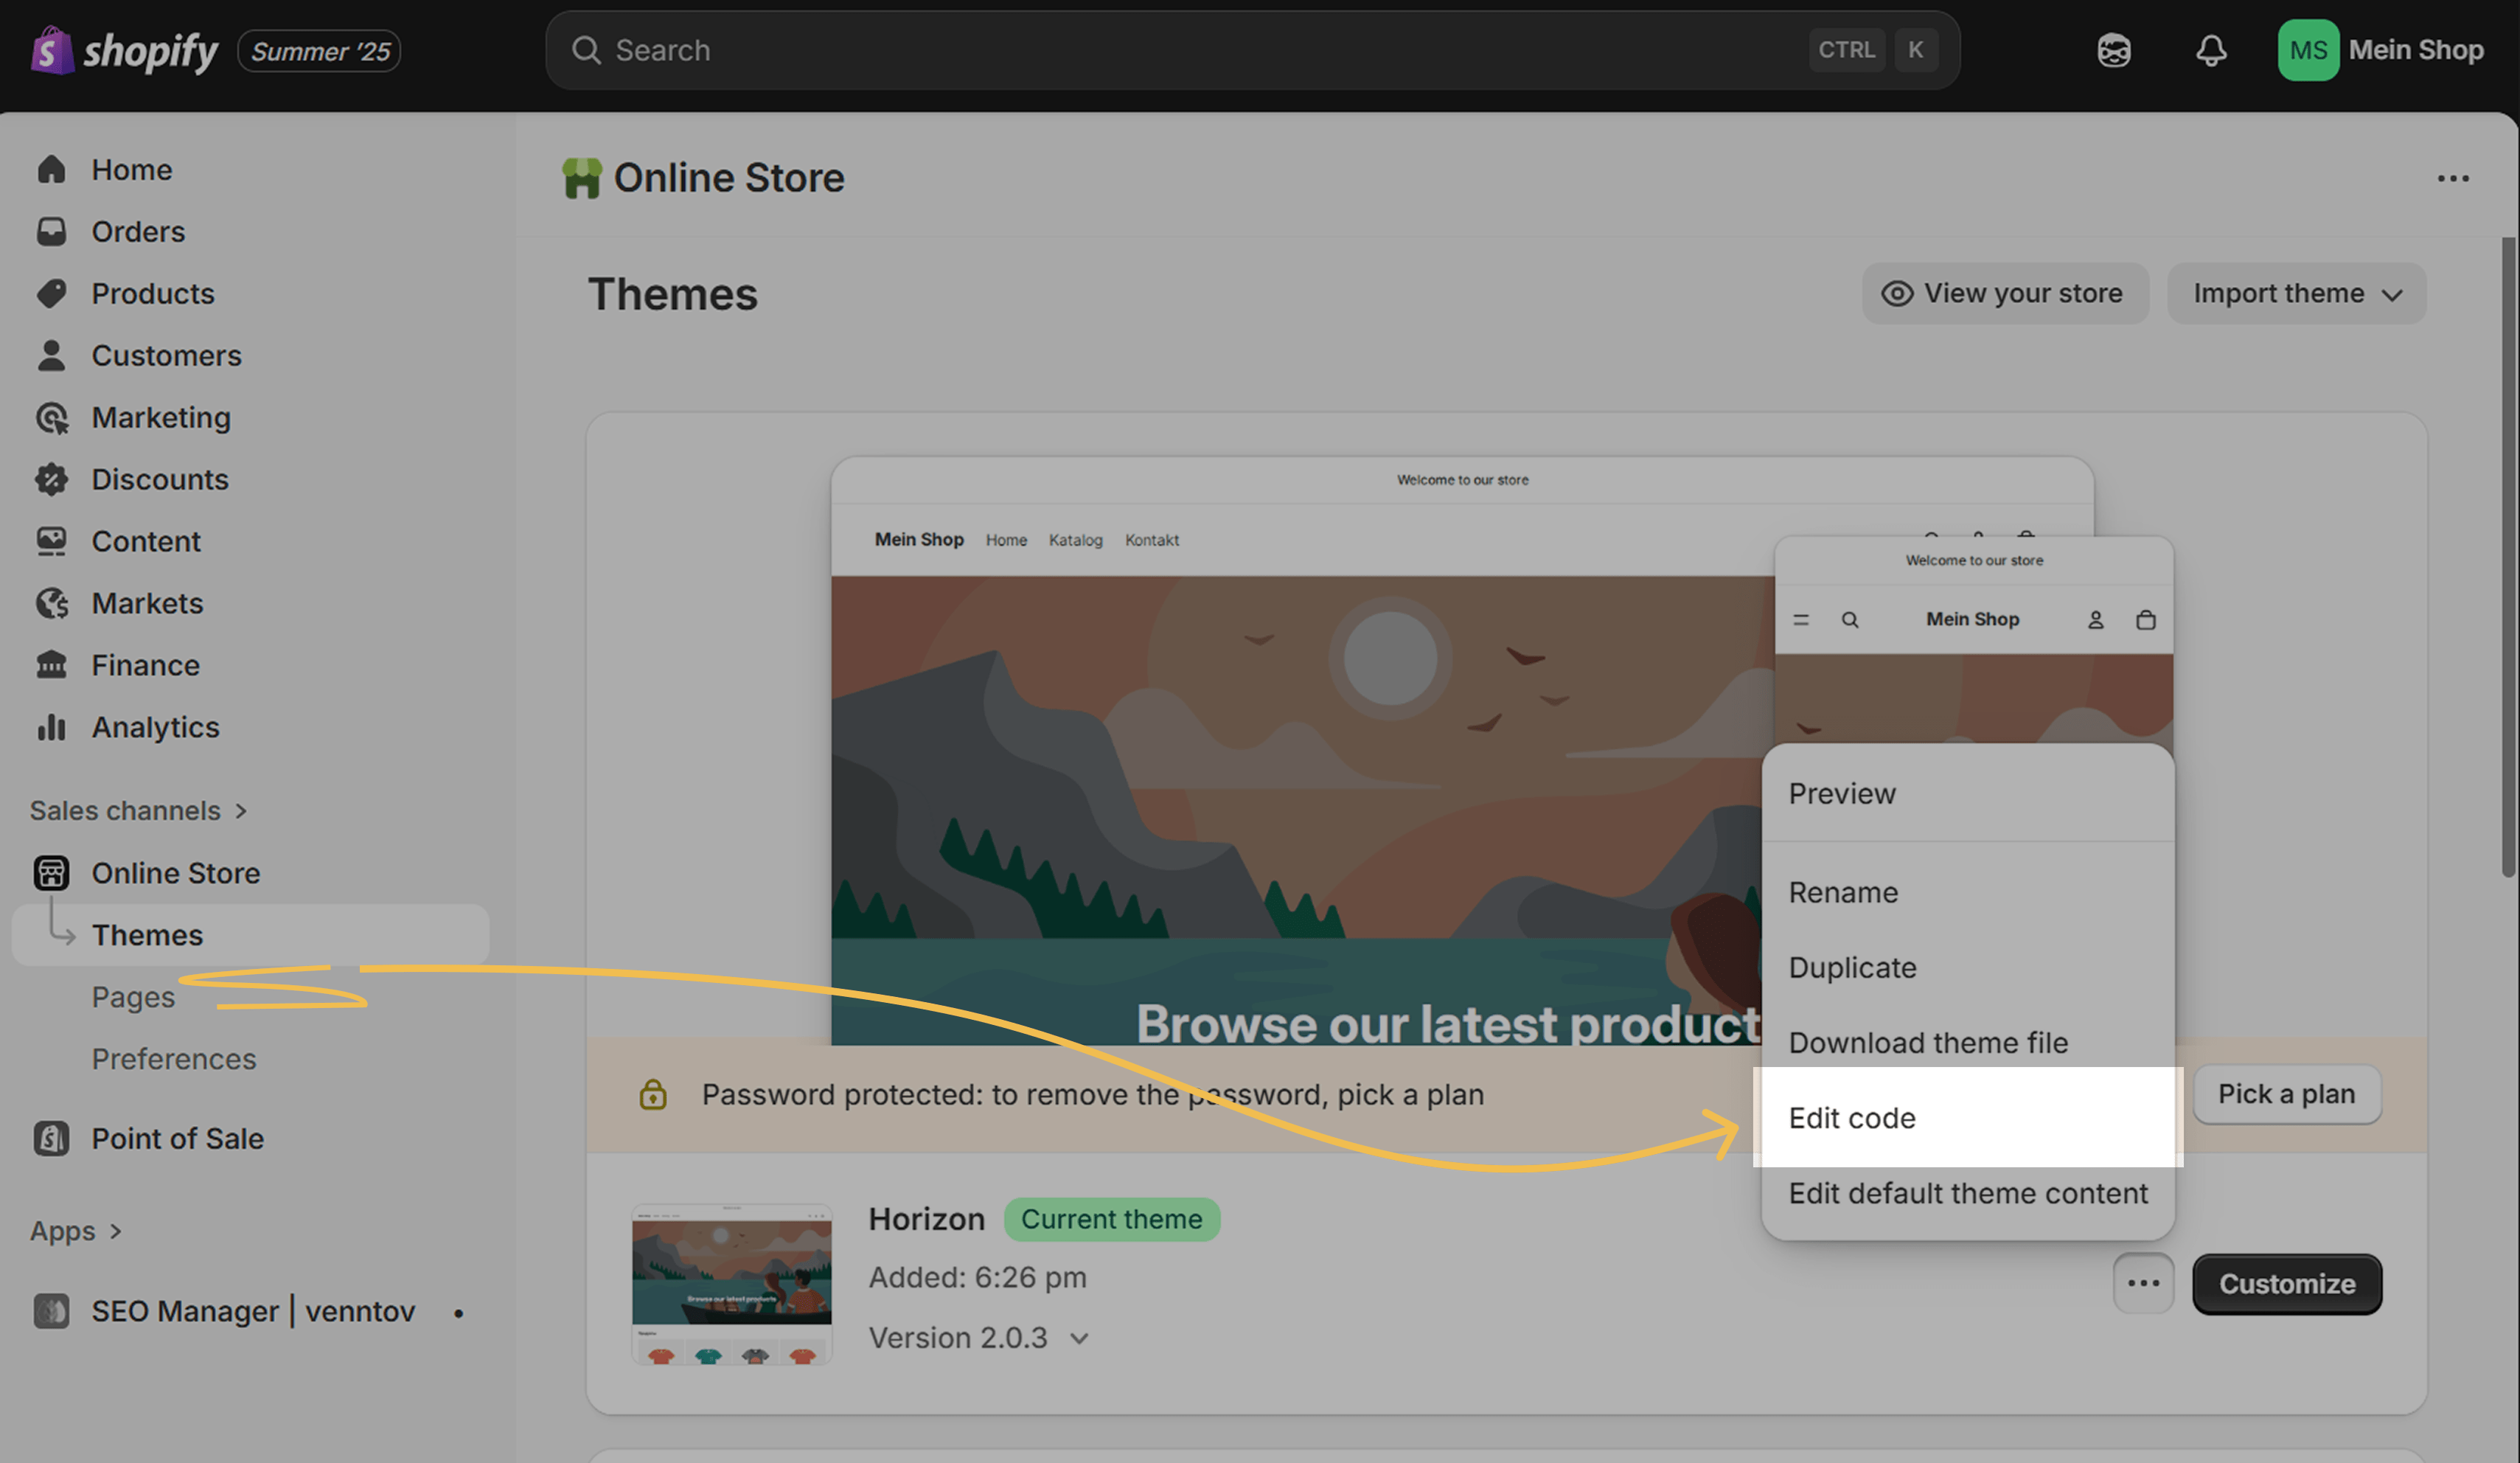
Shopify
Go to your online store in Shopify and select Online Store > Themes. Next to your theme, click the three dots and select Edit code.
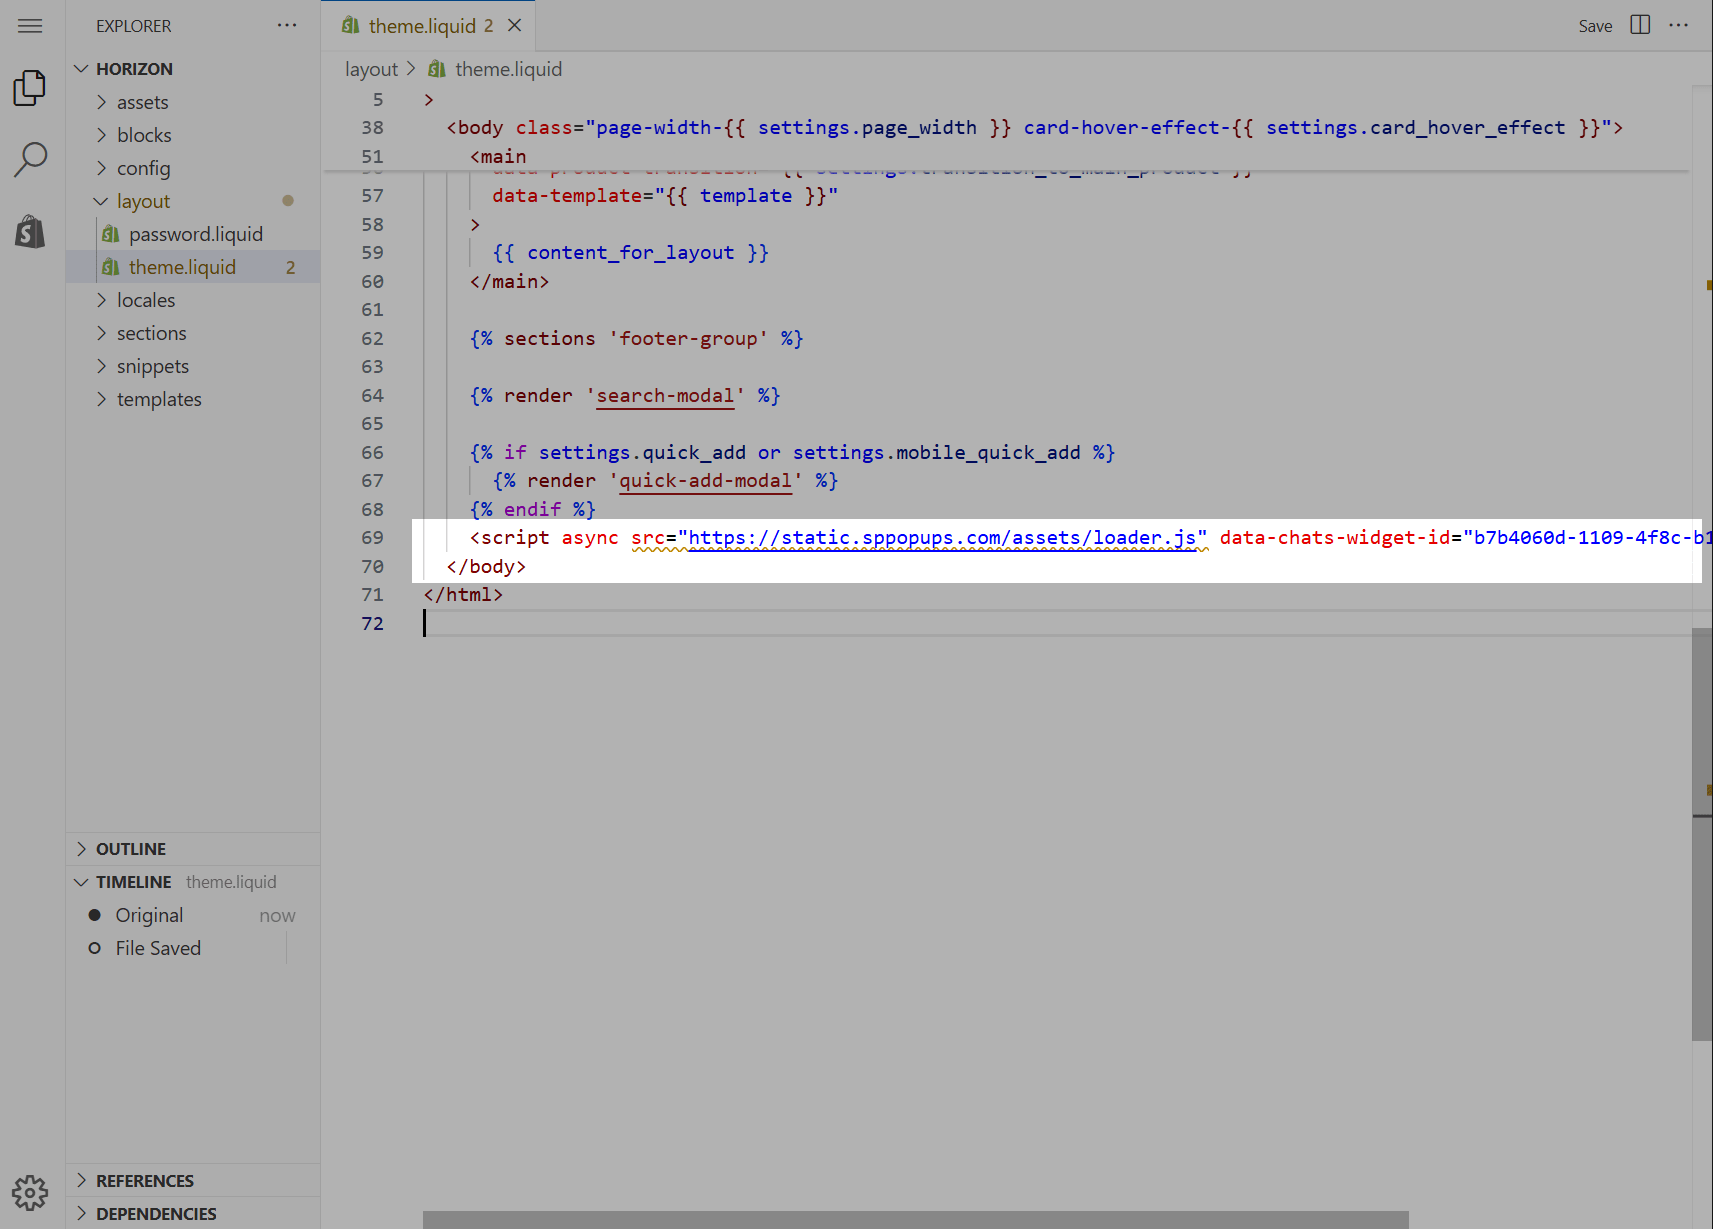
Open the layout > theme.liquid file. Add your pixel installation code right before the closing </body> tag.
To save your changes, click Save in the upper-right corner.
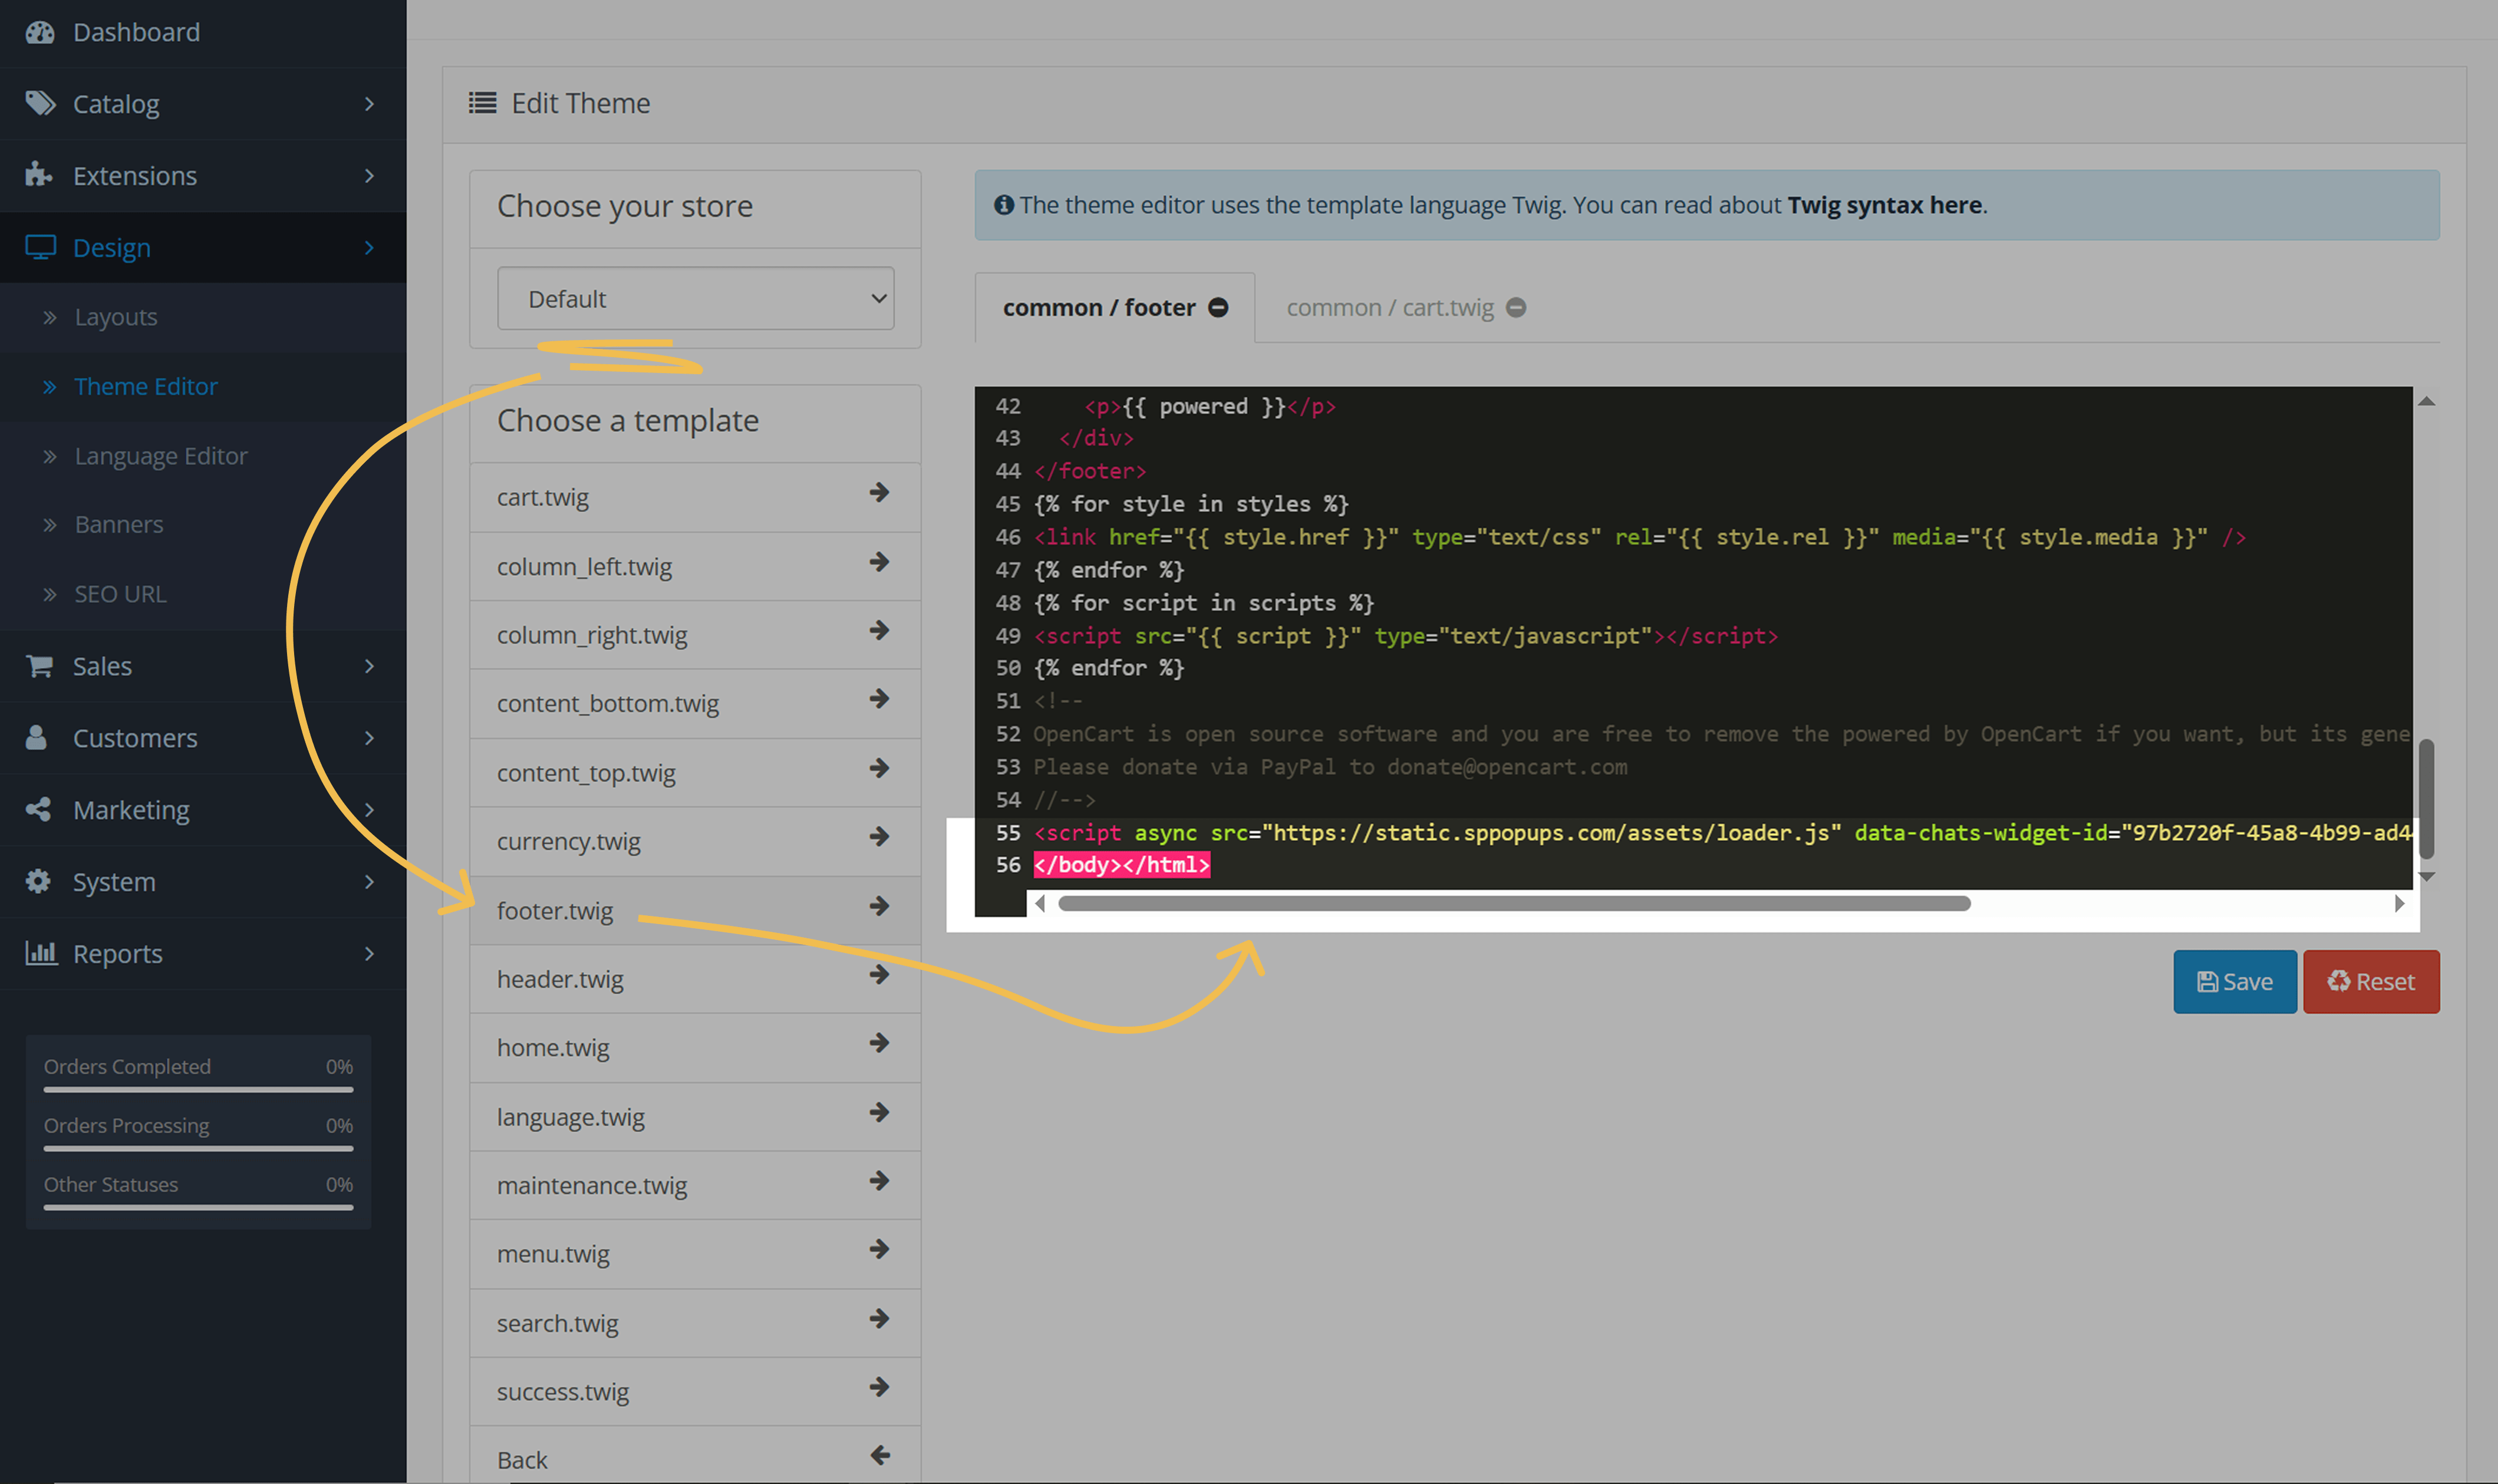
OpenCart
Go to your OpenCart dashboard. In the sidebar, click Design > Theme editor.
In Choose your store, select your store from the dropdown list. Then, under Choose your template, open Common > footer.twig.
Scroll down to the bottom of the file and paste the copied pixel installation code just before the closing </body> tag.
Click Save.
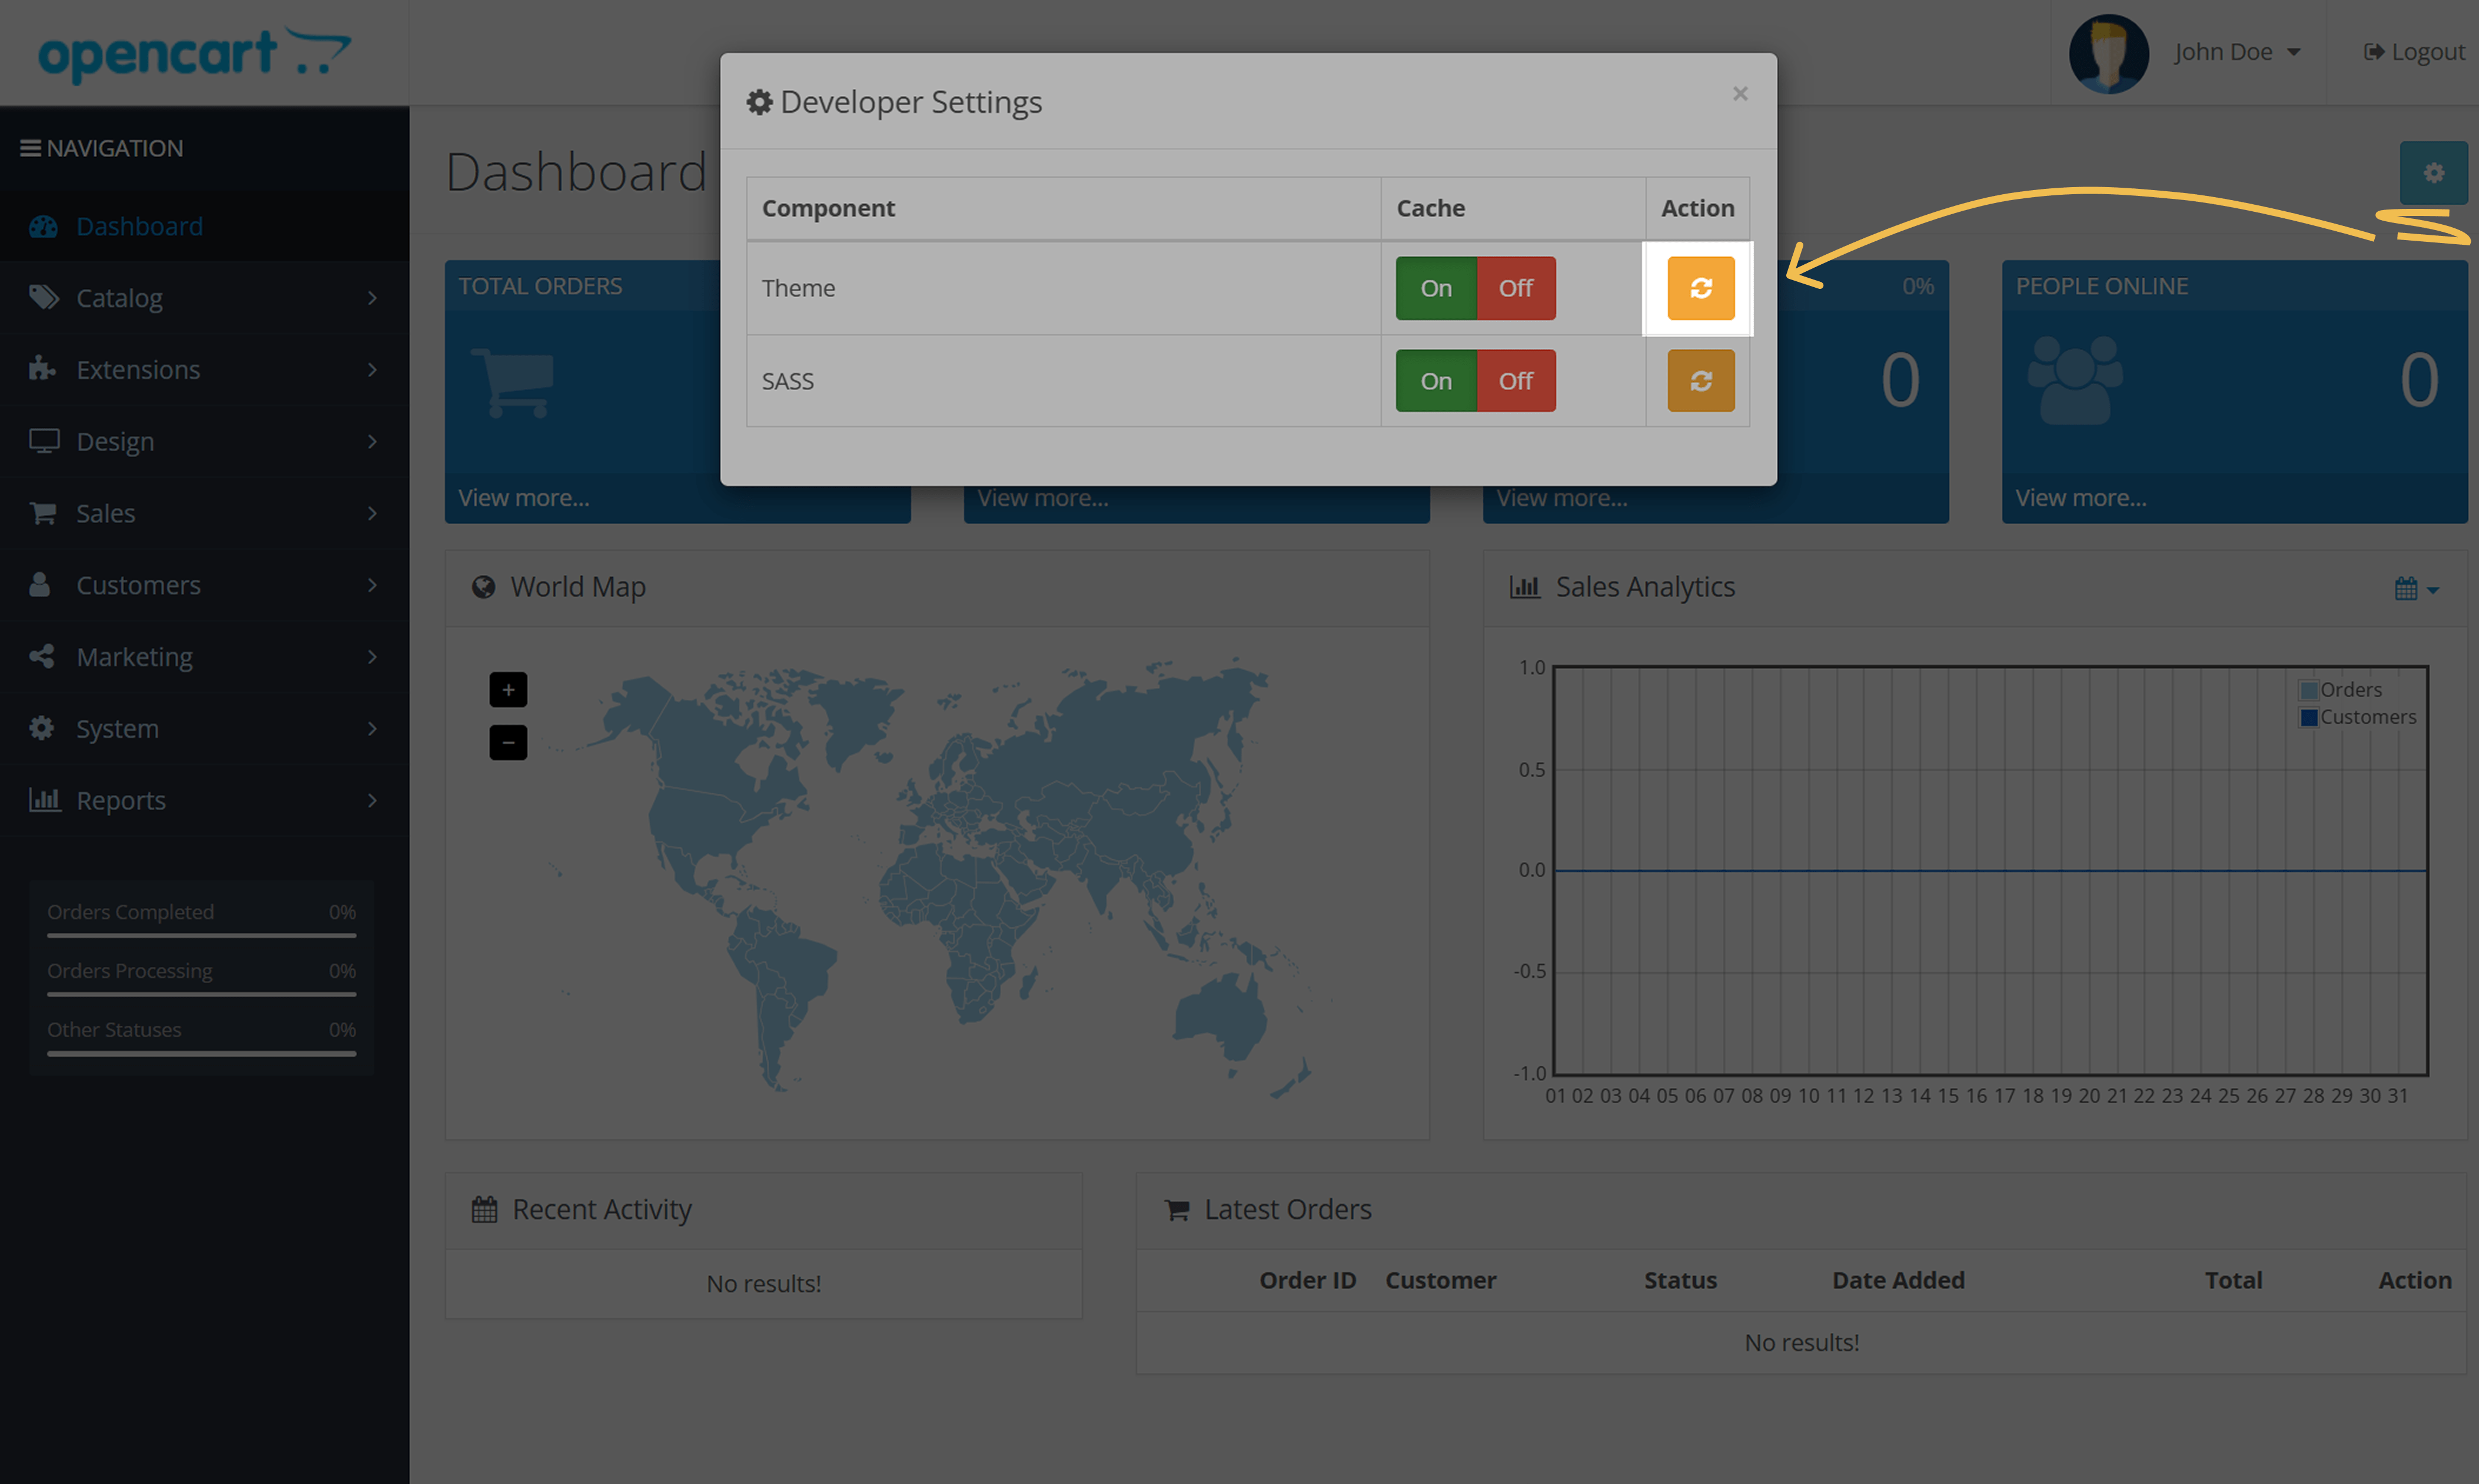
To show the pop-up on your website, clear your theme cache after adding the code.
Go to Dashboard and click Developer Settings.
In the modal window, under Theme cache in Action, click the refresh icon.
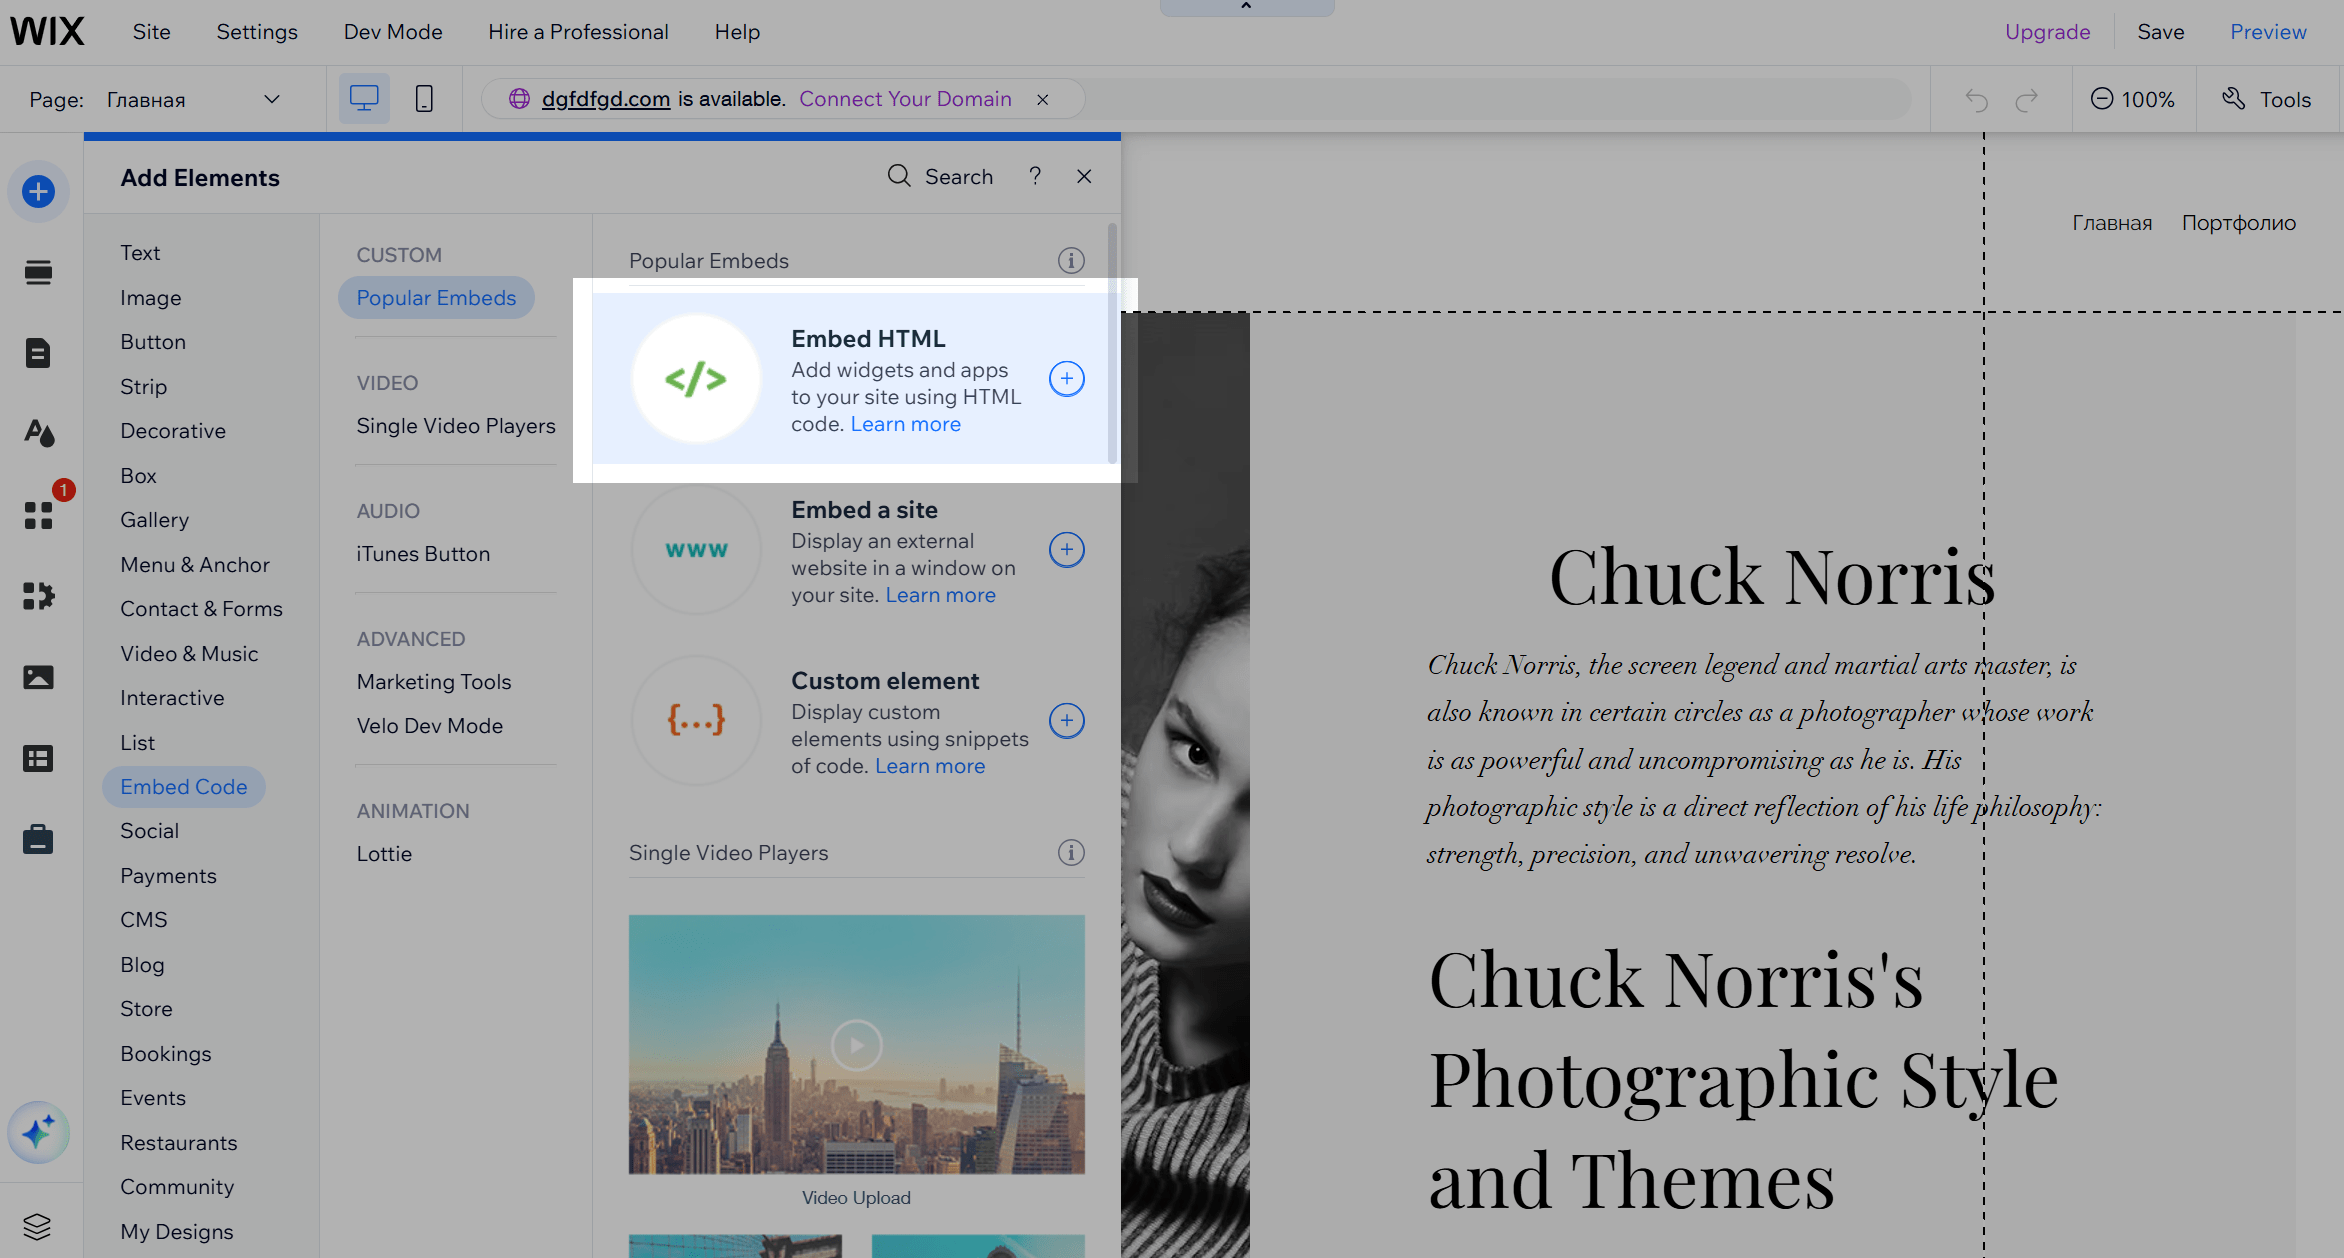
Wix
Go to your Wix dashboard and click Edit Site.
Click + Add elements, then select Embed code > Embed HTML.
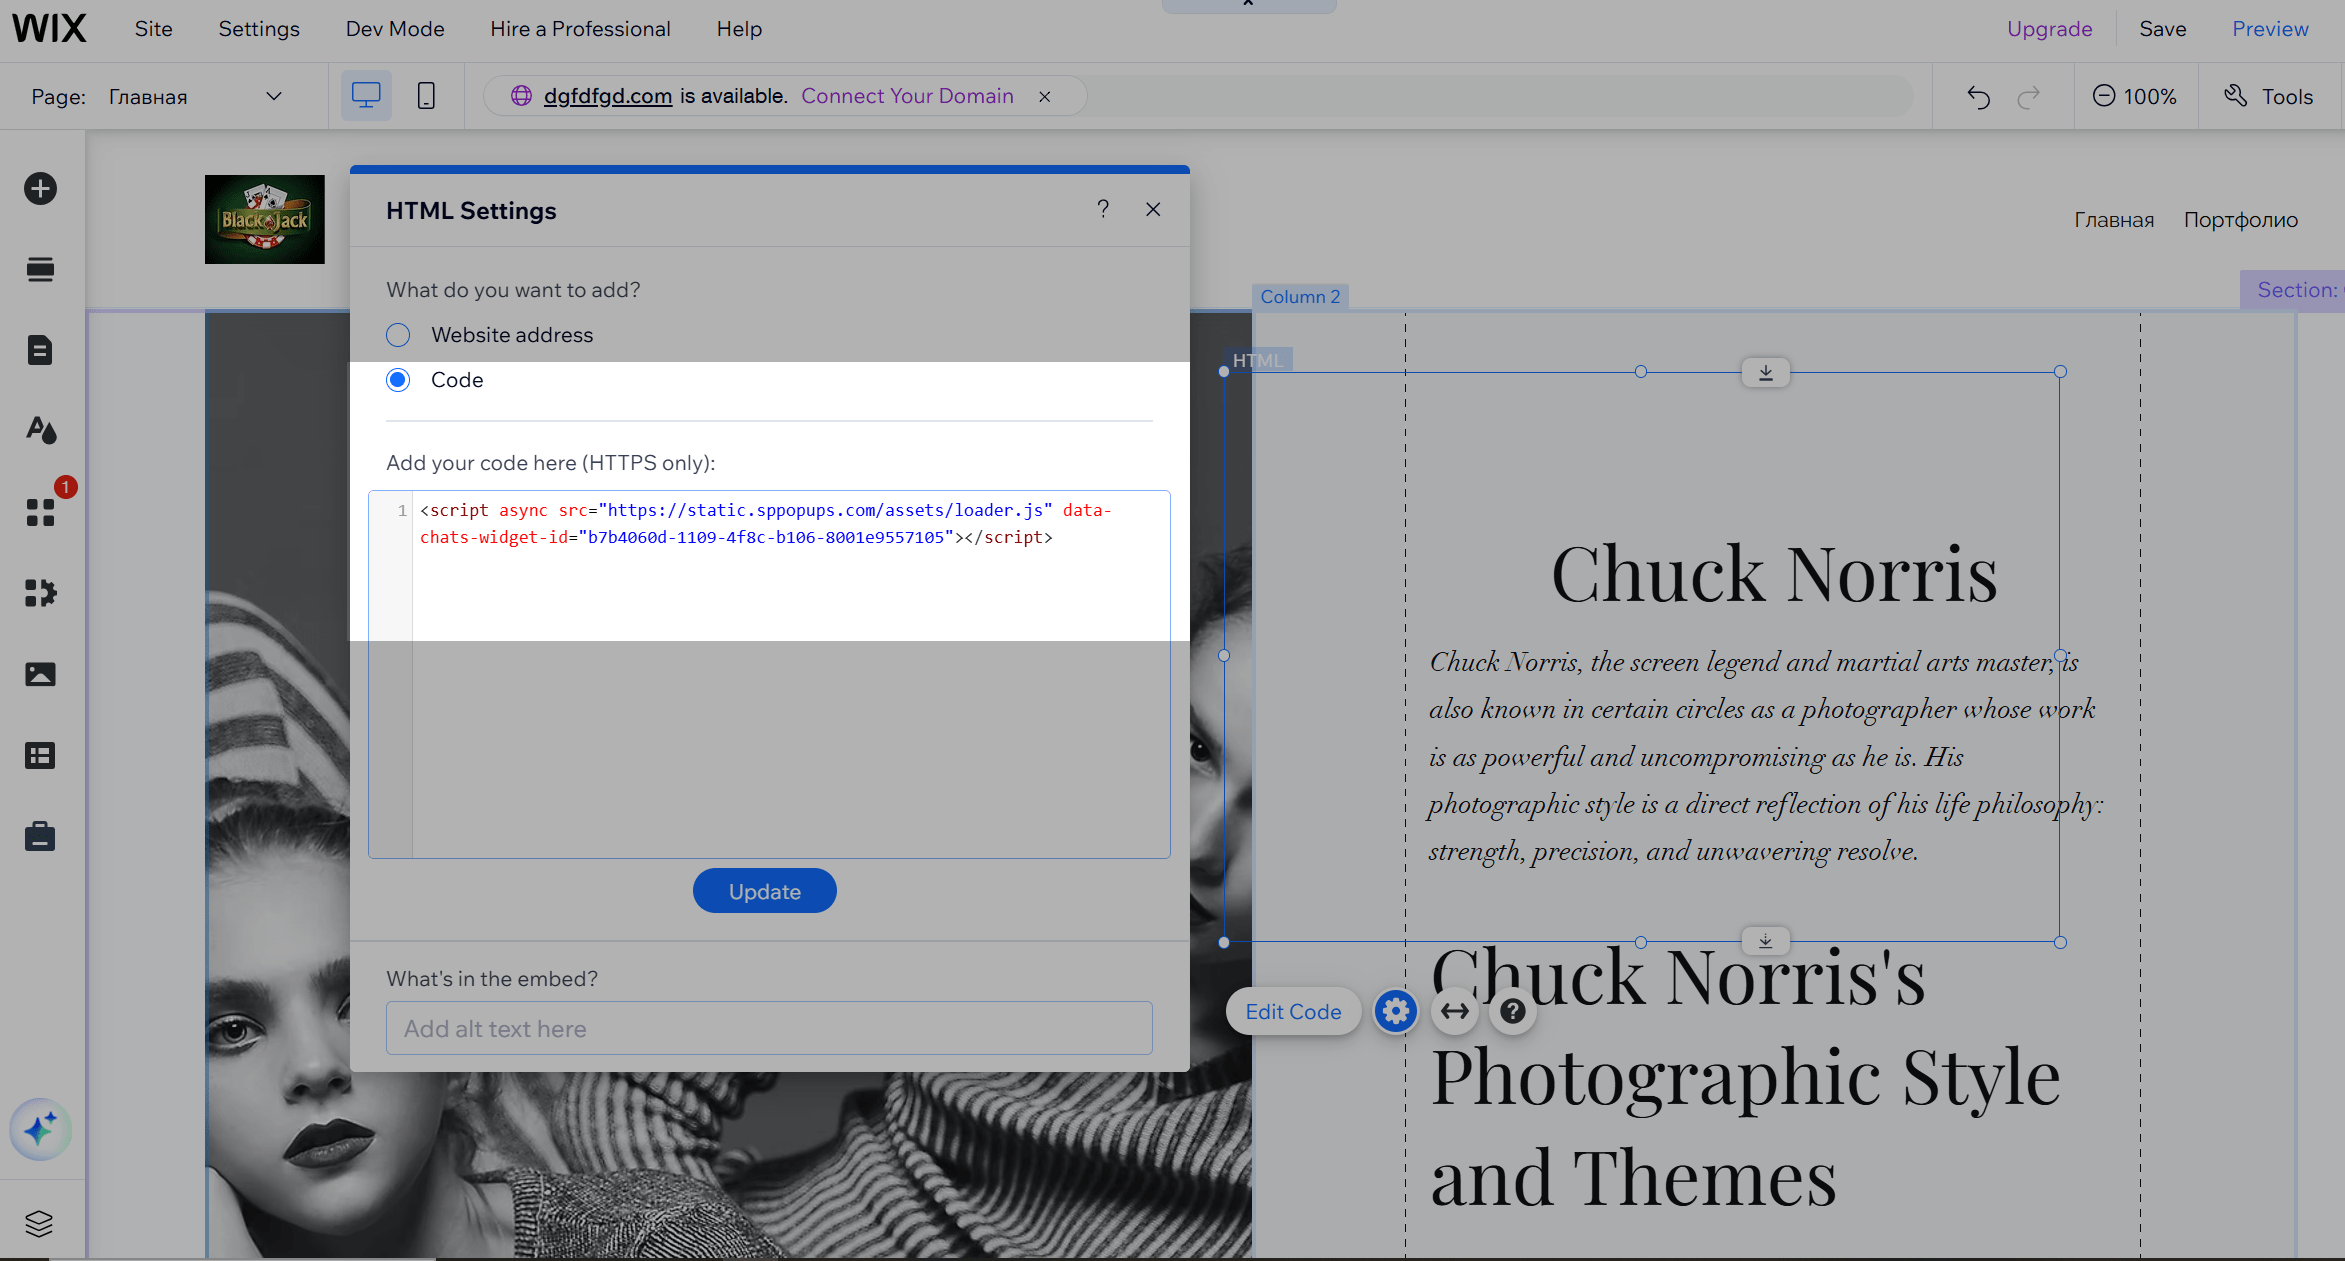
Select the Code as the embed type, paste your pixel installation code, and click Update.
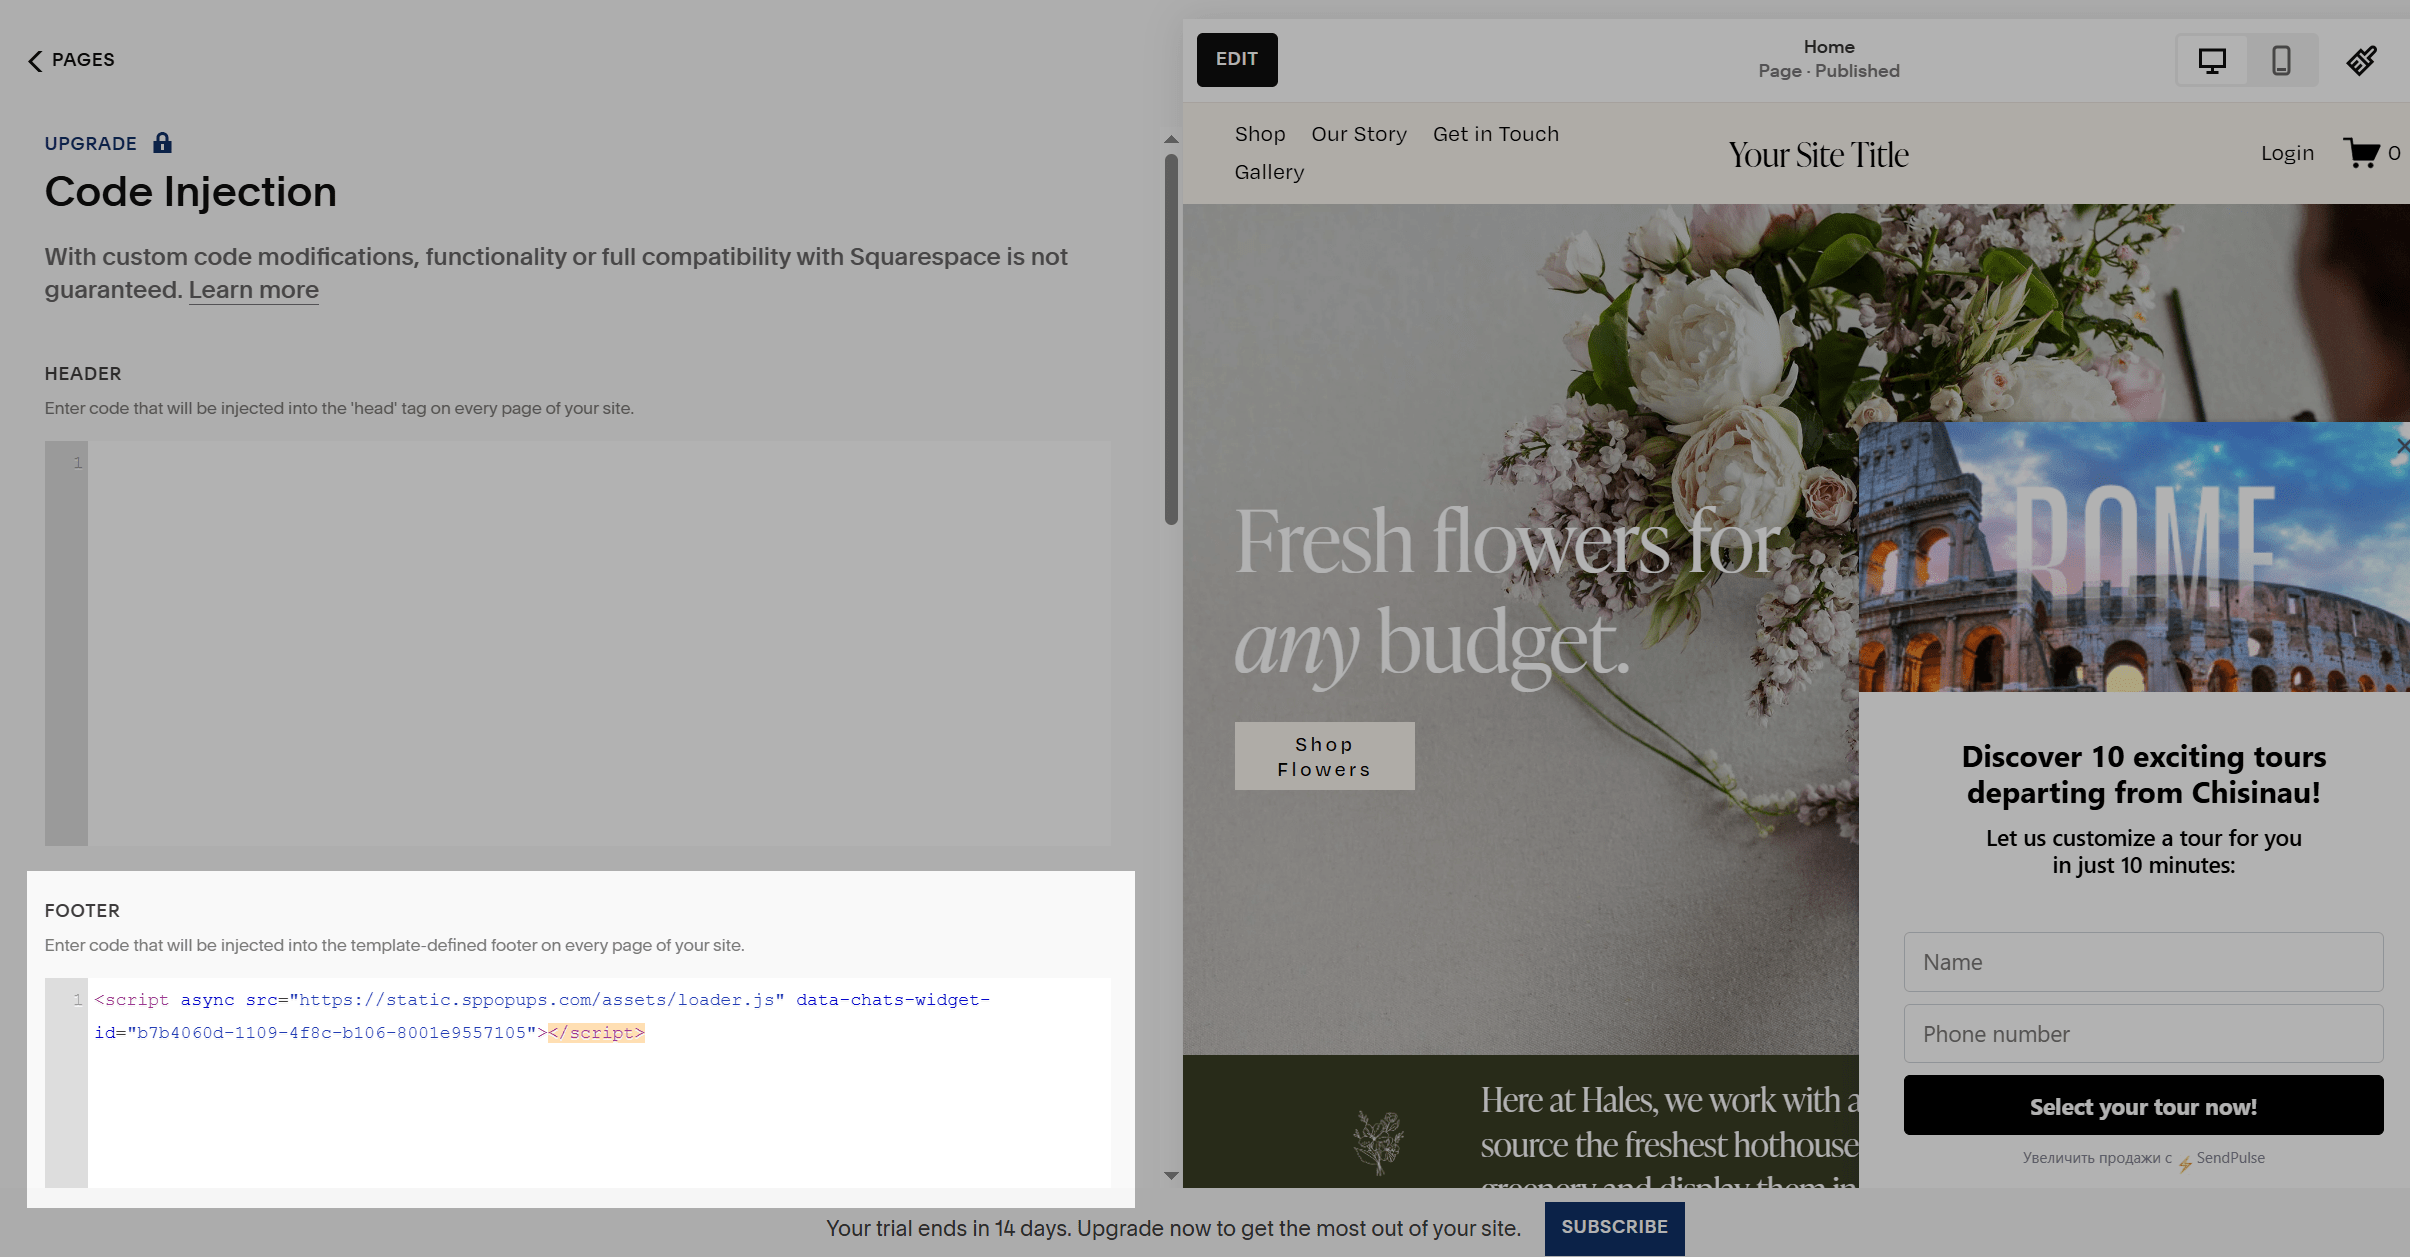
Squarespace
Go to your Squarespace dashboard and click Settings > Custom code > Code injection
In Footer, add your pixel installation code.
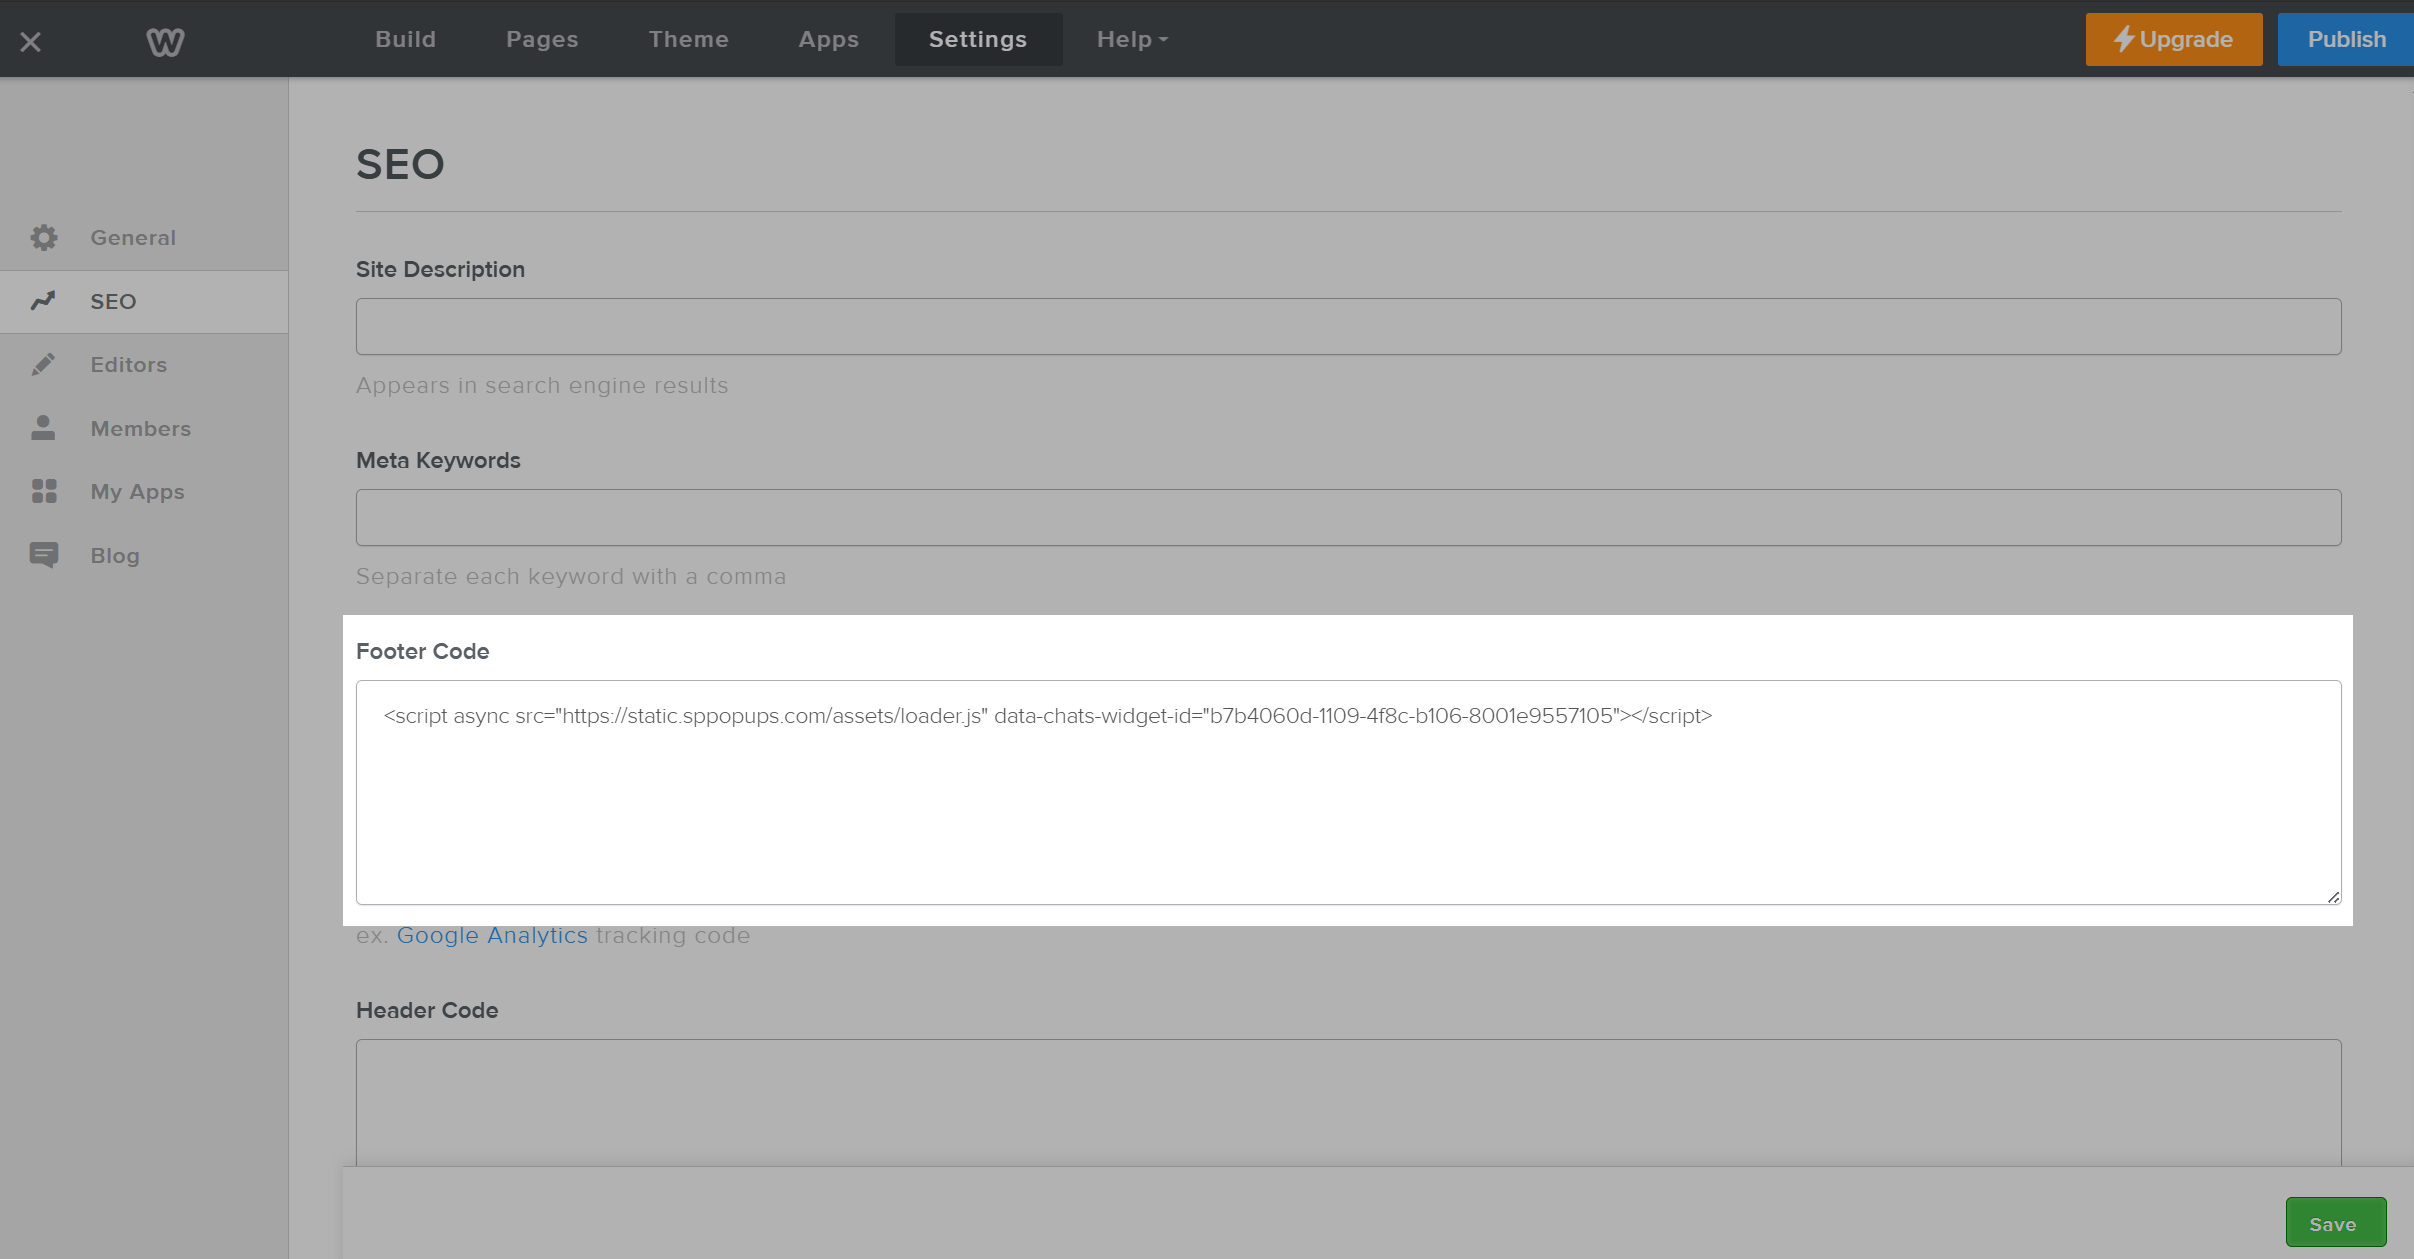
Weebly
Log in to your Weebly dashboard and go to Settings.
In SEO, find the Footer Code field and paste your pixel installation code there.
Click Save.
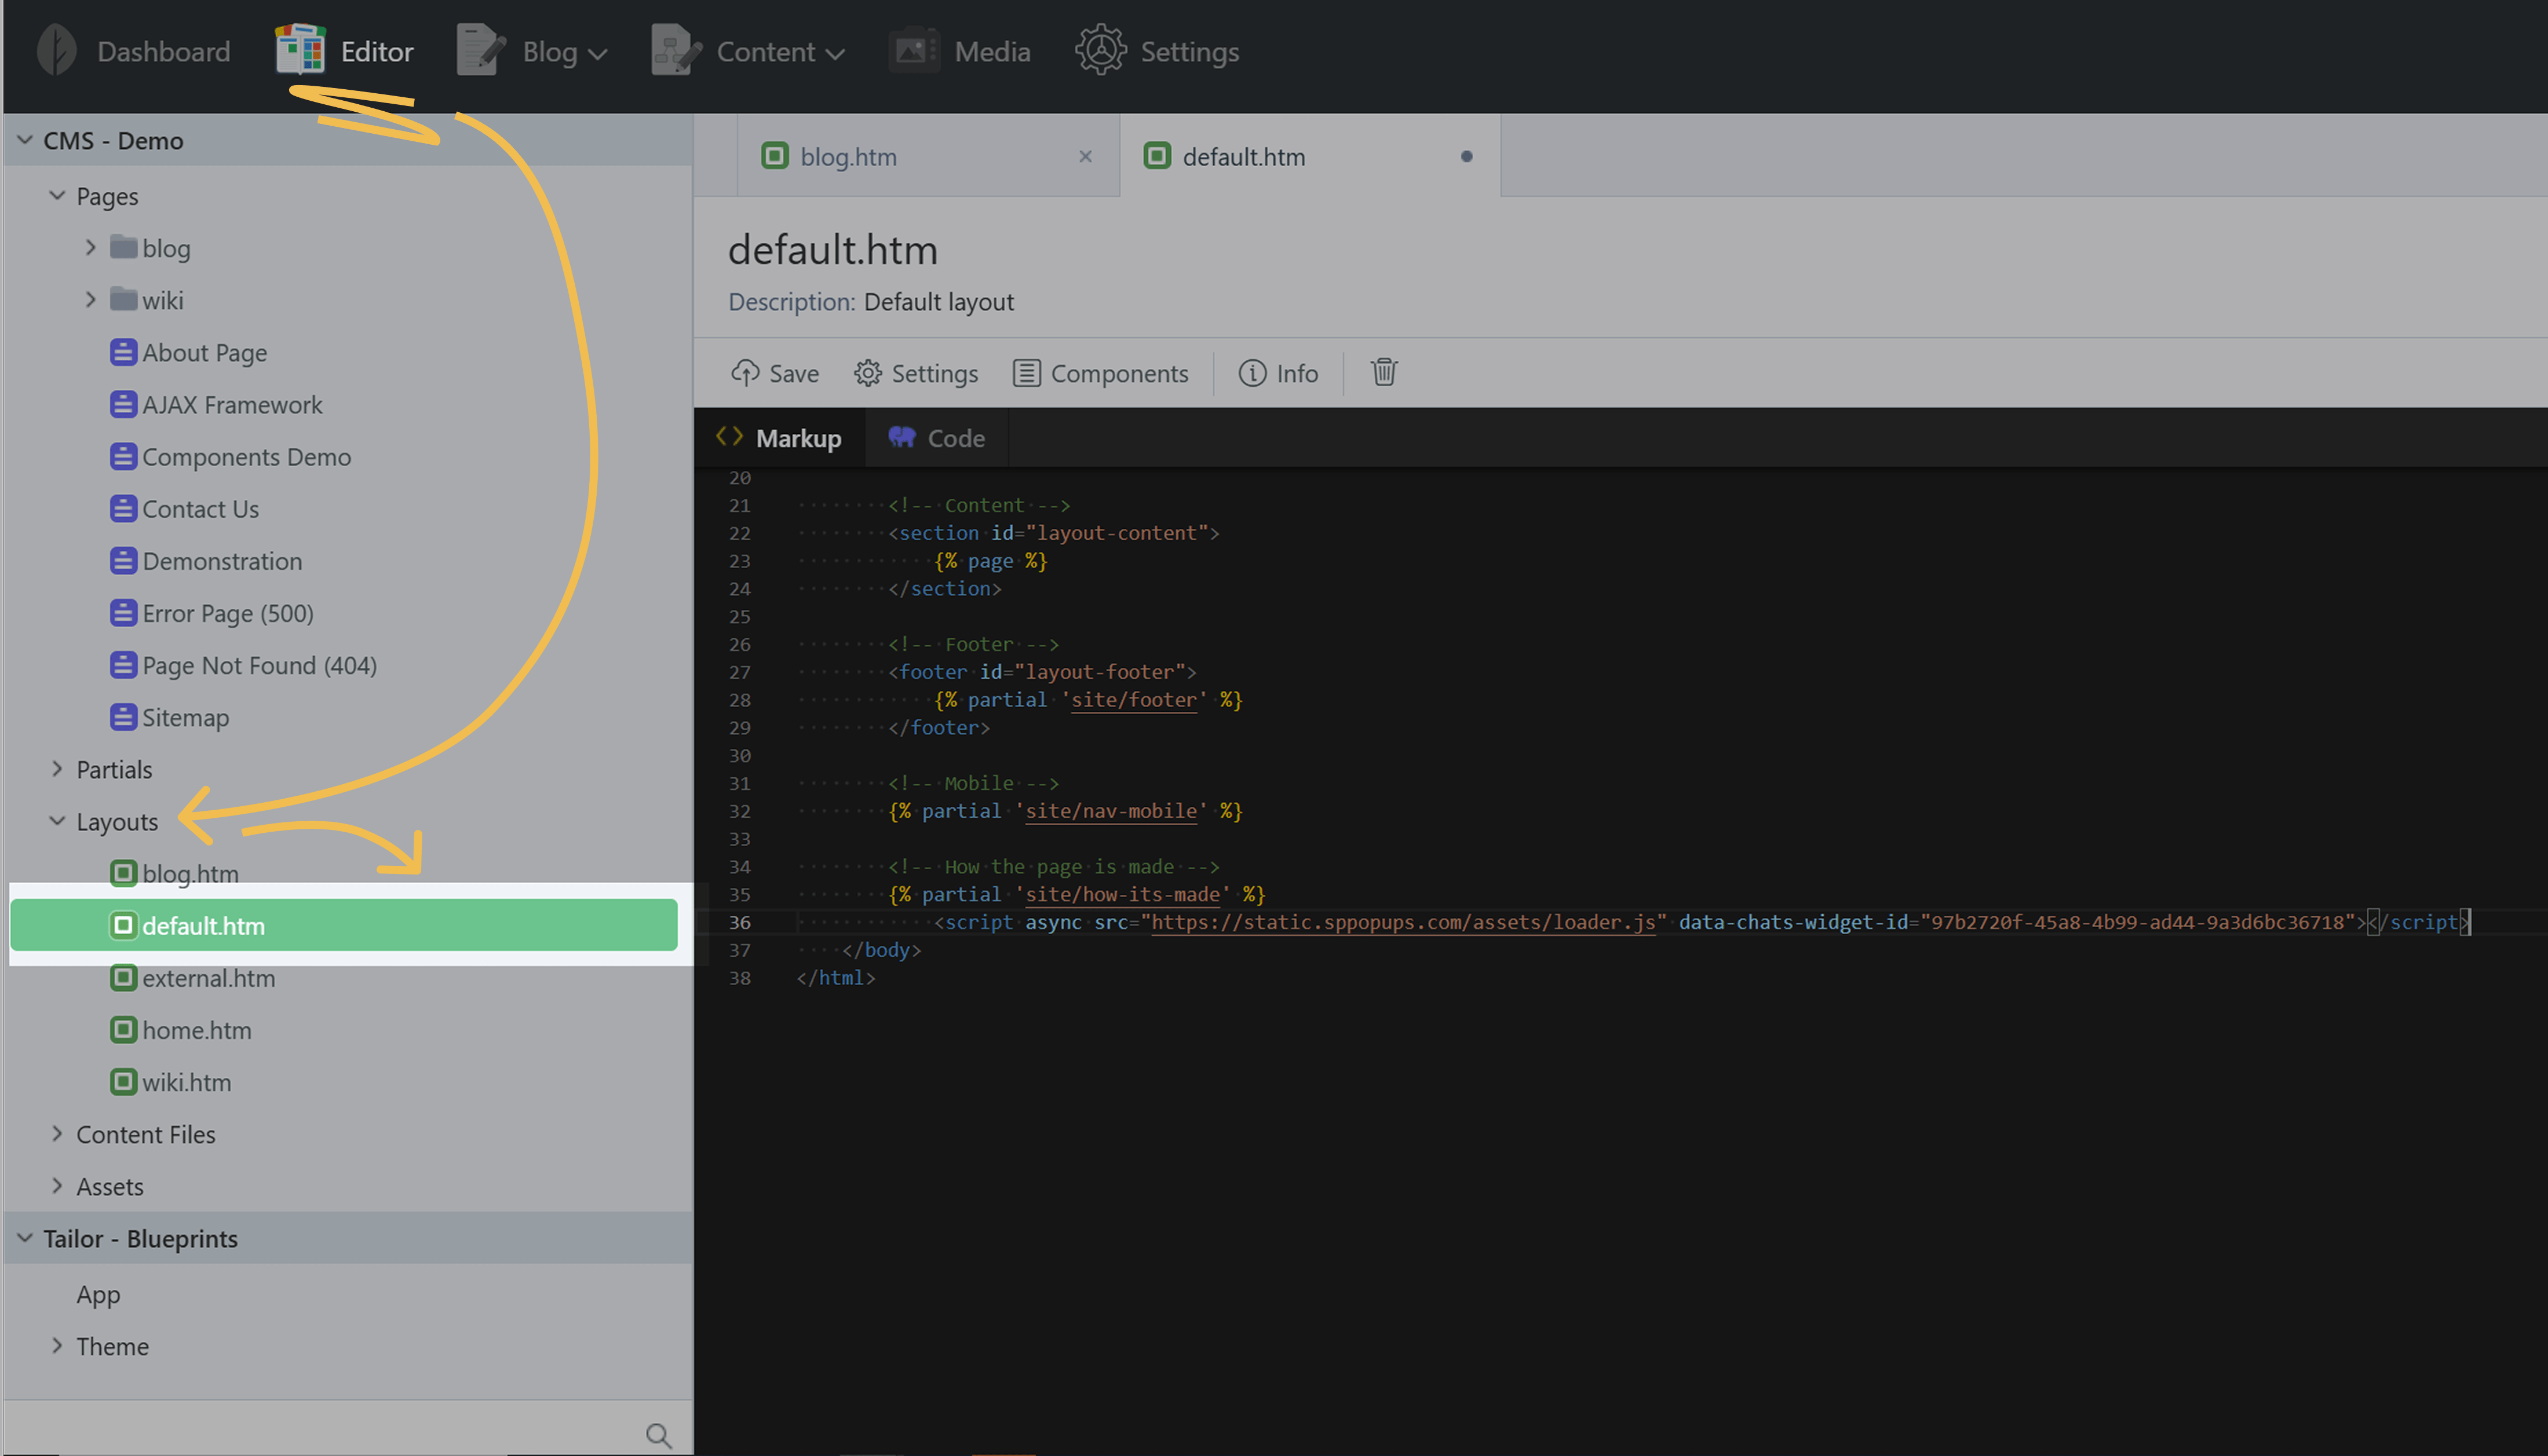
OctoberCMS
Go to your OctoberCMS dashboard > Editor > CMS > Layouts.
Choose the layout used on your pages, for example, default.htm.
In the layout, add your pixel installation code just before the closing </body> tag, right after the {% page %} tag.
Click Save in the upper left corner.
Ecwid
With Ecwid, you can show your products on any website created from scratch or using a CMS. We recommend adding the pixel installation code to your website before the closing </body> tag or through Google Tag Manager.
You can embed a pop-up only with paid Ecwid plans.
If you’re using Ecwid’s Instant Site, you can paste the code in the <head> element in the meta tag field since you cannot edit the </body> tag to add your JavaScript code.
We recommend using this method only as a last resort because scripts placed in the <head> element may not operate as expected. For example, this can lead to incorrect statistics and other inaccuracies.
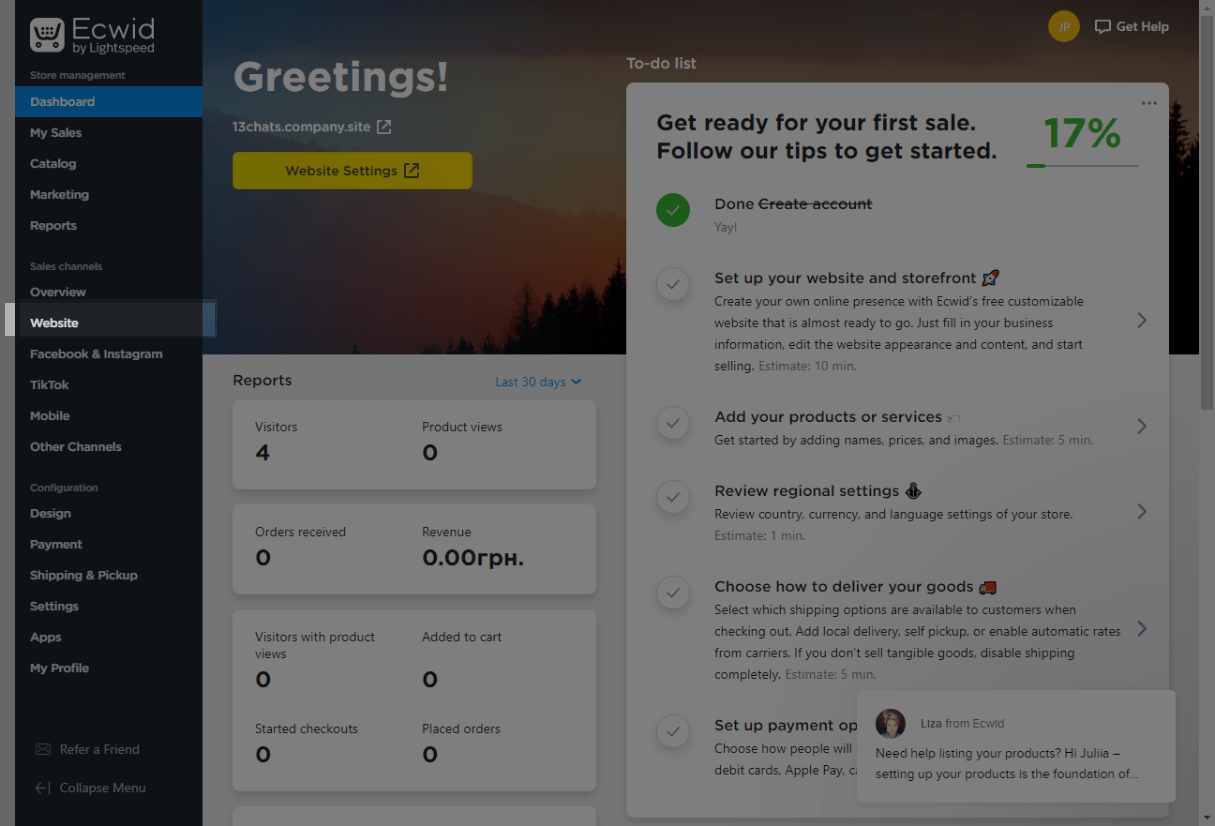
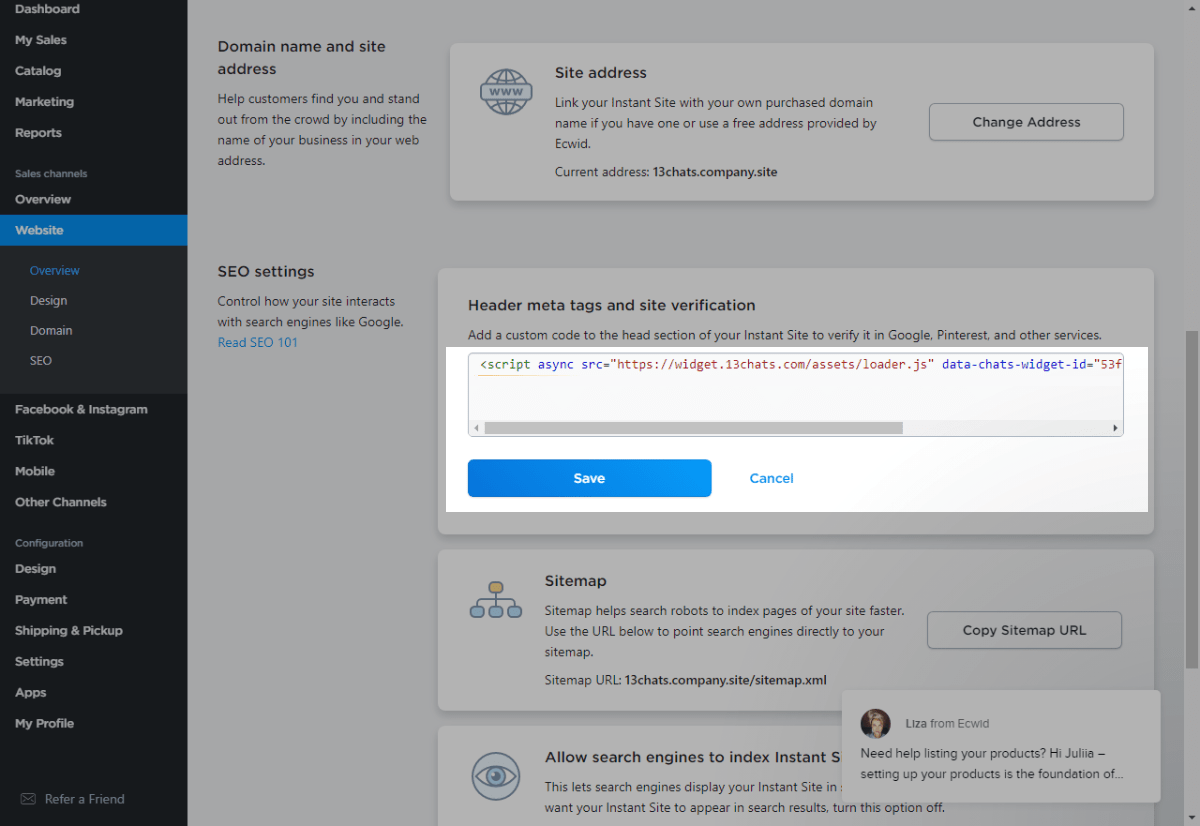
If you are aware of all the risks and ready to use this method, log into your Ecwid account, and select the Site tab on the dashboard.
Scroll down to the SEO Settings section, find the Meta tags for site verification block, and click on the Add code button.

Paste your pixel installation code into the opened field, and click Save.
Paste your pixel installation code into the opened field, and click Save.
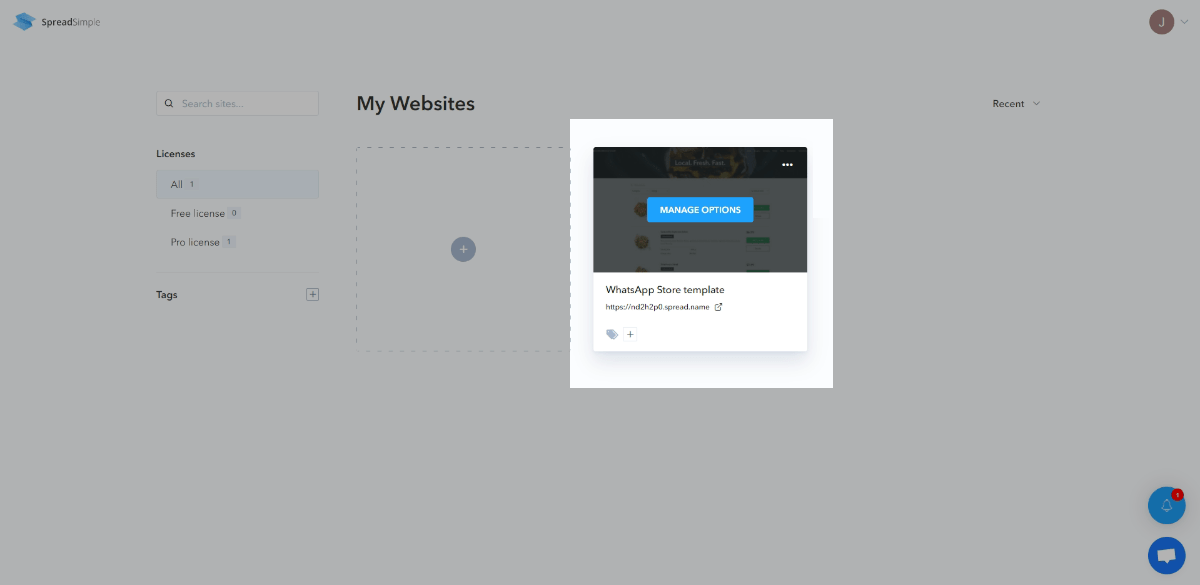
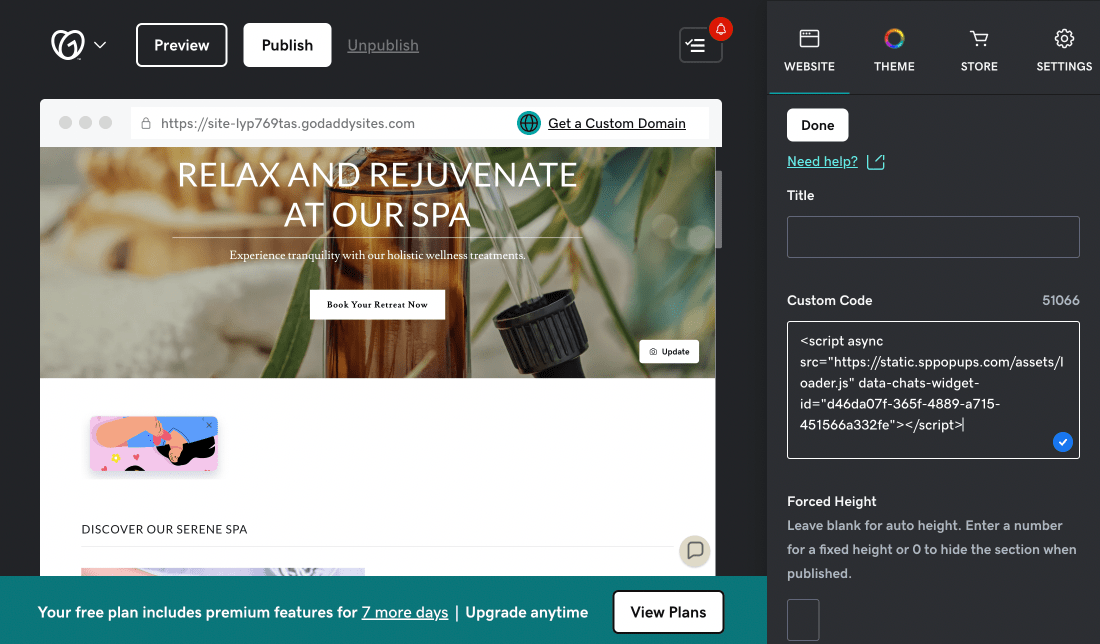
SpreadSimple
You can add SendPulse’s pixel installation code to your site only with the paid SpreadSimple Pro plan.
Log in to your SpreadSimple account, and select the Manage options option in your website settings.
In the left sidebar, select the Settings tab.
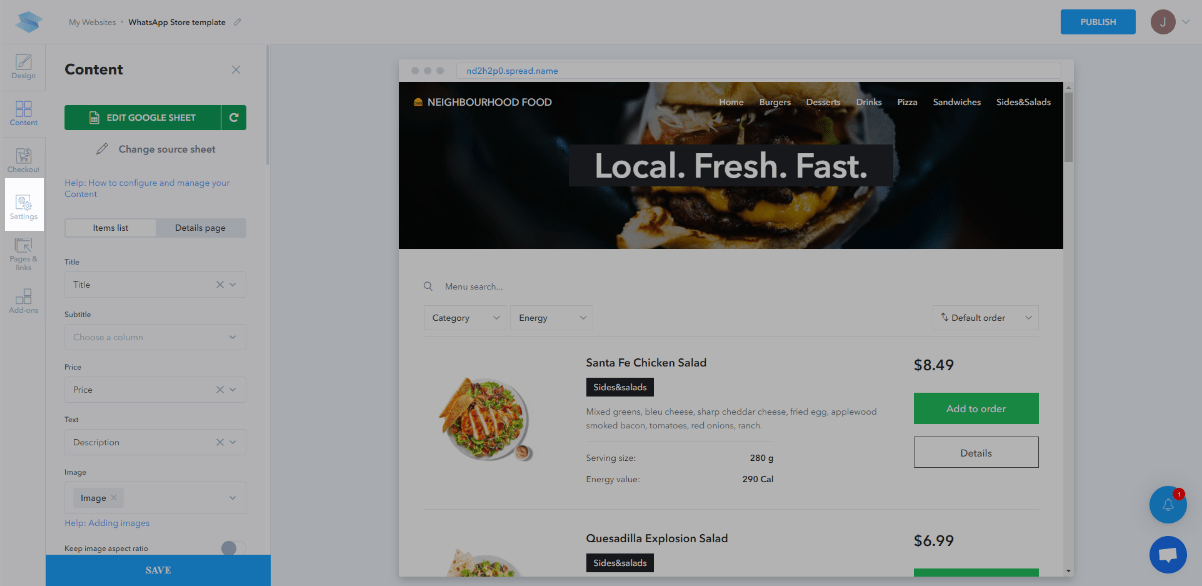
Click Inject custom code.
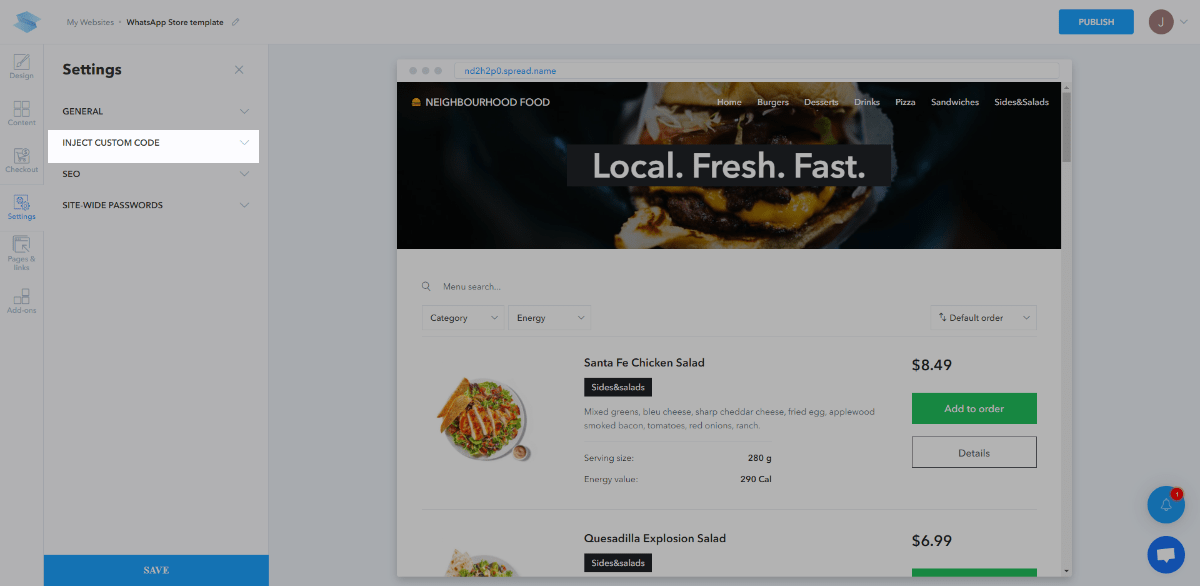
Paste your code in the </body> - end field, and click Save.

Click Publish to publish the changes.
Webflow
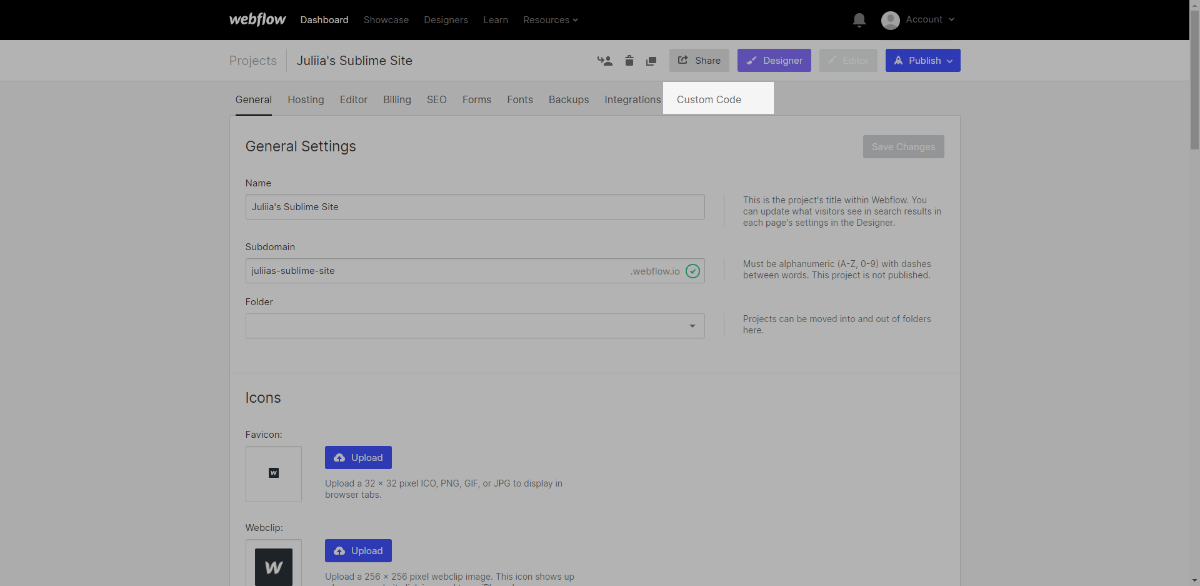
You can add SendPulse’s pixel installation code to your site only with paid Webflow plans.
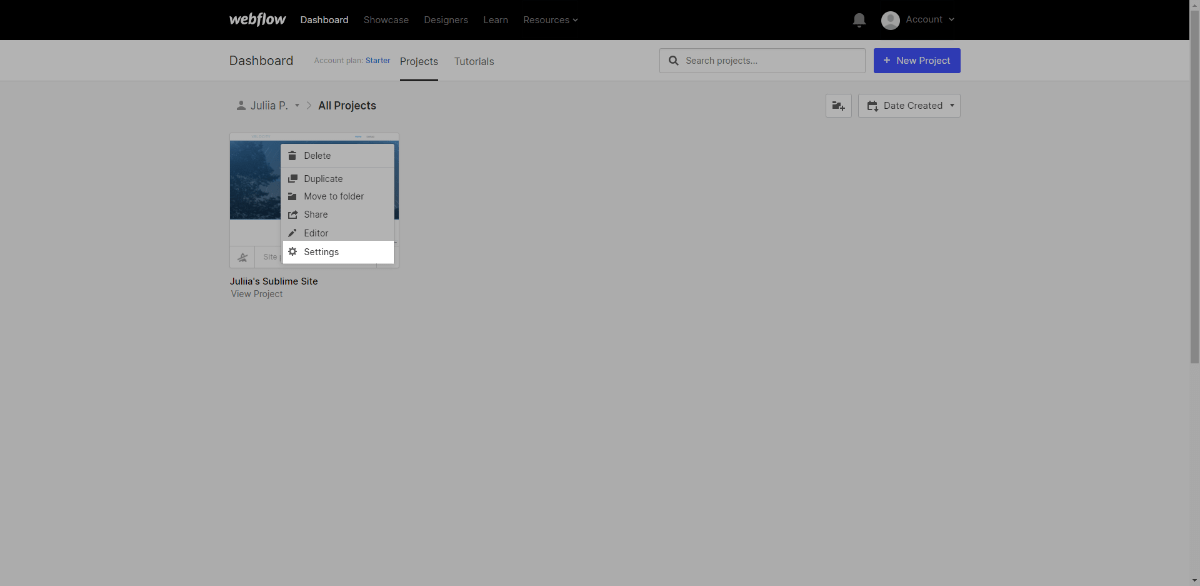
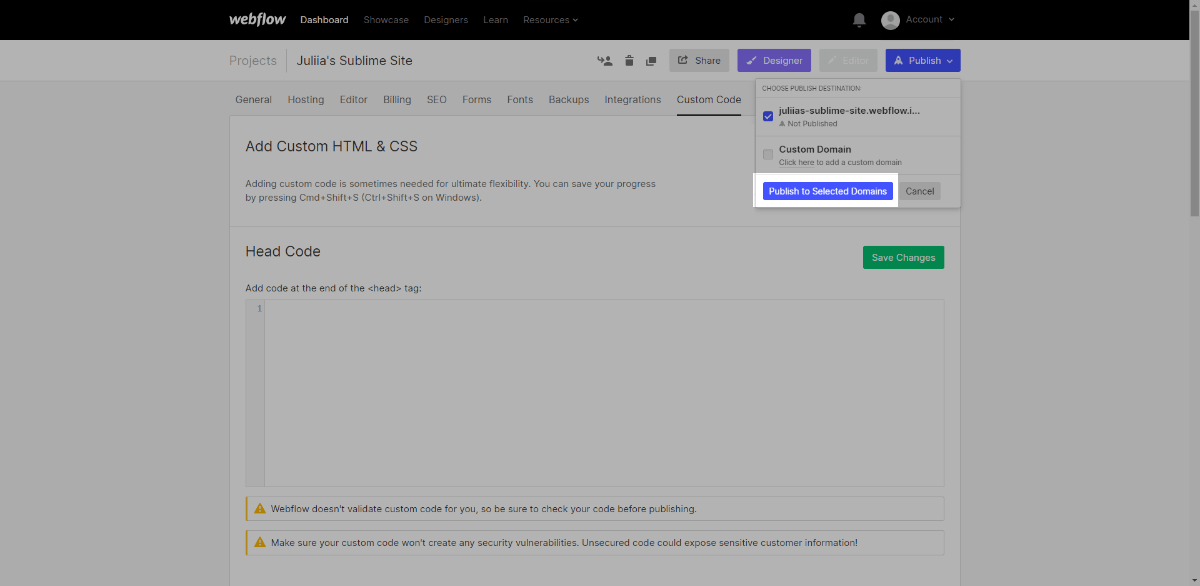
Log in to your Webflow account, find your project, click the three dots, and select Settings.
Go to the Custom Code tab.
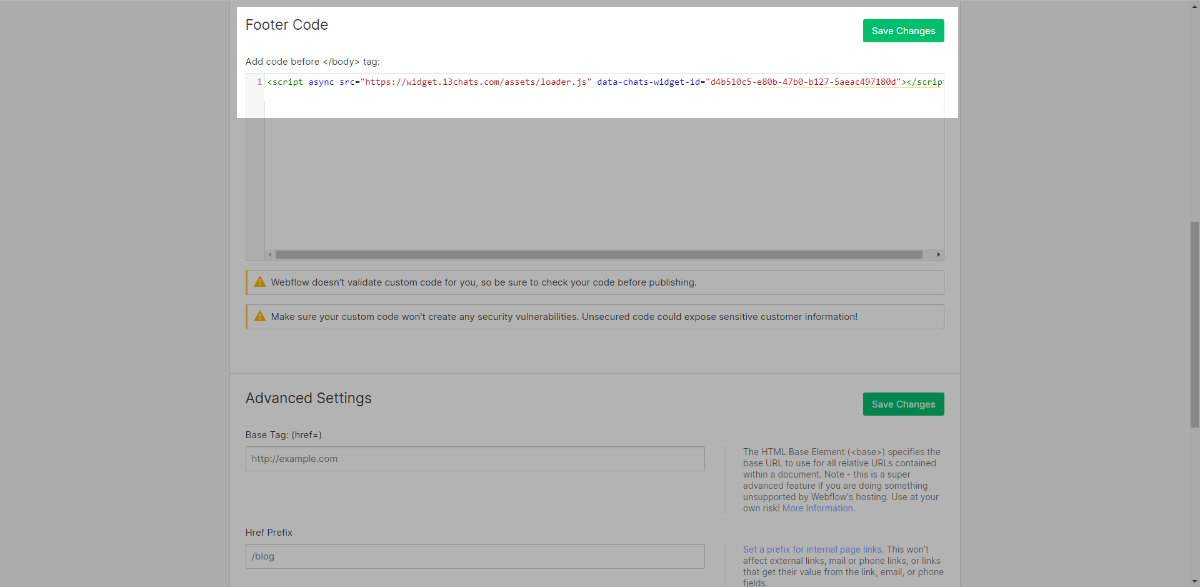
Paste your pixel installation code into the Footer Code field, and click Save Changes.
To show SendPulse-powered pop-ups on your website, publish your project. To do this, click Publish in the upper menu bar, select your project using its checkbox, and confirm the publication by clicking Publish to Selected Domain.
https://sendpulse.com/knowledge-base/pop-ups/settings/add-popup-to-sitebuilder
Nuvemshop
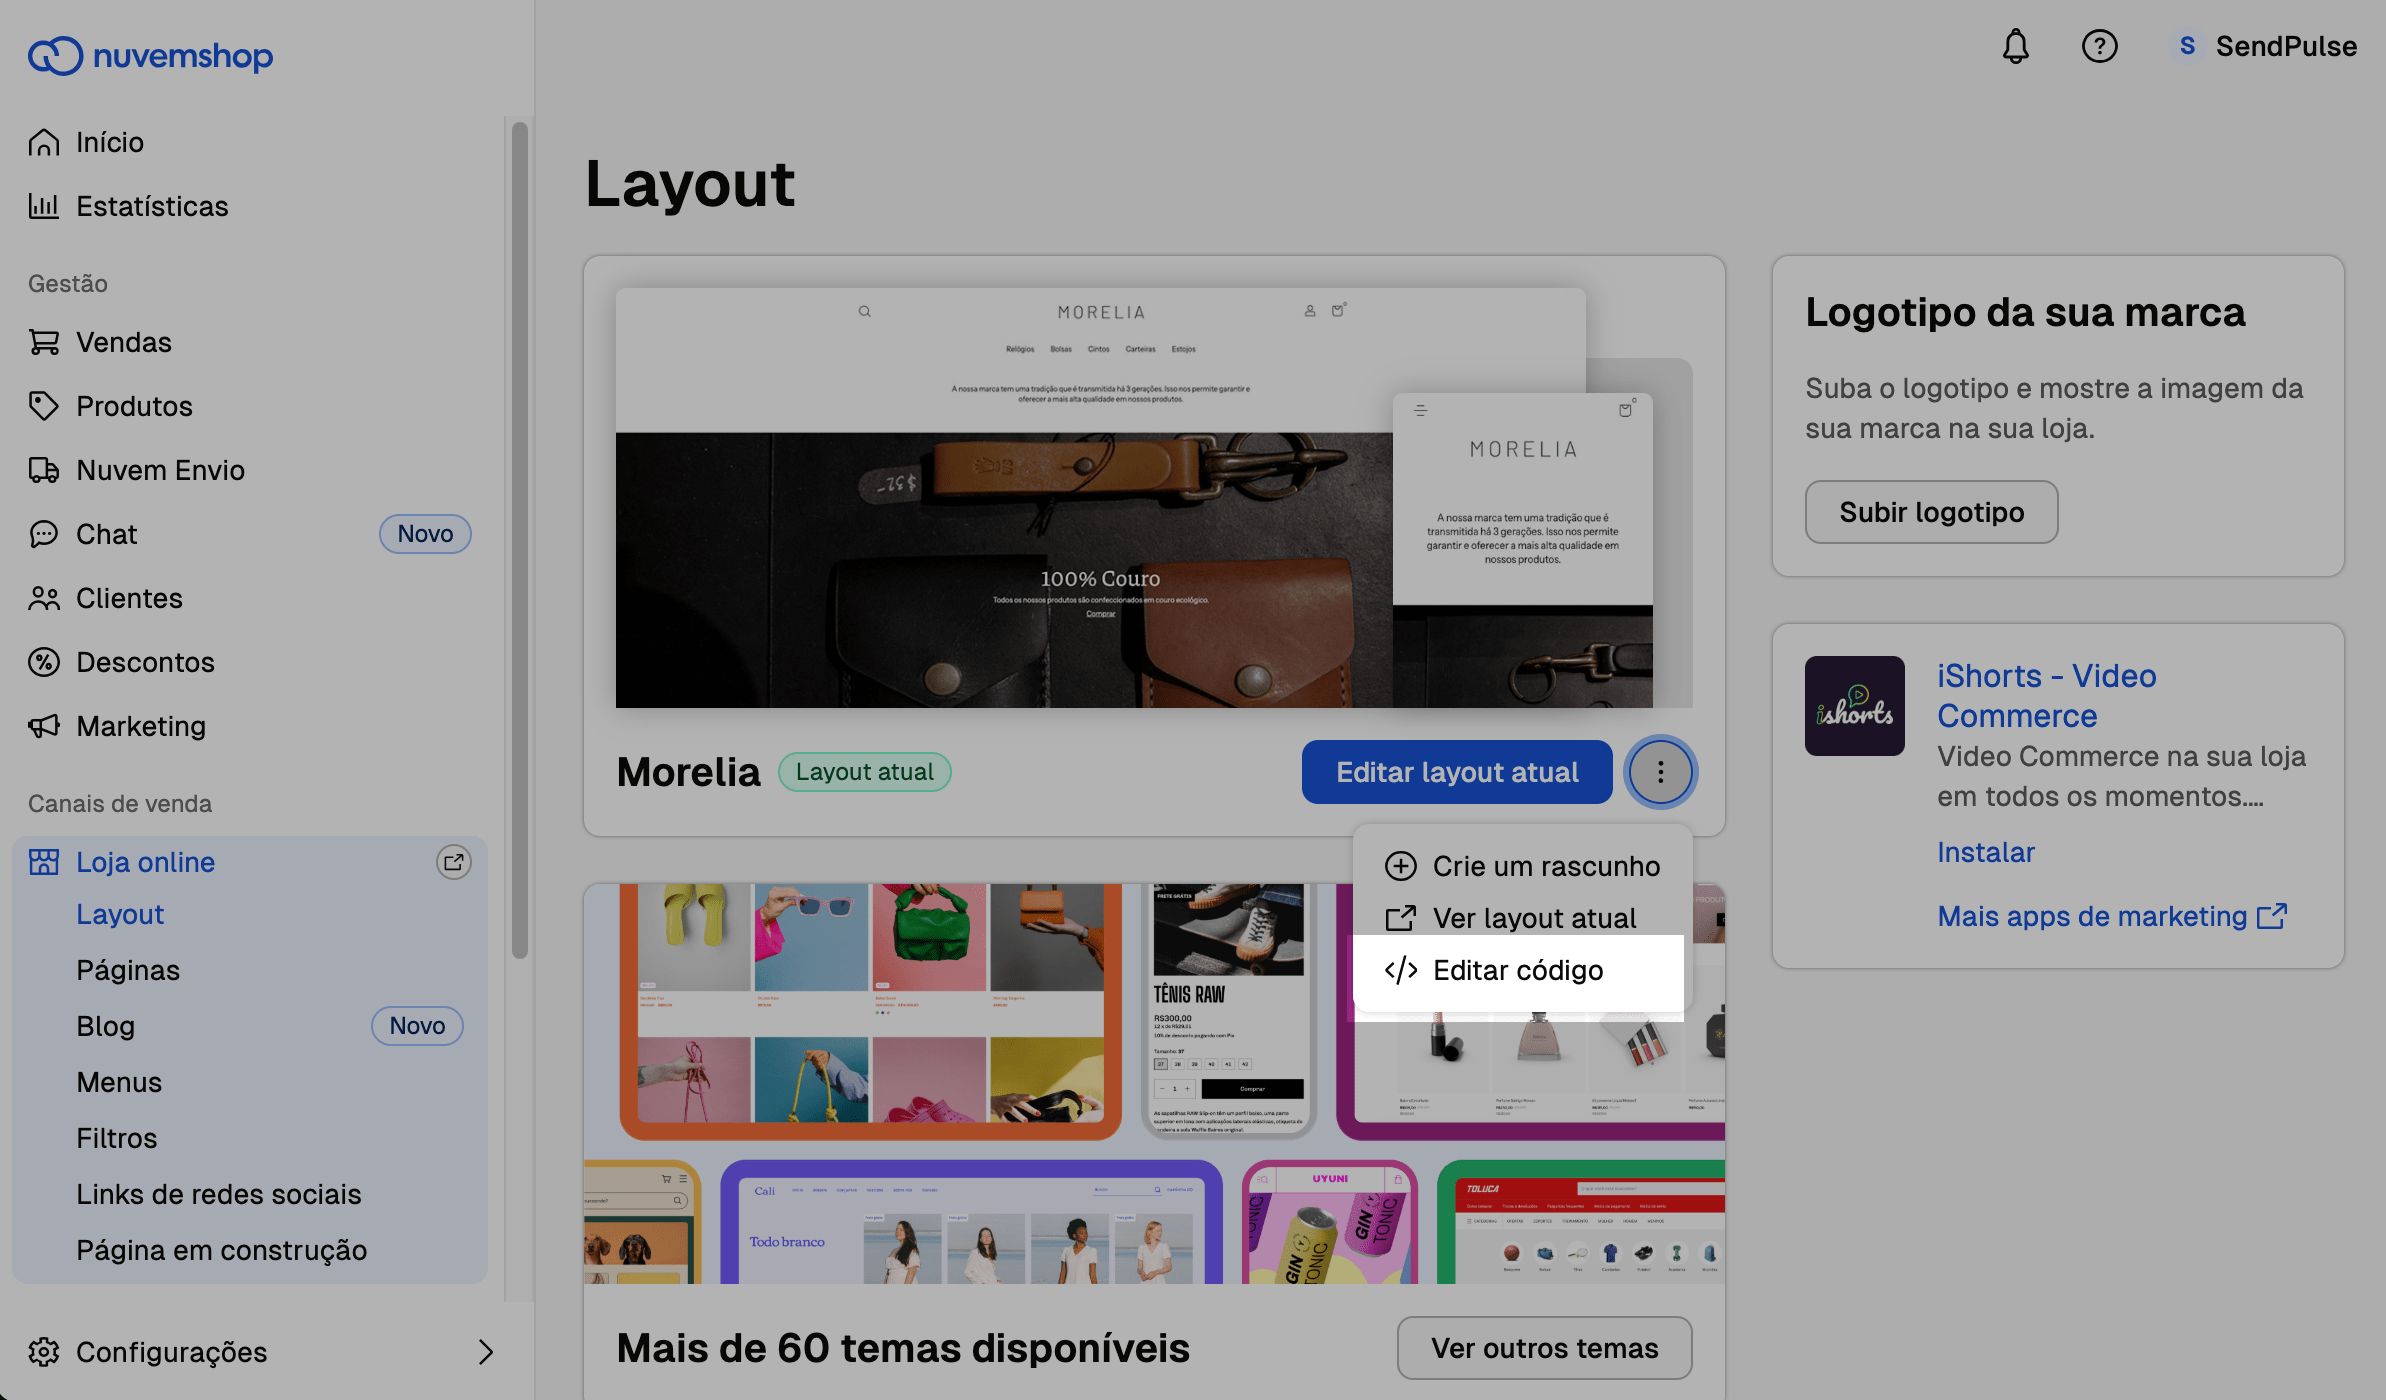
In your Nuvemshop store, go to Loja online > Layout. Find your layout, click the three dots, and select Editar código.
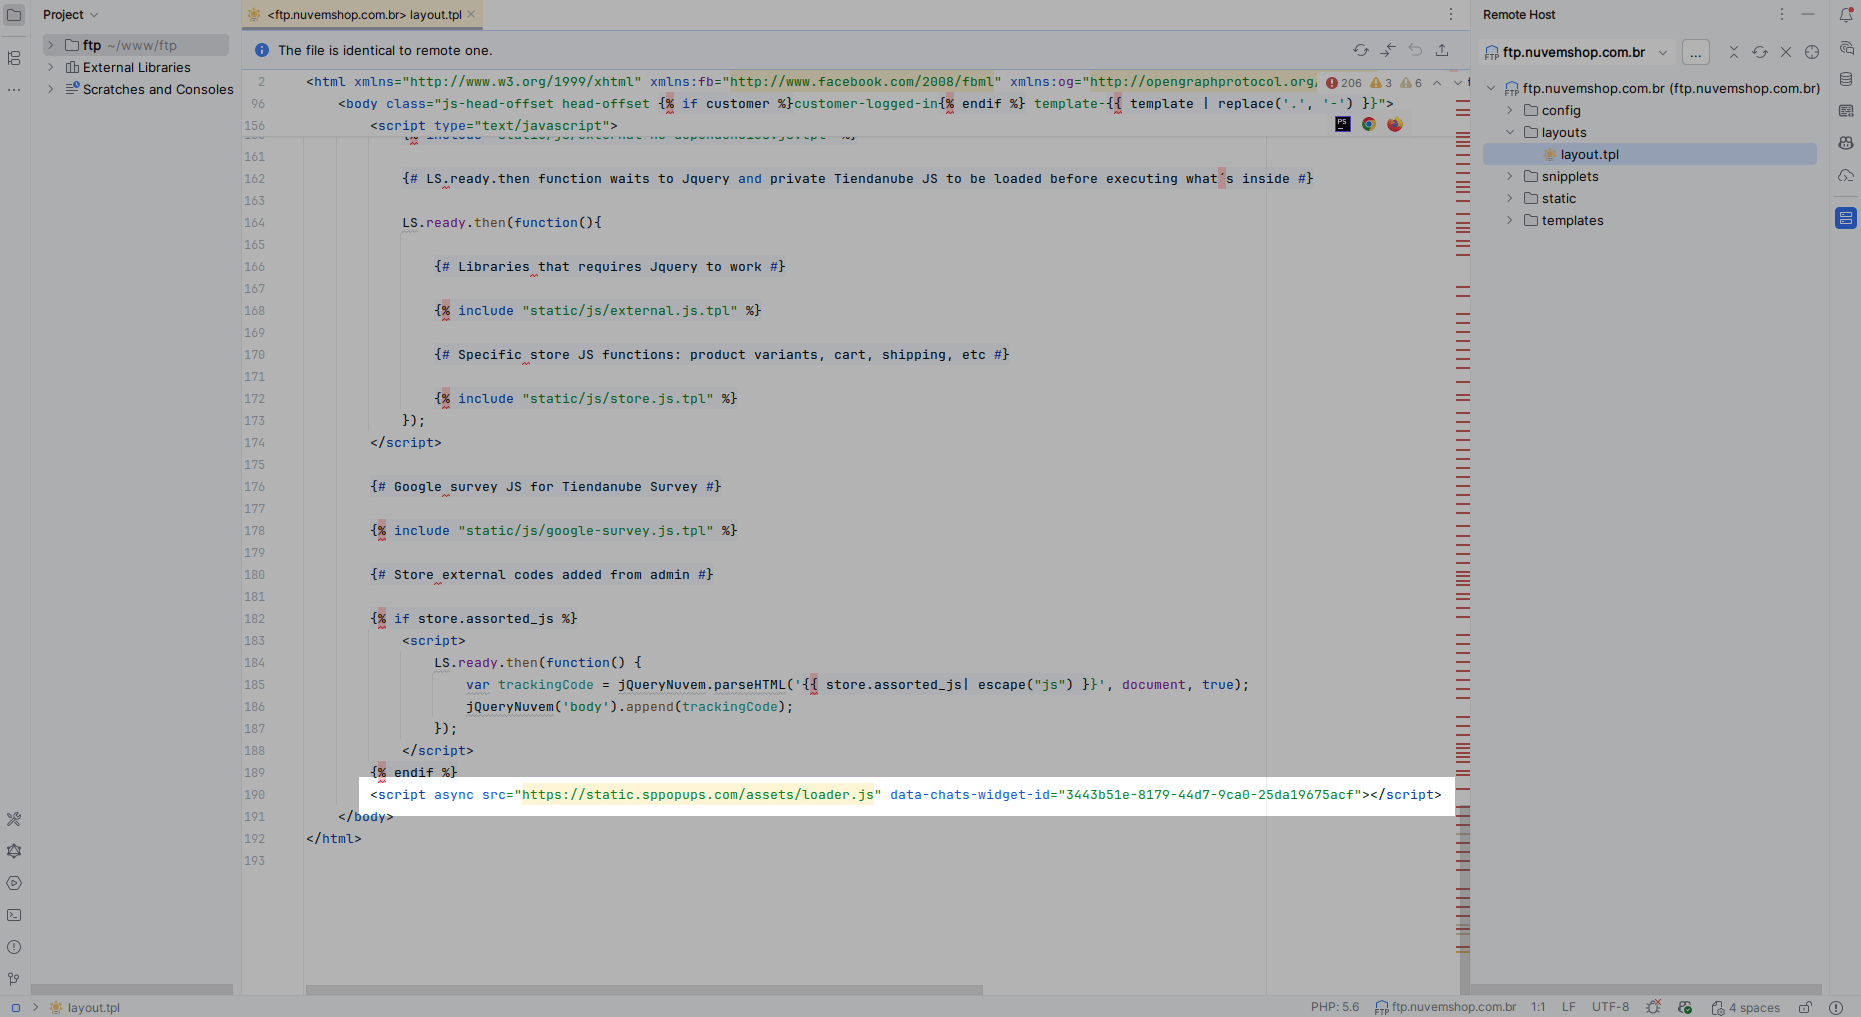
In the modal window, click Abrir FTP and download the layout file.
Open the layout in your editor through FTP. Scroll to the bottom of the file and paste the copied pixel installation code right before the closing </body> tag. Then, upload the layout file back.
FTP is available only with paid pricing plans.
Drupal
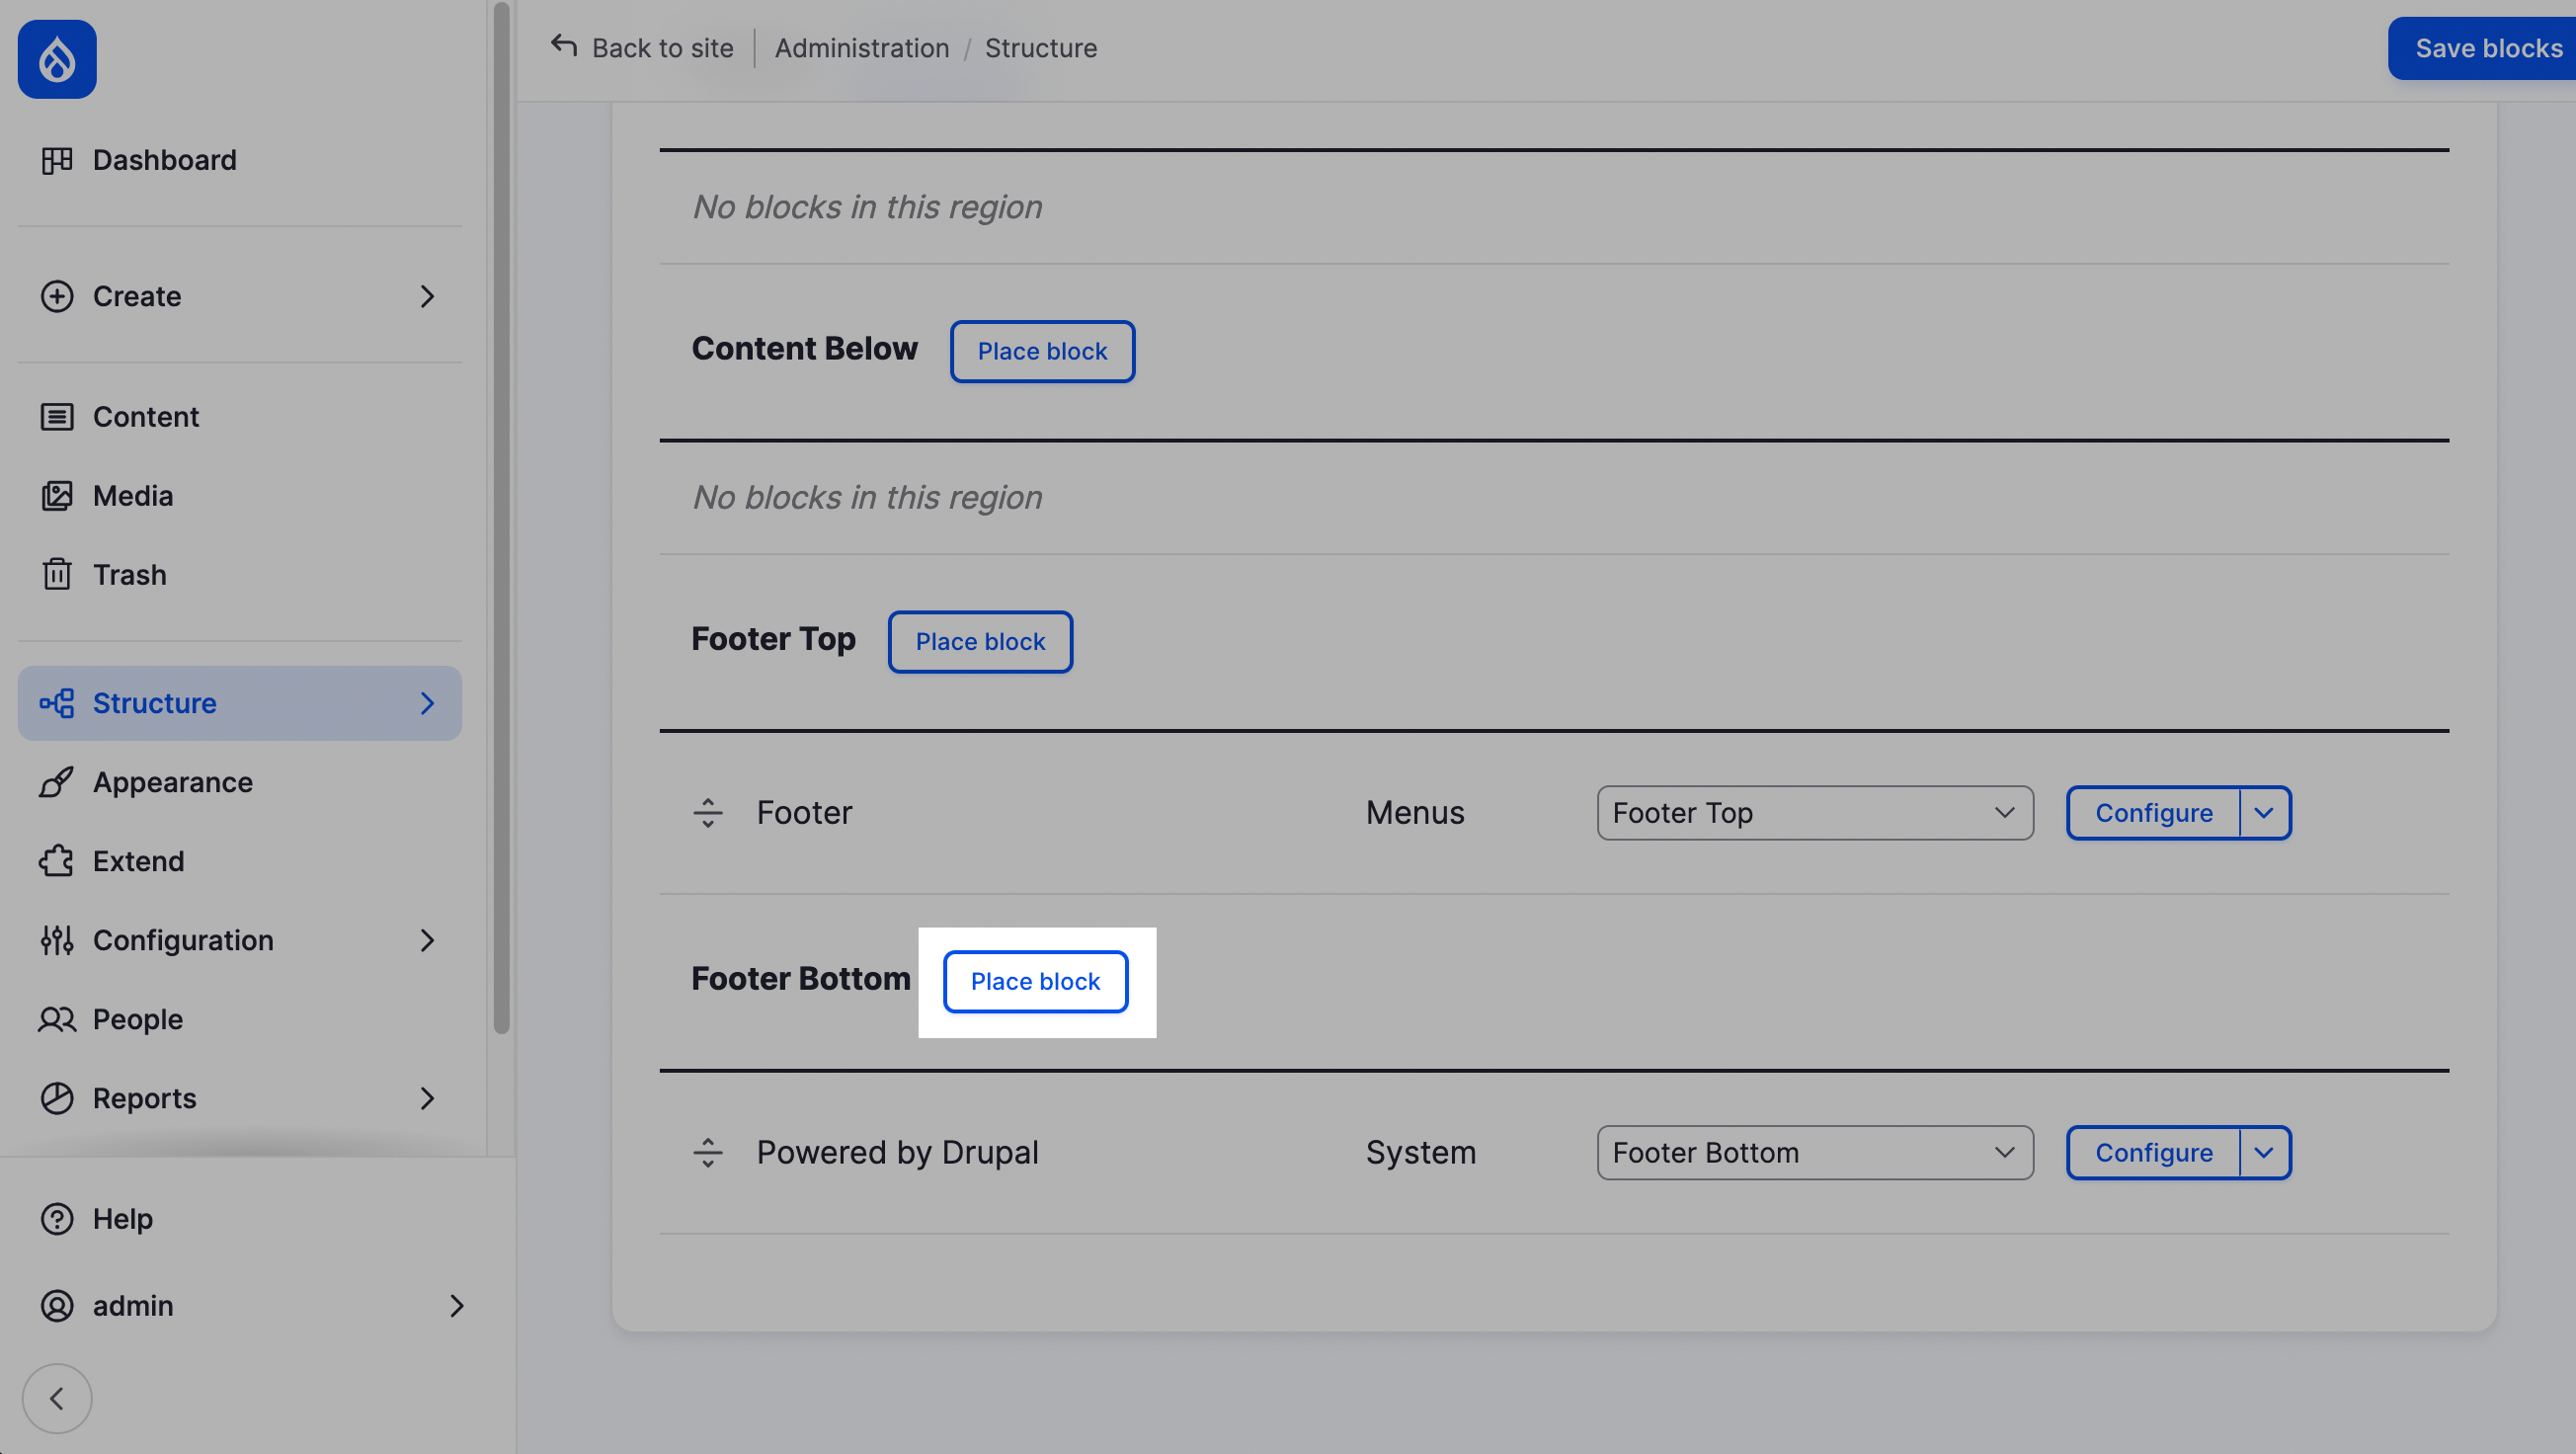
In your Drupal admin dashboard, go to Structure > Block layout. Next to Footer Bottom, click Place block.
In the modal window, click Add content block.
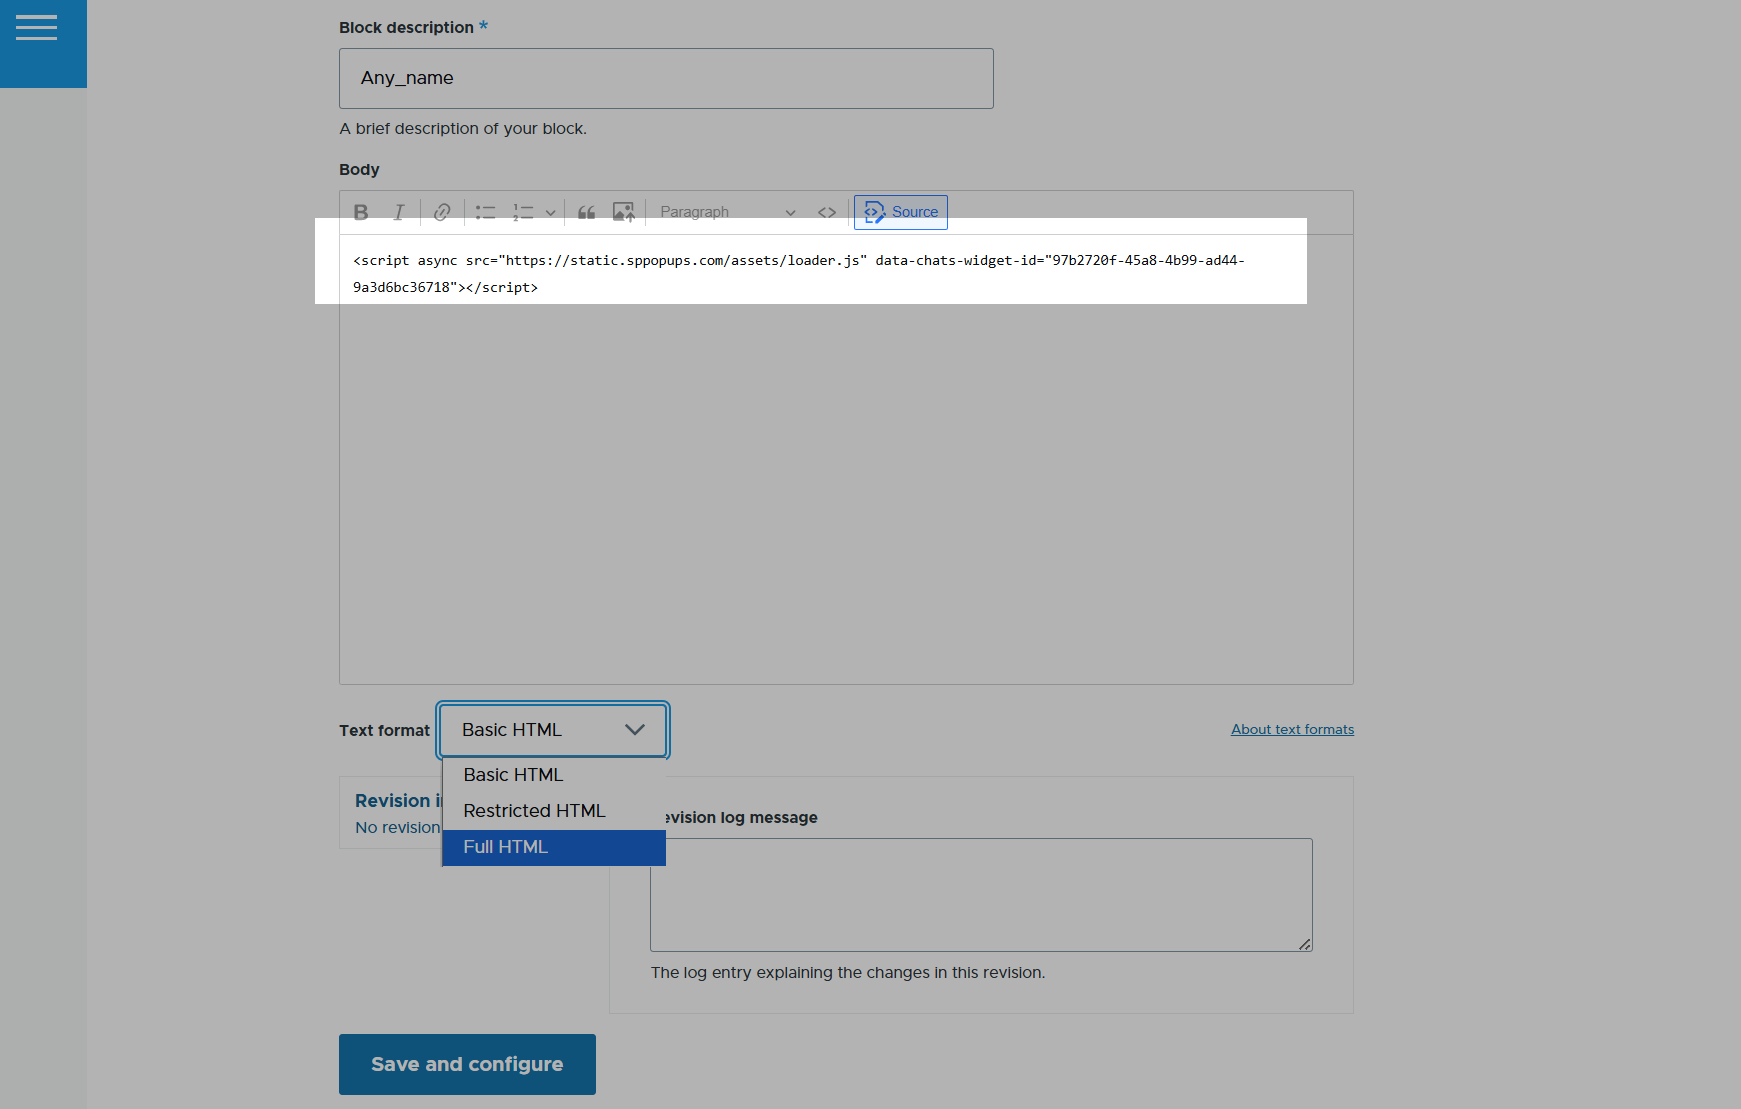
In the Block description field, enter a block name. In the Body field, click Source. Next to Text format, select Full HTML and paste the copied pixel installation code. Save the changes.
Horoshop
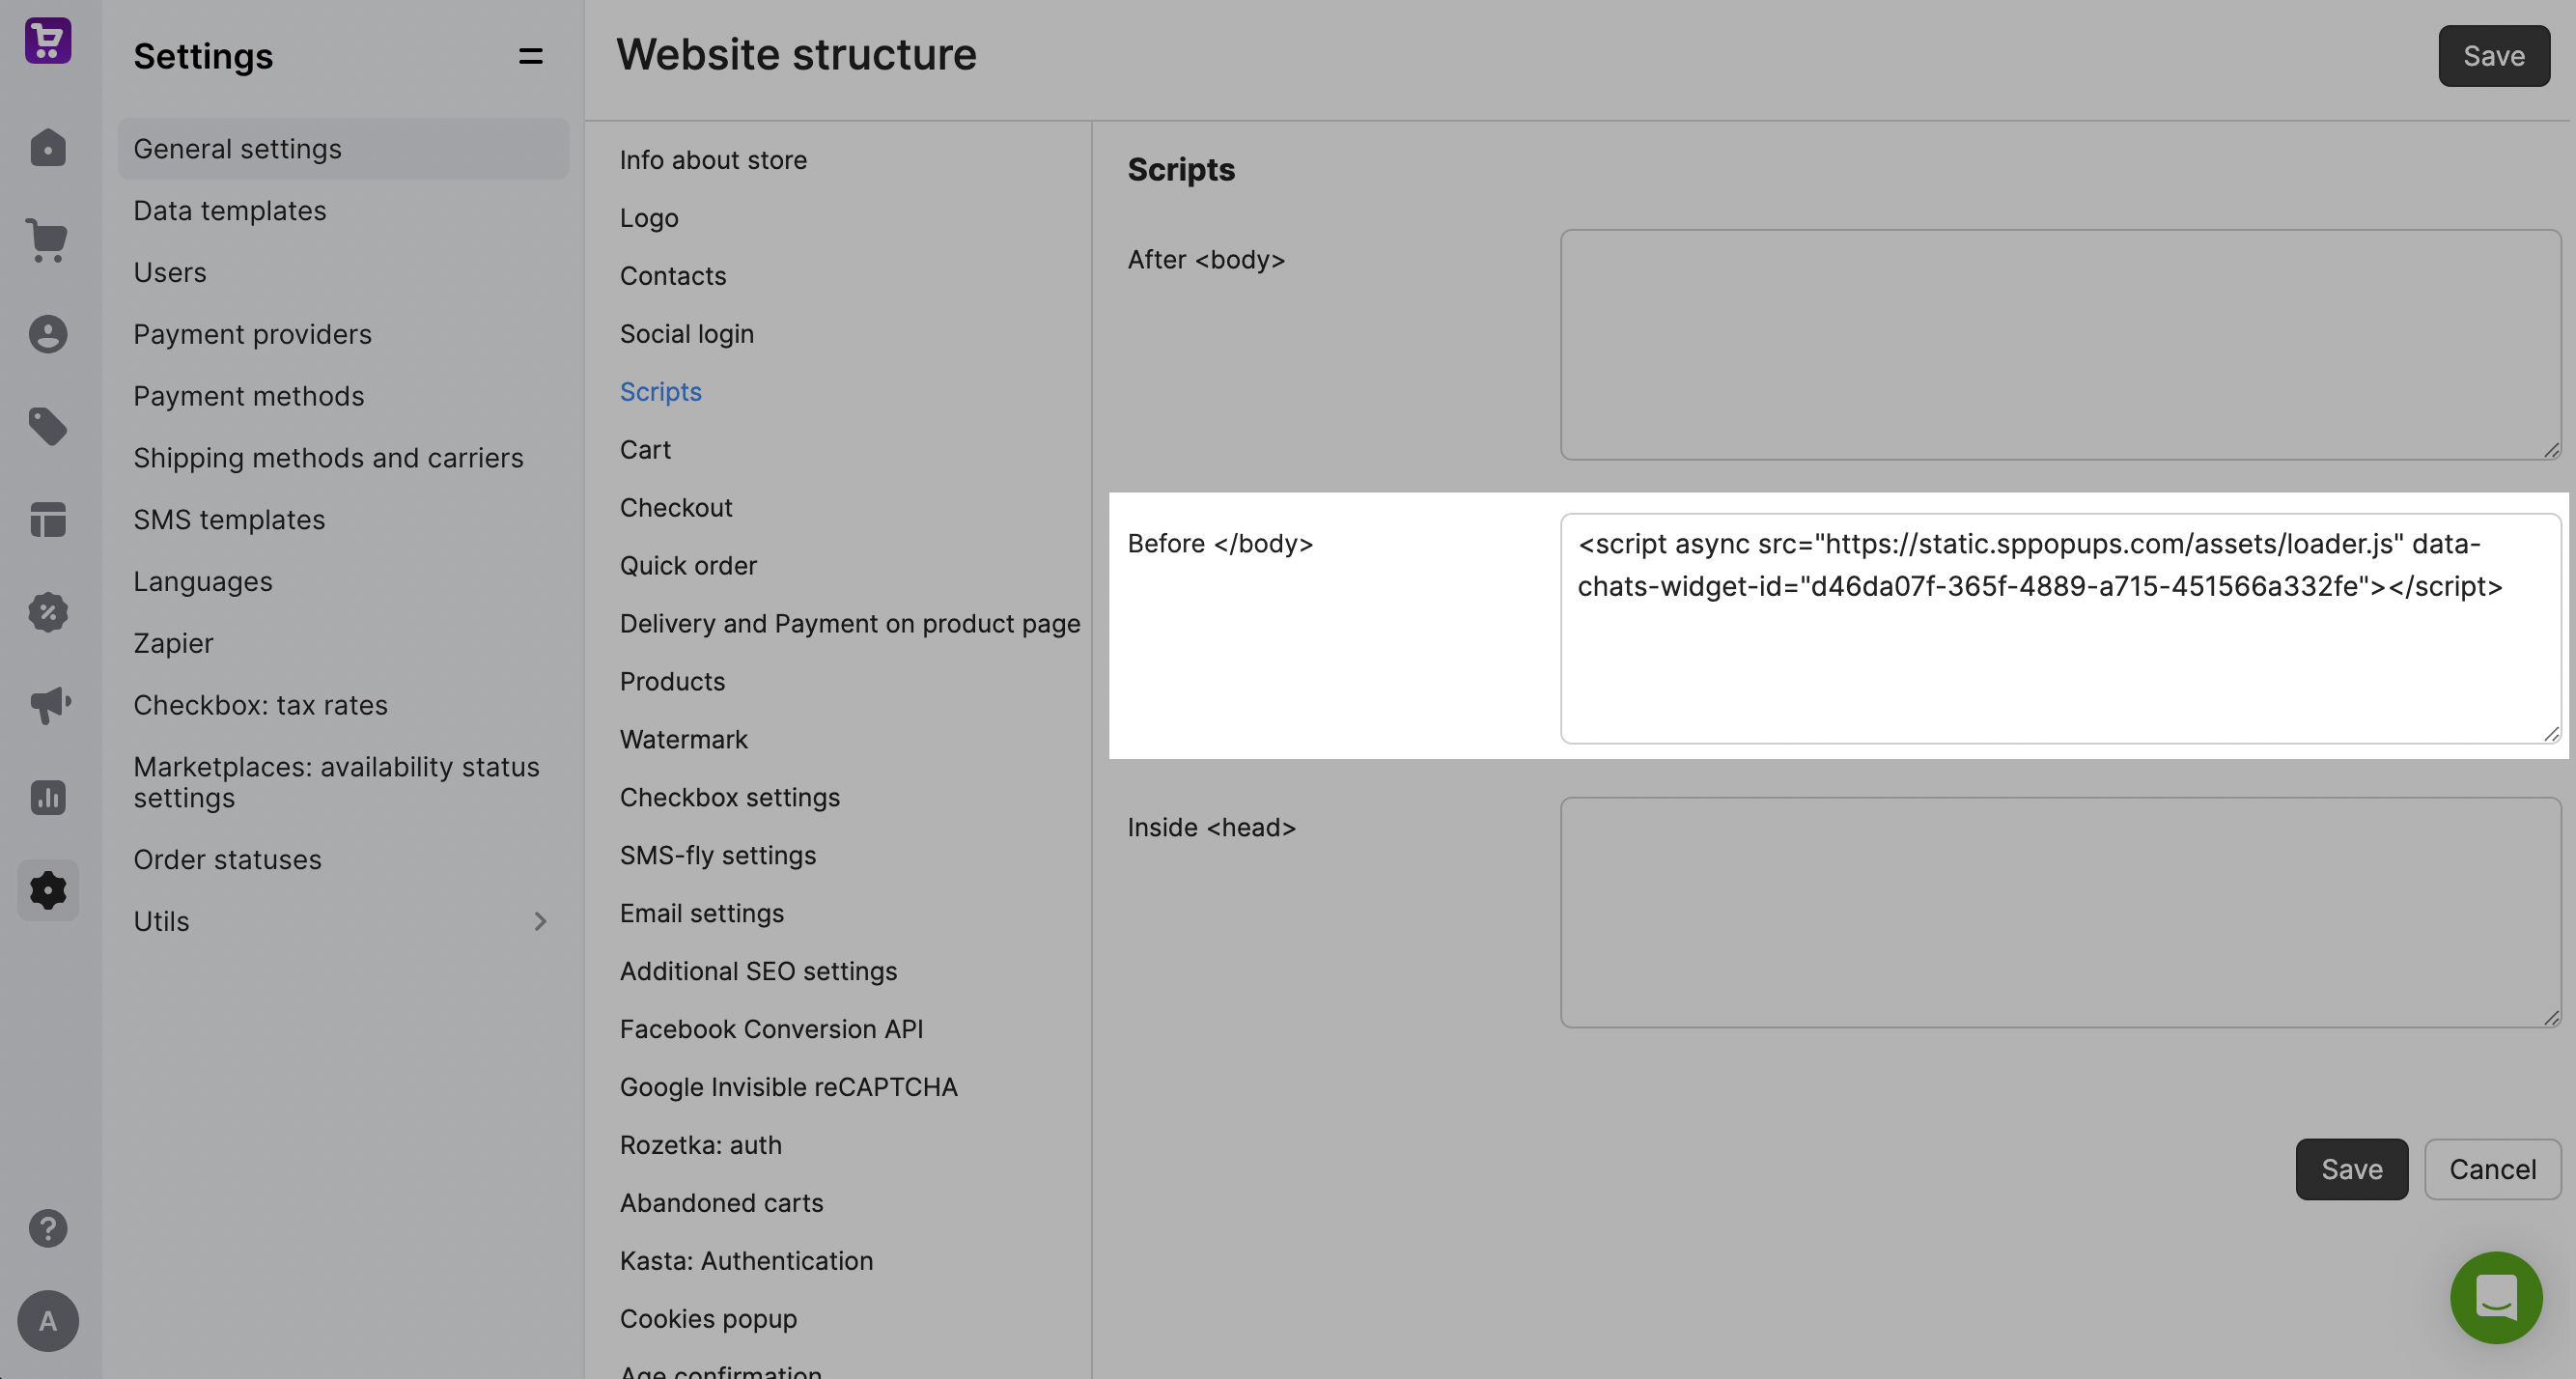
In your Horoshop account, go to Settings > General settings > Scripts. Next to Before </body>, paste the copied pixel installation code. Save the changes.
BigCommerce
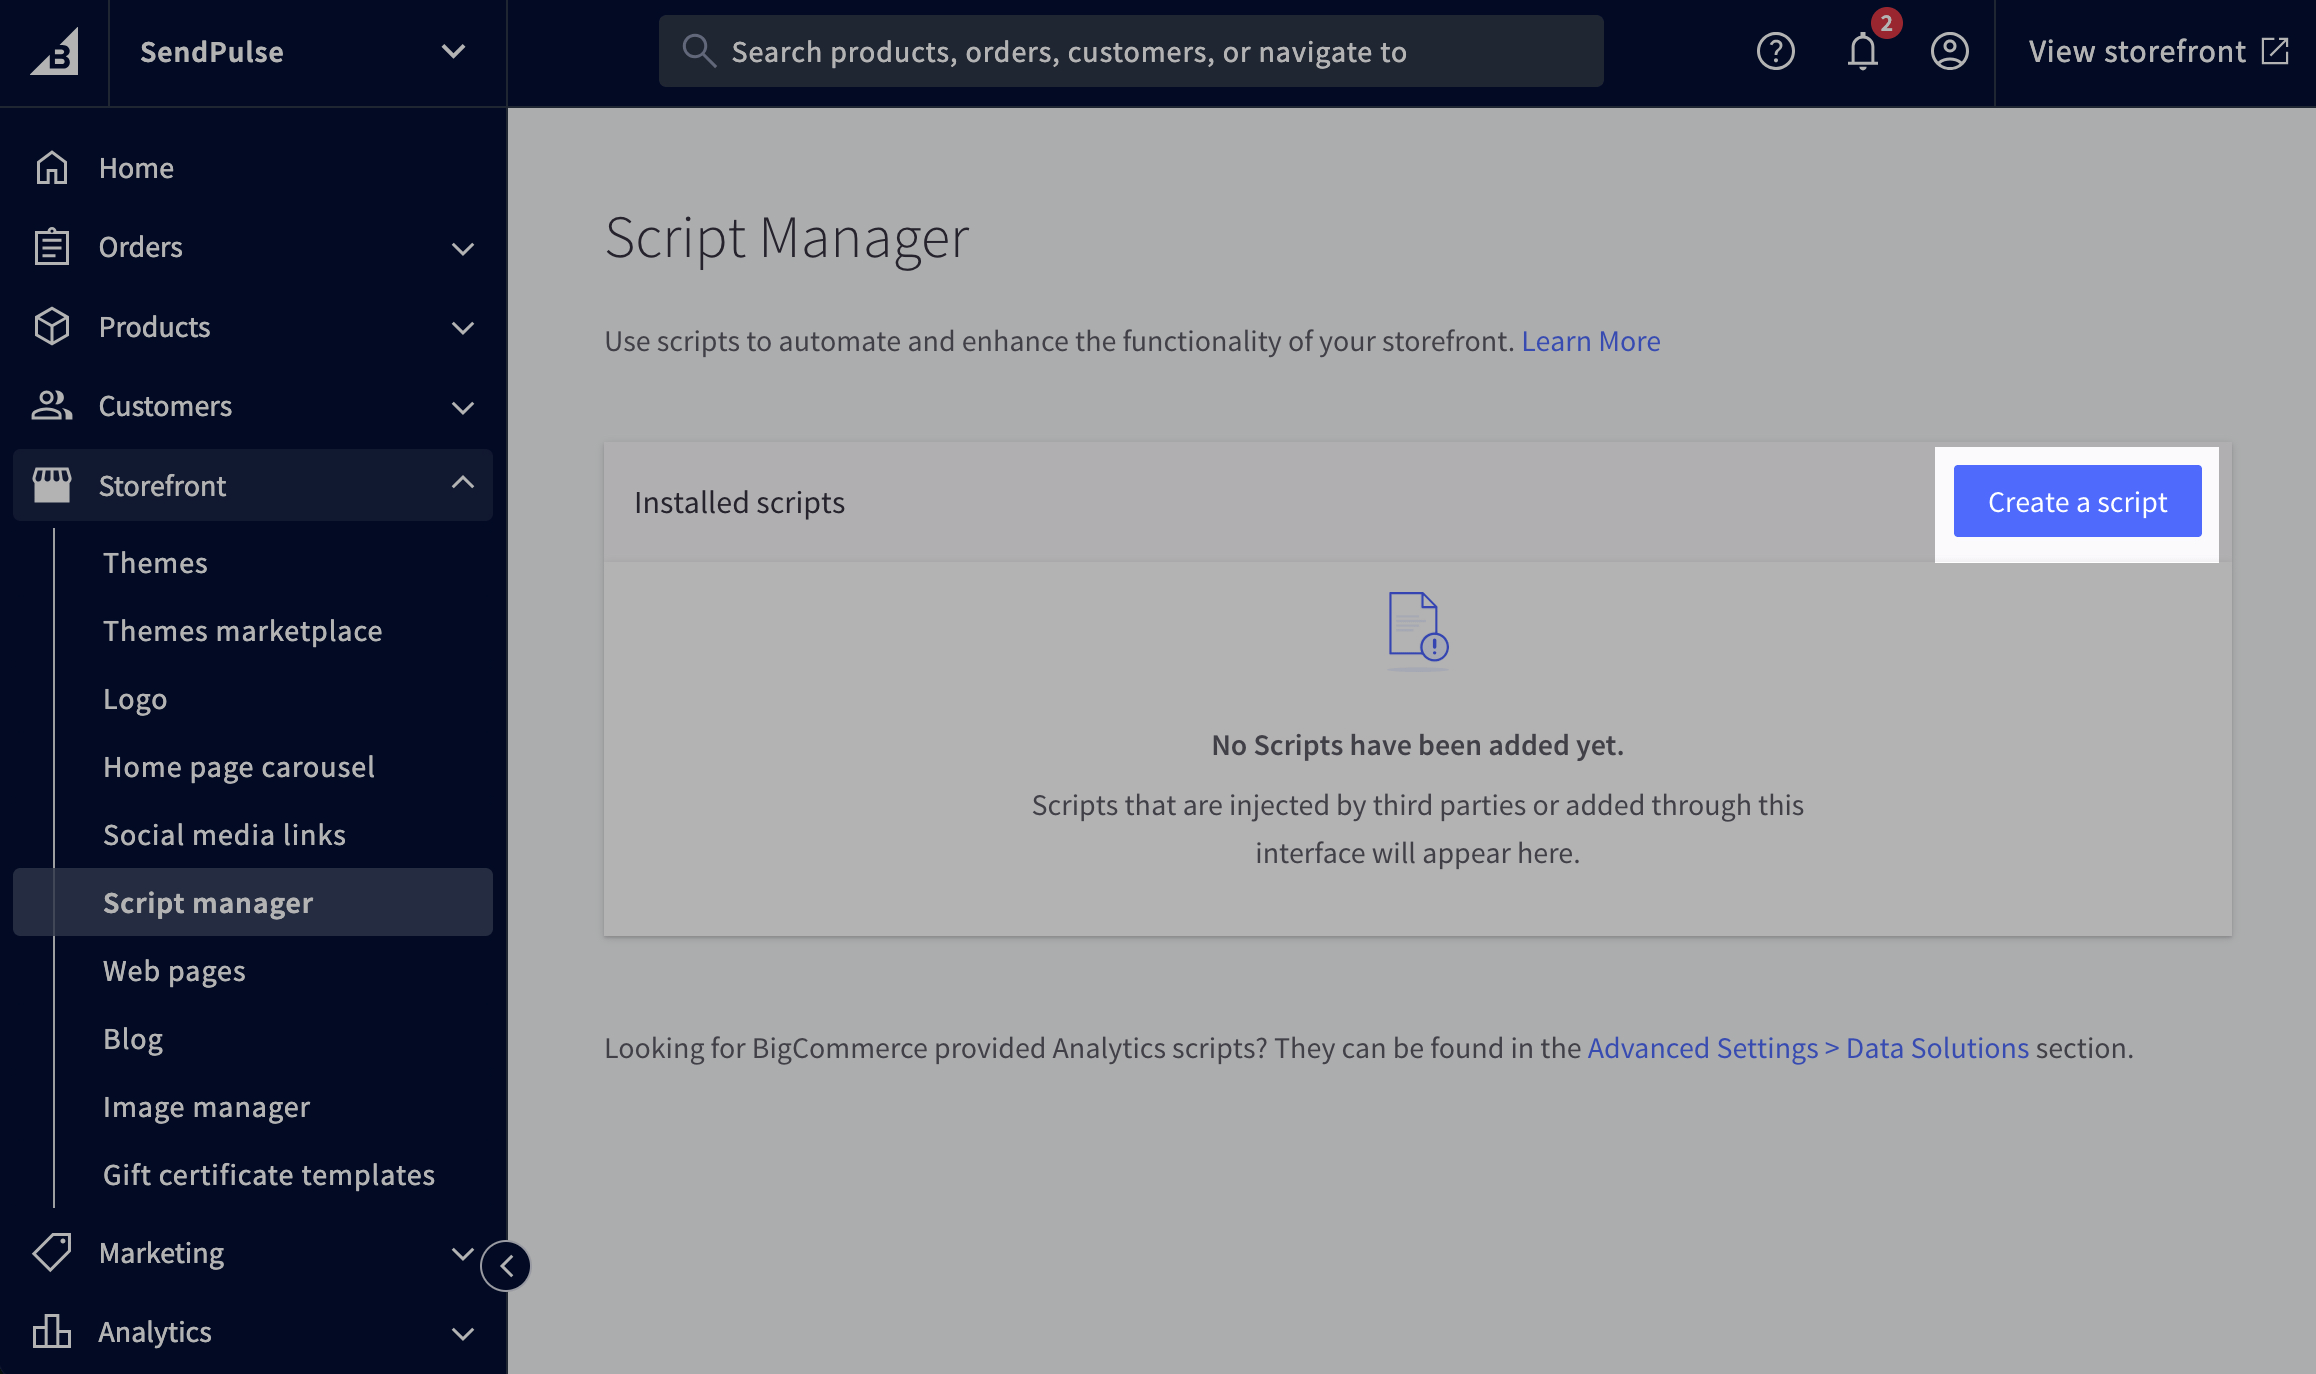
In your BigCommerce account, go to Storefront > Script manager and click Create a script.
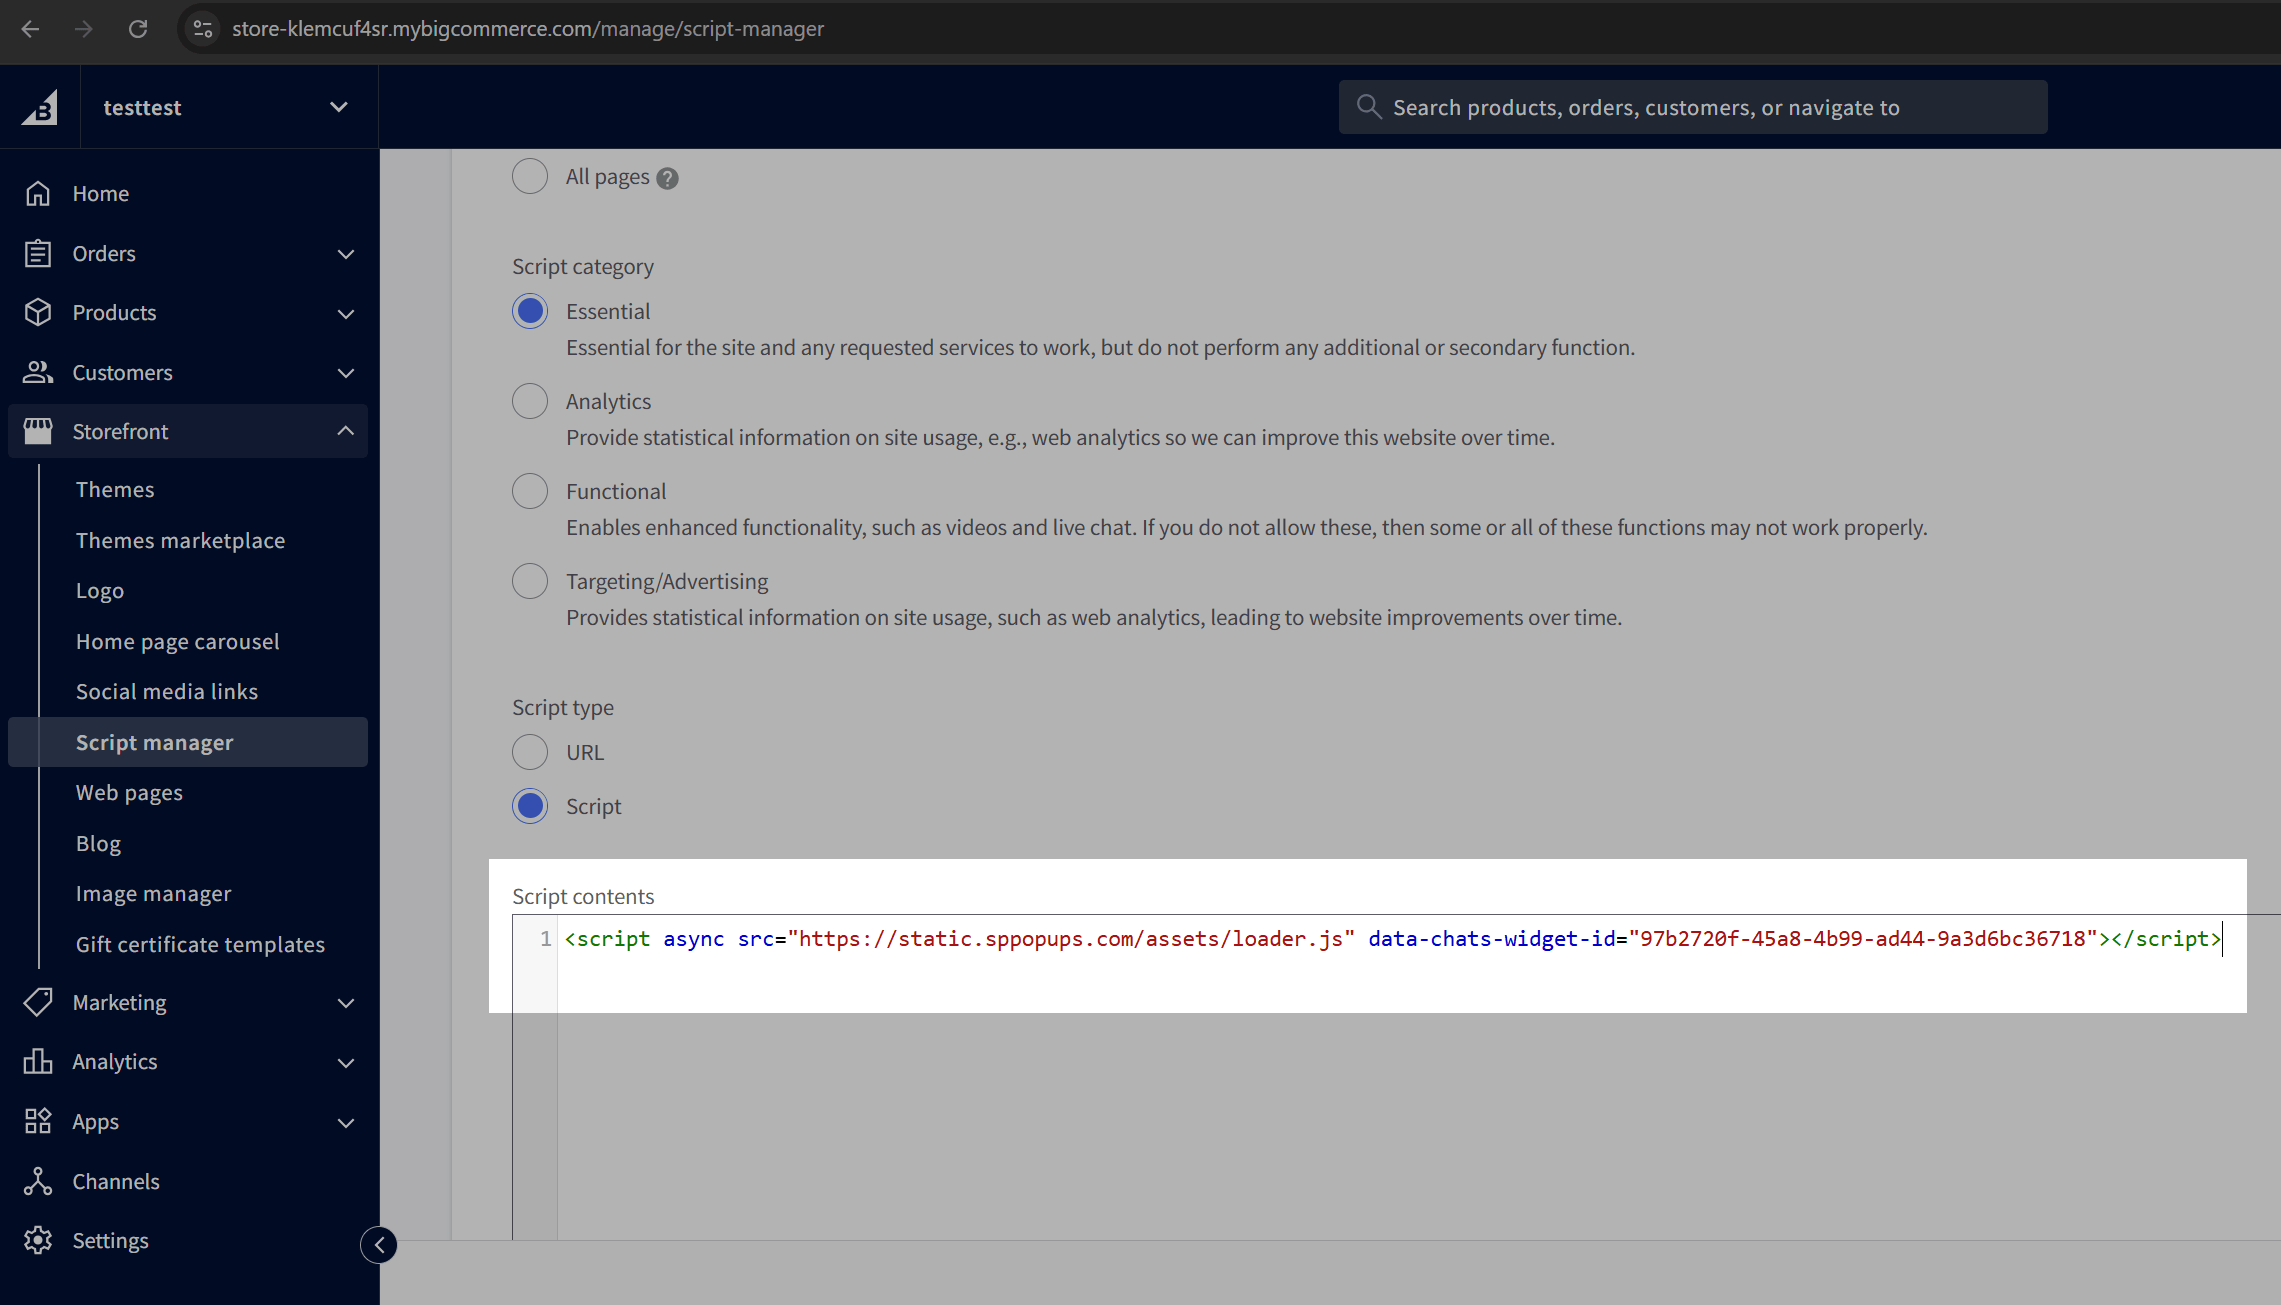
Enter a script name, then select a script location and type. In Script contents, paste the copied pixel installation code and save the changes.
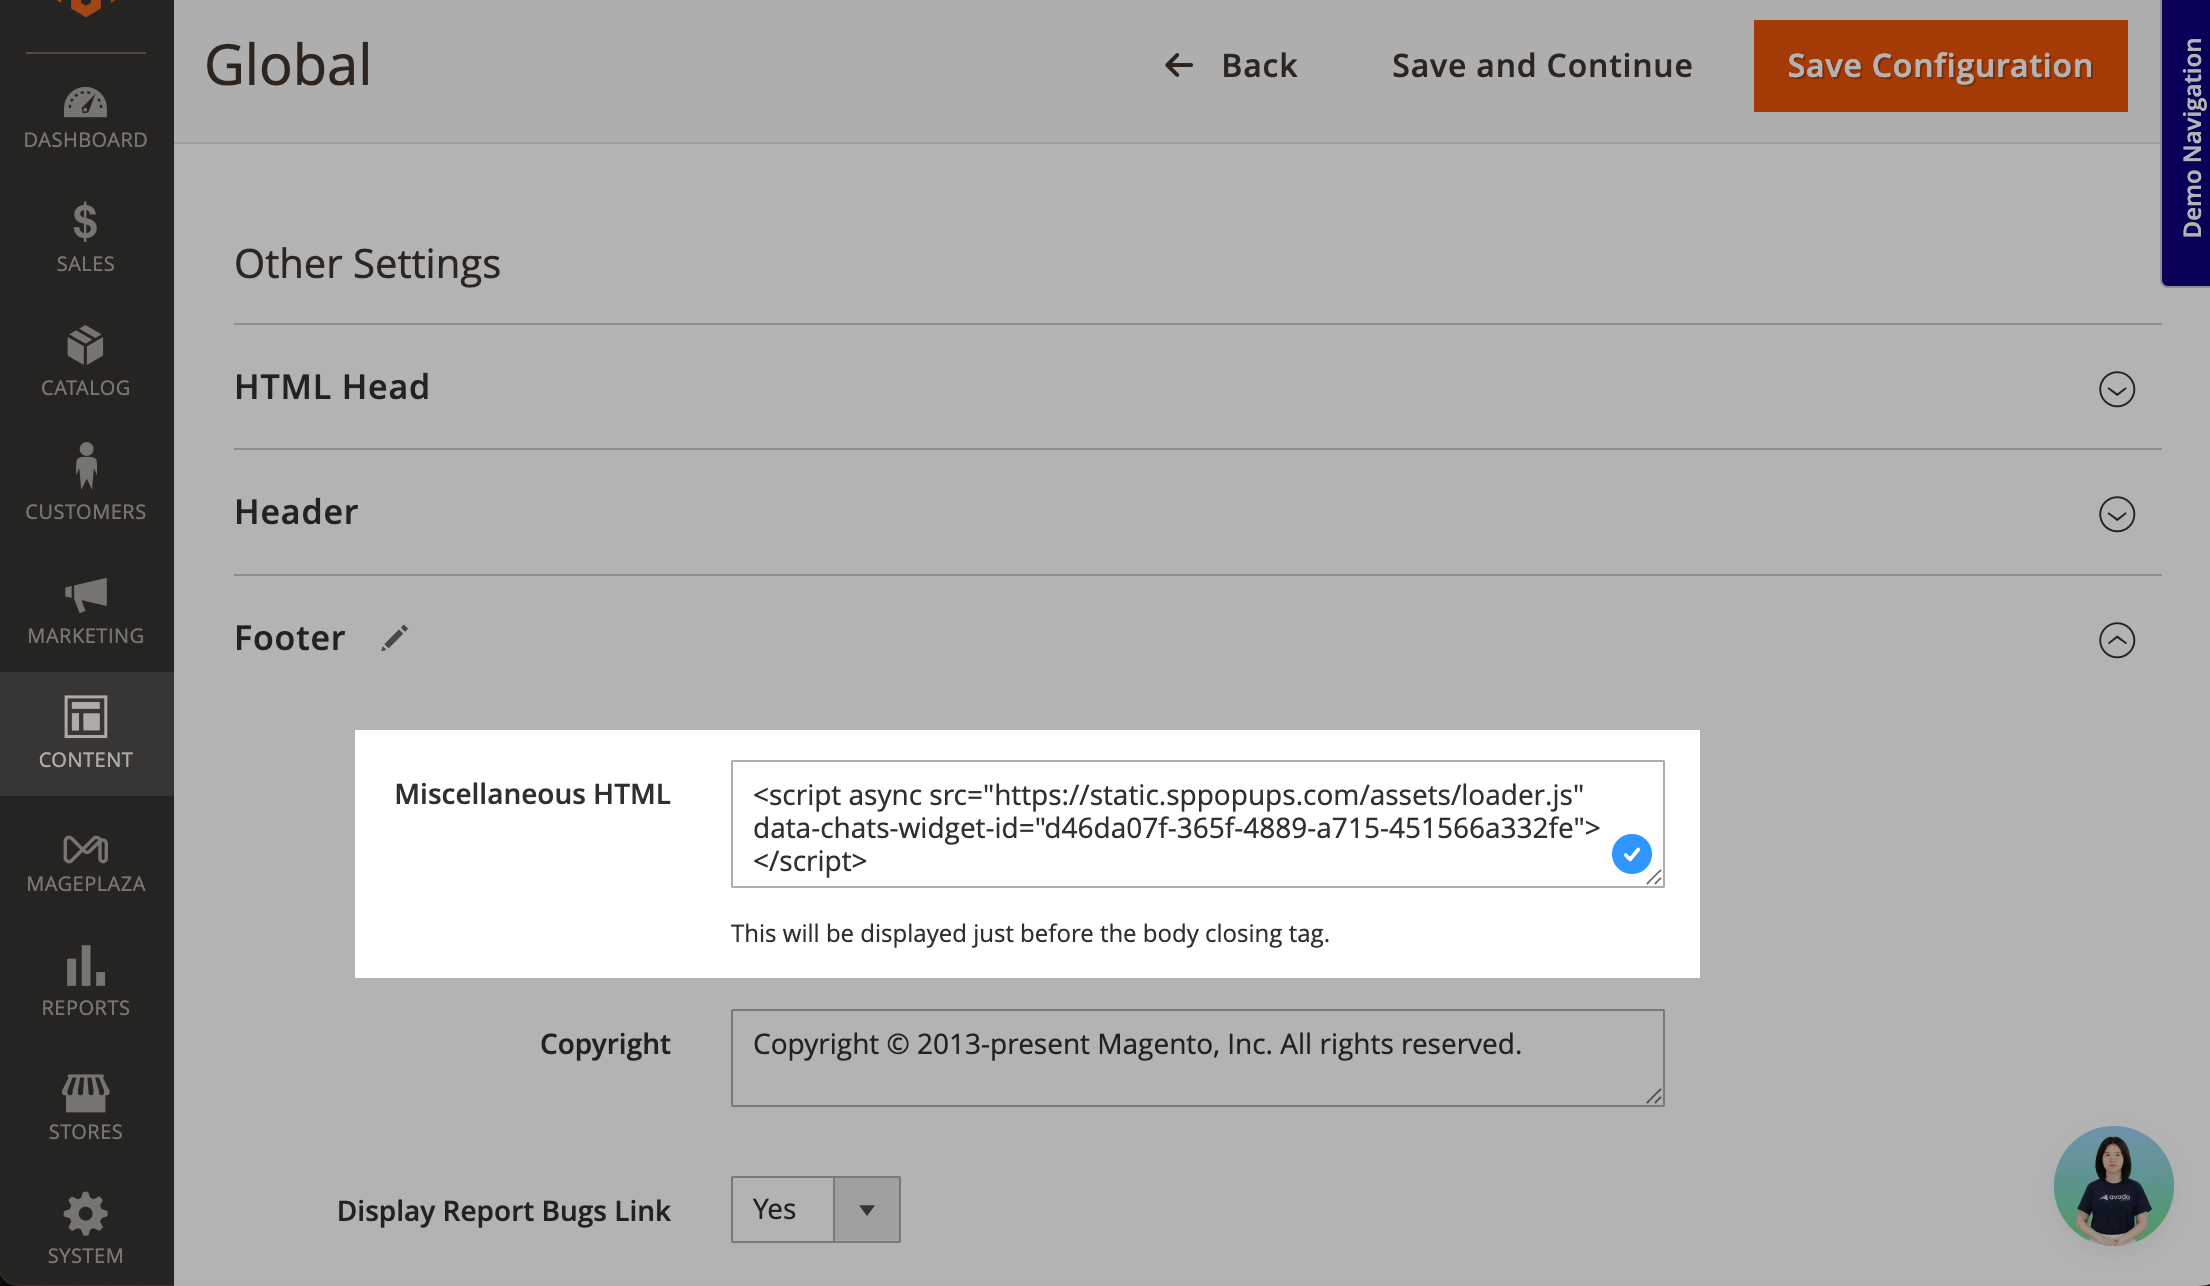
Magento
In your Magento admin dashboard, go to Content > Configuration.
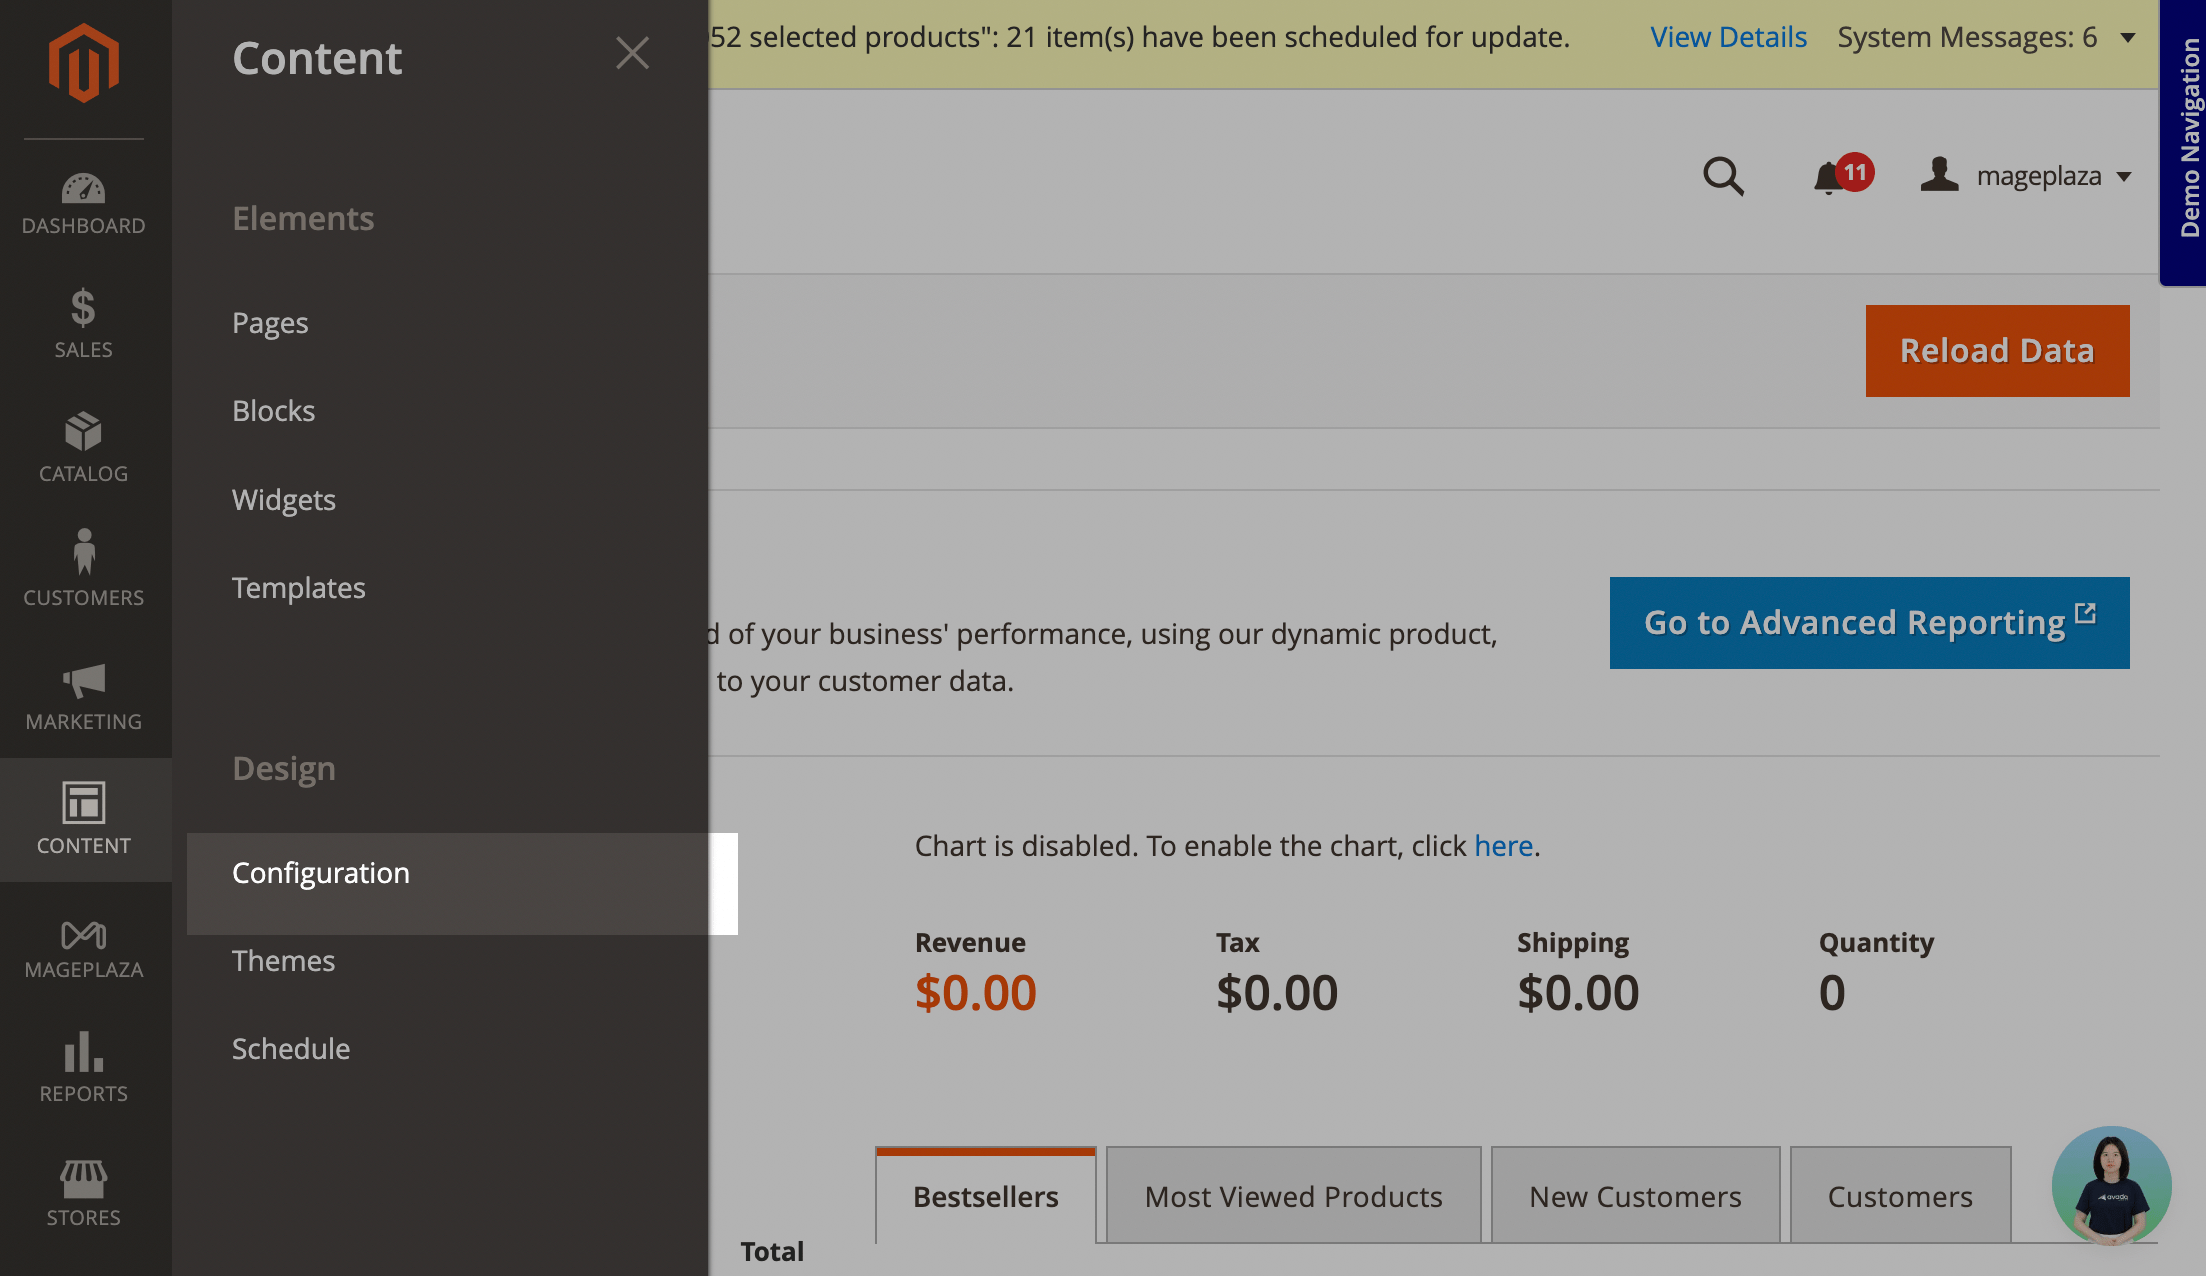
Next to your website, click Edit. Expand Footer, and in Miscellaneous HTML, paste the copied pixel installation code. Save the changes.
Then, you need to clear Magento cache. Go to System > Cache Management and click Flush Magento cache.
GoDaddy
In GoDaddy, you can add only embedded pop-ups.
Go to GoDaddy and click Add Section. Scroll down to Files & Web, select HTML, and click Add.
Click the added section. In Title, enter a name. In Custom code, paste the copied pixel installation code. Save the changes.
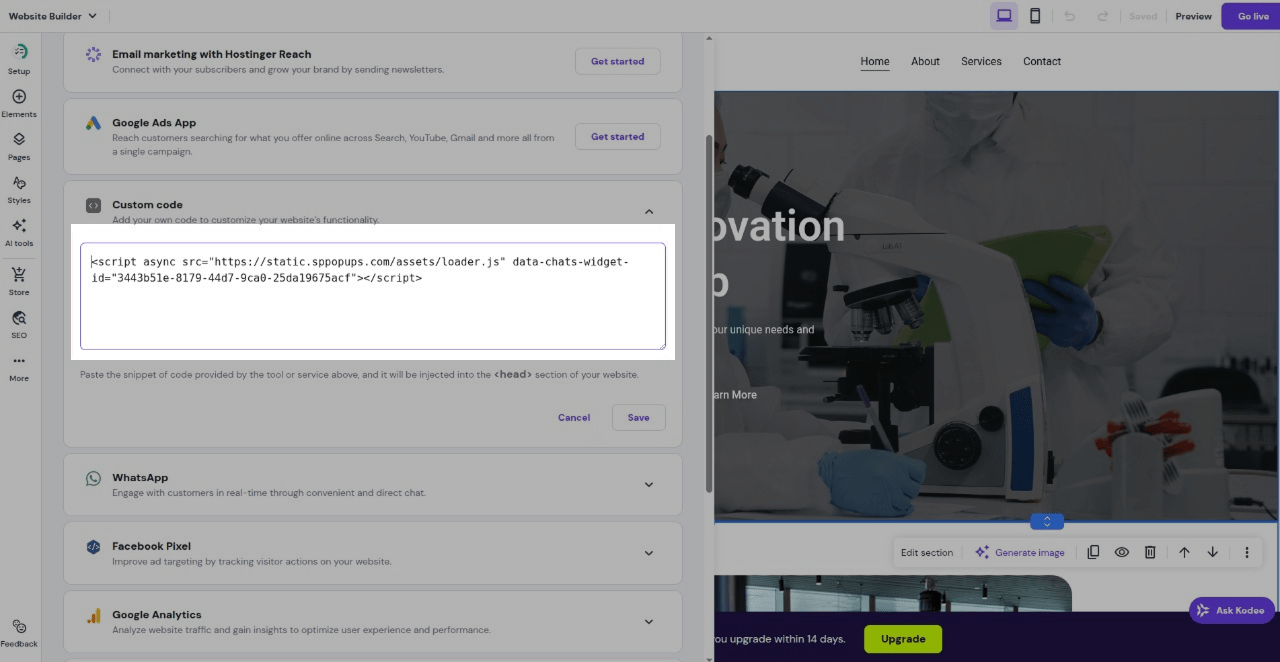
Hostinger
Go to Hostinger and select More > Integrations.
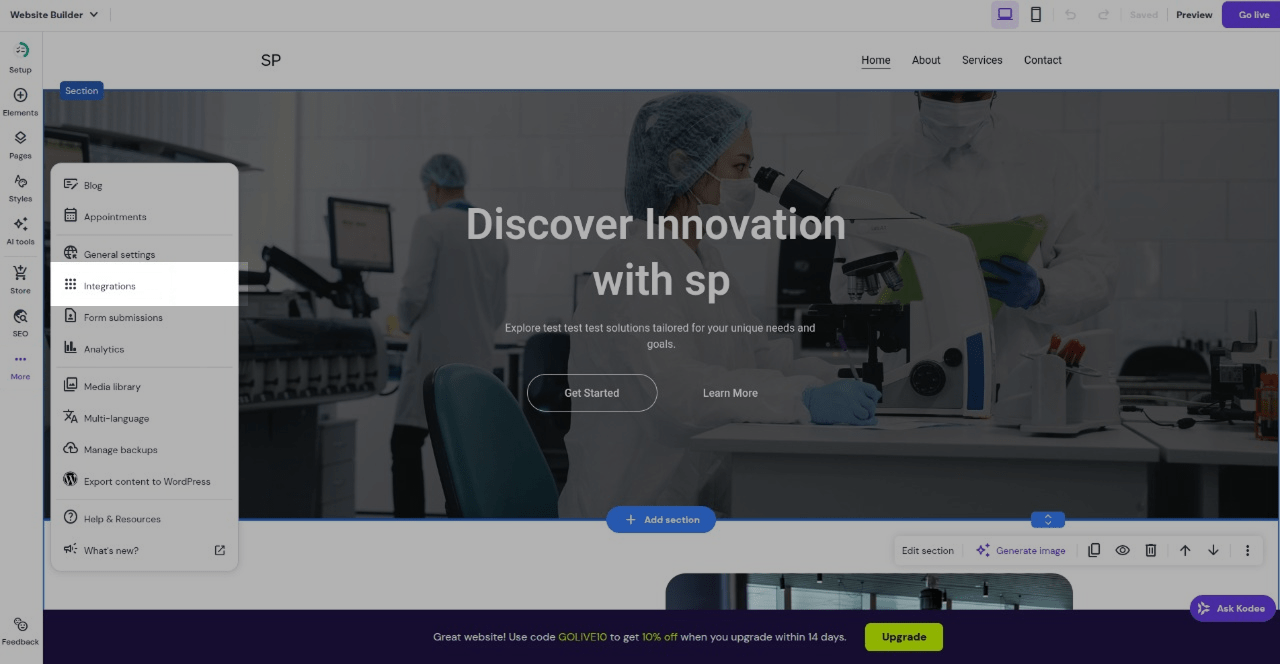
Expand Custom code and paste the copied pixel installation code. Save the changes and update your website.
Google Tag Manager
You can install the pixel through Google Tag Manager.
Copy the pixel code, go to Google Tag Manager, create a tag of the Custom HTML type, and paste the code there. Select the All Pages trigger so that the pixel works on all website pages.
Read more: Add pixel installation code to a website using Google Tag Manager.
Сheck installation
Once you added the code to your trird-party website, click Check the installation. The system will verify whether the code was added correctly. You will see the Installed or Not installed status once the verification is complete.
The installation time depends on your CMS and can take from a few minutes to several hours.
If you installed the pixel through Google Tag Manager, the automatic check will not confirm it. Verify the installation manually by triggering a tracked event on your website and checking the pixel's Event log.
You can also check if the code was installed properly in the Settings tab of your added website.
Once you install the pixel, add events to be tracked.
Last Updated: 25.02.2026
or