Create a course group
To organize your courses by topic, student proficiency level, or other criteria, you can create course groups. This helps you keep everything in order and stay on top of your academy’s content when you’re managing dozens of courses.
In this article, we will talk about how to create and manage course groups.
Create a group
Go to your academy and click Add group.

In the modal window, enter a group name of up to 255 characters and click Add.
Group names are visible to instructors only.
Add courses to the group
Select the courses you want to group from the list. Click Move to group.
A course can belong to only one group. By default, new courses are ungrouped.

In the modal window, select a group and click Move.
You can change your course’s current group by selecting and moving it to another group.
Manage your groups
All created groups appear on your academy page, and the number of courses appears next to each group name. Switch between groups to view the courses within them.
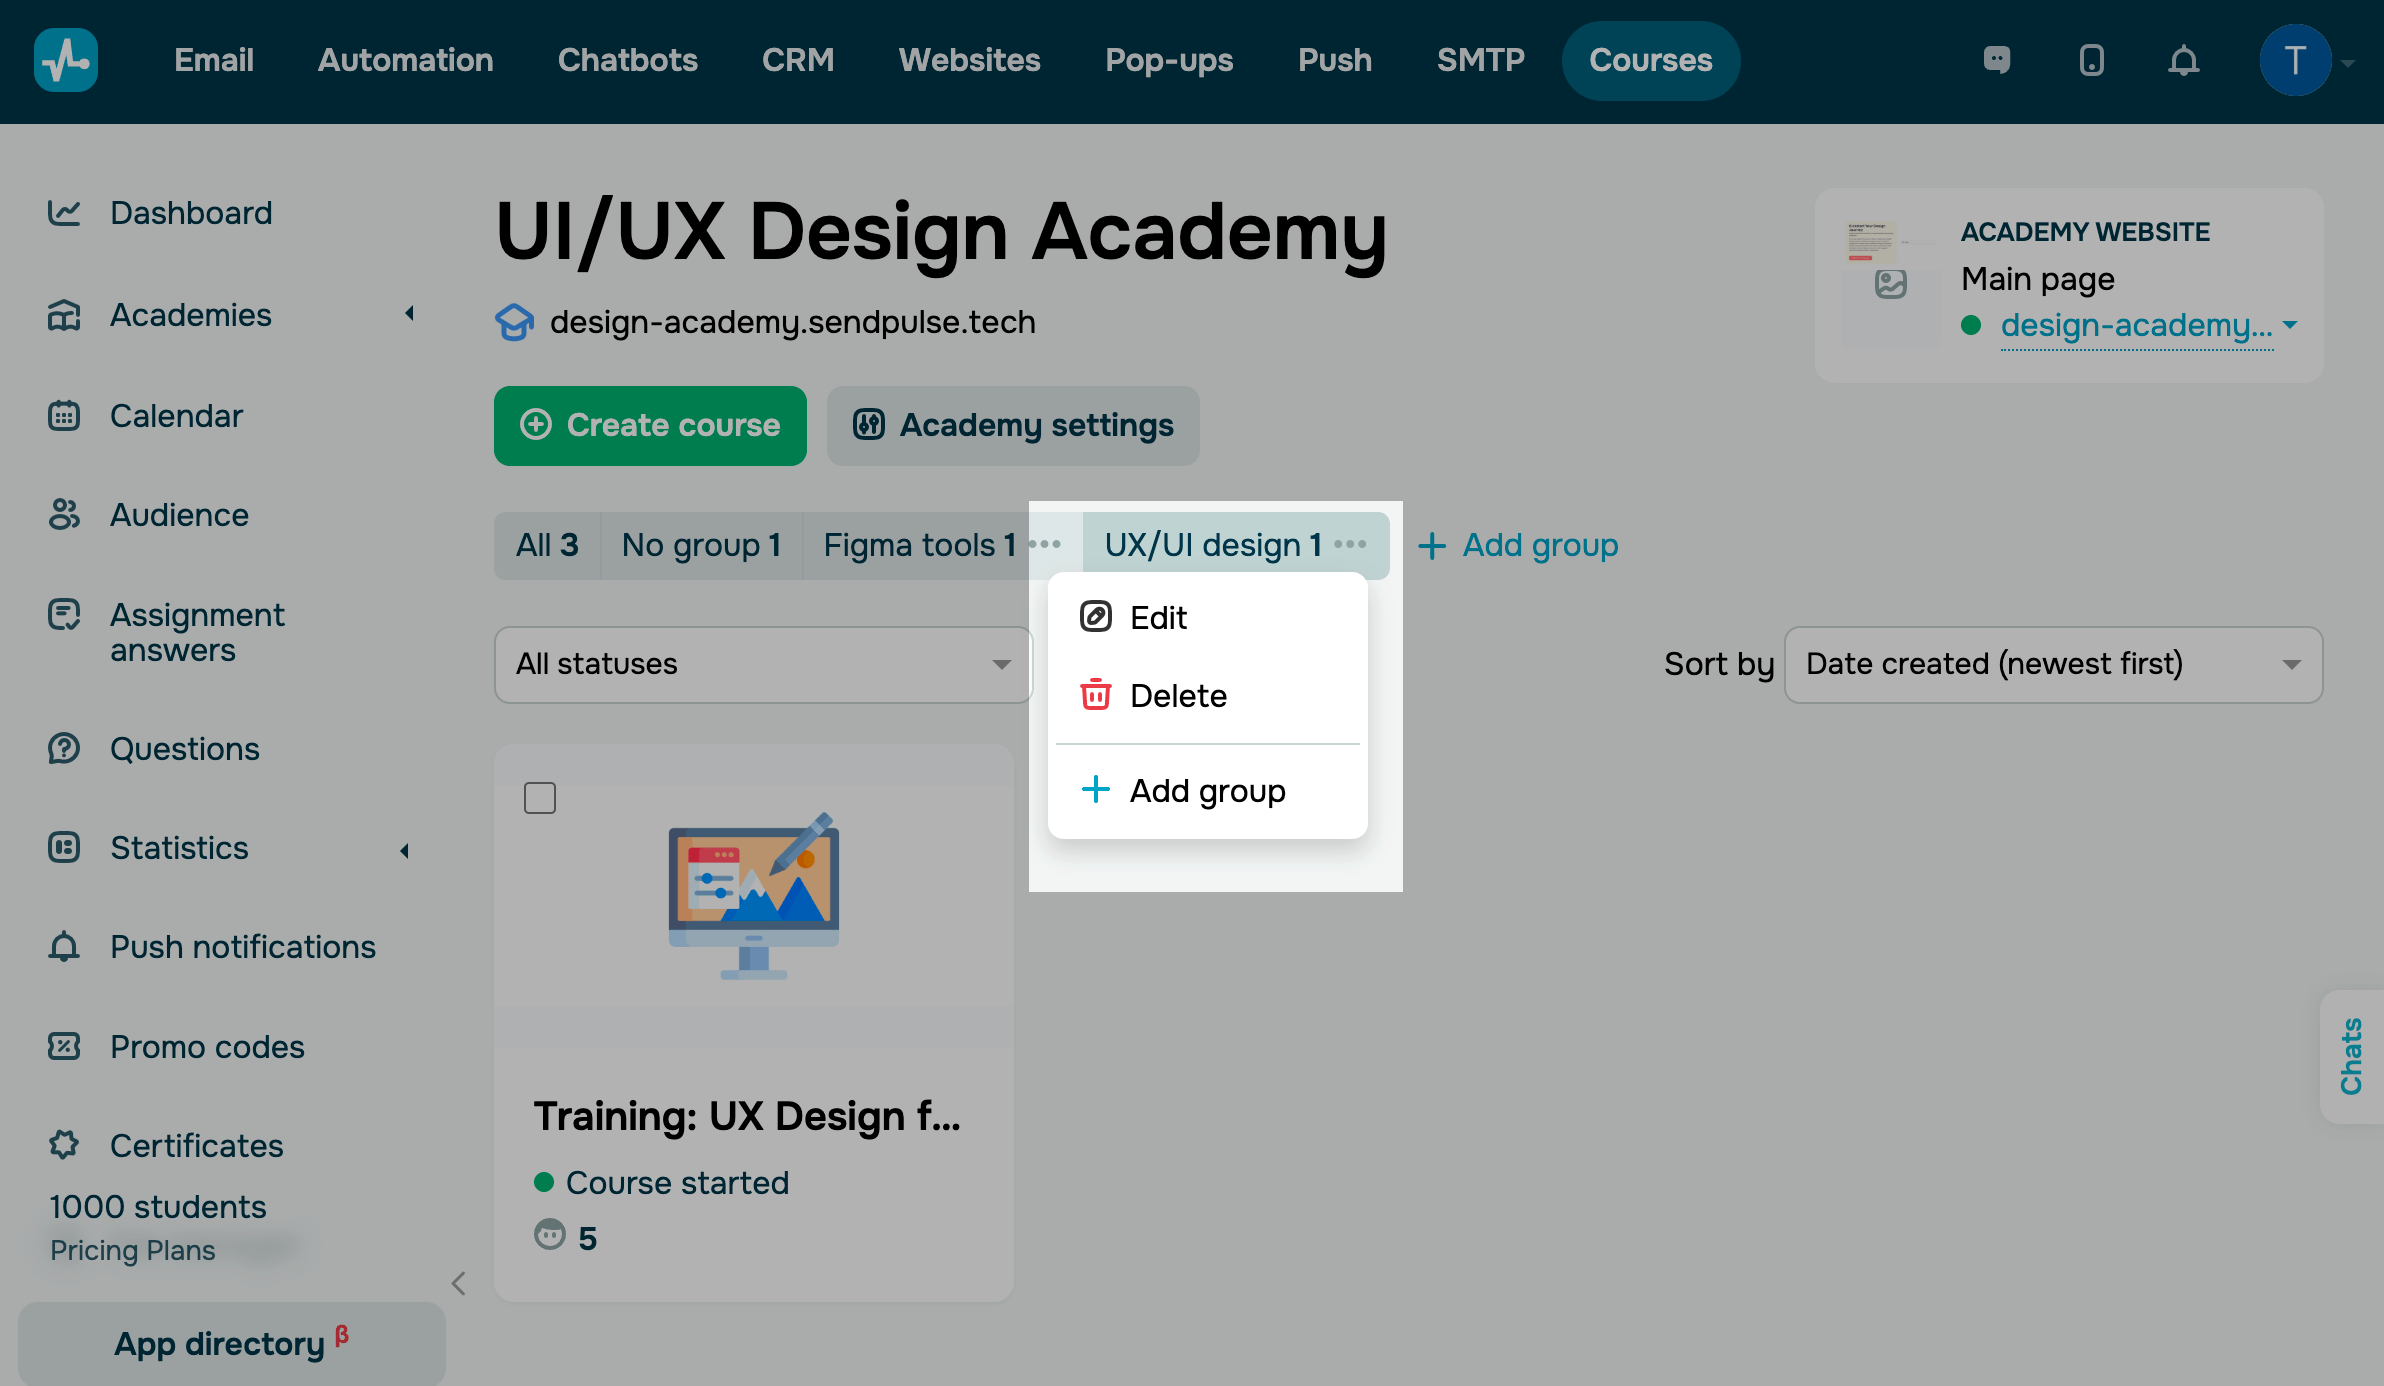
To edit or delete a group, click the three dots next to its name and select an action:
| Edit | Edit the current group name or rename it completely using up to 255 characters. Click Save. |
| Delete | Assign the courses to another group or make them ungrouped. Click Delete. |
To a new course group in your academy, click Add group.
Last Updated: 26.11.2025
or