Filter element in Automation
Use the filter to segment your audience by their preferences, client status, and other personal data. It can help you interact with your clients better: send targeted messages, send webhooks to your system, assign or update variables and tags, create deals in CRM, and more.
Let’s talk about how you can add the Filter element and track user data using values in their variables in our A360 flow builder.
Unsubscribed contacts can go through all flow elements except the Email element. When the system verifies email addresses, it processes the following types of unsubscriptions: Unsubscribe from the entire service, Unsubscribe from a category, and Unsubscribe from a specific flow.
If you use the Launch for mailing list option, contacts who unsubscribed from all campaigns will not be added to your flow start, and contacts who unsubscribed from this category or this flow will go further down your flow, skipping the Email elements.
Add the element
Drag and drop the Filter element from the left panel to your workspace. Link it with an element after which you need to branch your flow scenario.
You can also rename your element to distinguish it from others, or add a comment for your team. Click Element name and enter up to 253 characters in the field. Once you save the settings, the new name will appear in a pop-up window when hovering over the element in the builder.

Specify your sending time
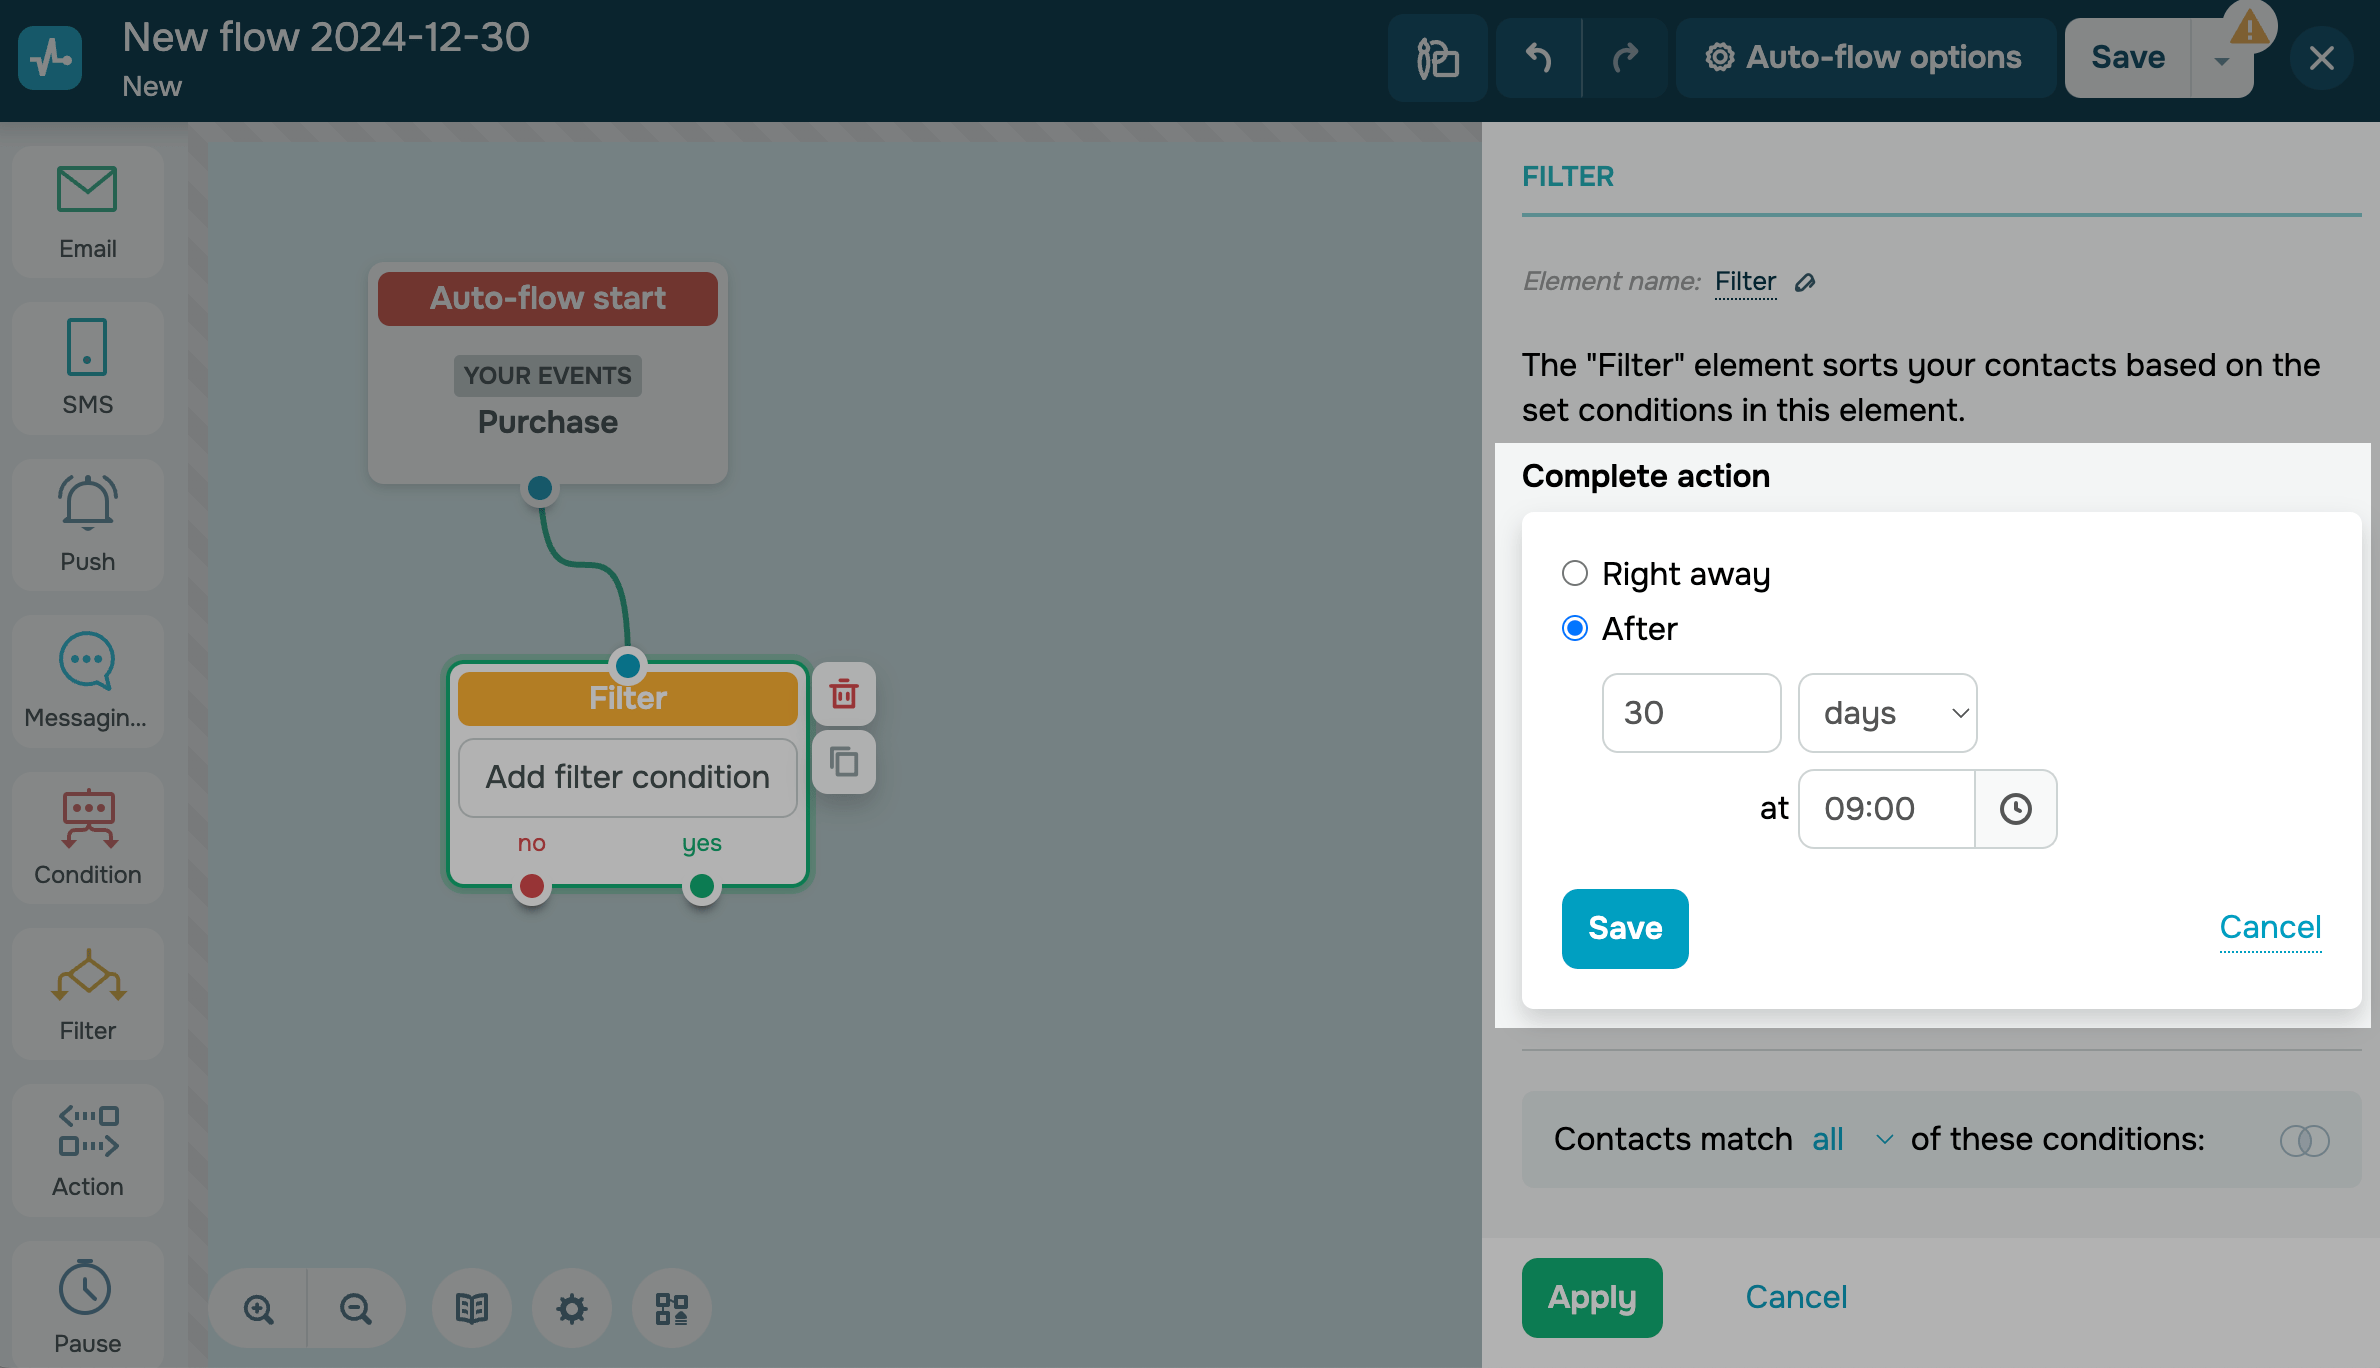
Specify when you want to execute the element.
| Right away | The condition will be triggered once a contact reaches the Filter element. |
| After |
The condition will be triggered after a delay. Set a delay in days, hours, or minutes. For delays measured in days, specify the time when your filter conditions should be applied. |
Read more: Element execution time.
Set up filter conditions
In the New option section, select a filtering condition: Variable, Week day, Specified interval, Exact date, Added to flow start, Last activity, or Added to mailing list.
You can add up to 5 filter conditions and link them with operators. By default, you will go to set up your first filter.
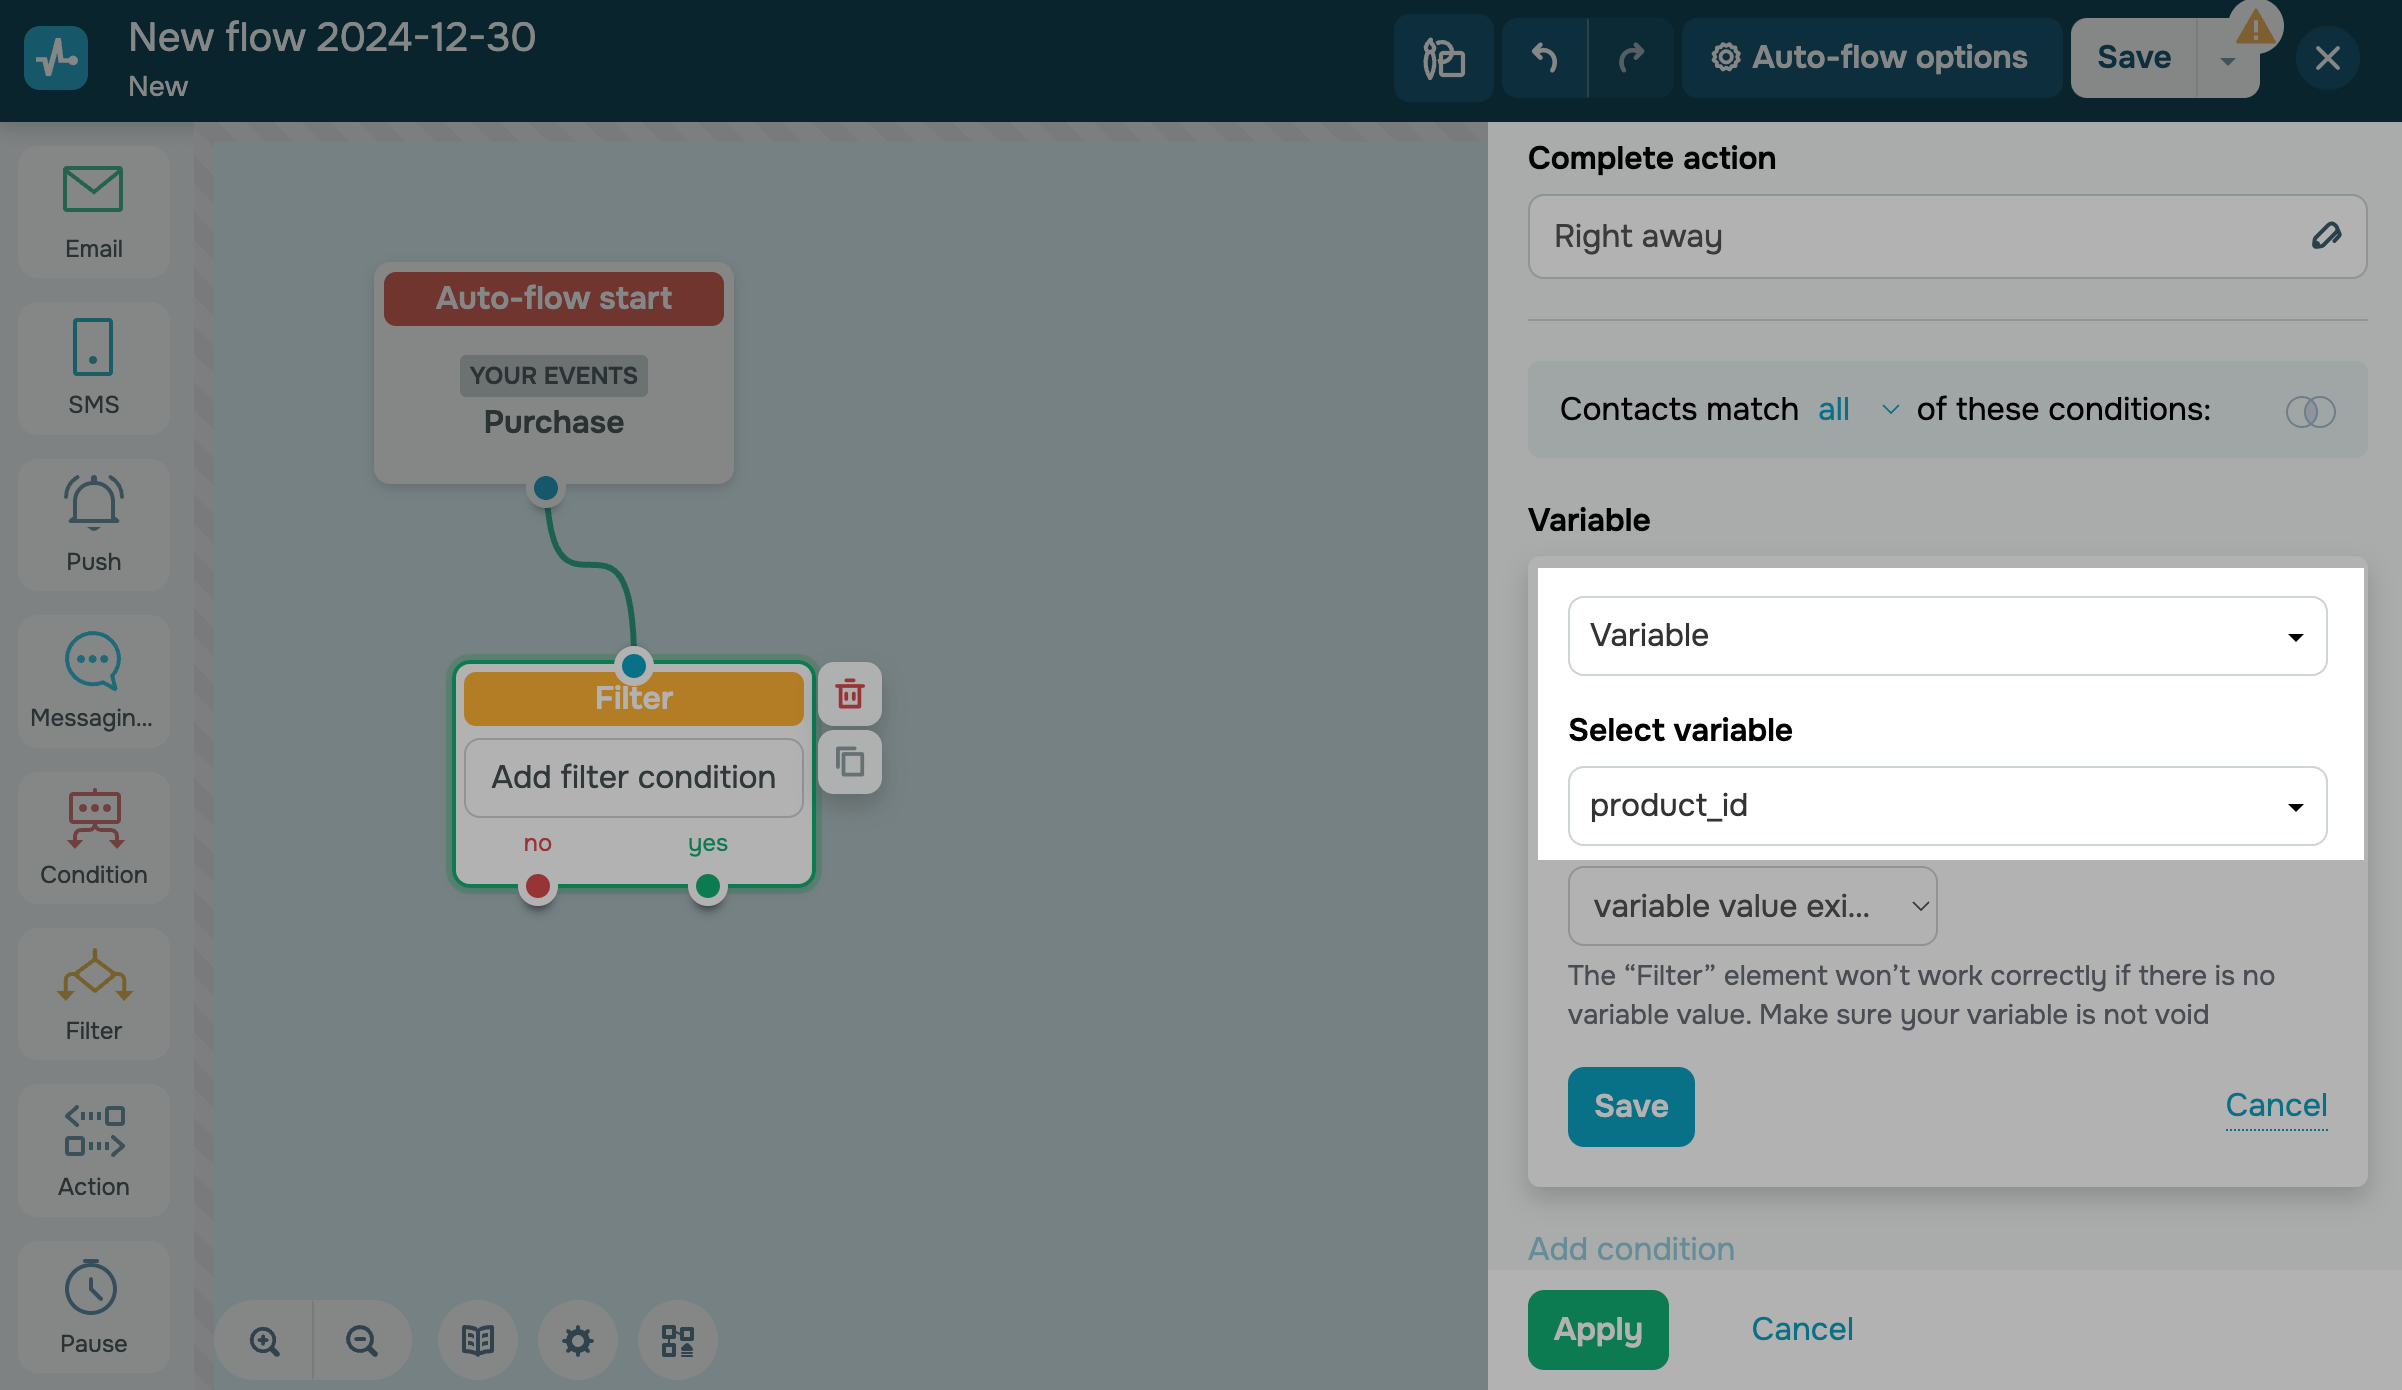
Variable
This option tracks variable values, including their presence, matching, or partial matching with a specified value. It stores and transfers customer data to facilitate personalized communication. For example, you can guide clients through specific flow branches based on the information you collect.
Specify a variable
Select a contact variable whose value you want to track.
The list of available variables is determined by your automation launch trigger.
| Email service triggers | The variables will be retrieved from the specified mailing list.
To give you an idea, you can send a newsletter on a specific day of the week. |
| CRM triggers
|
The variables will be retrieved from the fields in the selected CRM pipeline.
To insert values from deal fields, choose a variable with the To give you an idea, you can arrange special offers for contacts from a specific city. |
| Course triggers | The variables will be retrieved from the specified course.
For example, you can ask students to share their opinion about a specific course or instructor. |
| Start the flow by event trigger | The variables will be retrieved from the event body or mailing list. Mailing list variables appear separately in the drop-down list. You can select a variable or apply a filter with multiple conditions to view variables from various sources. |
Select a variable from an array
If you’ve selected a flow trigger based on an event that includes an array (a variable of the Structure type), you can select a variable from within that nested array. For example, you can create a product card that shows its various features.

Filtering the values of your selected variable applies only within the array that contains it. The name of this variable is specified in square brackets next to the array name it belongs to — for example, array[variable].
When entering criteria, make sure the value matches the variable’s type. For example, if you select a variable of the Number type, the criterion can only contain numbers, without letters or special characters.
If at least one variable in the array matches your selected criterion, the filter will trigger the yes flow. If no variable matches the criterion or contains any value, the filter will trigger the no flow.
Select a condition
You can select the variable value existence condition to check if a variable has any value or select a condition with a value to check if values match in the third field.

Possible filter conditions vary depending on the variable type:
| Type | Condition | Value |
| Number | > | Checks if the variable number is more than the entered value.
The specified value is not included in the range of the condition sample. |
| < | Checks if the variable number is less than the entered value.
The specified value is not included in the range of the condition sample. |
|
| = | Checks if the variable number is equal to the entered value. | |
| ≠ | Checks if the variable number is not equal to the entered value. | |
| between | Checks if the variable number is included in the selected range. | |
| String | contains | Check if the variable contains the entered value. Used for partial matches. |
| not contains | Check if the variable does not contain the entered value. Used for partial matches. | |
| equal | Check if the variable equals the exact entered value. Used for total matches. | |
| not equal | Check if the variable does not equal the exact entered value. Used for total matches. | |
| starts with | Check if the variable contains the entered value at the beginning of the variable. | |
| ends with | Check if the variable contains the entered value at the end of the variable. | |
| Date | is after | Check if the date is after the entered value. |
| to | Check if the date is before the entered value. | |
| equal | Check if the date matches the entered value. | |
| between | Checks if the date in a variable is included in the selected range. |
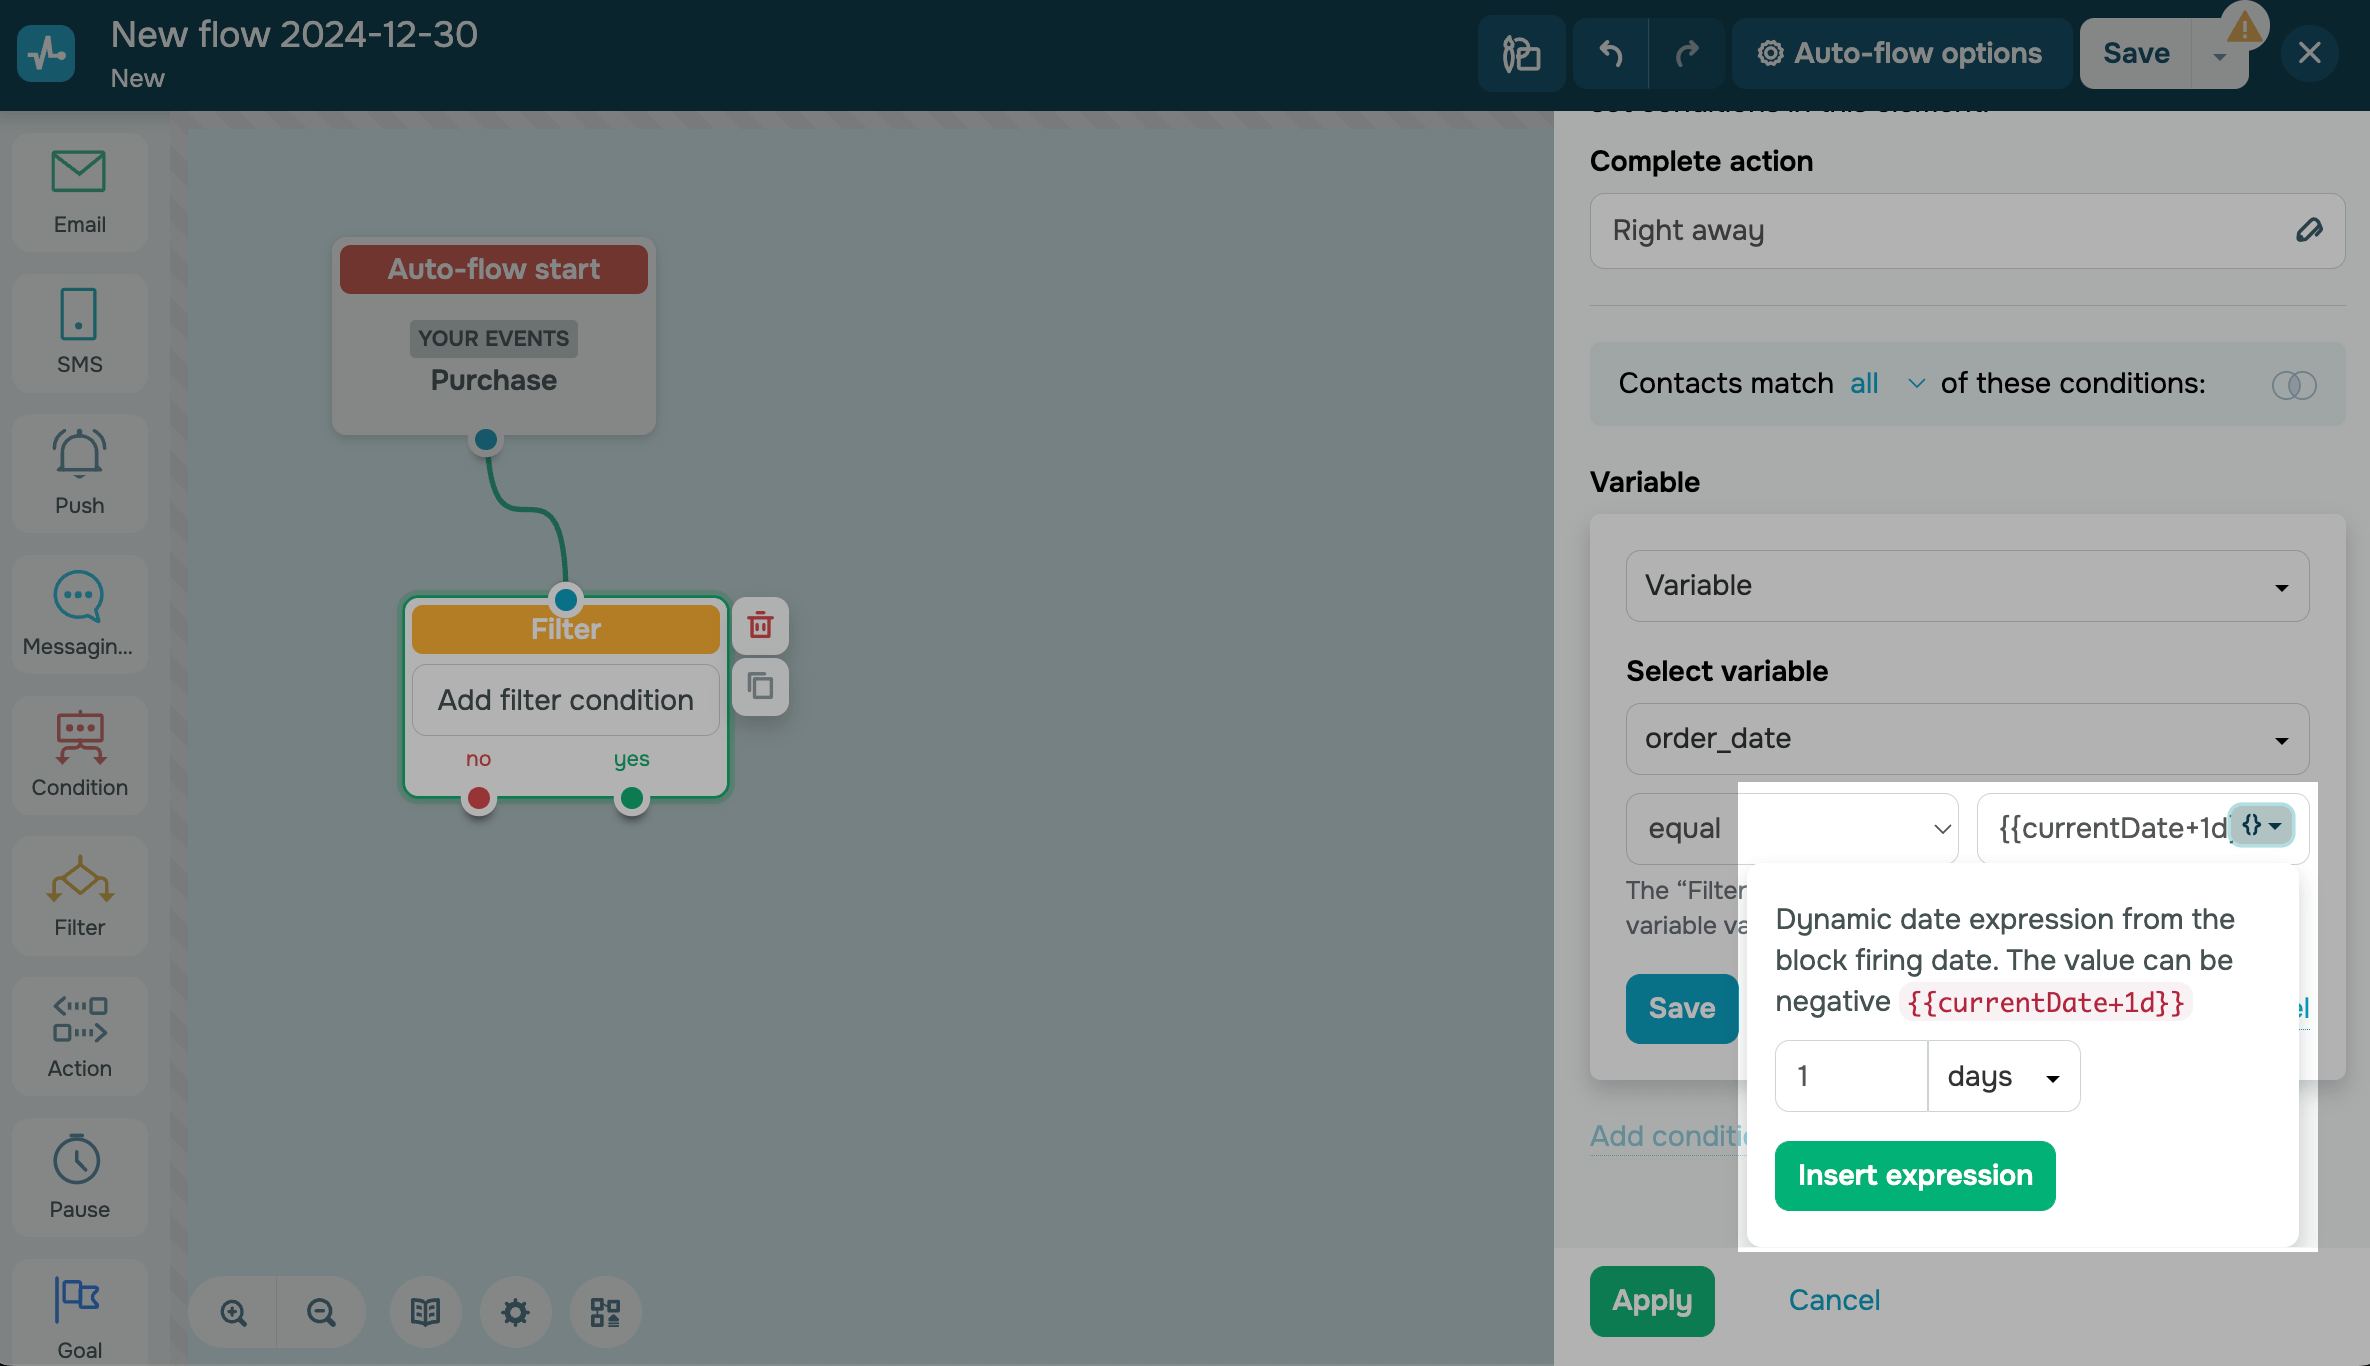
If you choose the date filter condition, you can limit your future events when a user action occurs before or after the date you select. To do this, click a date, and select one from the calendar.
You can also set a specific expression. To do so, add a variable of the Date type, and click {}. Select a dynamic date value (day, hour, or minute), and enter its amount — these data points will be checked for consistency. You can also use negative values.
For example, you can send reminders 3 hours before your event to those who registered a long time ago. Select the registration day variable, set your conditions to is after, and specify 3 hours. Afterward, your email will be sent only to those who registered earlier than 3 hours before the start.
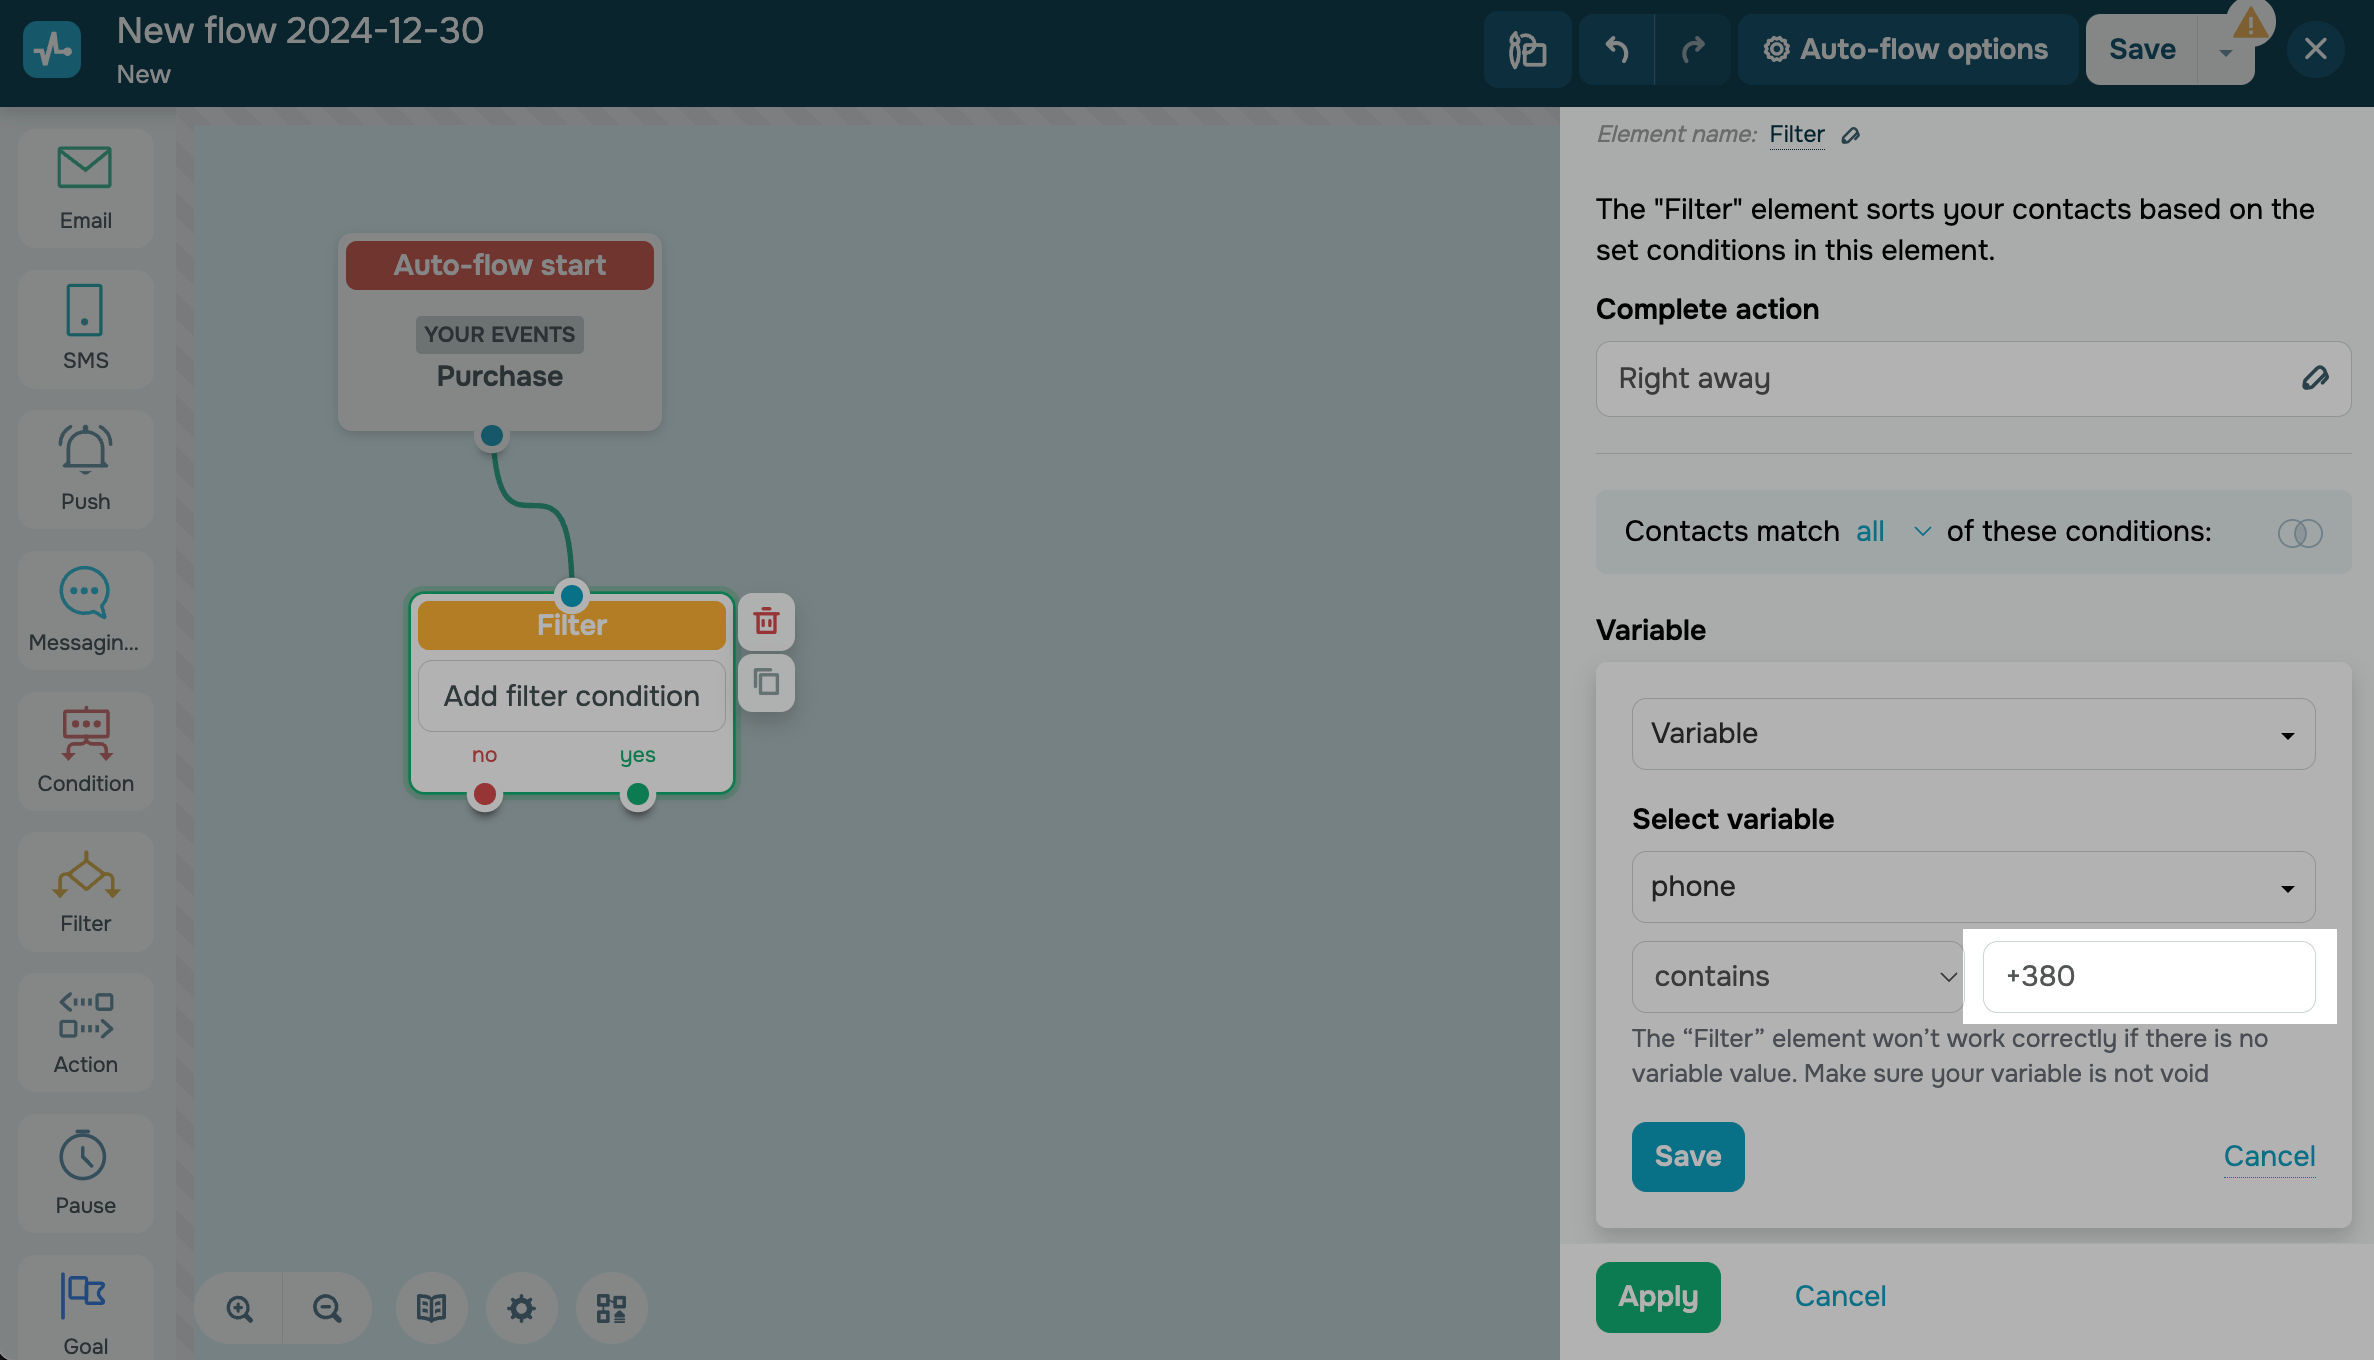
Enter the value
Once you select a condition, specify a value using which you want to check clients' data in a variable.
Please note that if you try to filter a variable without a value or if its value is blank, the filter will not work in the Yes and No branches, as filtered variables must have a value. To check for a variable or value, select the corresponding condition.
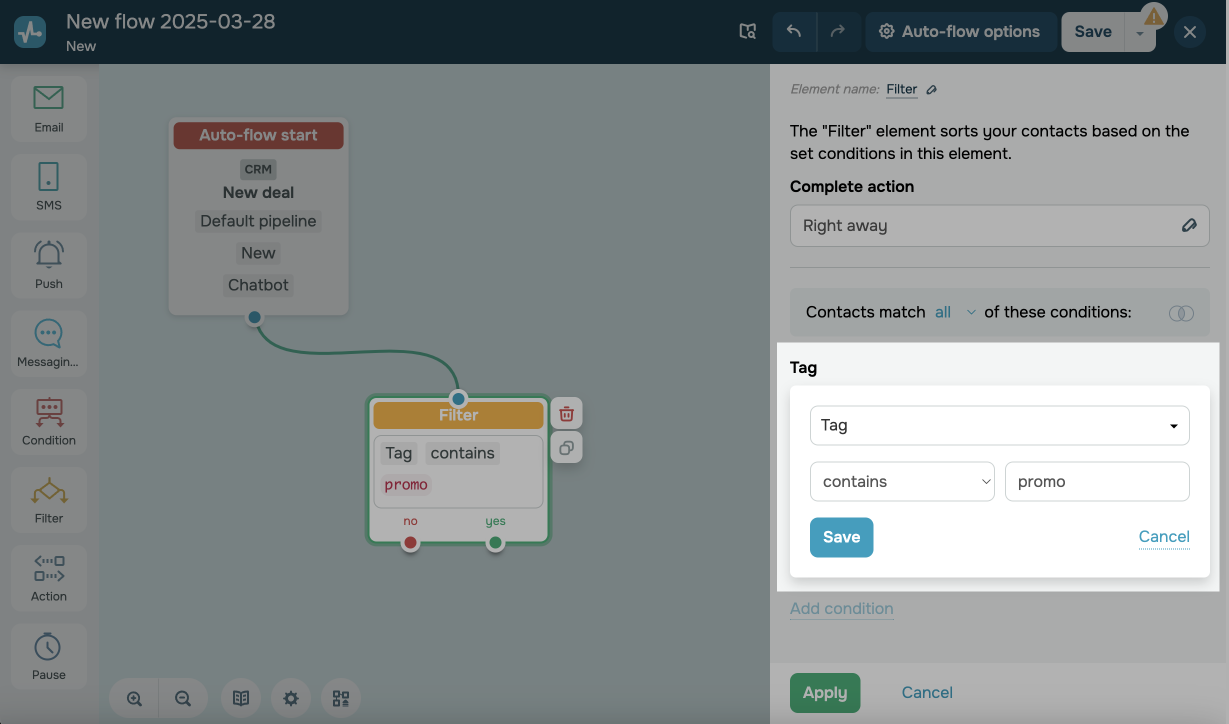
Tag
This option tracks contact tags in the email service, CRM system, or course student card based on the trigger event. For example, you want to target customers who have purchased your courses before. You can use a tag like marketing_course to trigger a flow with a discount on your new course.
Select a tag filtering condition:
| contains | Checks if a tag includes your entered value. Used for partial matches. |
| does not contain | Checks if a tag does not include your entered value. Used for partial matches. |
| equals | Checks if a tag equals your exact entered value. Used for complete matches. |
| not equal | Checks if a tag does not equal your exact entered value. Used for complete matches. |
| starts with | Checks if a tag starts with your entered value. |
| ends with | Checks if a tag ends with your entered value. |
If a contact’s tag meets the condition, the filter will follow the Yes flow branch.
If a contact does not meet the condition or has no tags, the filter will always follow the No flow branch.
If a contact has multiple tags, the system will check if any of them meet the condition. If at least one tag matches, the filter will follow the Yes flow branch.
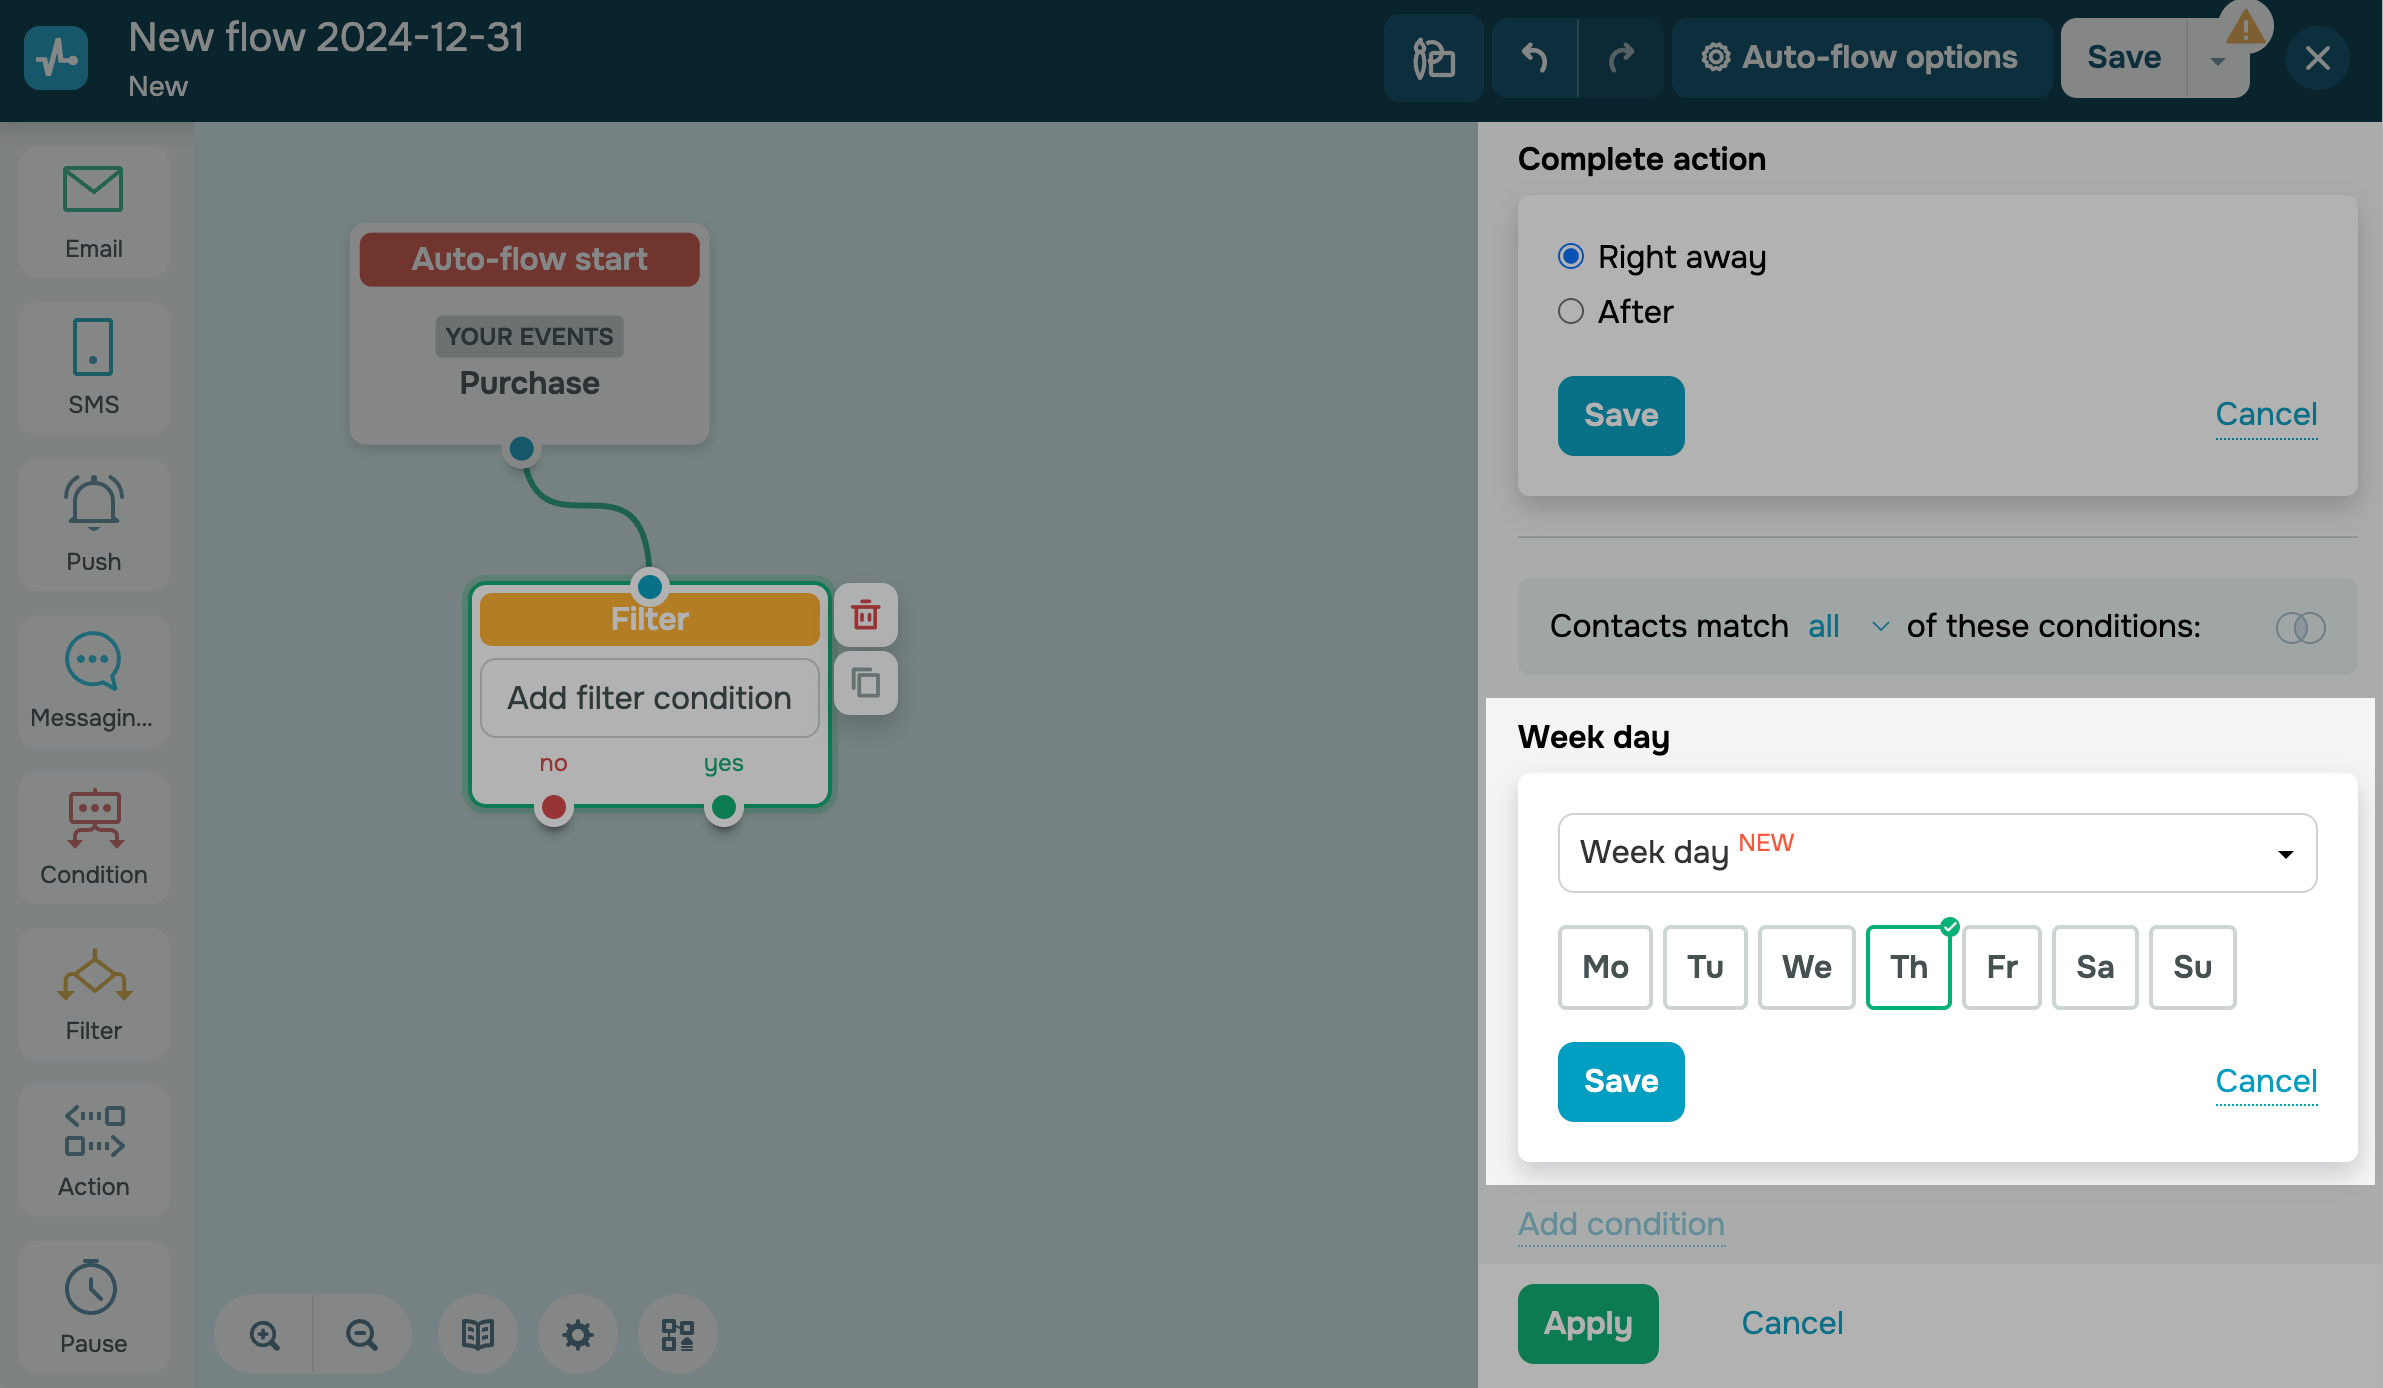
Week day
This option tracks the days of the week when contacts reach the Filter element. For example, if you have designated special offer days, you can branch your flow and send targeted messages to customers who contact you on these days.
Select the days of the week. If a contact reaches the Filter element on the selected day, they will go through the Yes branch.
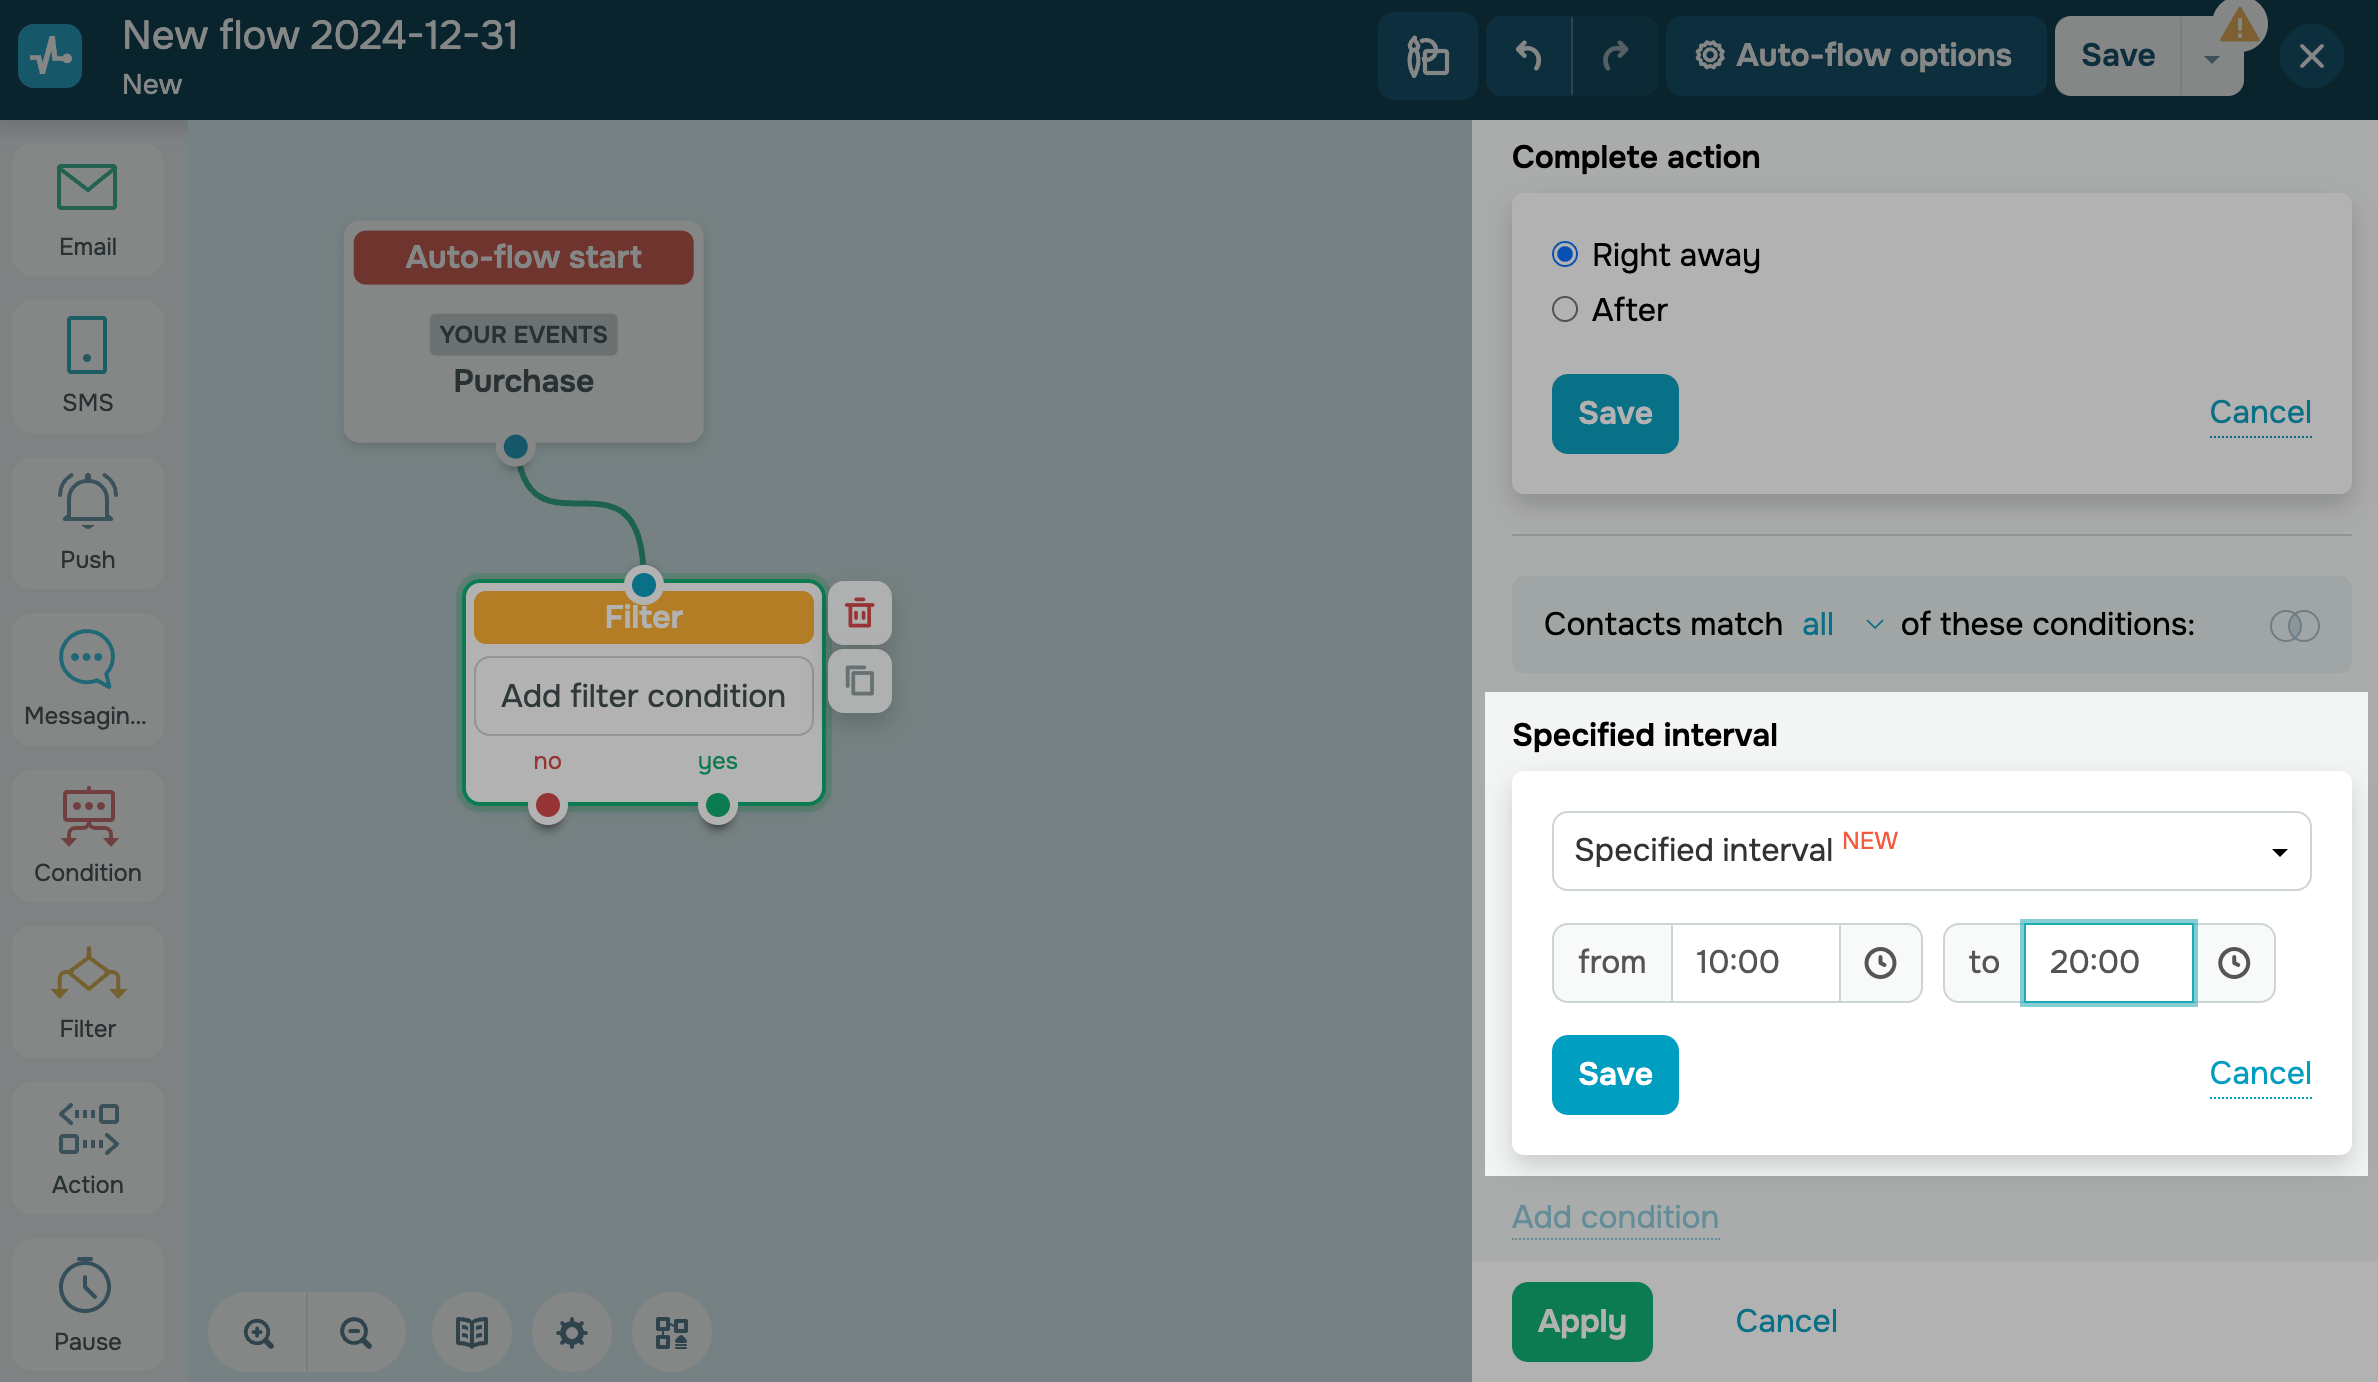
Specified interval
This option tracks daily time intervals when contacts reach the Filter element. For example, you can send a message with your working schedule during off-hours or inform customers that their orders will be confirmed later.
The time is based on the time zone set in your SendPulse account. To check your selected time zone, go to Account settings > General > Time zone.
Set a timeframe in the from and to fields. If a contact reaches the Filter element within this timeframe, they will go through the Yes branch.
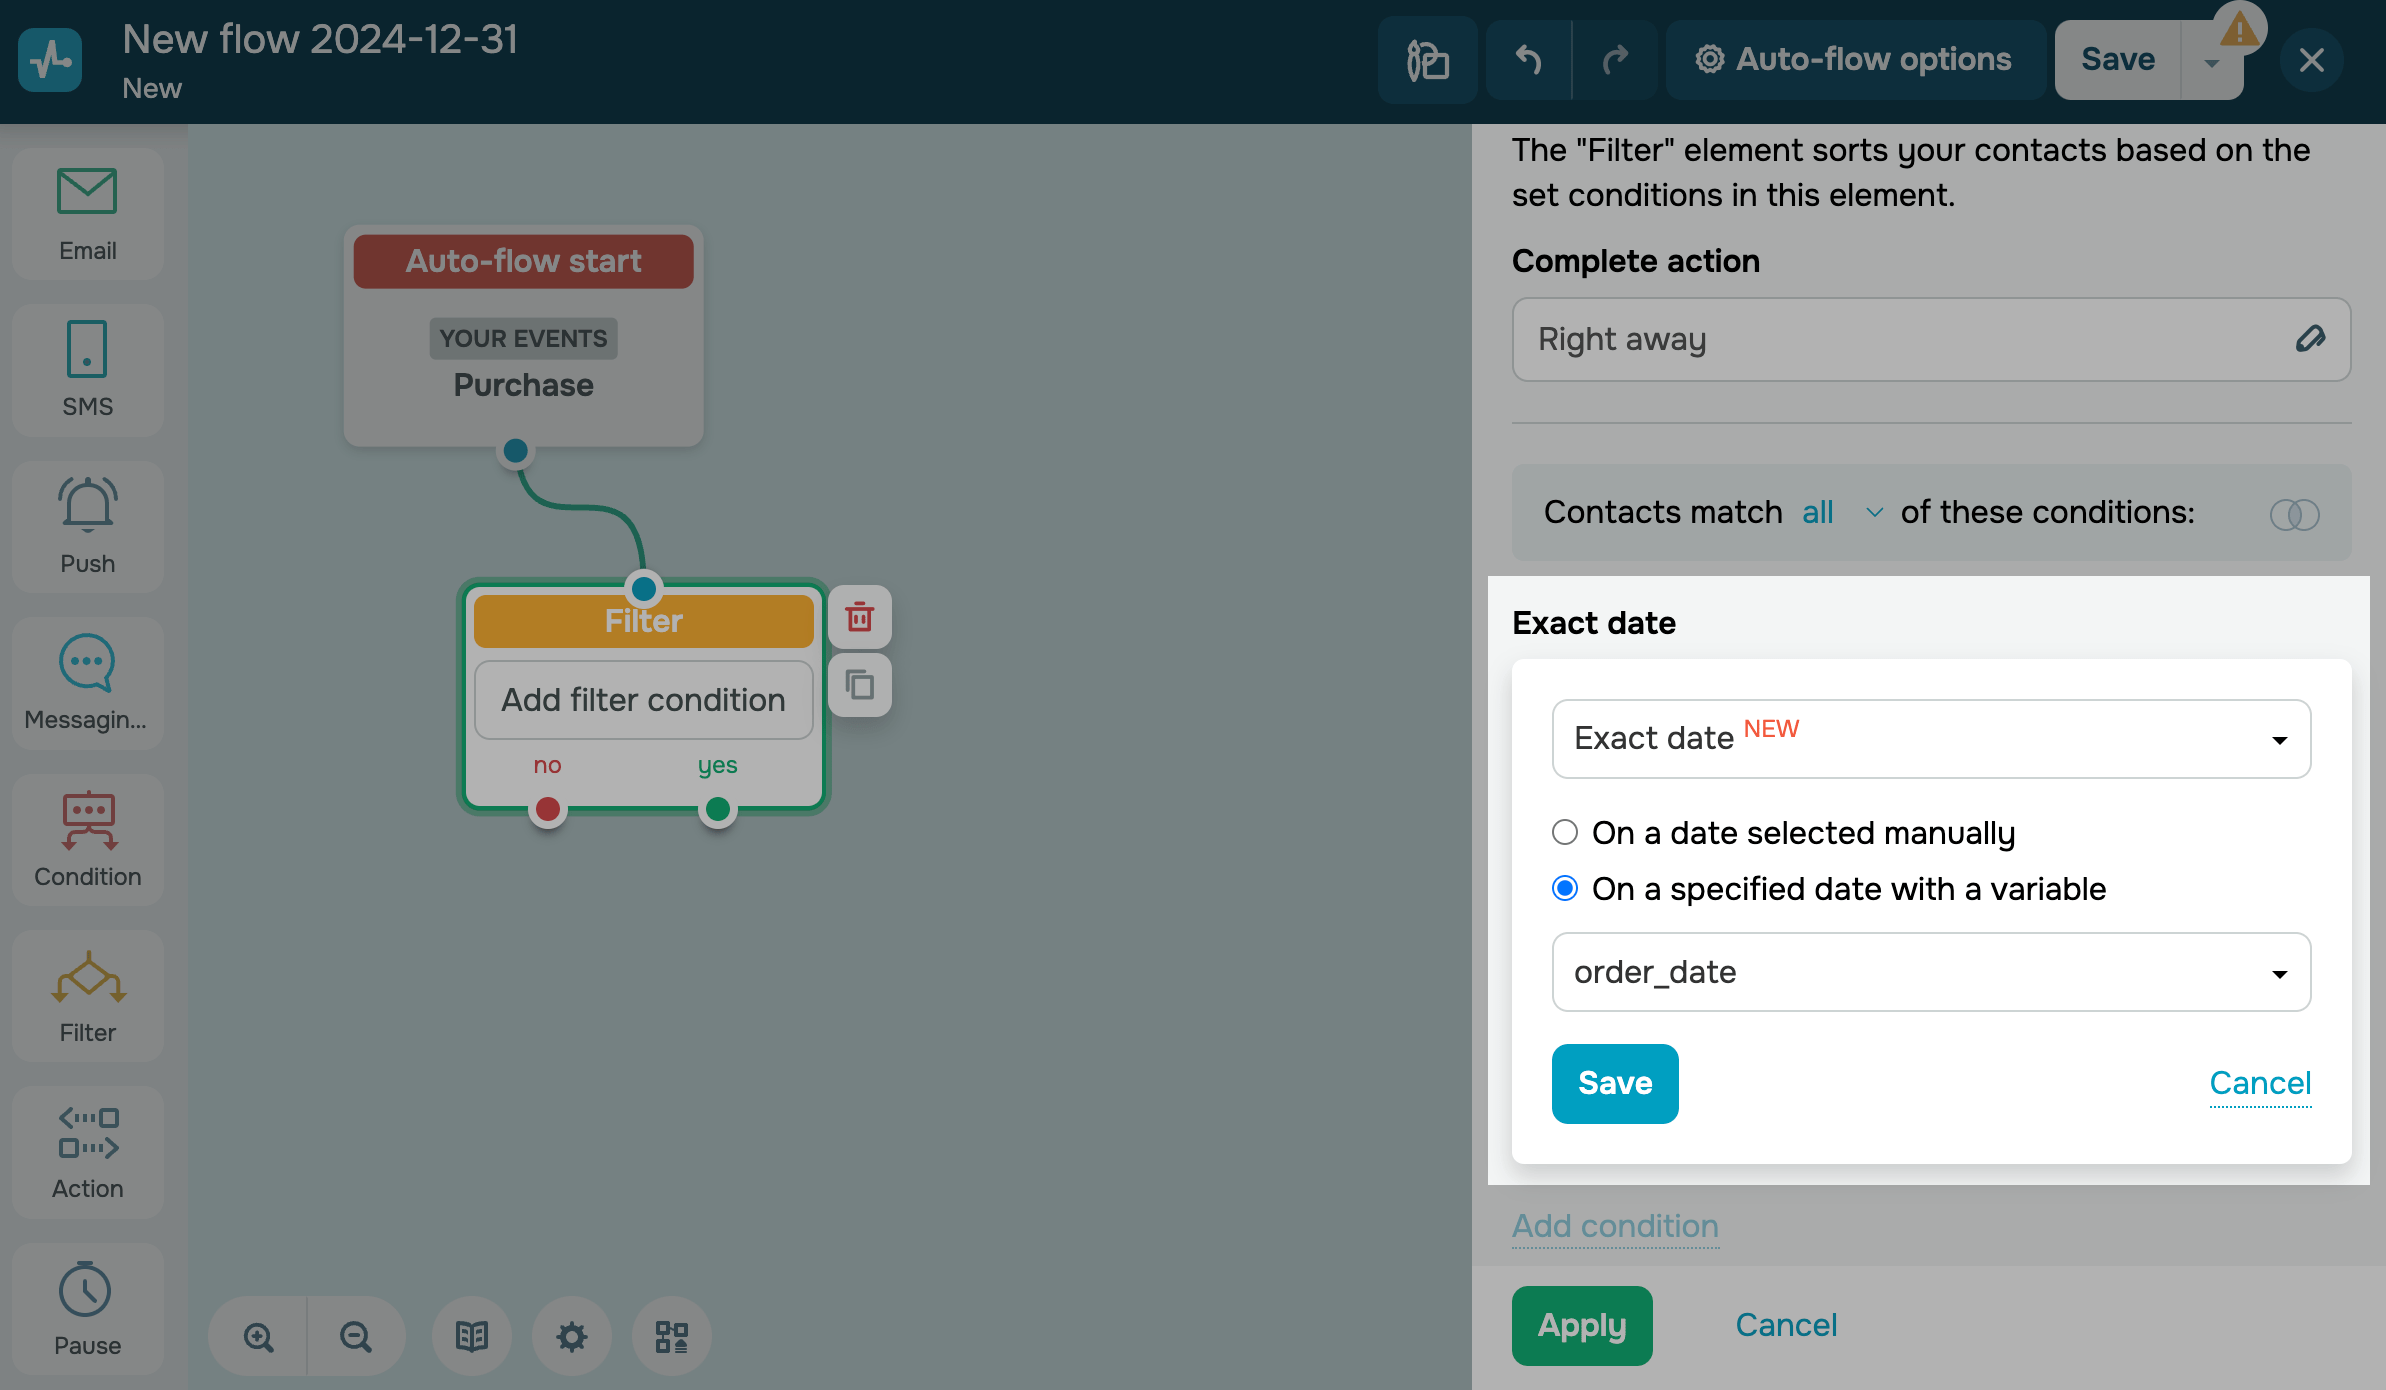
Exact date
This option tracks the dates when contacts reach the Filter element.
Decide how the filter should recognize the date. If a contact reaches the Filter element on the selected date, they will go through the Yes branch.
| On a date selected manually | Sets a specific date the Filter element will recognize.
Select a date using the calendar. If a contact reaches the Filter element on this date, they will go through the Yes branch. |
| On a specified date with a variable | Sets a date-type variable the Filter element will recognize.
Select a variable from the dropdown list. If a contact reaches the Filter element on the date specified in your variable, they will go through the Yes branch. |
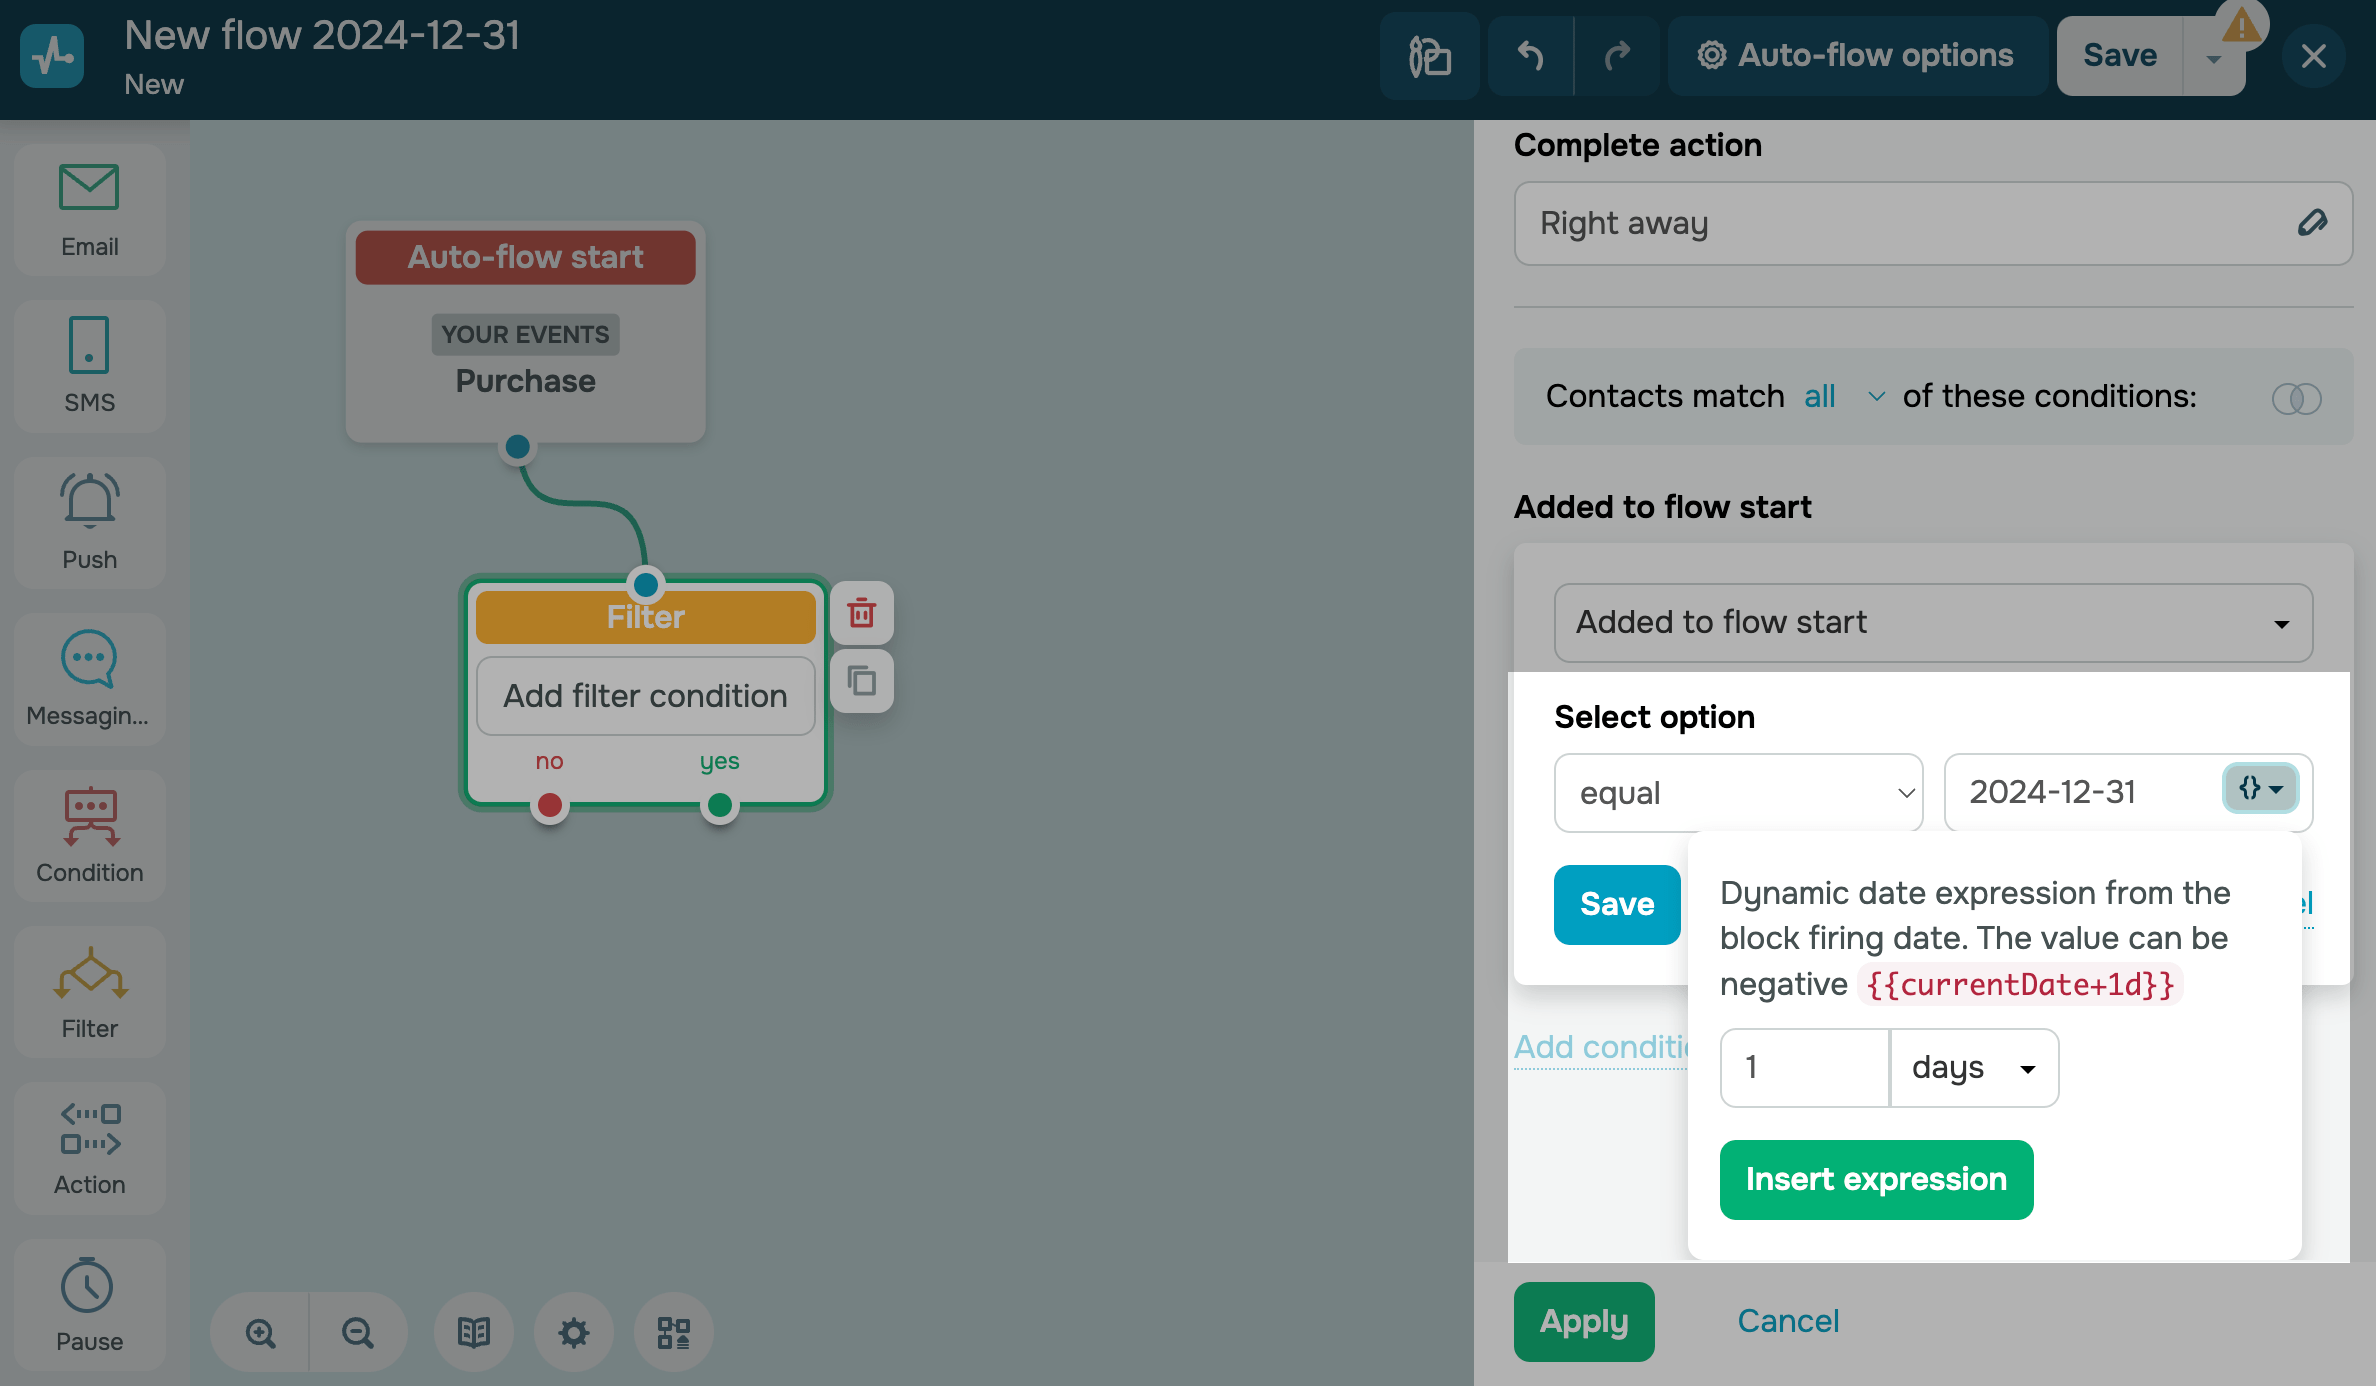
Added to flow start
This option tracks when contacts reach your flow start element with a trigger. For example, if you’ve rebranded, you can send company updates to all contacts that are already in your flow.
In the Select option field, select a condition operator:
| is after | Select an end date. |
| before | Select a start date. |
| equal | Select an exact filtering date. |
| between | Select start and end dates. |
In the field on the right, select a date from the calendar. If a contact reaches the Filter element within the selected timeframe, they will go through the Yes branch.
You can also set a specific expression. To do so, add a variable of the Date type, and click {}. Select a dynamic date value (day, hour, or minute), and enter its amount — these data points will be checked for consistency. You can also use negative values.
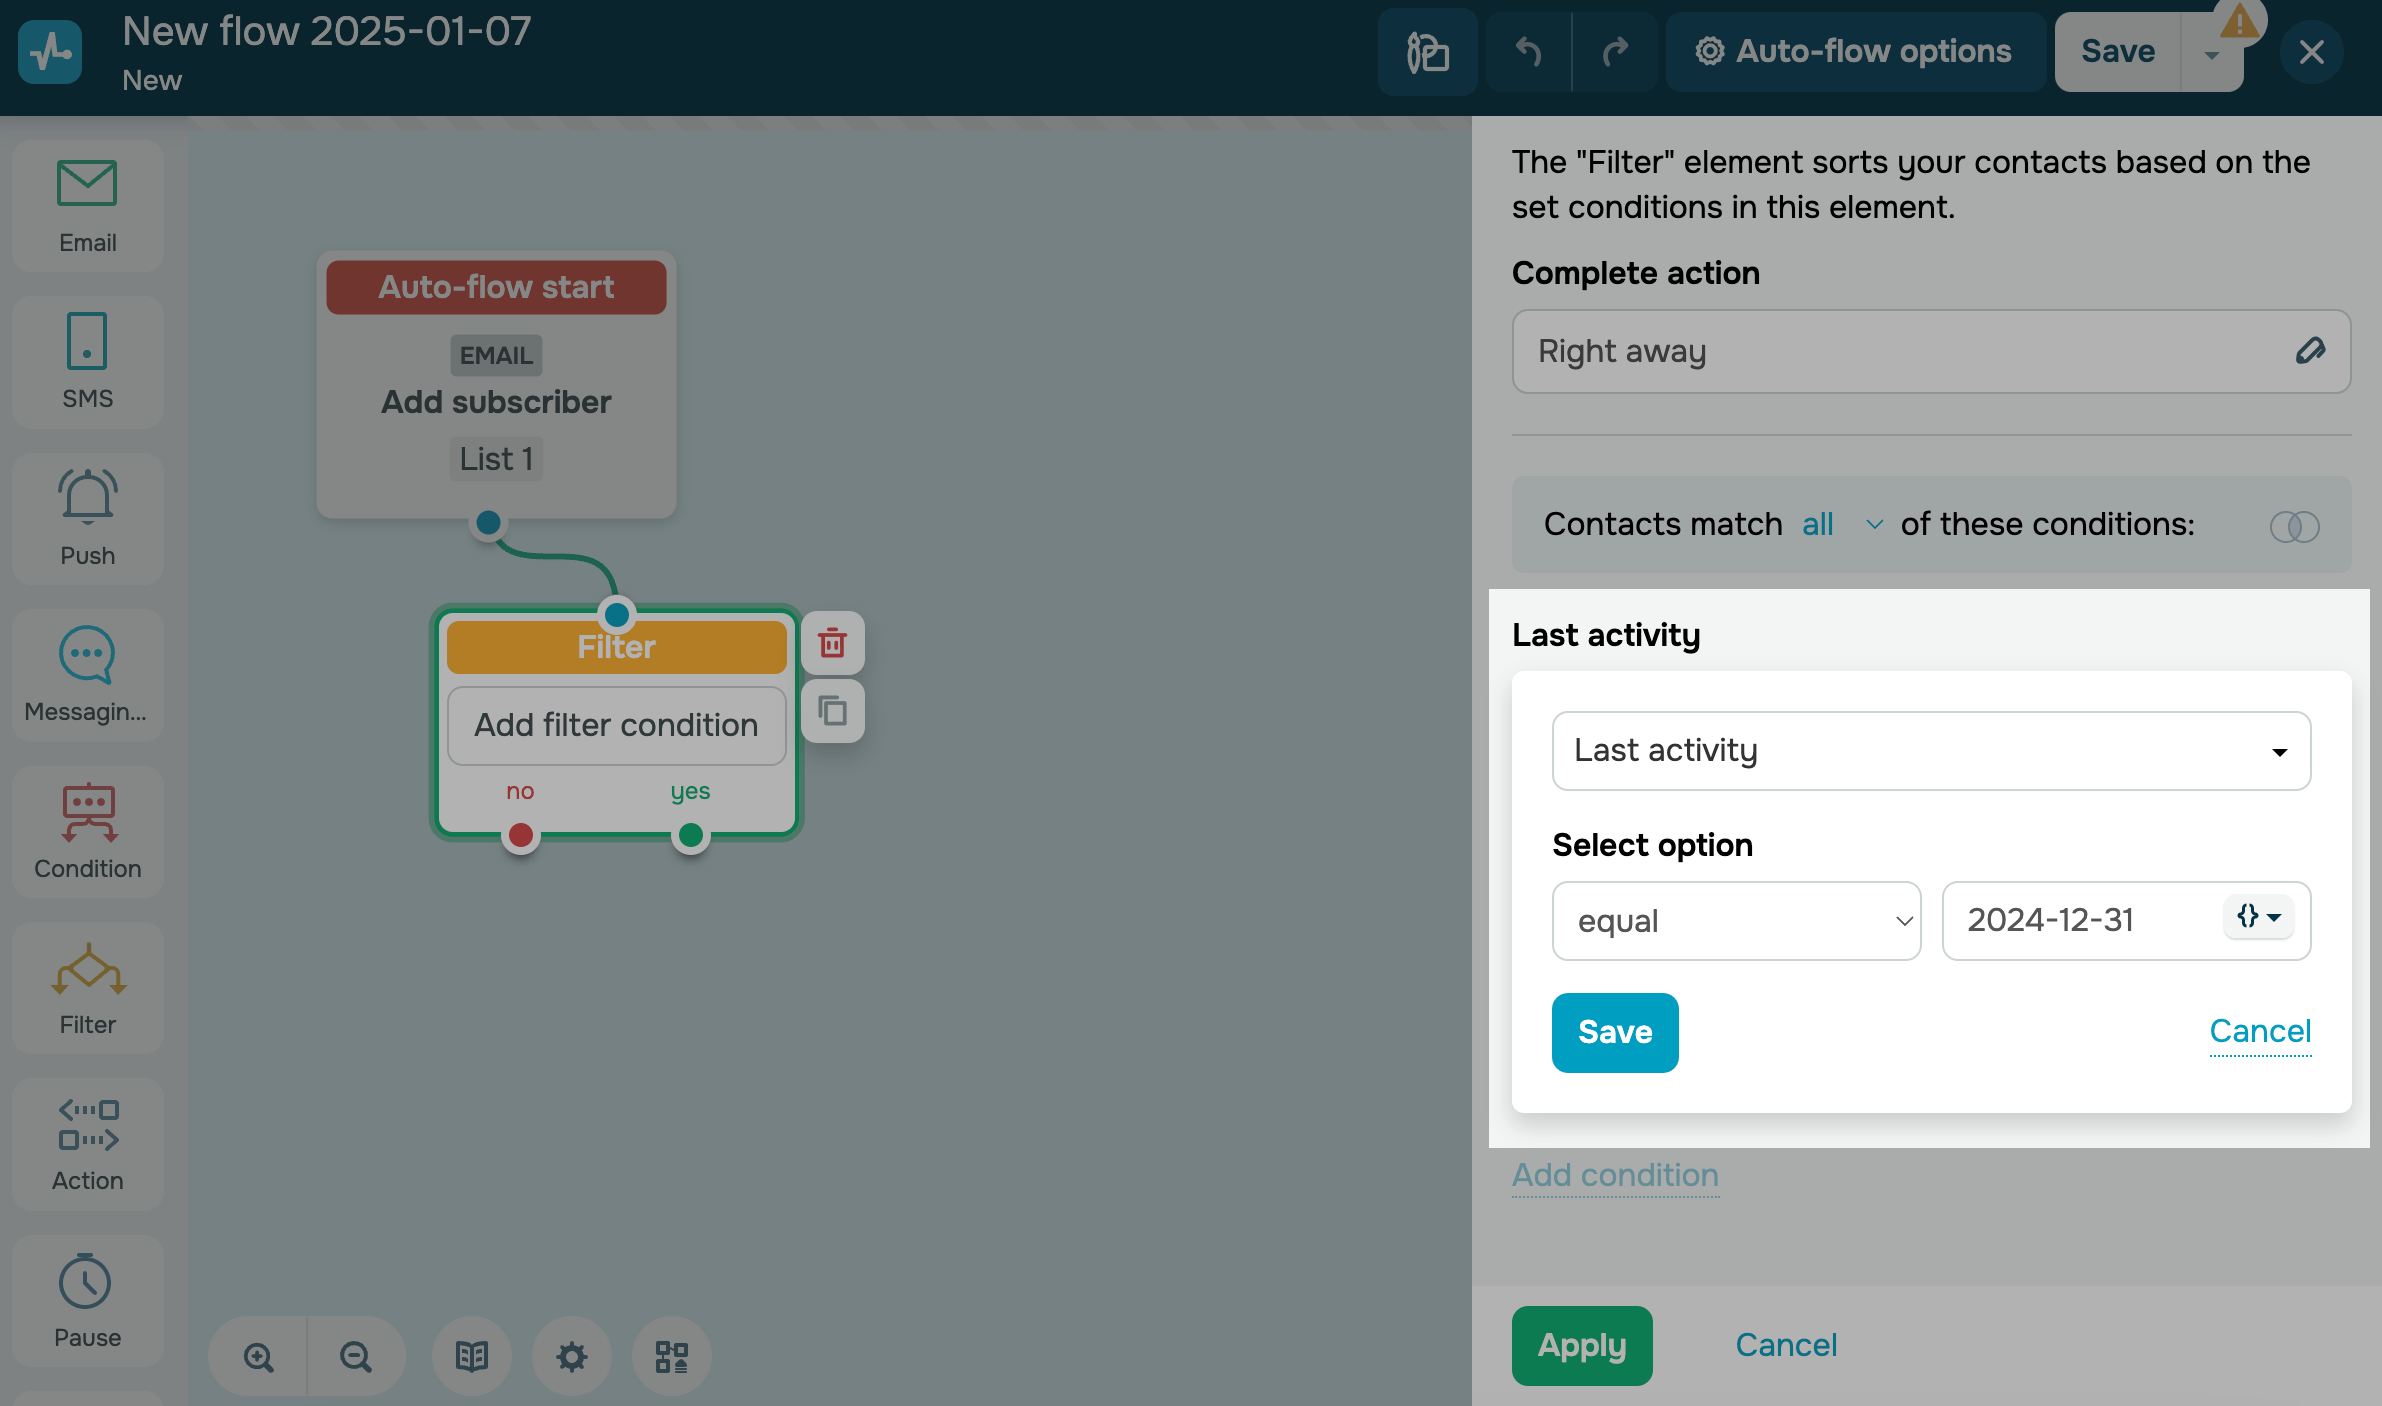
Last activity
Available if you select an email service trigger in your start element.
This option tracks contacts' last activity dates using variables. You can use it to send notifications to customers who haven't been active for a while.
In the Select option field, select a condition operator:
| is after | Select an end date. |
| before | Select a start date. |
| equal | Select an exact filtering date. |
| between | Select start and end dates. |
In the field on the right, select a date from the calendar.
You can also set a specific expression. To do so, add a variable of the Date type, and click {}. Select a dynamic date value (day, hour, or minute), and enter its amount — these data points will be checked for consistency. You can also use negative values.
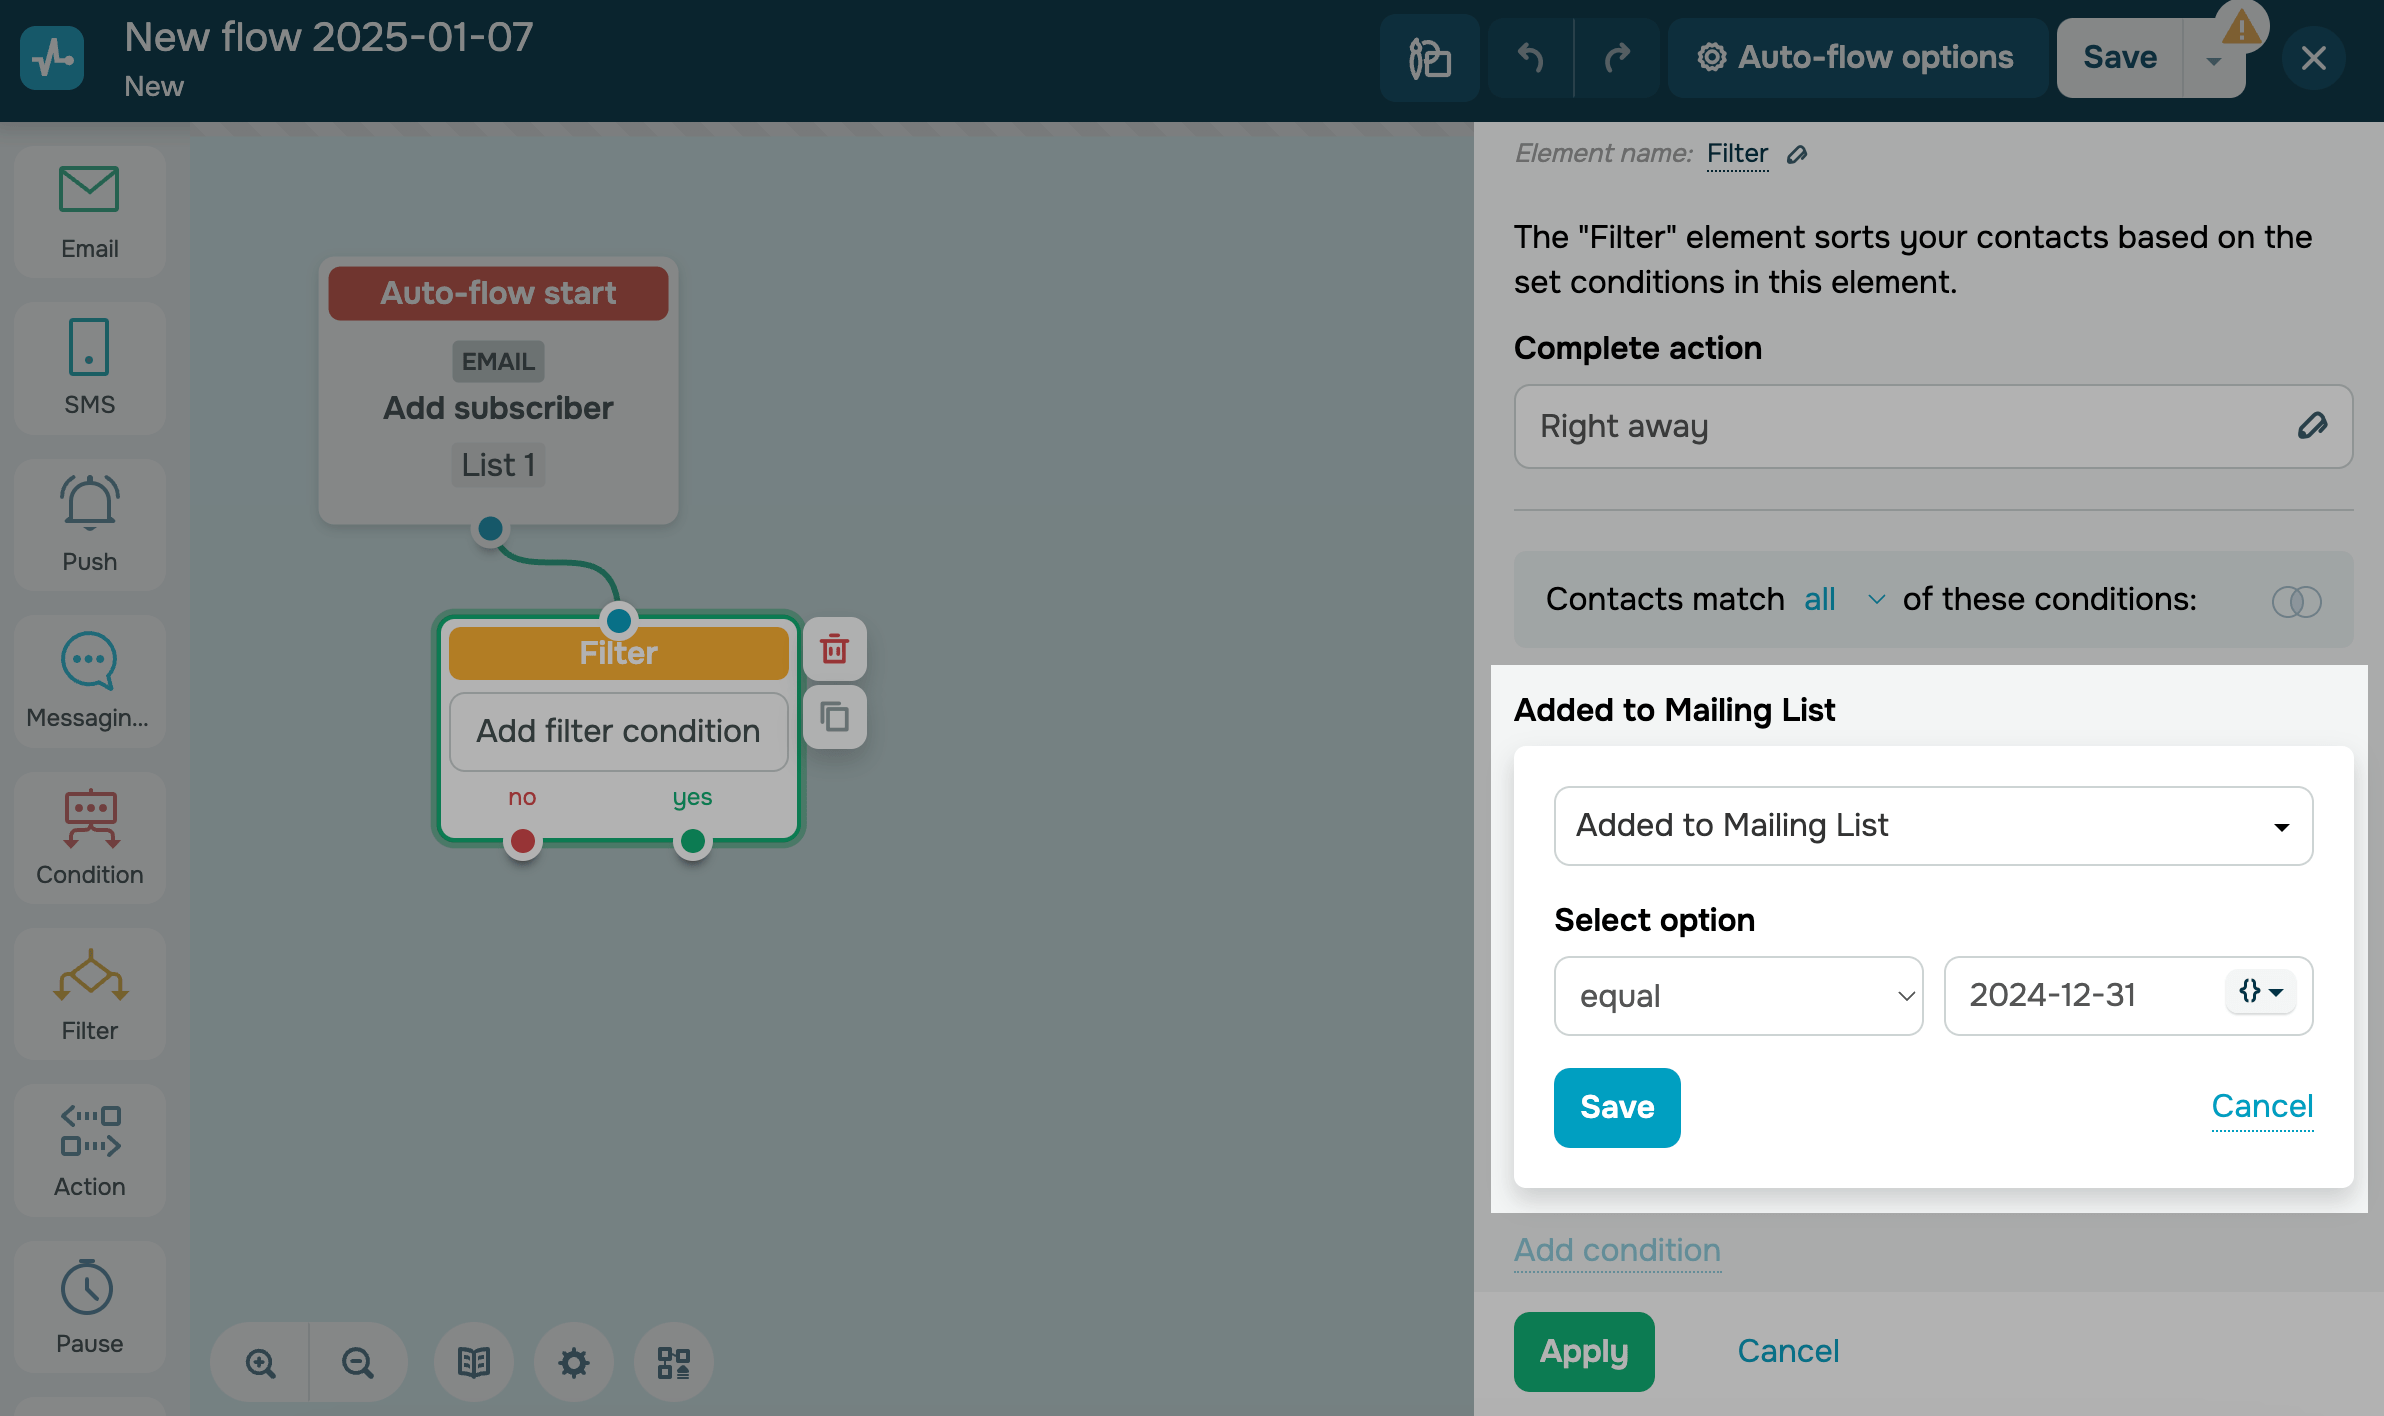
Added to mailing list
Available if you select an email service trigger in your start element.
This option tracks when contacts join mailing lists specified in your start element settings. For example, you can notify customers about your sale if they join the mailing list before it begins.
In the Select option field, select a condition operator: is after, before, equal, or between. Select a date or click {} to add a dynamic expression.
Course
This option checks a student's progress in a specific course. You can use it to send an invitation to an advanced course to students who have completed a related lesson or deliver other targeted messages.
| Course study | Invited | Checks if the student has been invited to your selected course. |
| Enrolled | Checks if the student has registered for your selected course. | |
| In progress | Checks if the student has started interacting with your course content. | |
| Course completion | Completed | Checks if the student has successfully completed all tasks. |
| Failed | Checks if the student has viewed your course content, submitted all assignments, and met your course completion criteria. | |
| Certified | Checks if the student has successfully met your course completion criteria and received a certificate. |
If you select the Course study option, the system will check if your student has any of the following statuses: Invited, Enrolled, or In progress.
If you select the Course completion option, the system will check if your student has any of the following statuses: Completed, Failed, or Certified.

Next, select the course to filter students by. If the user matches your selected course status, the filter will trigger the yes flow. If the user is not enrolled in the course or doesn’t match the status, the filter will trigger the no flow.
Team member assigned to the deal
Available when a CRM trigger is used in the starting element
This option checks which of your invited users is assigned to a contact, deal, or task, depending on the element that starts your flow.
For example, if your team members have different responsibilities, you can set a trigger to create new deals, see who is assigned to them, and branch your automated flow.
Select a team member from the drop-down list and click Save.

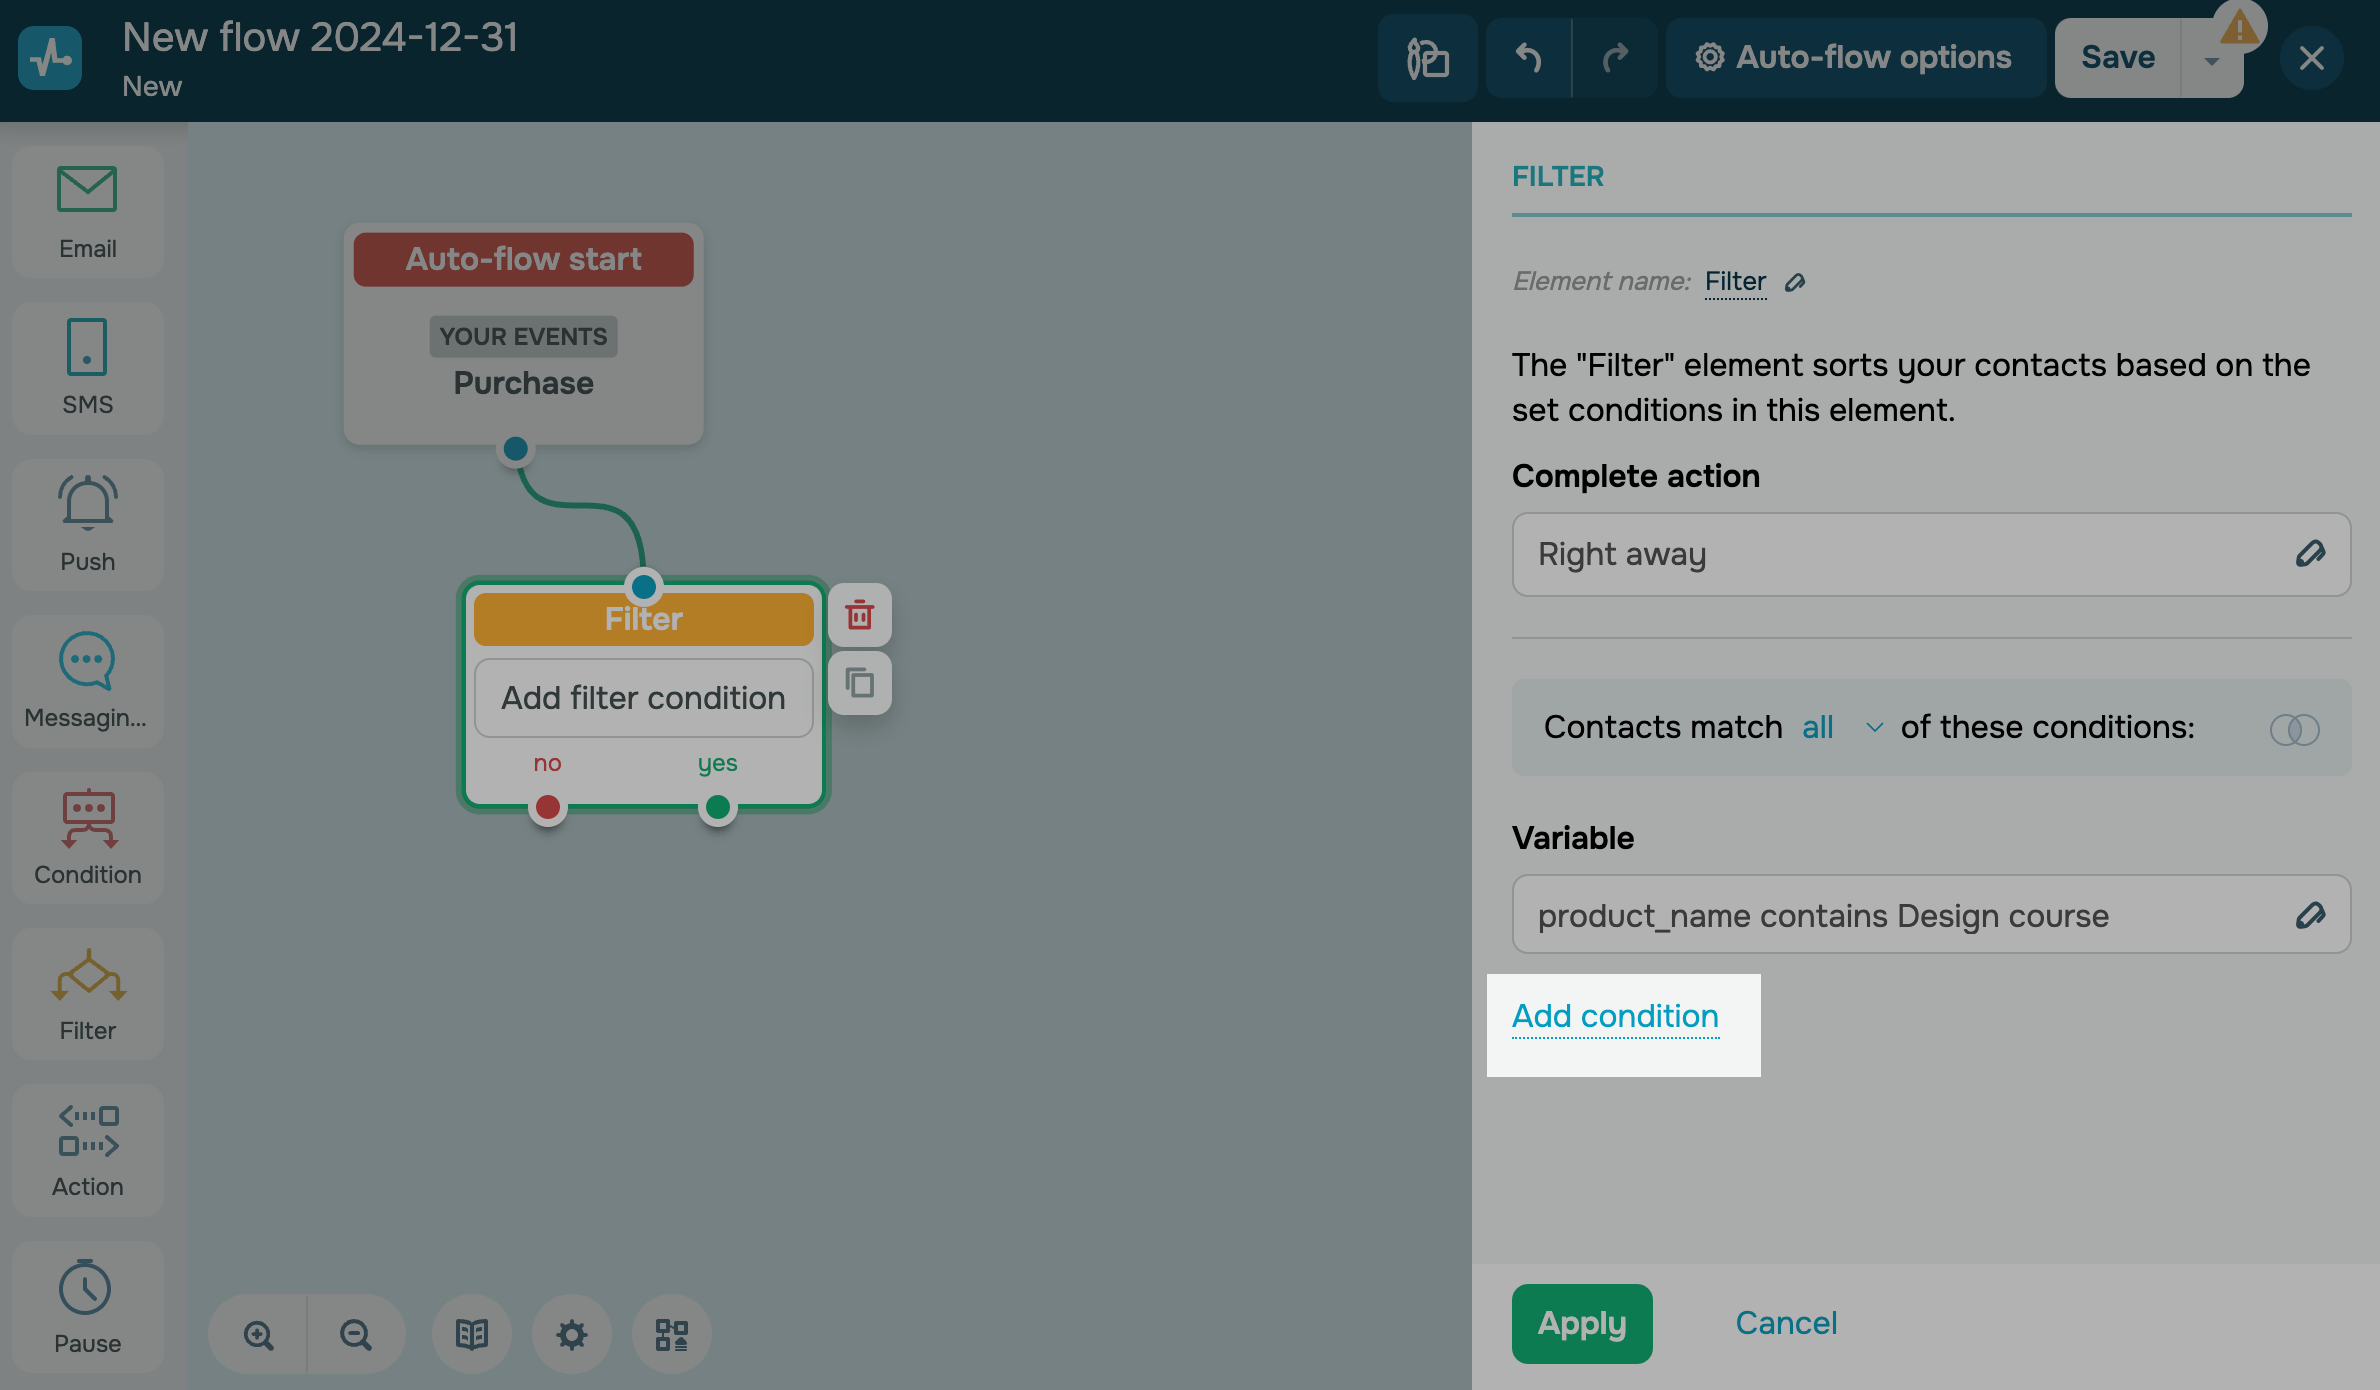
Add other conditions
To add another condition, click Add condition, and set up your filter by analogy.
Select an operator to link your conditions.
| Any |
This operator is used to add alternative conditions — the filter will check the execution of any condition. Let’s say that you have a home delivery service only in specific cities. You can check if your delivery address matches the required city and send a chatbot flow to specify client data and close the deal. If it does not match, create a card in CRM so that your manager can contact the client to find their nearest post office. |
| All |
This operator is used to add dependency conditions — the filter will check if each condition is executed. Let’s say that you have a special offer: if a client makes an order on certain days, they will have it delivered for free or get a discount. You can add additional conditions with a purchase event date. |
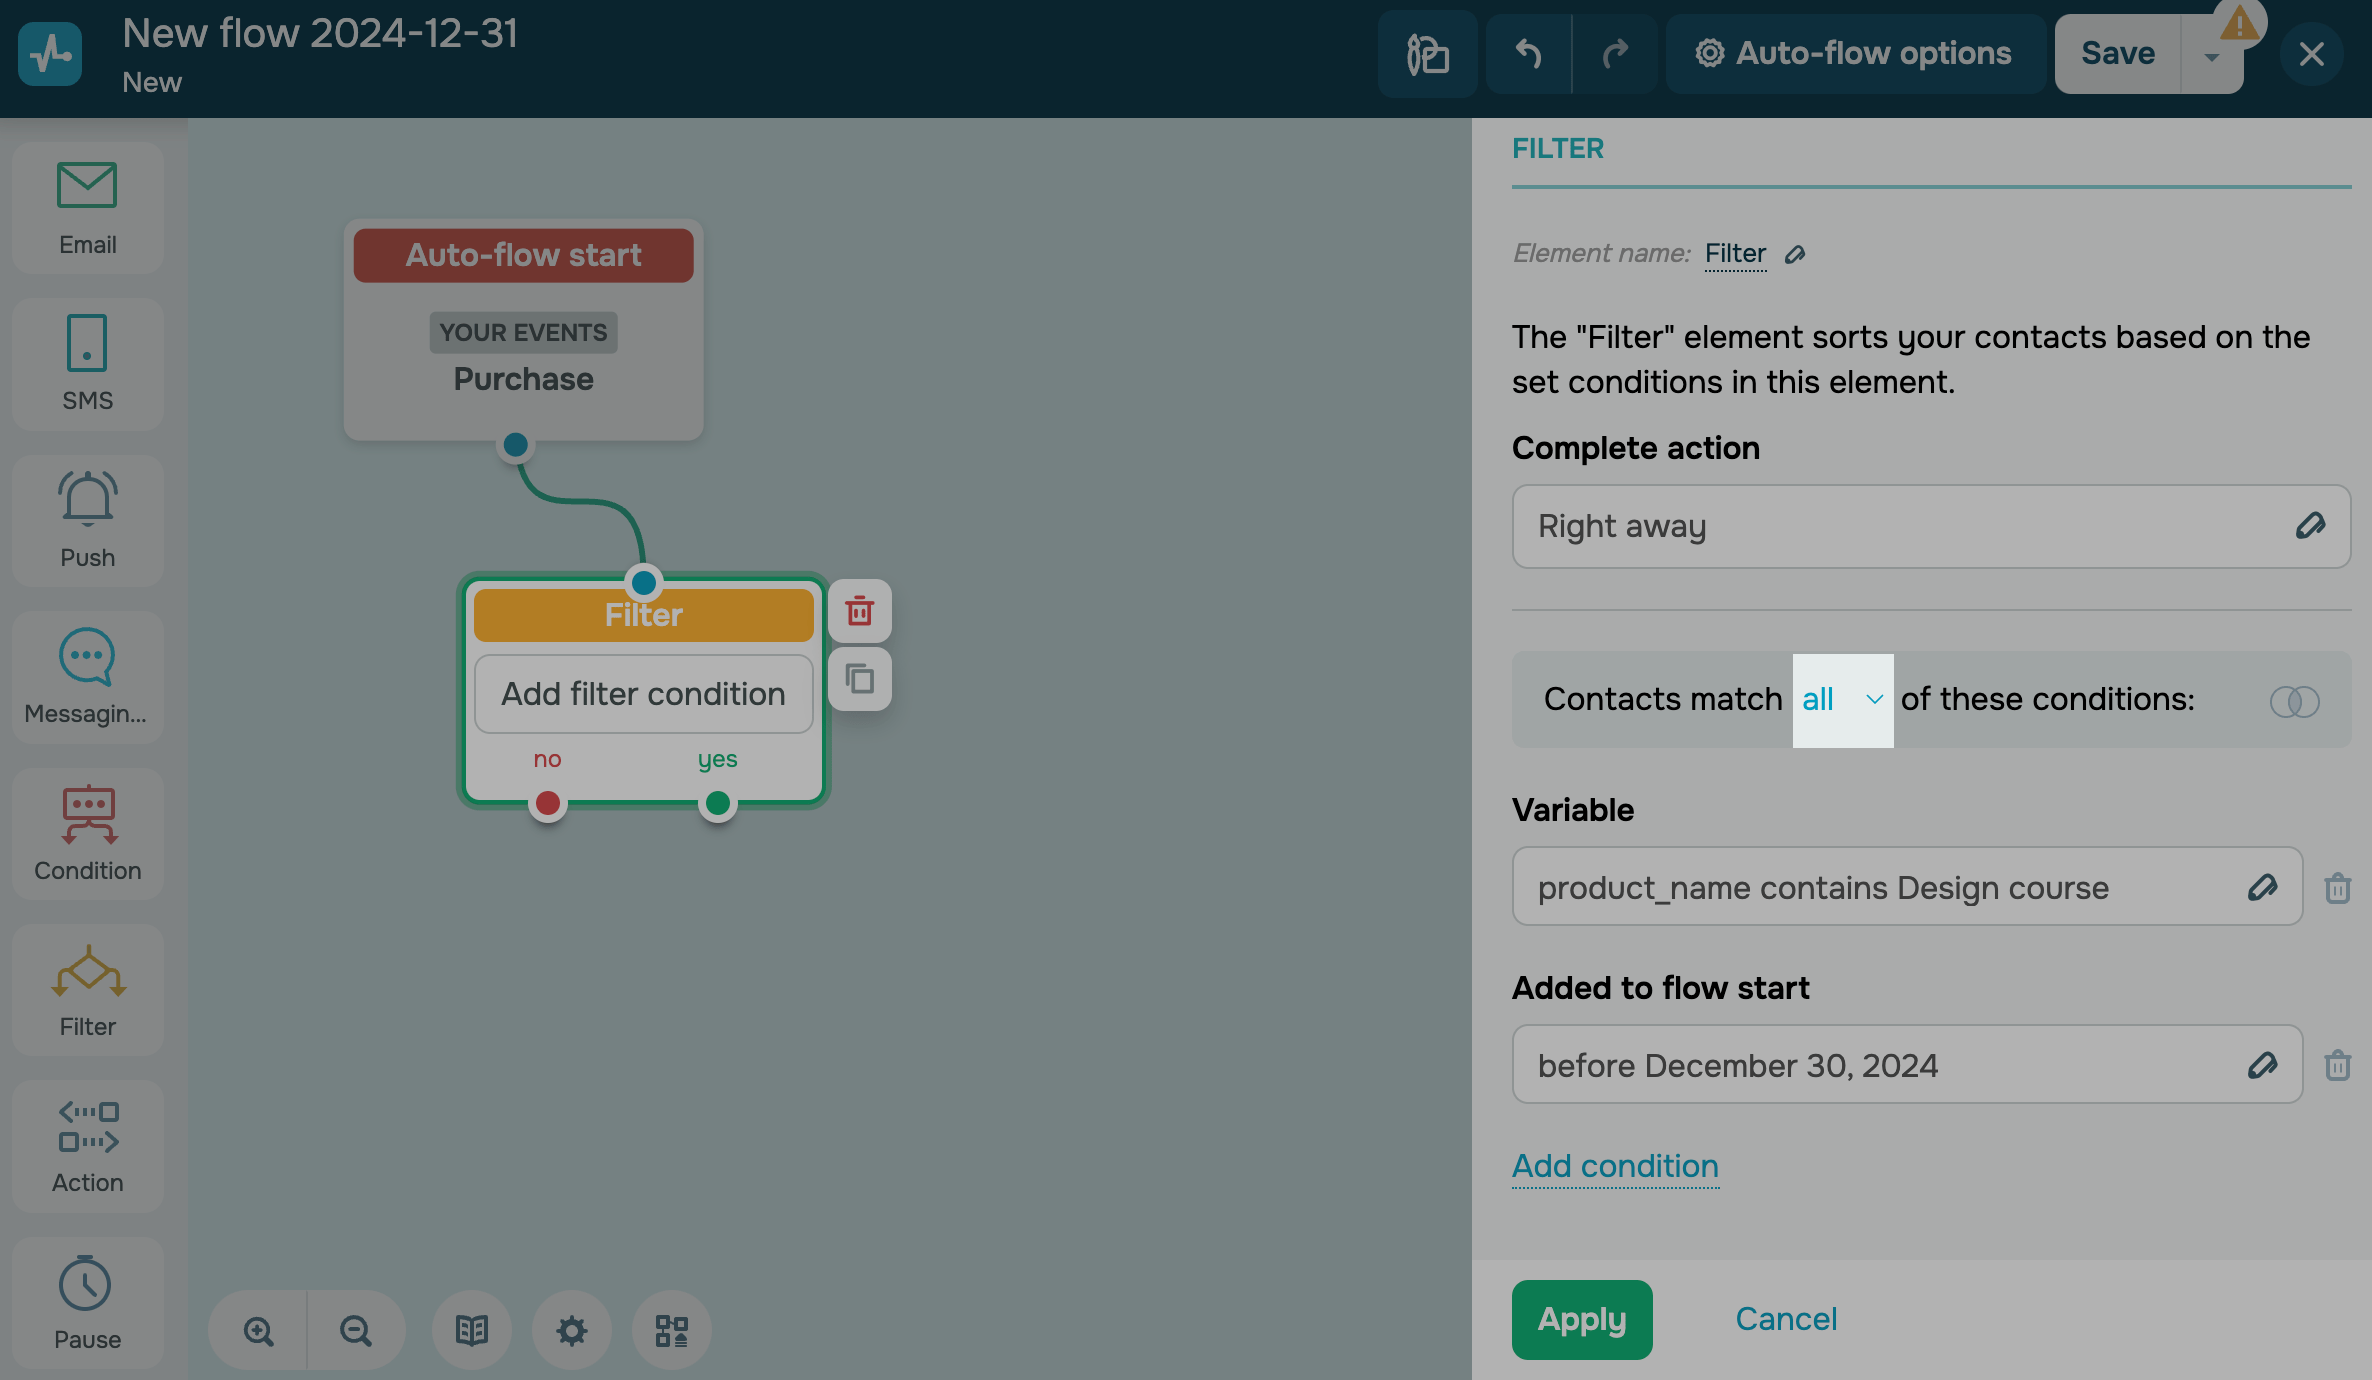
Once you set up the element, click Apply.
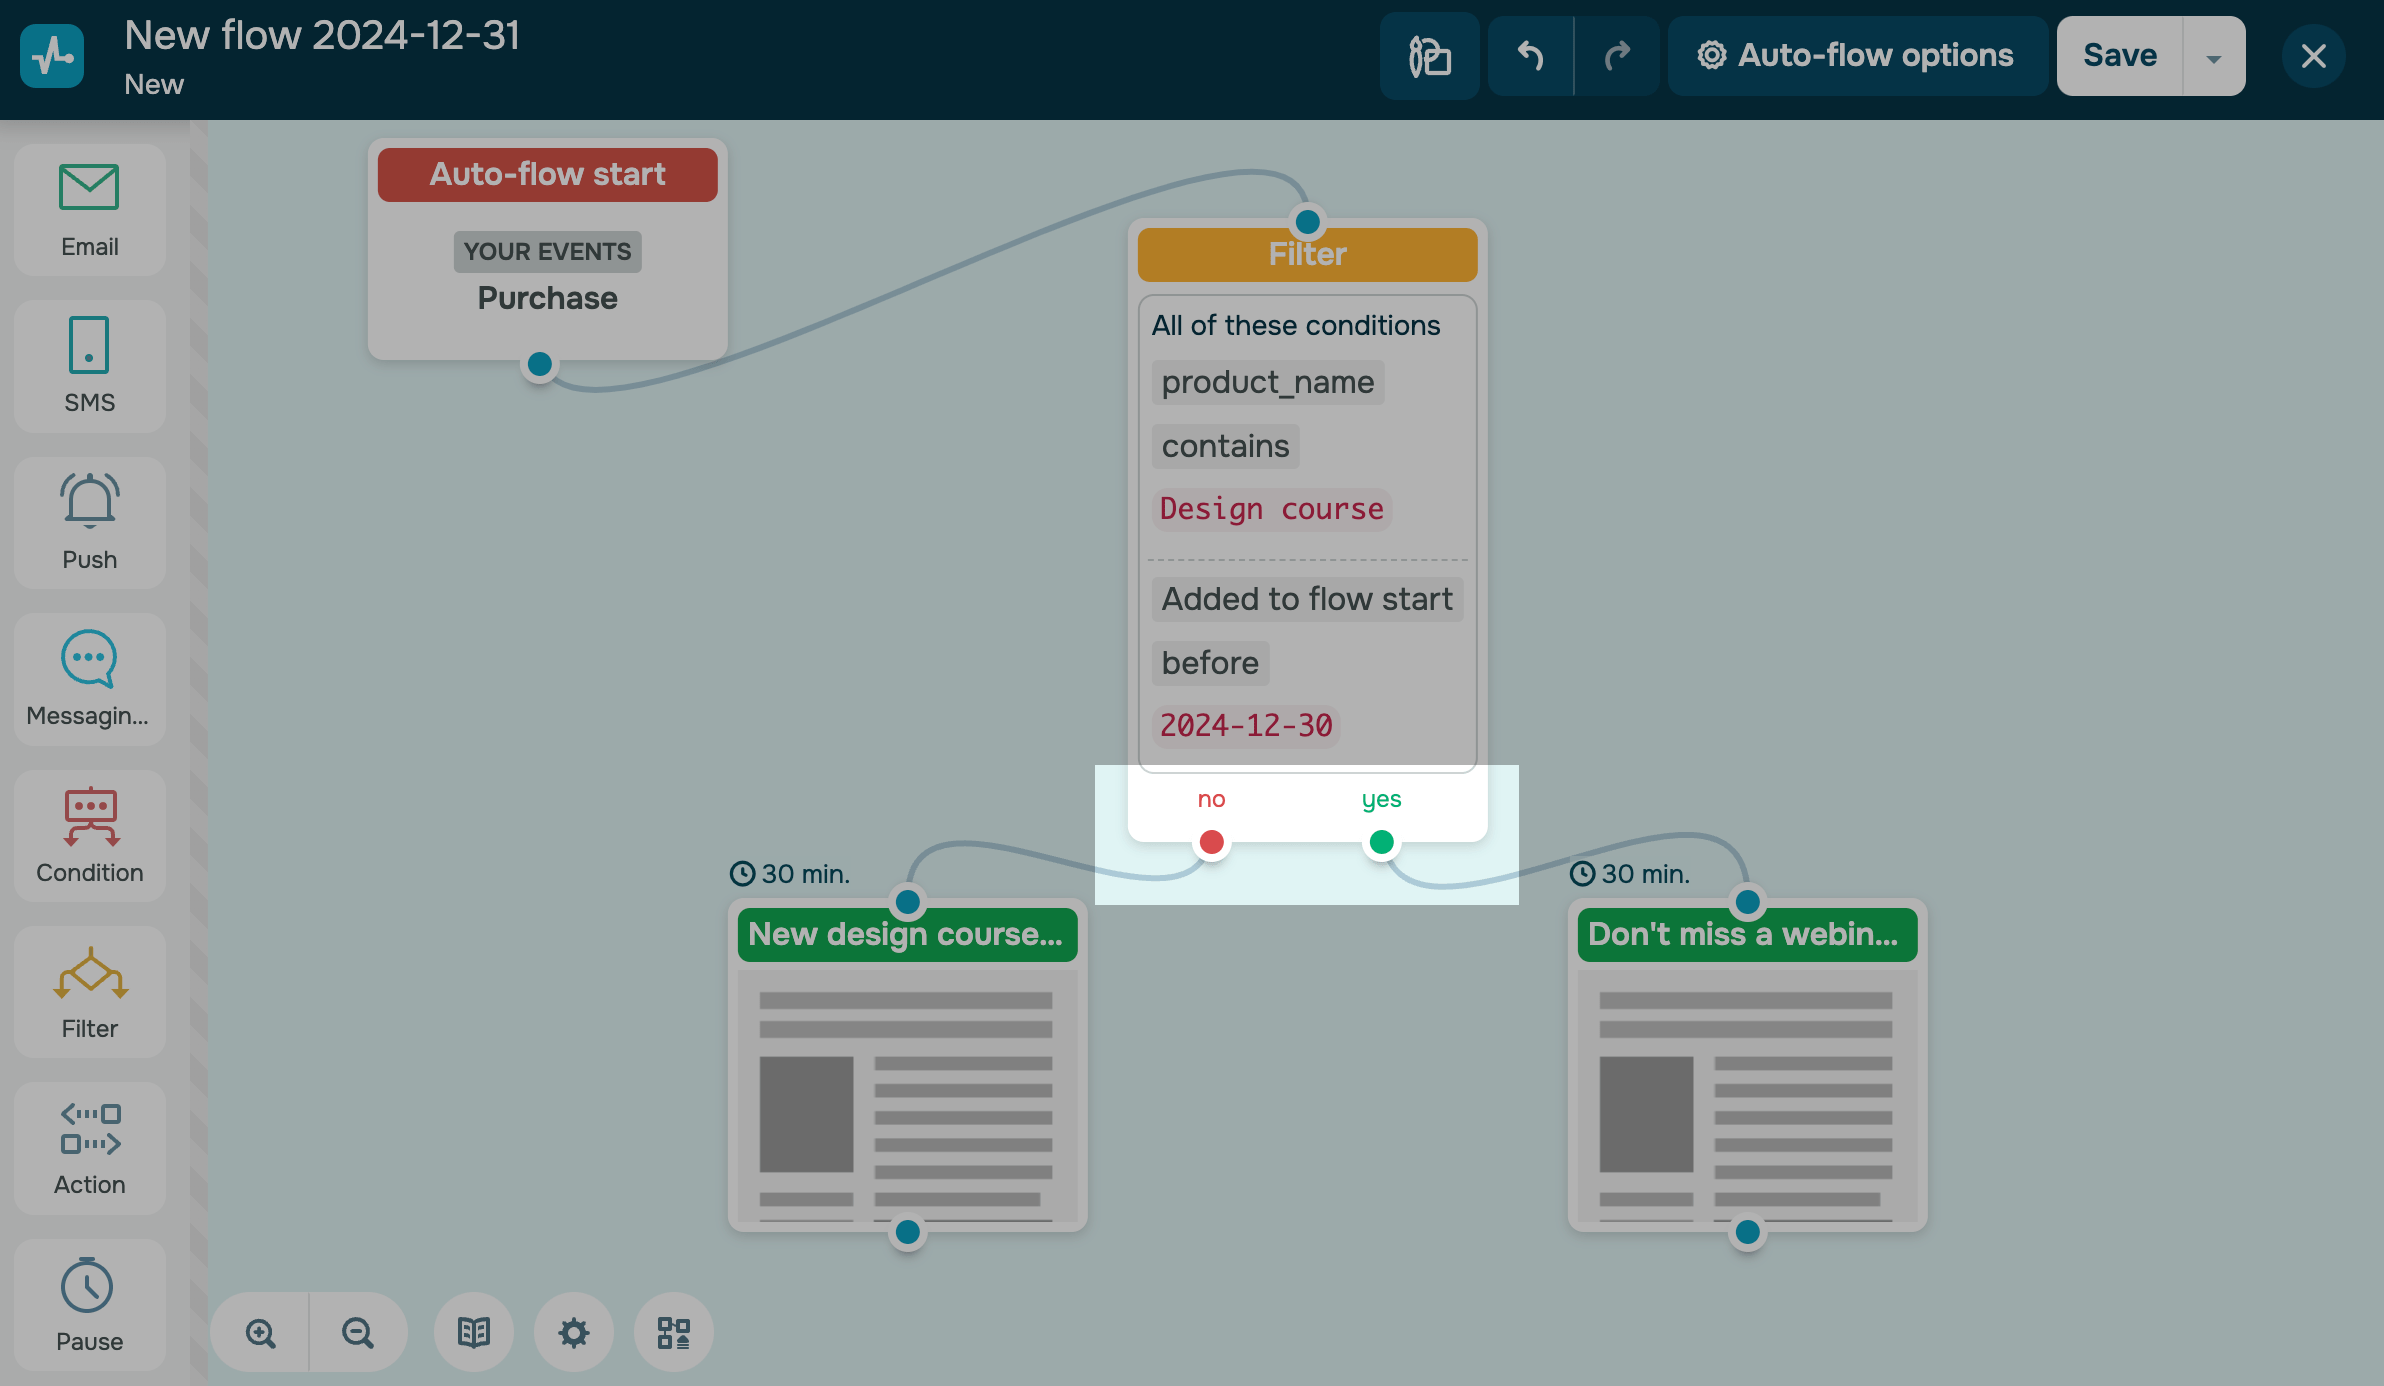
Branch your scenario
Below the Filter element, you can branch your flow and add elements to your branches based on whether the condition was fulfilled:
| The Yes branch | The condition was executed during the moment of element execution |
| The No branch | The condition was not executed during the moment of element execution |
View element statistics
To view information about an element, exit the editor, and hover over the required element in the Flow tab.
Last Updated: 08.01.2025
or