Transfer subscriber data from website widgets to chatbots
Add a link to the chatbot that sends users to your selected messaging app after they interact with a form, button, chatbot, or social media links on your website. On top of that, you can also store subscriber data as chatbot variables, including UTM tags, client IDs, session IDs, email addresses, phone numbers, names, and other field details. These data points can be used for webinar signups, sharing lead magnets, or subscribing to company newsletters.
Add widgets to your website
You can add your chatbot’s links to specific website widgets so that users can subscribe to it. This applies to the following widgets:
- Buttons, Socials, and Chatbots — triggered when users click your widget and subscribe to your chatbot;
- Form and Payment — triggered when users submit a form or make a payment and then subscribe to your chatbot.
To do this, add a widget in the website builder. If you're using the Form and Payment widgets, you can customize their fields in the editing panel.
Add a chatbot link
To copy your chatbot flow link, in the Chatbots section, go to your chatbot and click its flow. Under the flow name, click the three dots and select Link to launch the flow.
During subscription, the following data points are automatically passed to your chatbot variables:
| UTM tags | A unique tracking tag added to your link. |
| Session ID |
A unique ID for one user session. This ID will be retrieved if the |
| Client ID (CID) |
A unique ID automatically generated by systems like Google Analytics to track individual users. This ID will be retrieved if the |
Add a chatbot link to your widget
Depending on the widget, you can add the copied chatbot link as follows.
| Button and Socials | Go to your widget settings, then click the pencil icon next to the button or social media platform name. Select a type from the dropdown list and paste your chatbot link. |
| Chatbot | Go to your widget settings, then click the pencil icon next to the messaging app. In the Subscribe to field, select a chatbot from the list. Below, select a chatbot flow that will run on subscription. |
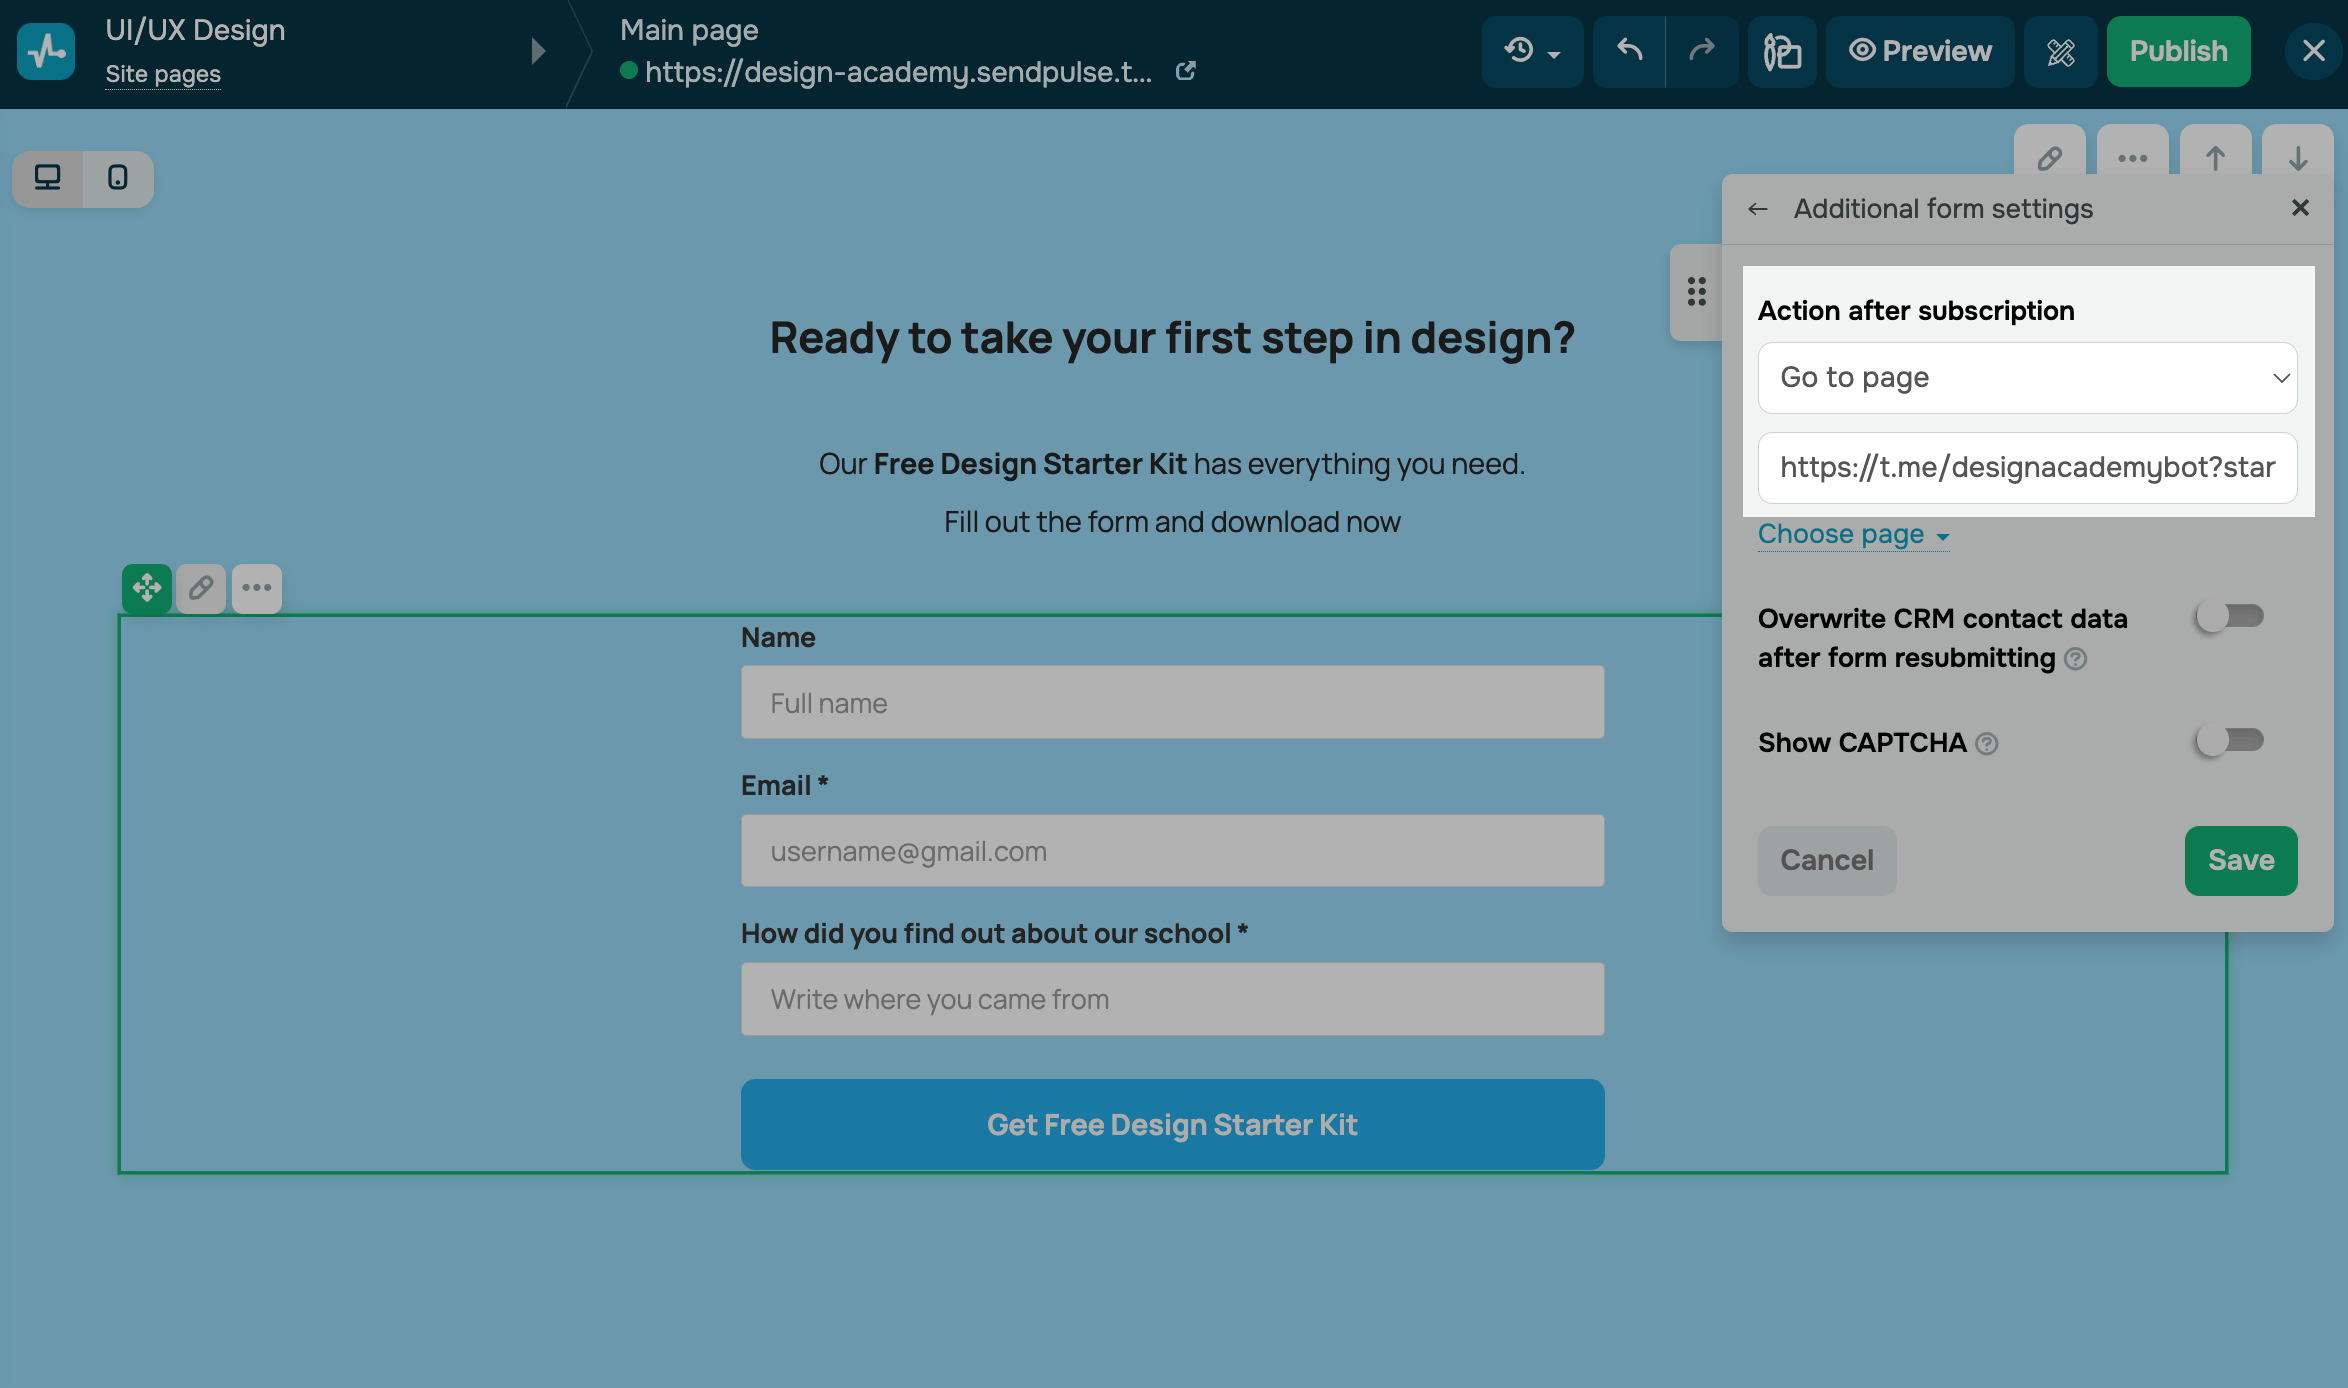
| Form |
To subscribe users once they click the subscription button, go to your Form widget settings and turn on the Add to chatbot audience toggle. Select a type from the drop-down list and choose a WhatsApp, Instagram, Messenger, or other chatbot. You can also add a post-subscription page. Go to your widget settings > Additional form settings. In the Action after subscription field, select Go to page. In the field below, paste the link to your chatbot flow. |
| Payment |
Go to your widget settings > Additional form settings. In the Link to the page after payment field, paste the link to your chatbot flow. Read also: Create a page after successful payment. |
Click Save.
Once you finish customizing your page, click Publish to make your form or button visible to visitors.
Add variables to your chatbot
If you use the Add to chatbot audience option to transfer data in the Form widget, you don't need to create variables. This section is relevant only when you use other methods.
Go to your chatbot and select the Audience tab.
Add variables with names matching your form fields. To do this, click Create variable and type in a variable name. You can copy the names from your published website page.
The email and phone field types will be mapped to your chatbot system variables even if you don’t create dedicated variables in the Audience tab.
To transfer client and session IDs, create the utm_clientid and utm_sessionid variables.
UTM tags don’t require any extra setup — relevant variables will be created automatically.

Values will be transferred to created variables as text (the String type) regardless of your form’s field types.
All subscriber data from your website form will be available in your chatbot. If an existing chatbot subscriber lands in your bot through a website link, their data will be updated in the Audience tab.
Transferring subscriber data to chatbots allows you to analyze your audience more thoroughly and personalize conversations. Beyond that, you can create a dedicated flow where users can learn more about your product or event.

Last Updated: 04.12.2025
or