Create and reuse AI agents in your chatbots
An AI agent uses an AI tool to chat with subscribers and guide them toward a goal. Its settings include a prompt, an AI model and its API key, tools, and exit conditions. You can create AI agents in the AI Agents section of the chatbot builder and reuse them in any flow using the AI Agent element.
The agent runs the conversation until the subscriber reaches your goal, such as choosing a product or leaving a phone number. Then, it moves them to the next element in your flow. Set up an agent once, use it in multiple chatbots, and update it in one place.
An online store, for example, can run a shop assistant agent and a support agent. The first searches the product catalog through an MCP server. The second replies to questions using the store’s policy files.
Let's talk about how to create an AI agent, use it in your flow, add MCP servers, and manage your agents.
Benefits and use cases
With saved AI agents, you can:
- create agents for different workflows, such as sales, support, or lead qualification, and add them to any flow as a dedicated step;
- give the agent your business data so that they can search your uploaded files with File search, reach external tools and data sources using MCP servers, and look up current facts with Web search;
- use goals as exit conditions, so the agent knows when a goal is reached, saves the information it collected to variables, and sends the subscriber further along your flow;
- change the prompt, model, or tools in one place instead of editing every AI Agent element.
Here's how businesses can use saved AI agents:
- An online store can run a shop assistant agent. The agent can search the product catalog through the store’s MCP server, ask about the customer’s budget, and suggest products. When the customer is ready to order, the exit condition is met, and the agent can save the product names to a variable for the next elements in the flow.
- A service business can run a first-line support agent that replies to questions using the company’s files with delivery and return policies. If the customer asks for a human or complains, the matching exit condition is met, and the flow can hand over the conversation to a team member.
- A B2B company can run a lead qualification agent that asks about the customer’s needs and saves the answers to variables. Qualified and unqualified leads can then leave the element through different exit points.
To do this, create an agent in the AI Agents section and select it in the AI Agent element of your flow.
Basics
A saved agent includes the prompt, AI model and its API key, tools (web search, MCP servers, and file search), conversation context size, reasoning level, and exit conditions, along with the information to save from the subscriber’s reply.
An AI Agent element that uses a saved agent inherits the agent's prompt, model, tools, context, and exit conditions. To change one of these settings in a single element, override it in that element. The other settings keep following the agent. You can also add exit conditions that apply only in this element.
Requirements
Before you create an agent, make sure you have the following:
- A paid pricing plan. The AI Agent element is available with paid chatbot builder plans.
- Permission to edit flows. To create and edit agents, team members need the right to edit your flows. You can grant it in their user role settings.
- A way to pay for AI requests. Add your own API key in Account settings > AI tools (ChatGPT, Claude, Gemini, or DeepSeek) or use AI credits (soon).
Create an AI agent
To add an agent you can reuse in any chatbot, create it in the AI Agents section.
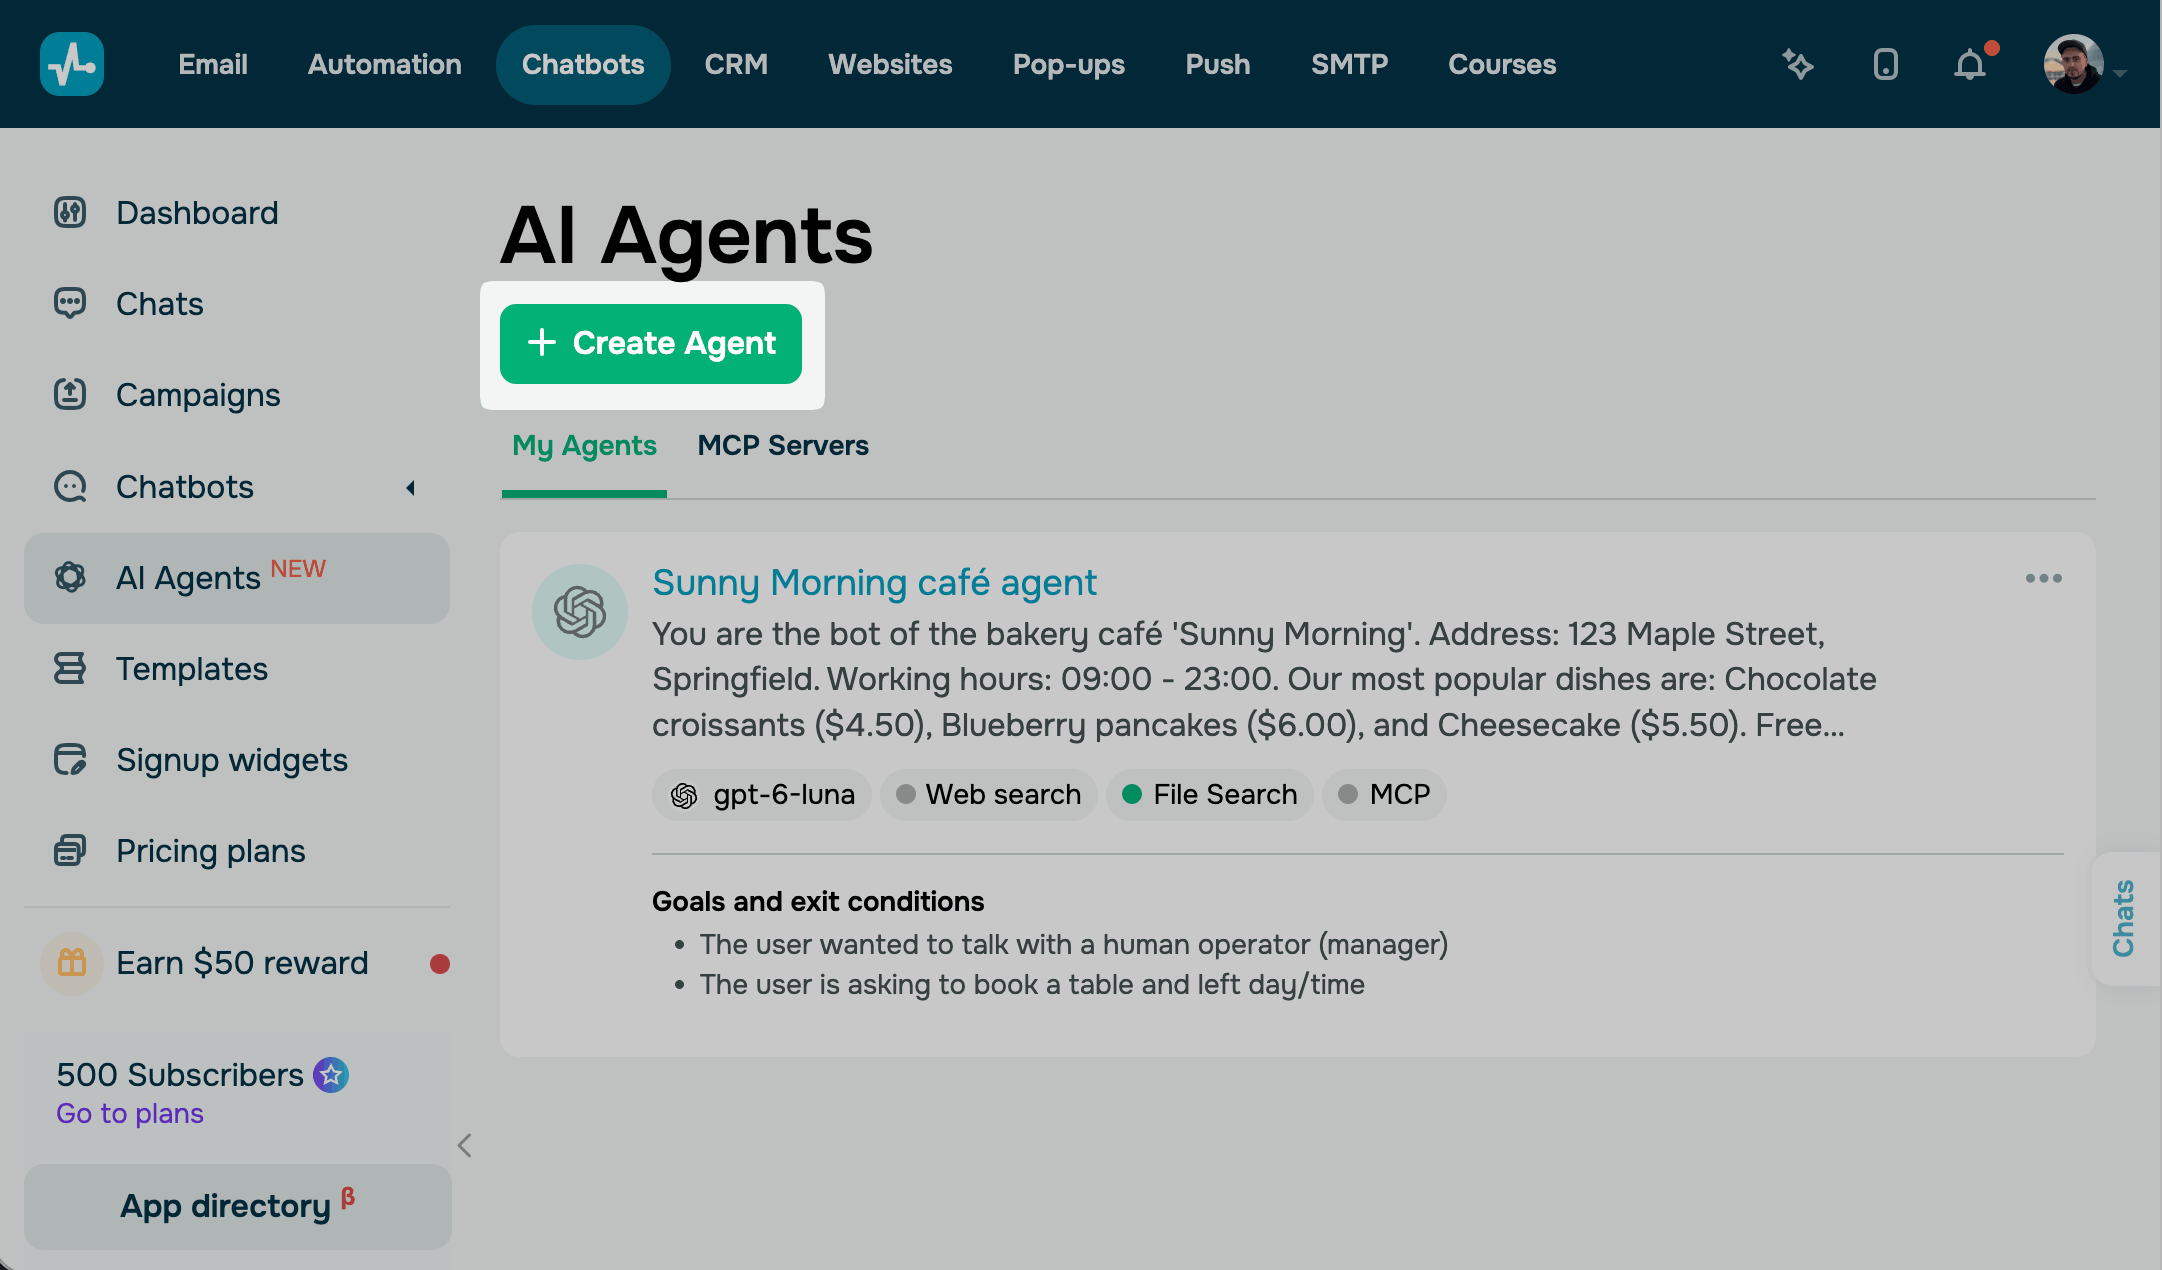
Go to Chatbots > AI Agents and click Create Agent.
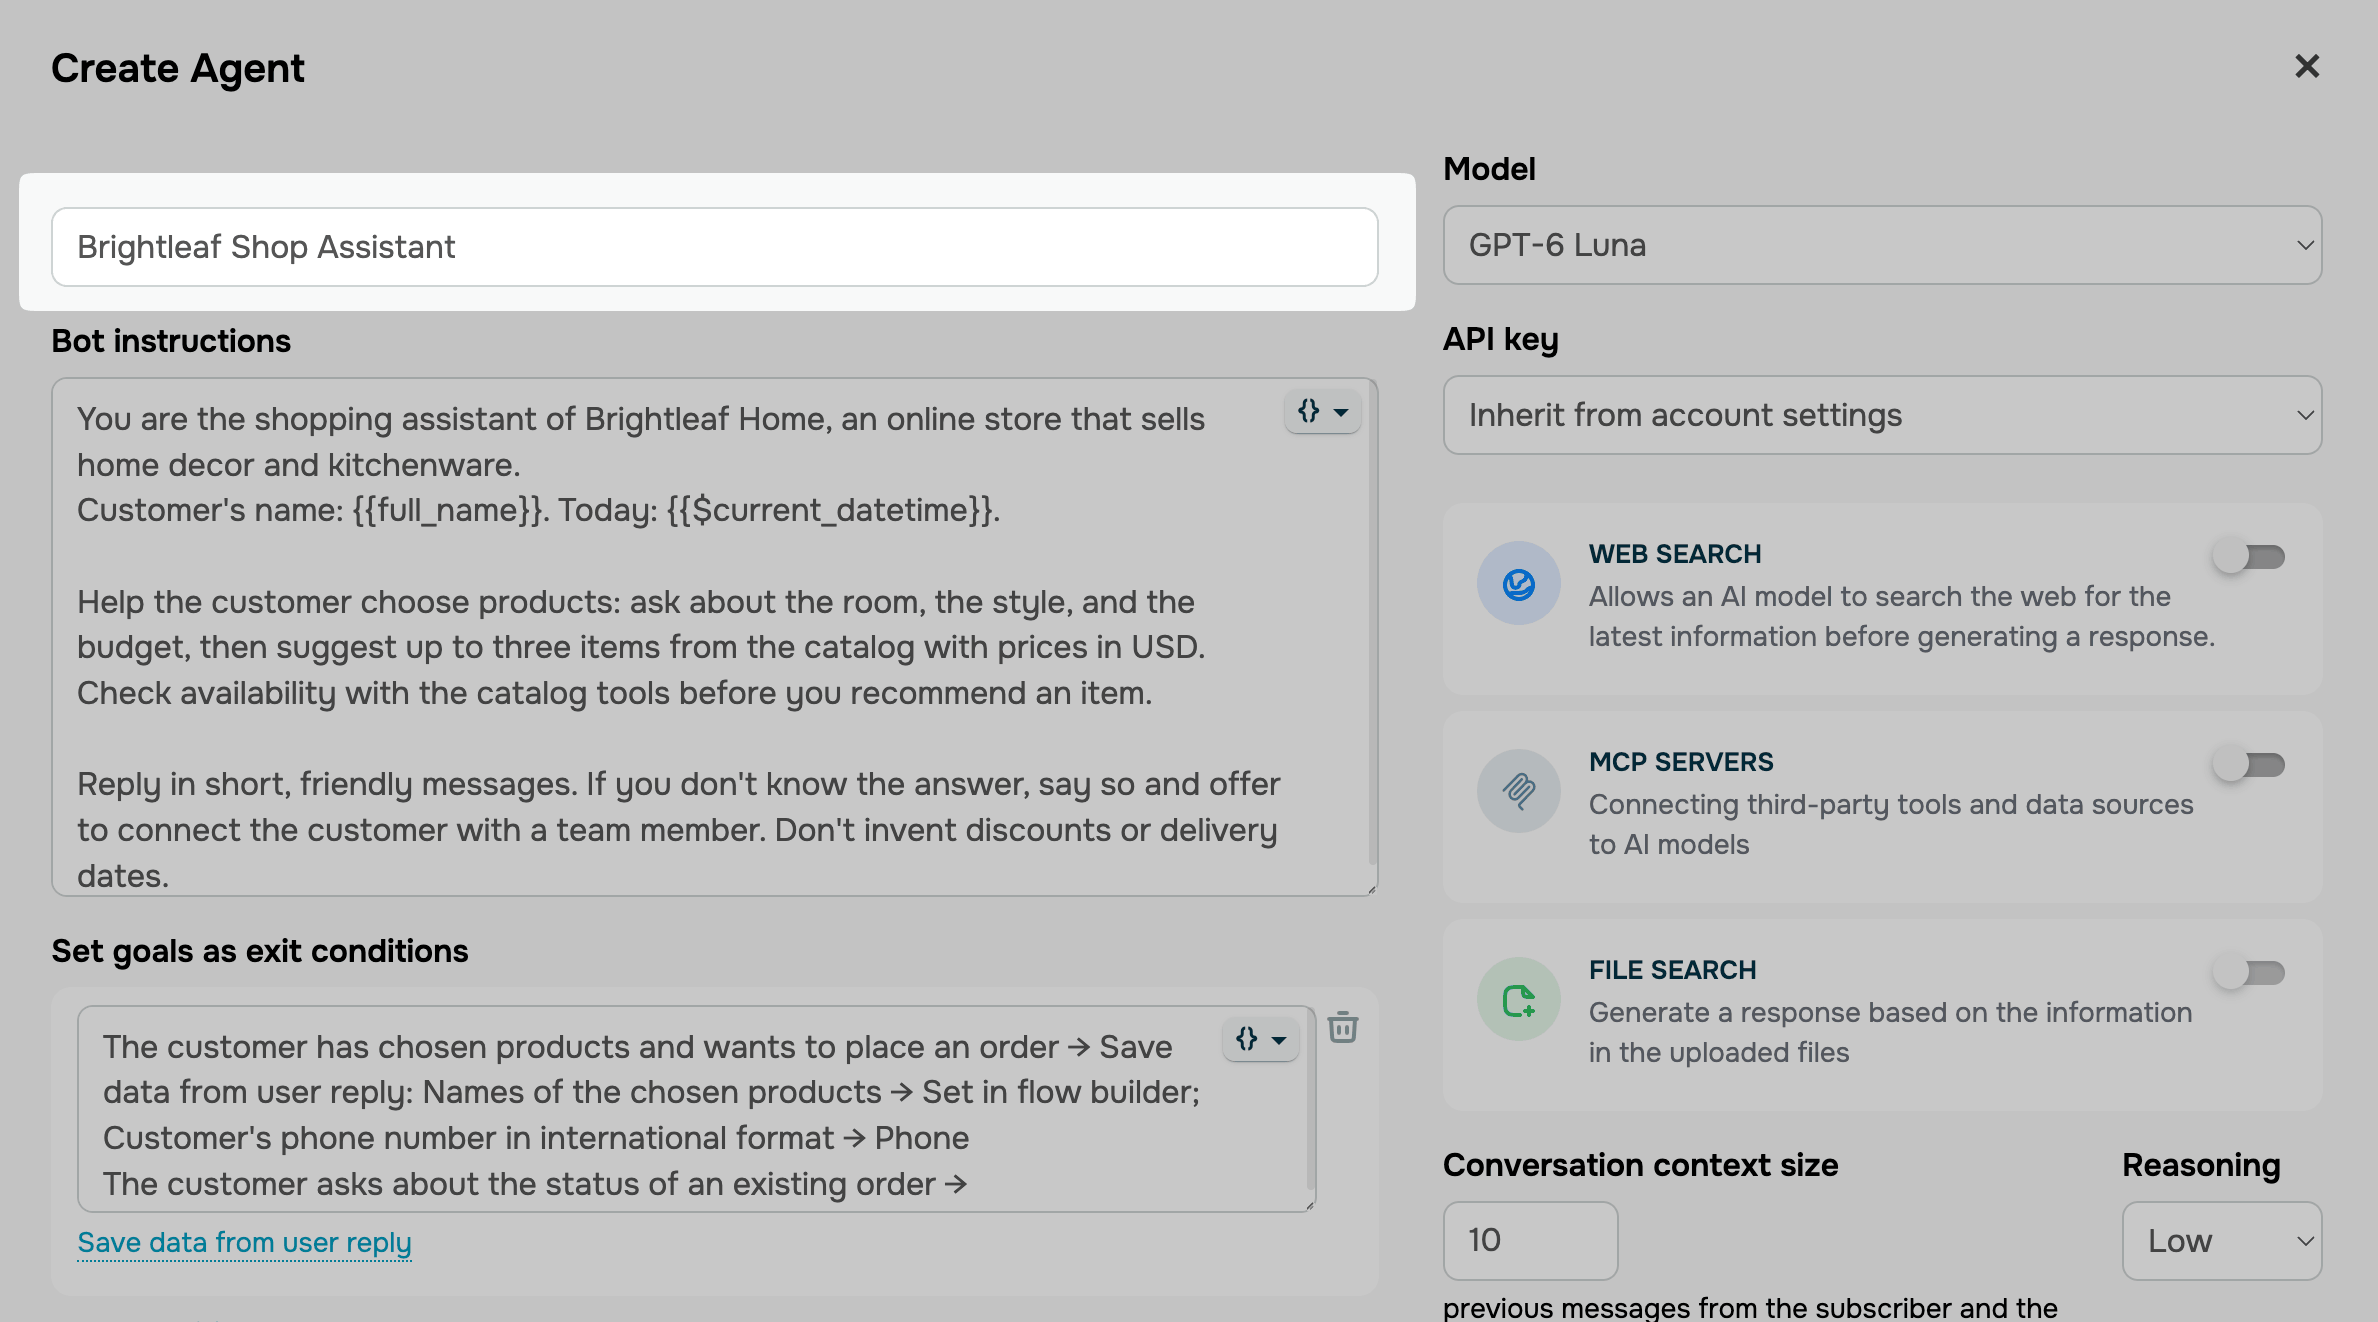
In the Internal name at SendPulse field, name your agent. This name will appear in the Use AI Agent list in all your chatbots.
Add an AI model
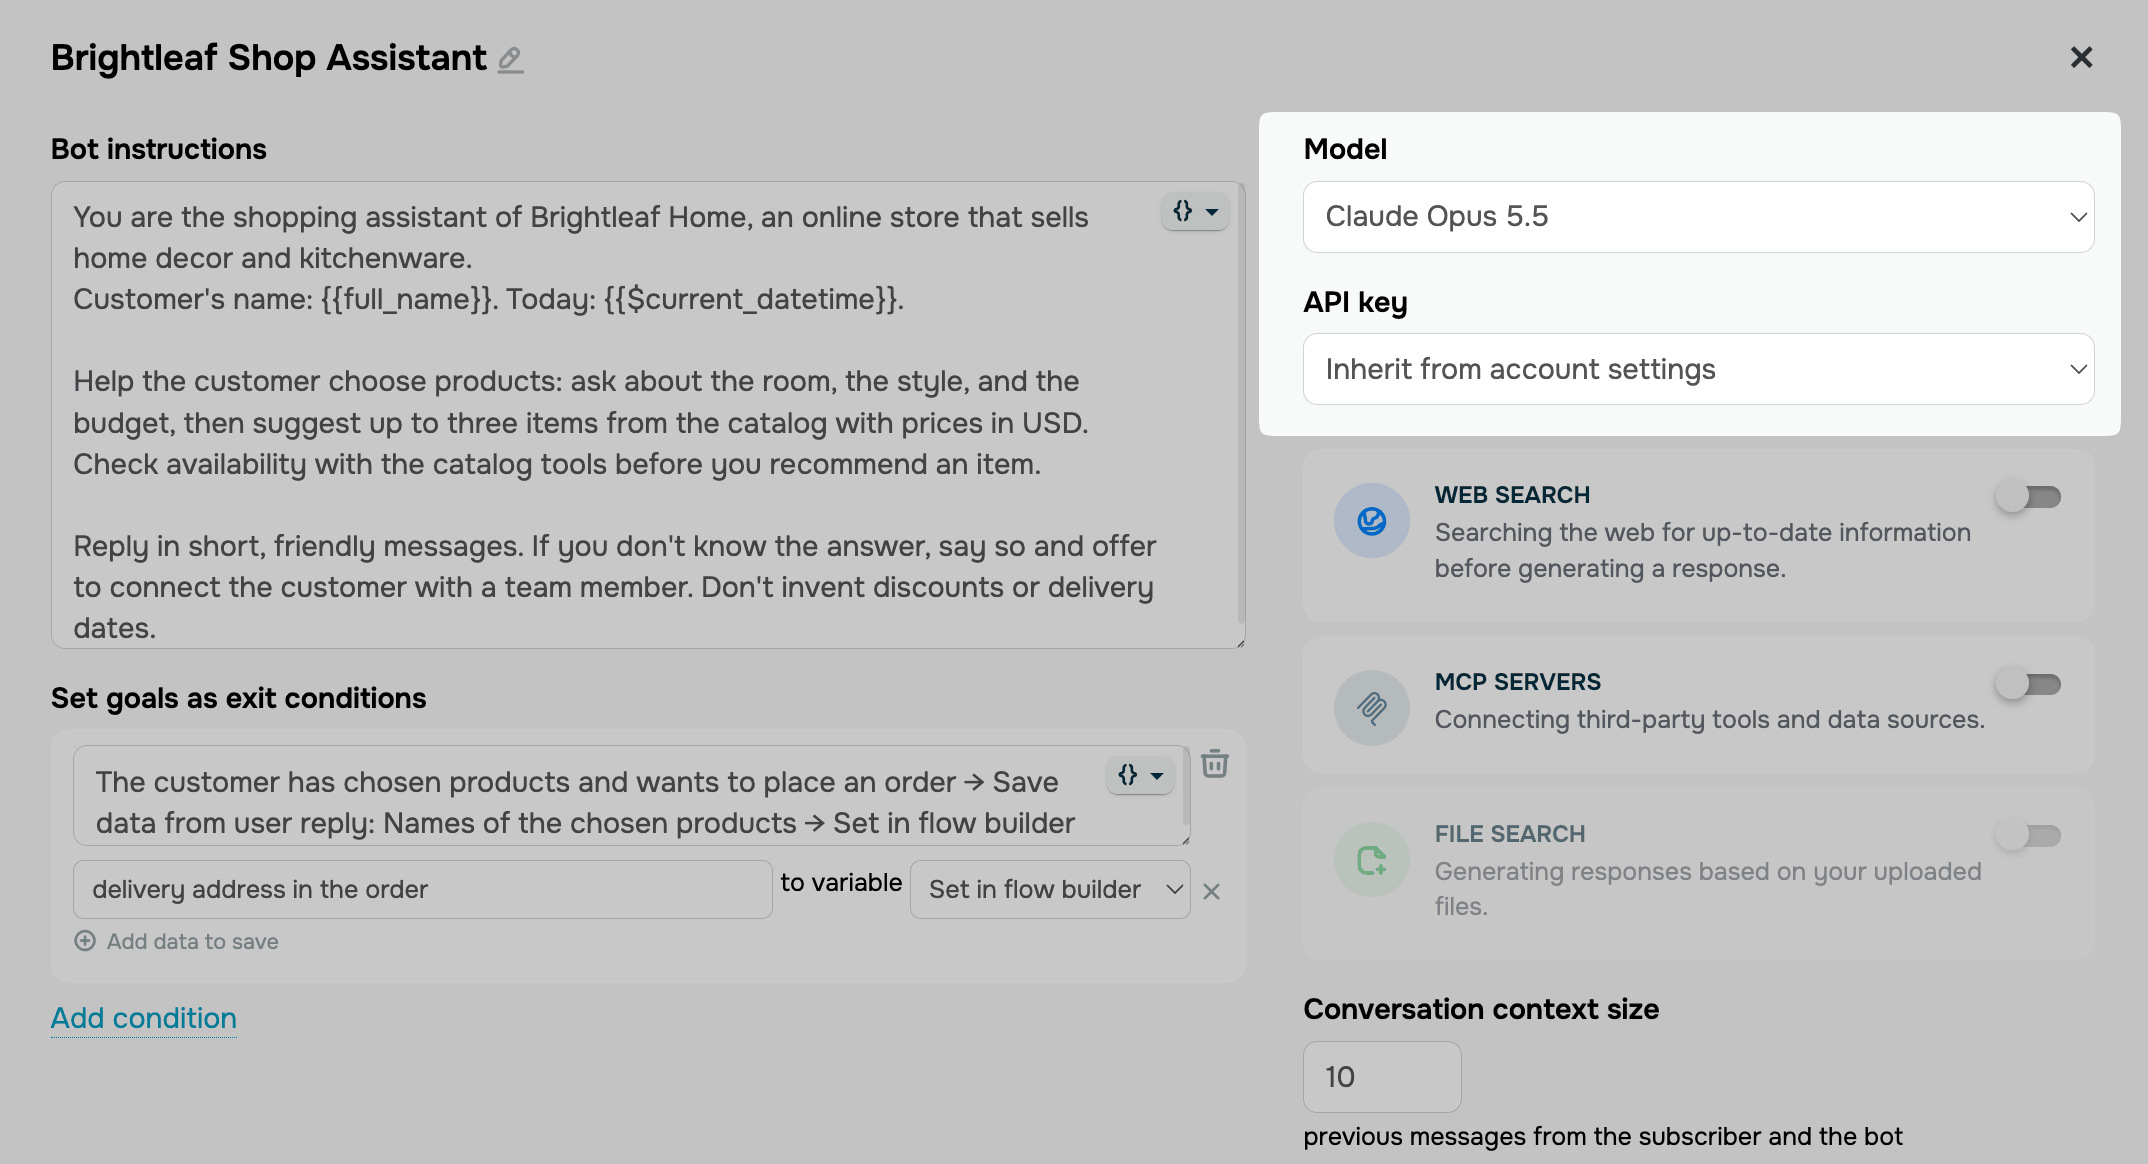
In Model, choose an AI model. Your choice affects how well your agent understands messages, follows prompts, handles complex workflows, and generates reples. Models also vary in response speed and API costs.
In API key, decide how to authenticate requests. You can inherit the API key from your account settings or use a dedicated one for this chatbot.
Write the prompt
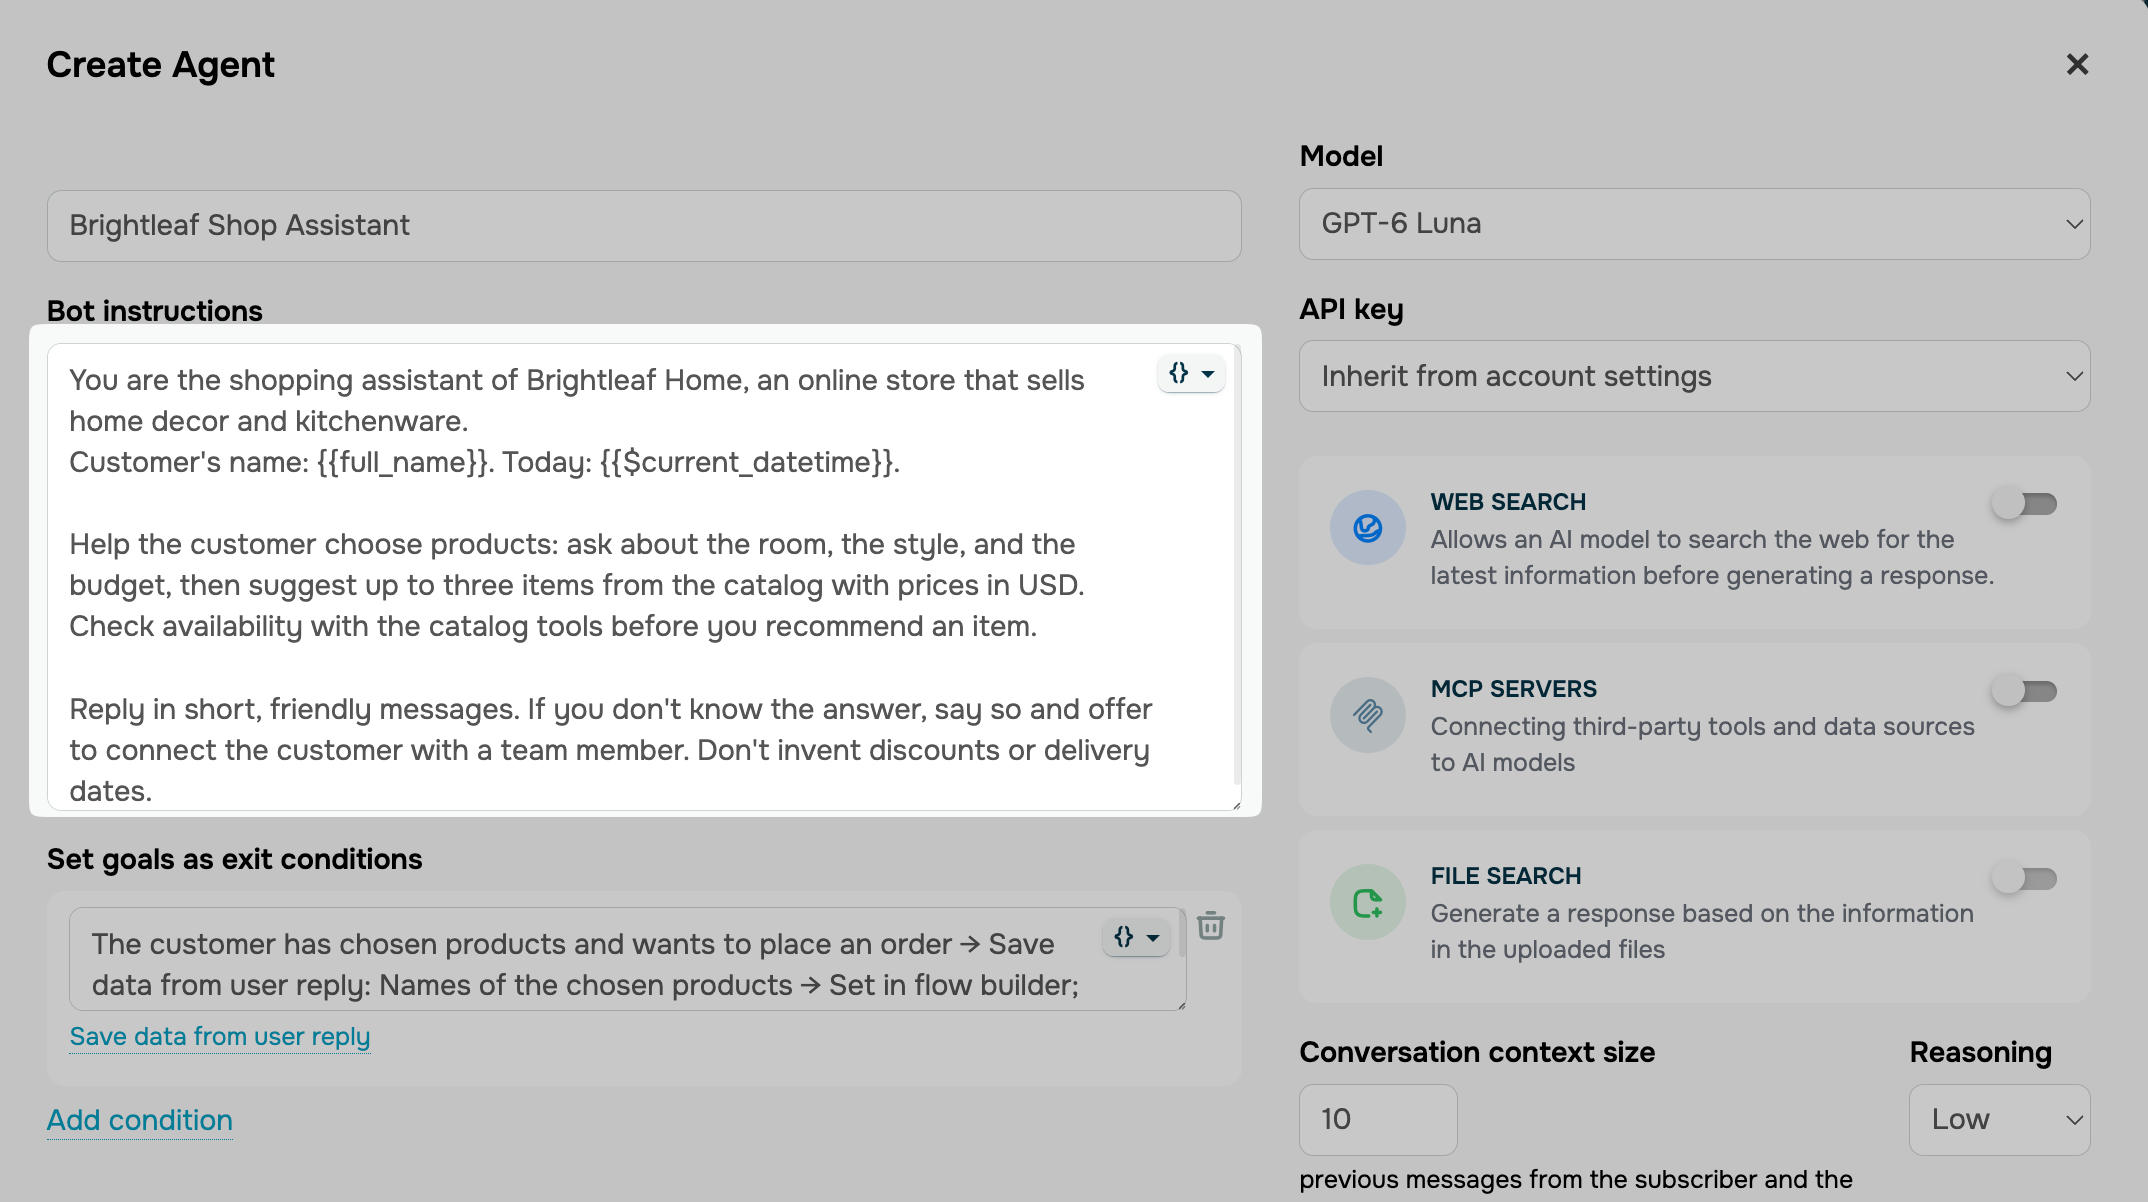
In the Bot instructions field, enter a prompt that describes your company, products, or services. Mention what replies should look like and include examples of common questions and answers. You can also add variables, such as your subscriber's name, to personalize messages.
Your prompt can include business specifics, limitations, and preferred communication style. You can instruct the AI to analyze customer intent and preferences and offer different options based on their replies.
Here's how your agent can approach conversations based on customer tone:
- If the customer is feeling positive, offer a bonus or special deal.
- If their mood is neutral, offer helpful information.
- If they seem upset, respond with empathy and offer assistance.
If the agent uses tools like web search, MCP servers, or file search, tell it when and how to use each one, as well as what information it should look for.
For example, if your AI agent can retrieve product details from your catalog through an MCP server, instruct it to check your stock and prices before it recommends a product.
Set goals as exit conditions
An exit condition is a goal that tells the AI agent when its work is done. When the subscriber reaches it, they leave the AI Agent element and keep moving down your flow. Each condition becomes a dedicated exit point of its element.
In the Set goals as exit conditions field, describe the goal. To add another goal, click Add condition.
You can also add variables to create a dynamic goal. Every subscriber gets a unique goal based on the variables available when they reach the element.
Your AI model should understand which user intentions or actions to track and what data to collect and save.
To avoid false triggers, it's essential to use clear and specific data collection conditions and criteria. General and vague descriptions can lead to errors in the flow execution.
✅ Clear: "When the user shares a phone number in international format, or their phone number is already known."
❌ Too vague: "Phone number received."
Condition and variable description clarity determine your flow accuracy, so take the time to write them out and minimize the risk of false triggers.
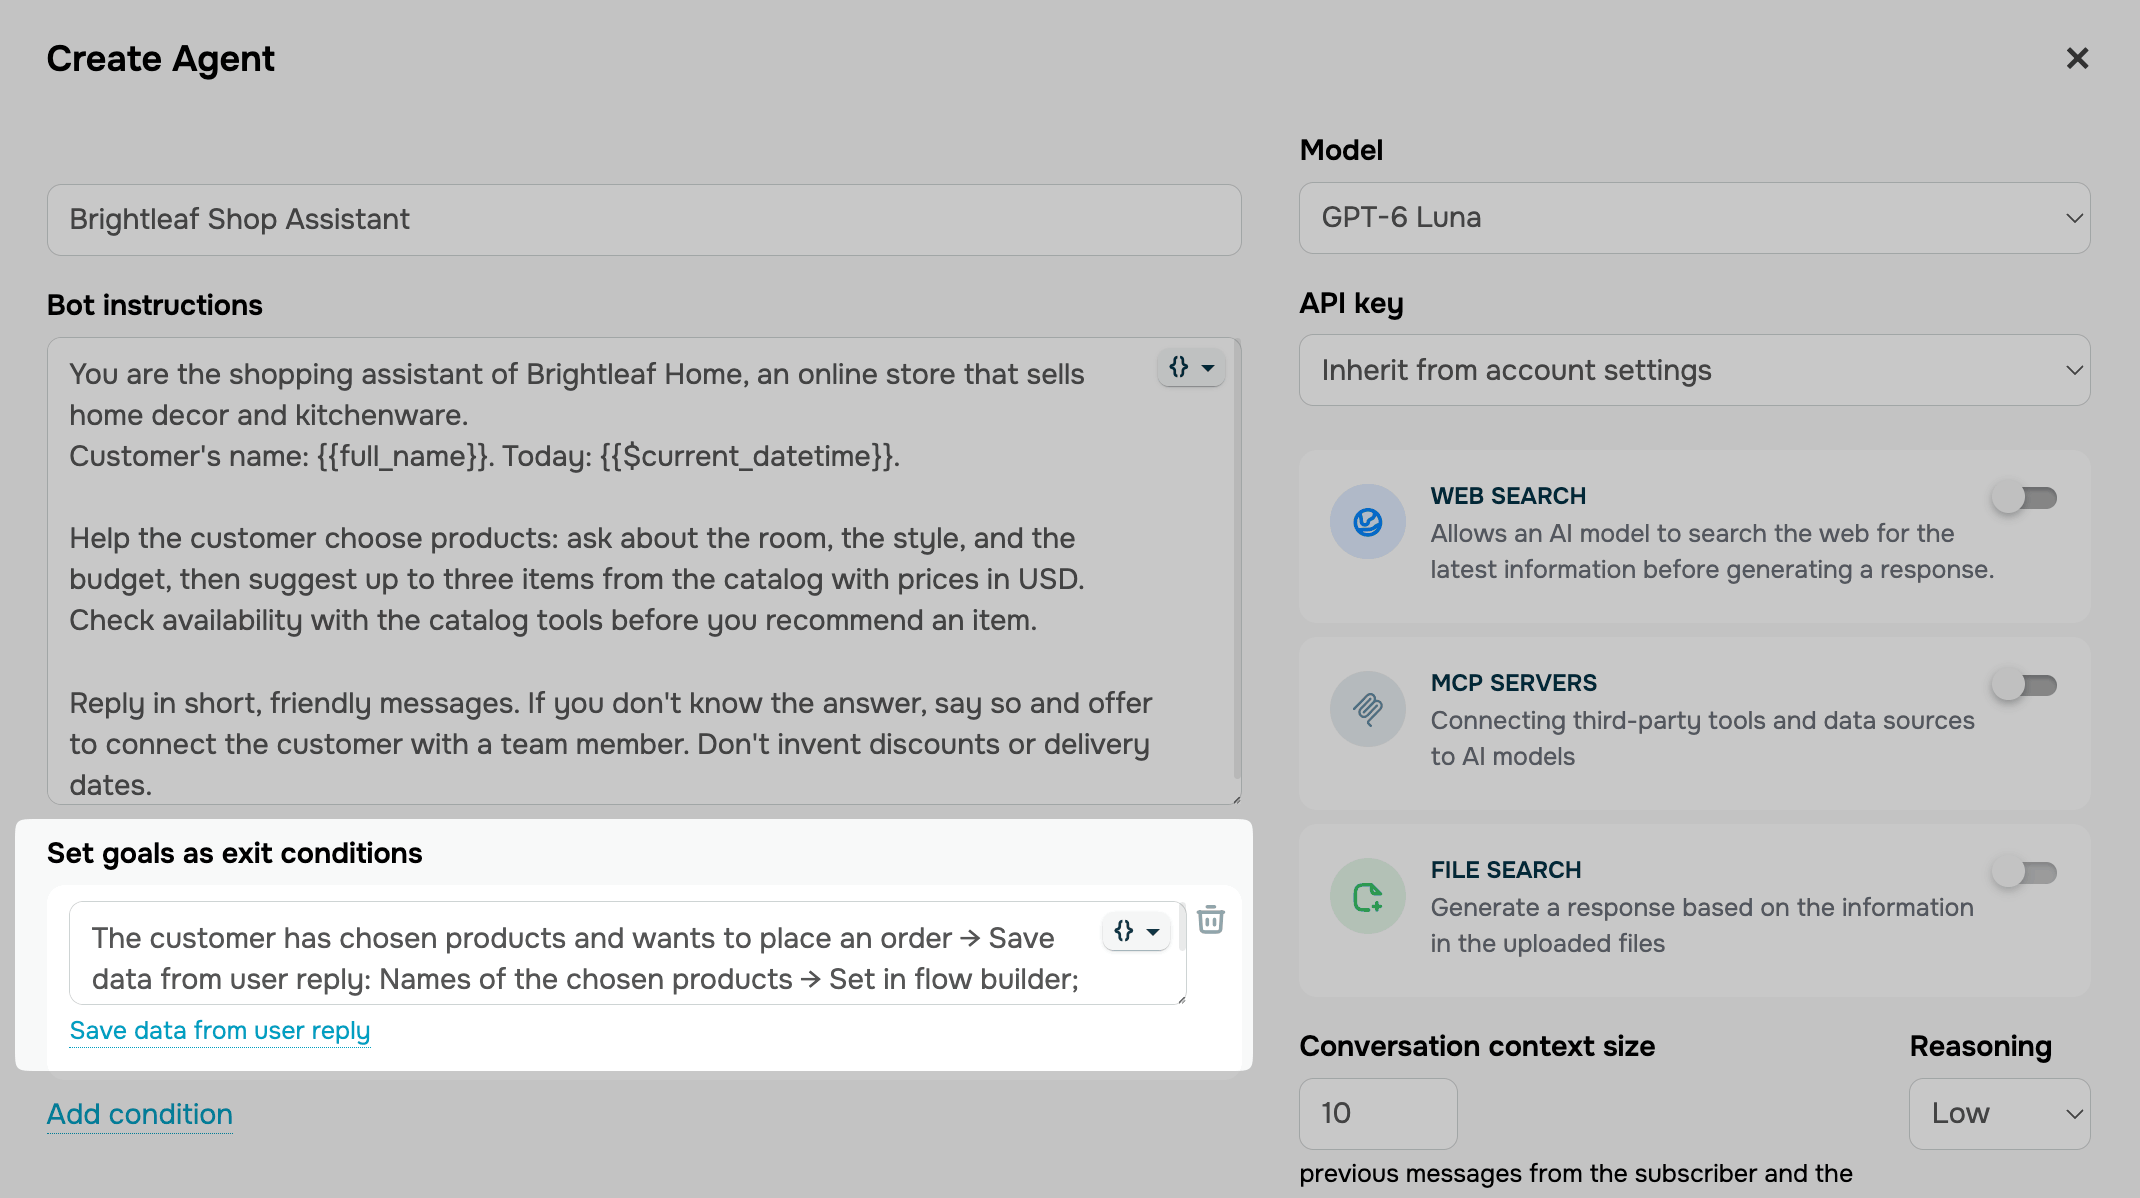
To save specific details from the conversation to a variable and use them in other flow elements, click Save data from user reply under the condition.
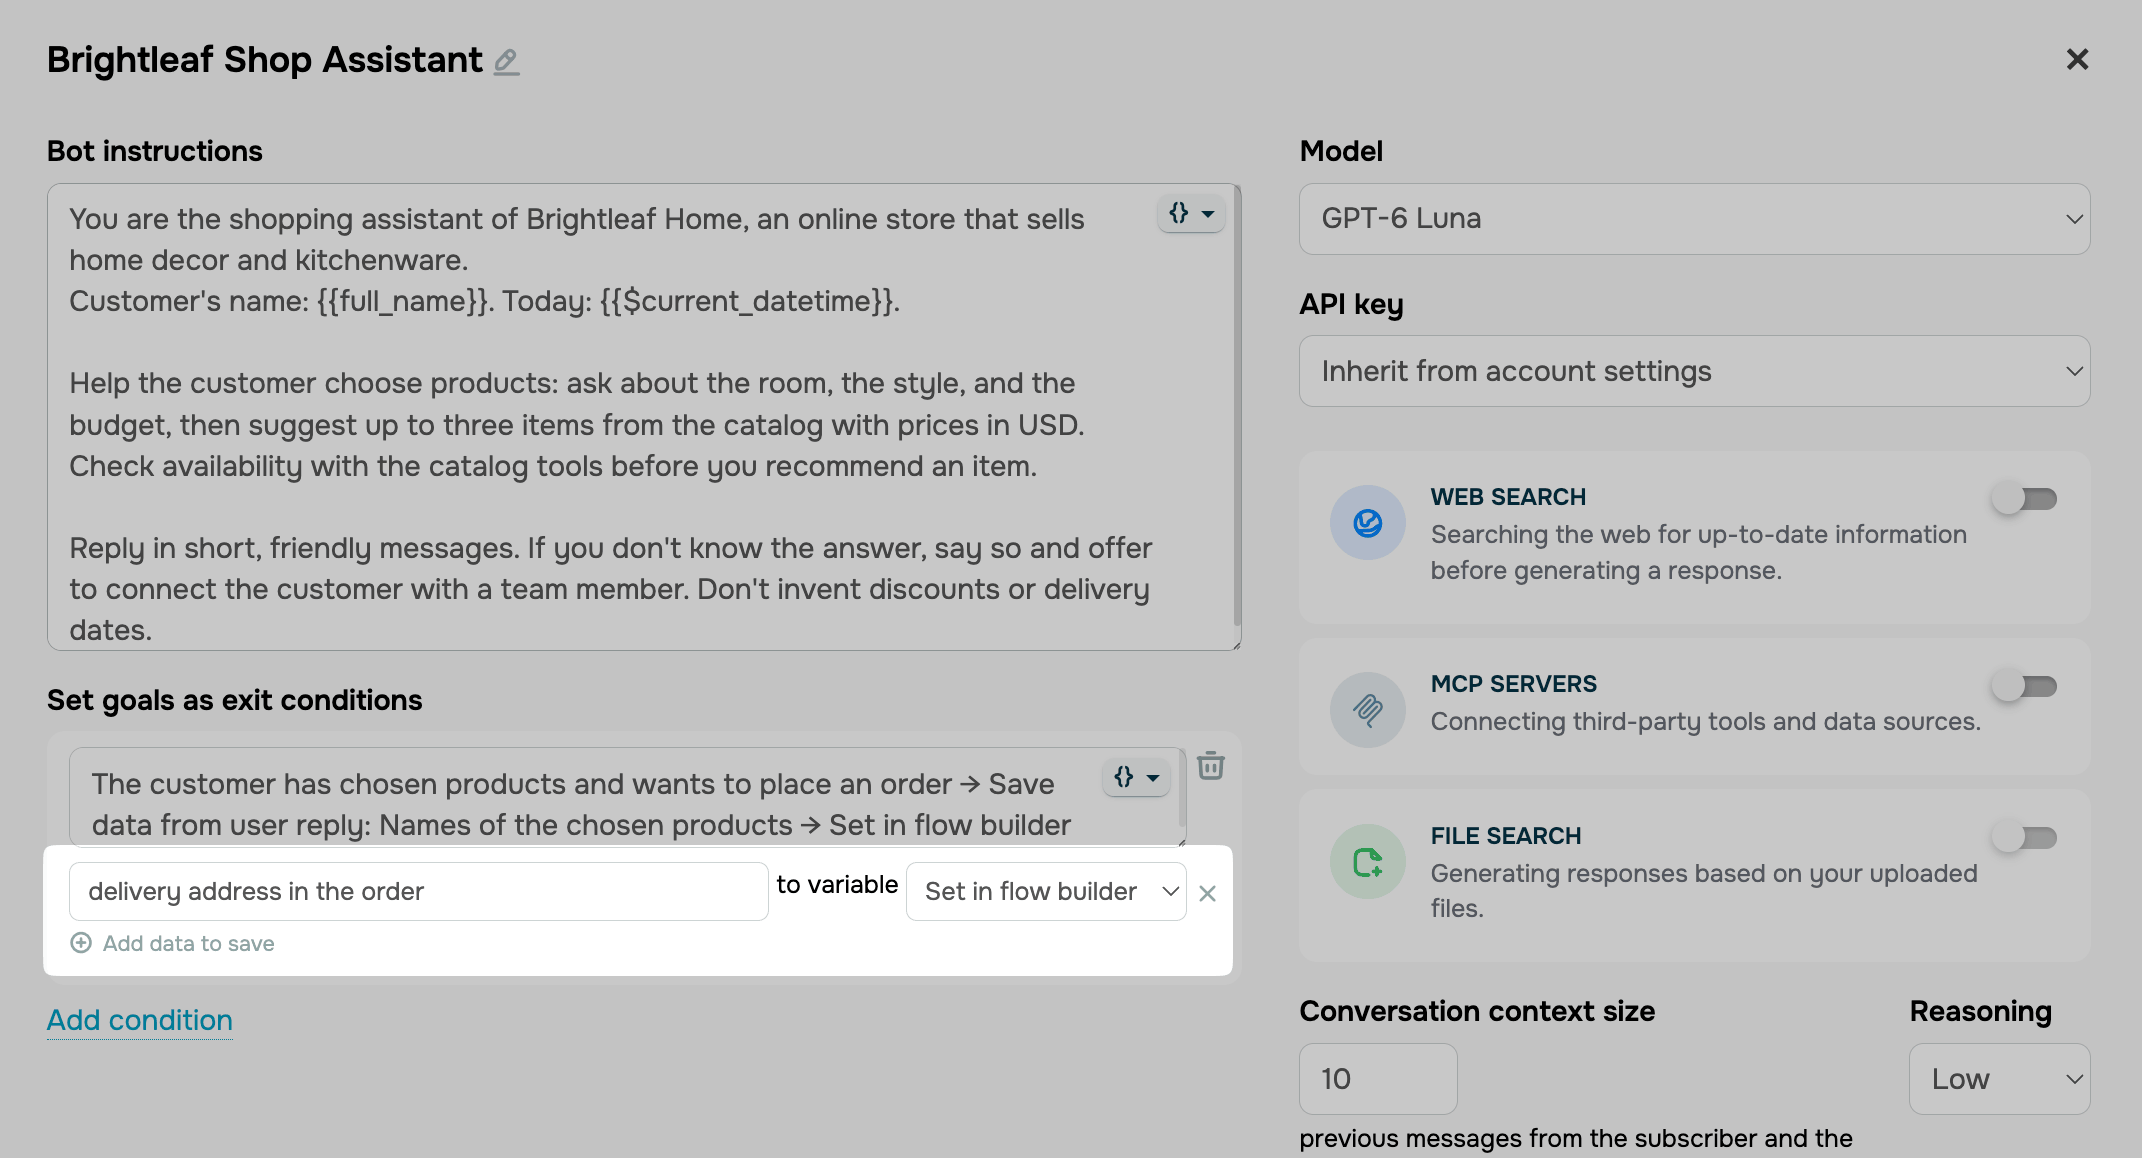
In the first field, describe the data to retrieve. In the second field, choose the variable to save the data to. To save more details, click Add data to save.
Describe the data you want to save as clearly as possible. Specifics help the AI find exactly what you're looking for and format it as intended.
Suppose a user chooses a product and delivery method. Here's how you can describe this:
✅ Clear: "Product names listed using commas, quantities shown in [square brackets]."
❌ Too vague: "Product."
✅ Clear: "Delivery address, including city, postal code (optional), street, and building."
❌ Too vague: "Delivery address."
When selecting variables, be mindful of their types. To save numbers that may need future updates, use the Number variable type. To record dates, select Date, and for text data, use String. Data will be automatically converted based on your variable's data type.
At the AI agent level, you can save data only to system variables, such as Phone or Email. To save data to a variable of a specific chatbot, select Set in flow builder, then choose the variable in the element when you add the agent to your flow.
Customize the AI model and tools
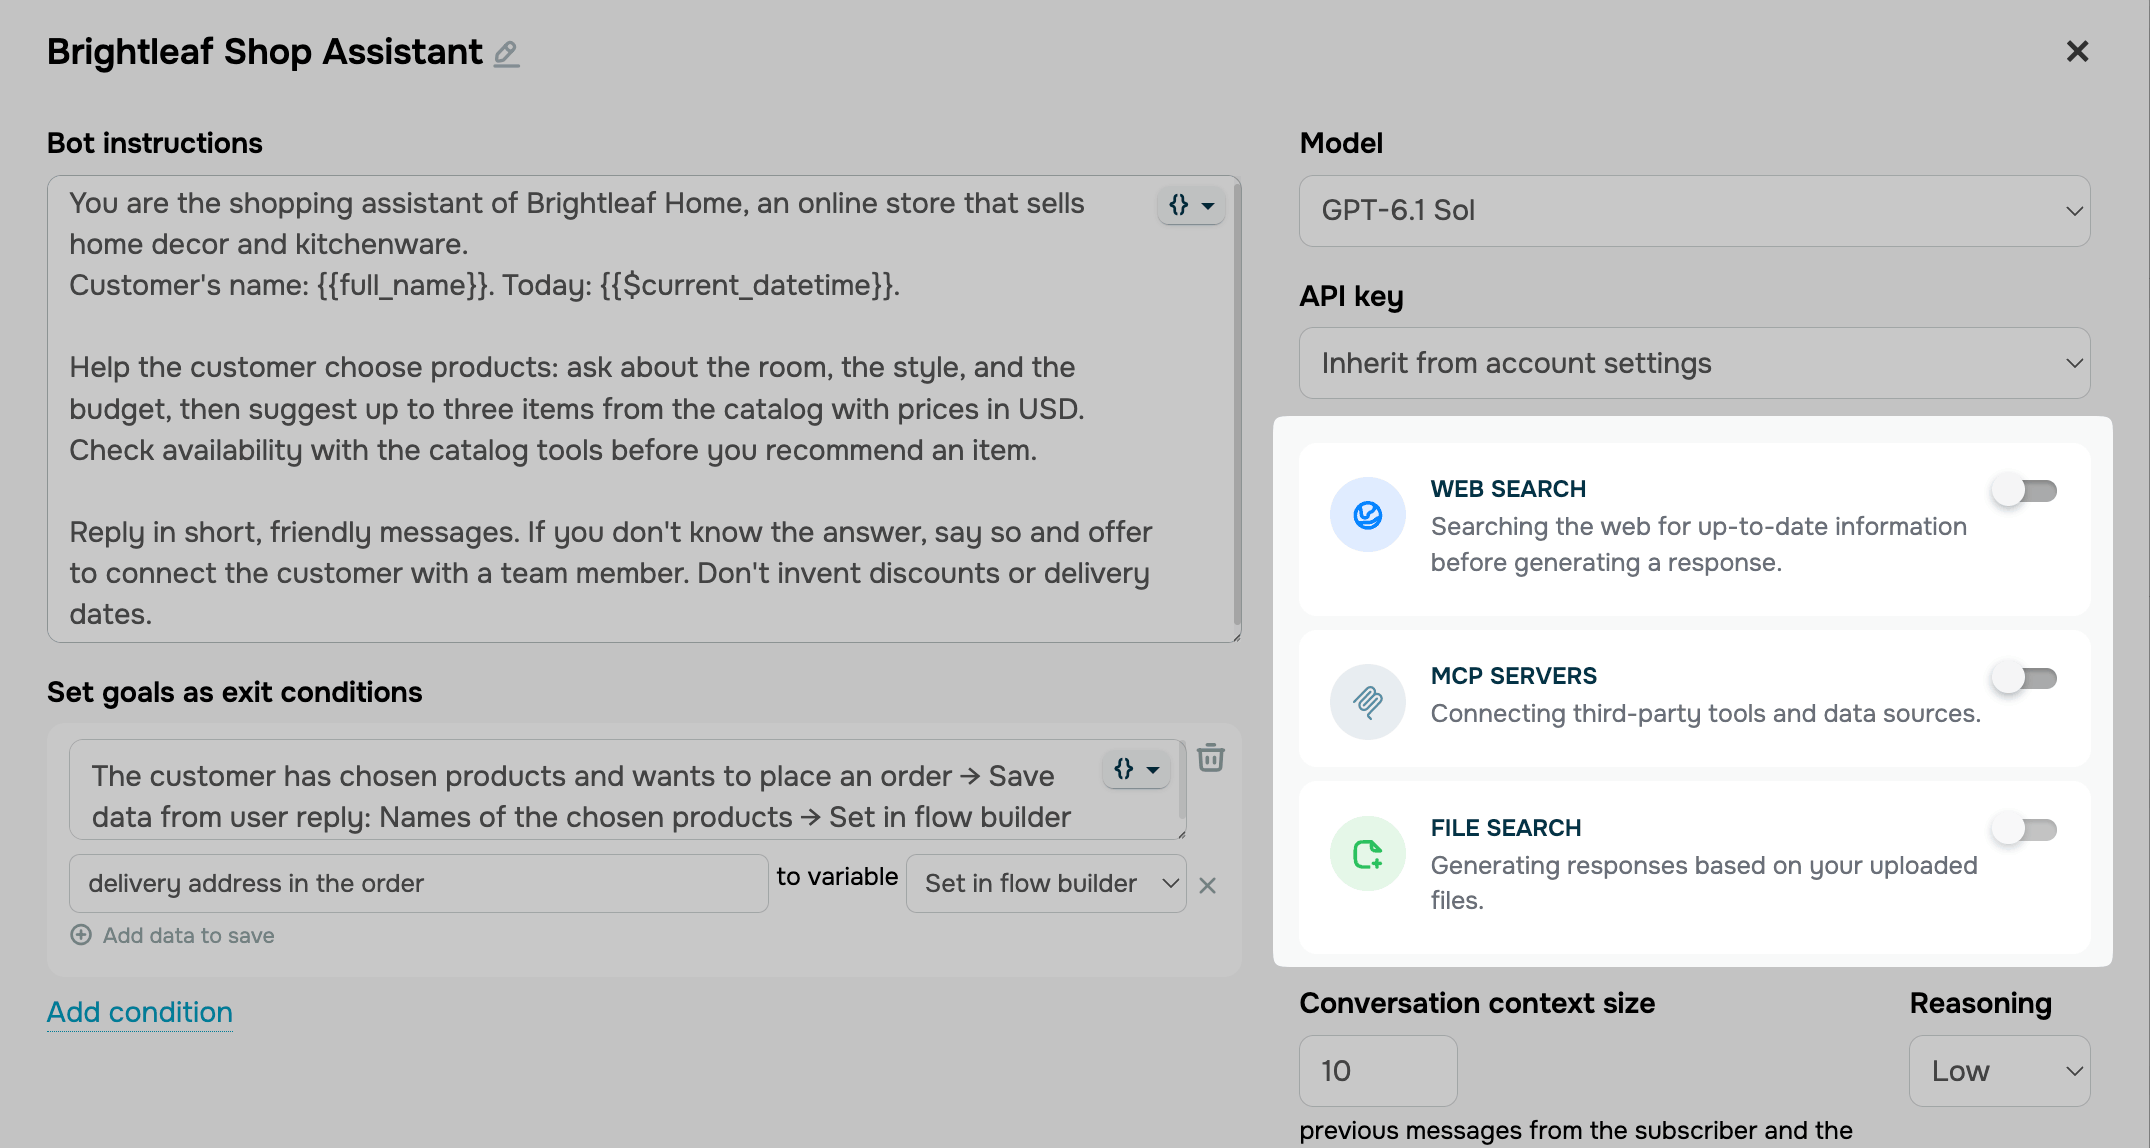
Optionally, you can add more tools to help your AI agent look up information outside the prompts. To enable a tool, turn on its toggle:
| Web search | Enable this tool to let your AI agent search the web for current information before it replies. Your AI provider bills search requests in addition to tokens. |
| MCP servers | Enable this tool to connect your AI agent to external tools and data sources, such as your product catalog. Choose a server from the list or click Add a new MCP server. |
| File search | Enable this tool to let your AI agent reply based on the files you upload, such as price lists or return policies. |
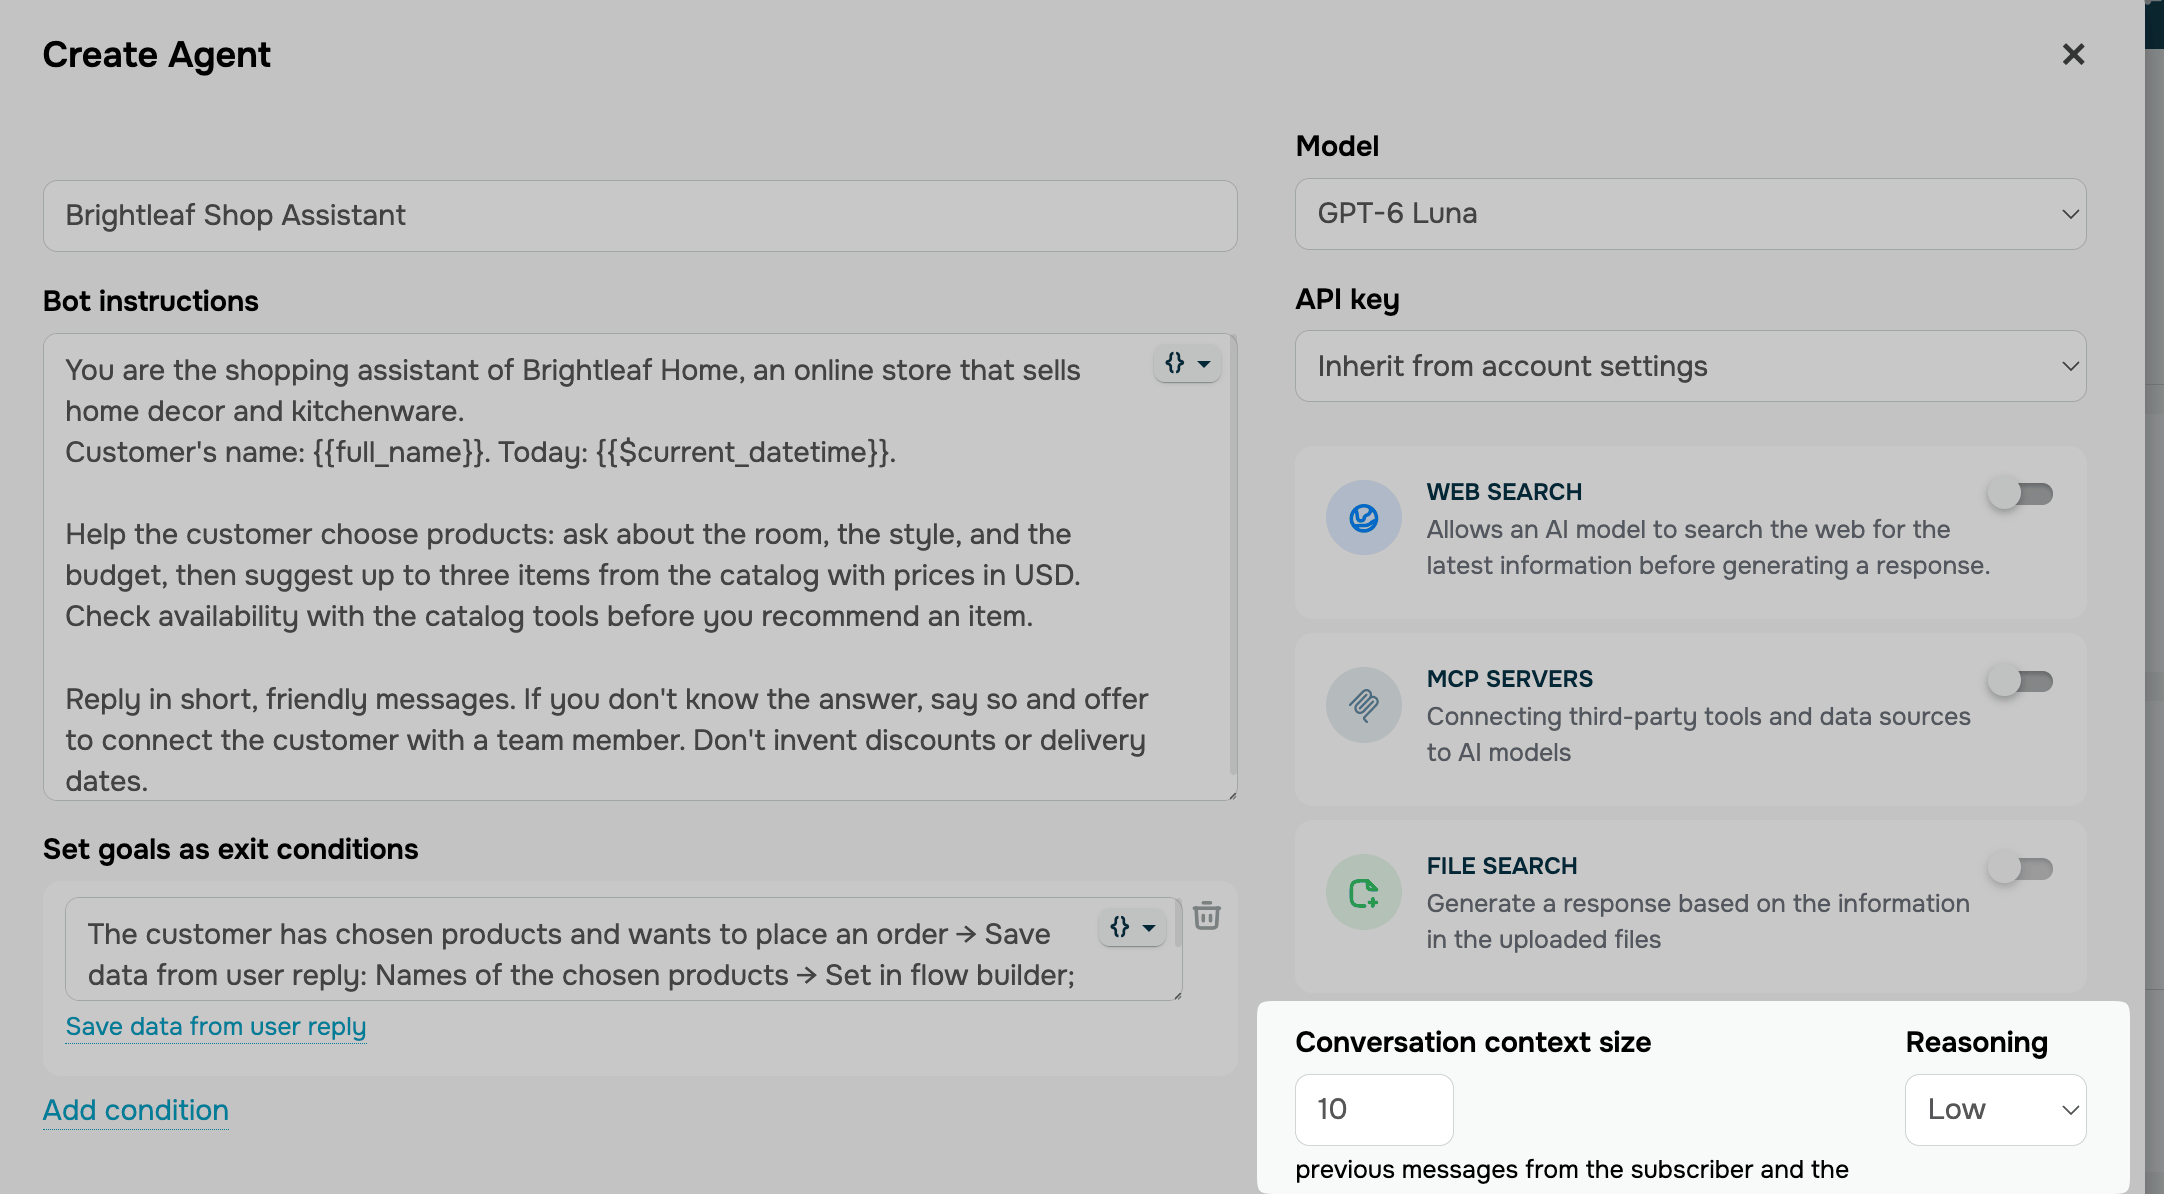
Some AI models support advanced settings that control the length and variety of replies.
In Conversation context size, set how many subscriber and chatbot messages the AI agent considers when generating each reply.
In Reasoning, decide how thoroughly the AI agent analyzes each subscriber message before replying.
Once you’re done, click Apply.
You can create up to 3 saved AI agents. To cover a small difference in behavior, add a condition to the element instead of creating a new agent.
View and manage AI agents
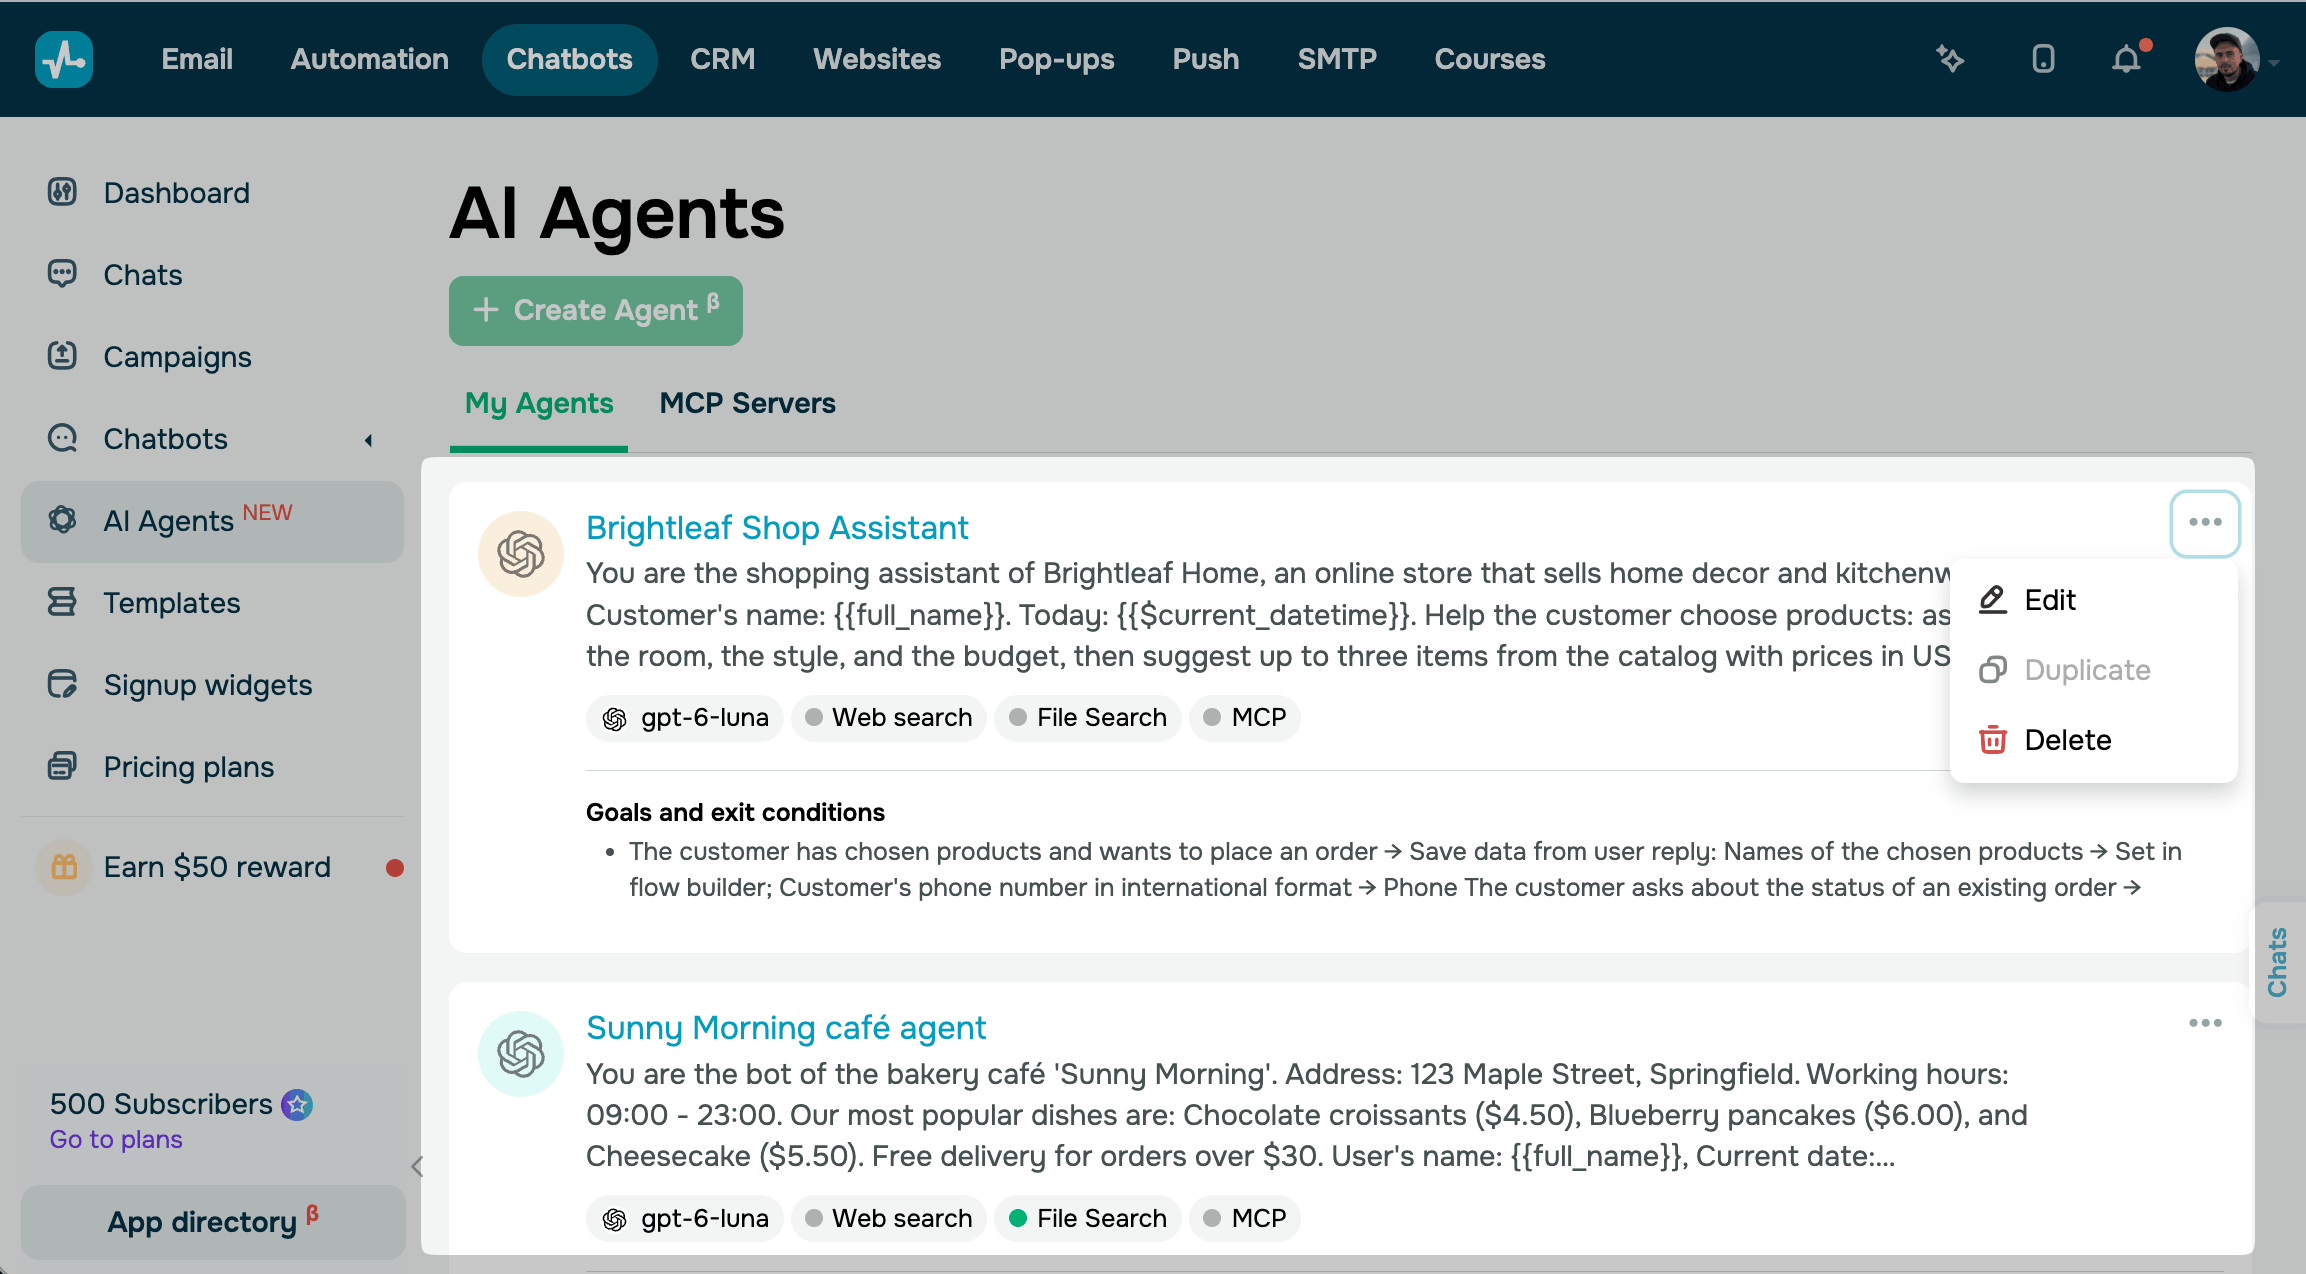
Your agents appear on the My Agents tab of the AI Agents section. Each agent is also available in the the AI Agent element in every chatbot.
To change an agent, open it, edit the fields, and click Apply. The changes apply right away to every element that uses the agent.
To create a similar agent, click Copy on its card. To delete an agent, click Delete and confirm the action.
Add the agent to a flow
To start using your AI agent in subscriber conversations, you need to add it to your chatbot flow.
In the flow builder, add the AI Agent element to your flow. In the Use AI Agent list, select your agent.
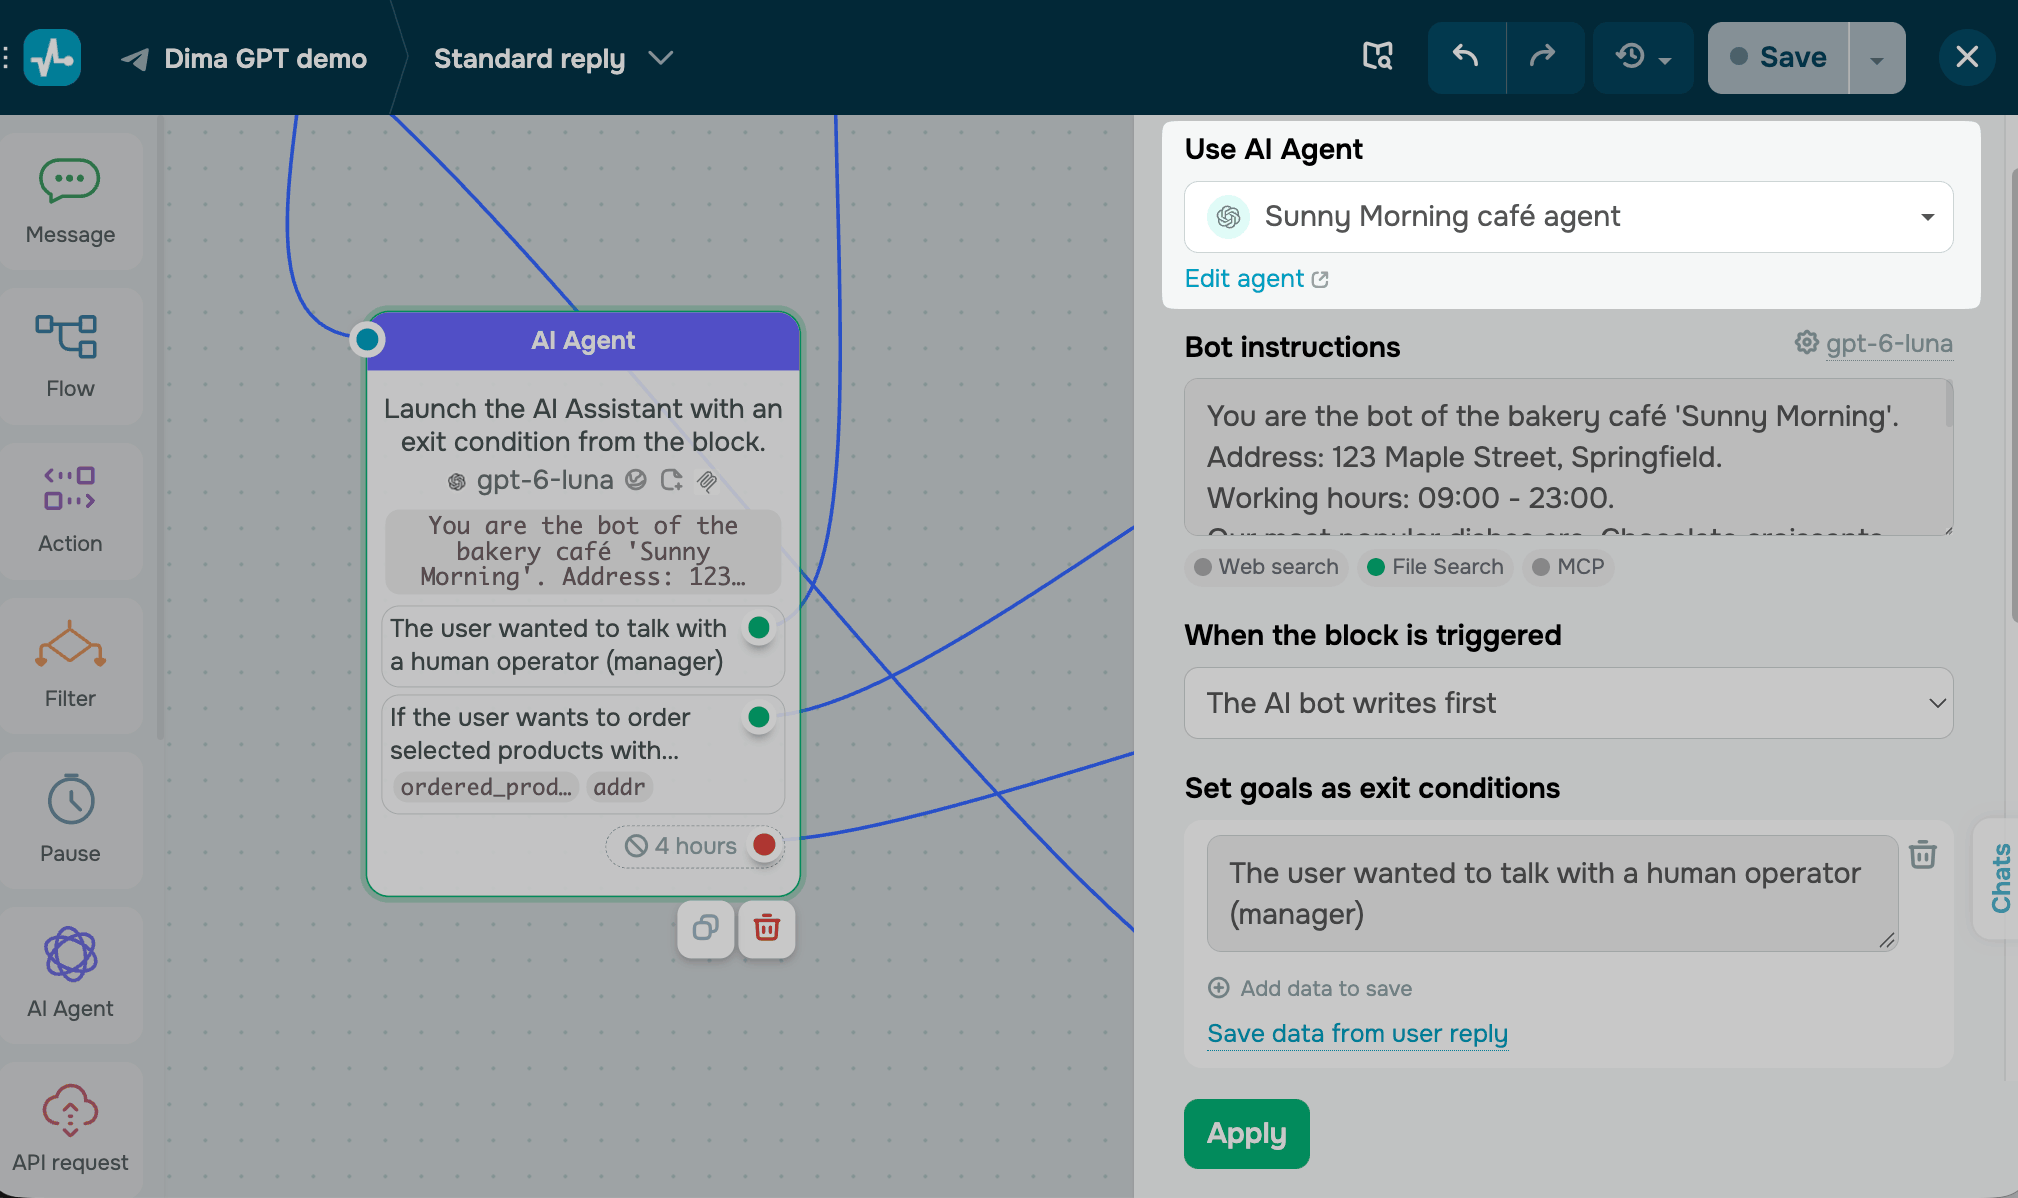
The element shows the settings it inherits from the agent. To change a setting in this element only, for example, to give a more specific prompt for this step, hover over the field and click Edit.
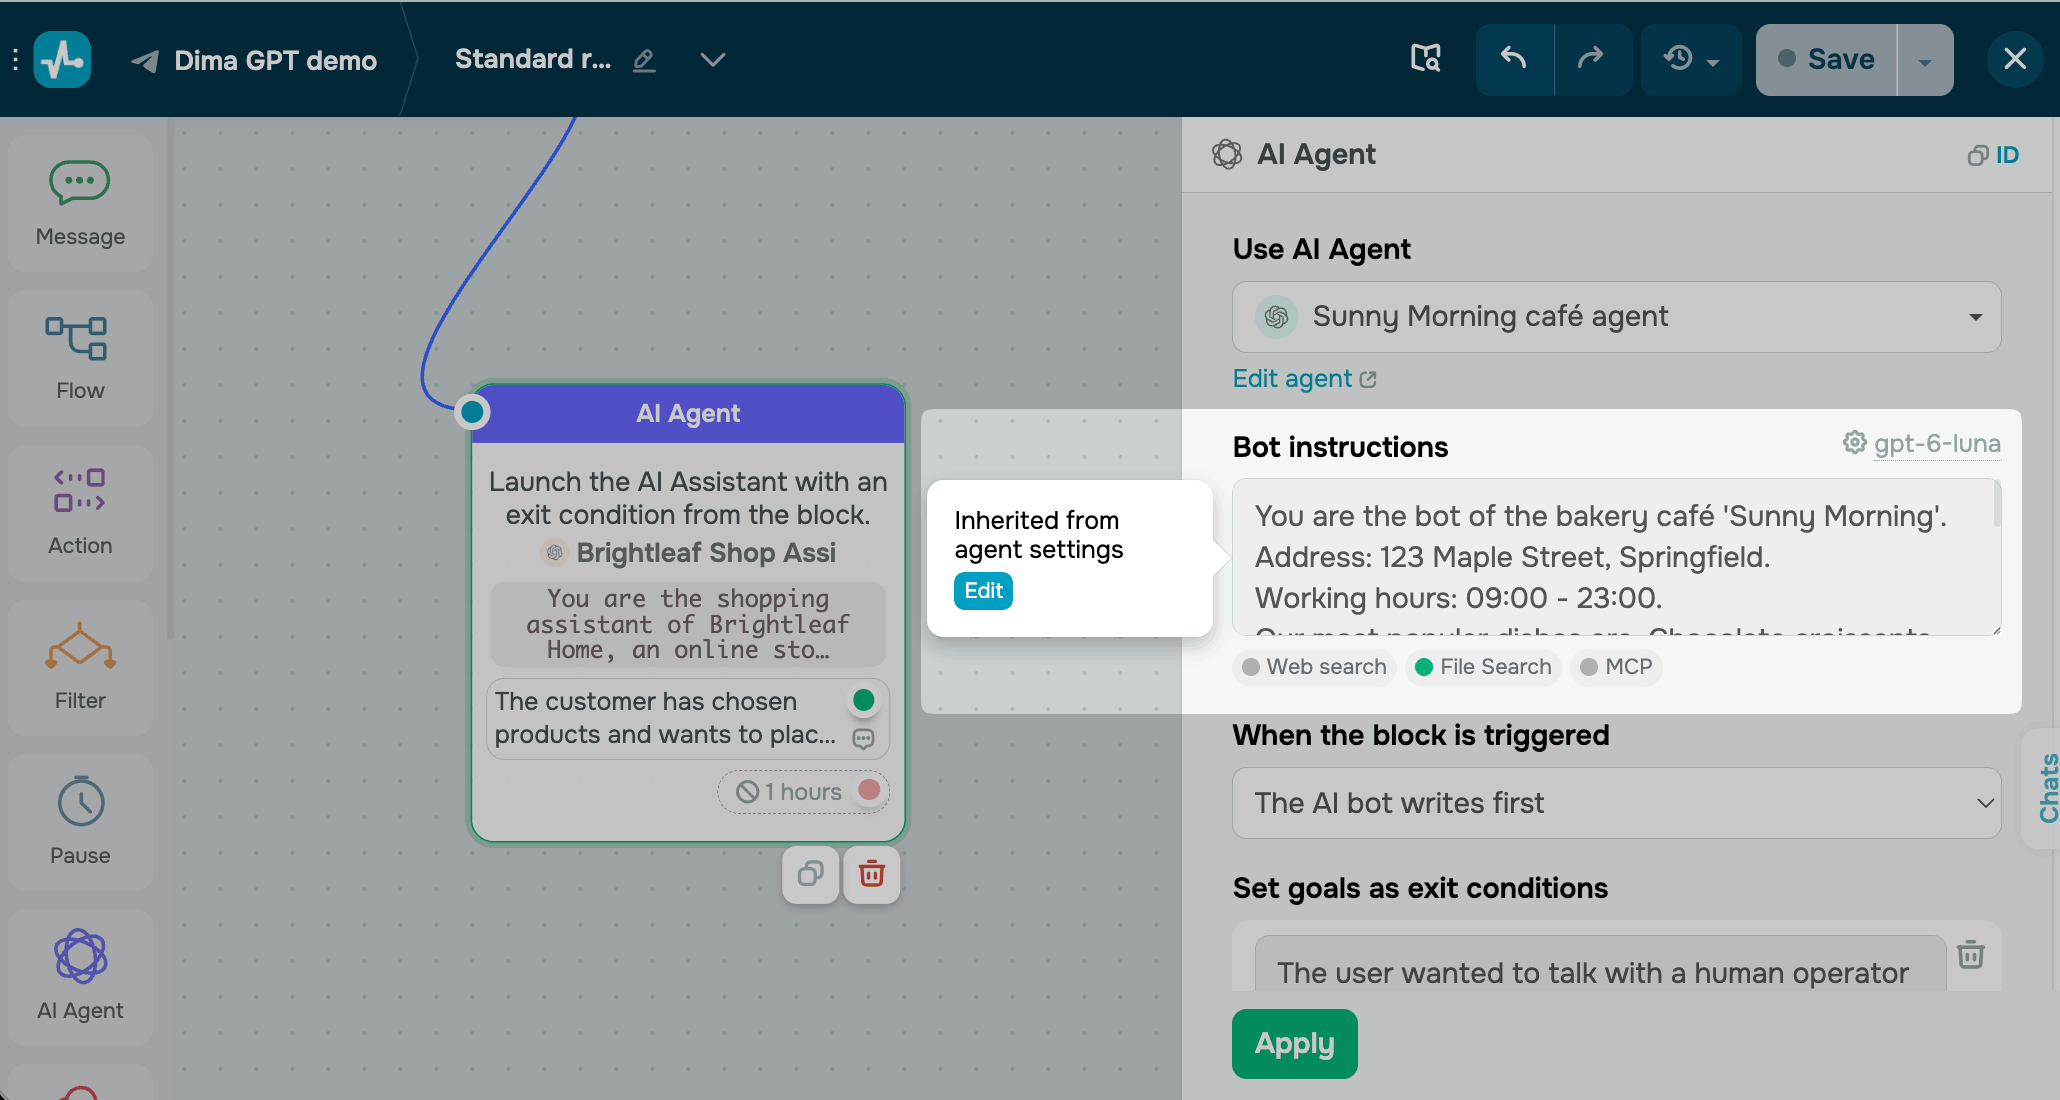
In When the block is triggered, choose who starts the conversation: your AI agent or the subscriber.
Your agent's exit conditions are listed in Set goals as exit conditions. To add a condition that applies only in this element, click Add condition. To edit a saved condition, hover over the field and click Edit.
If your AI agent saves data using the Set in flow builder option, choose a variable of this chatbot from the Choose list. SendPulse fills in system variables, such as Phone, automatically.
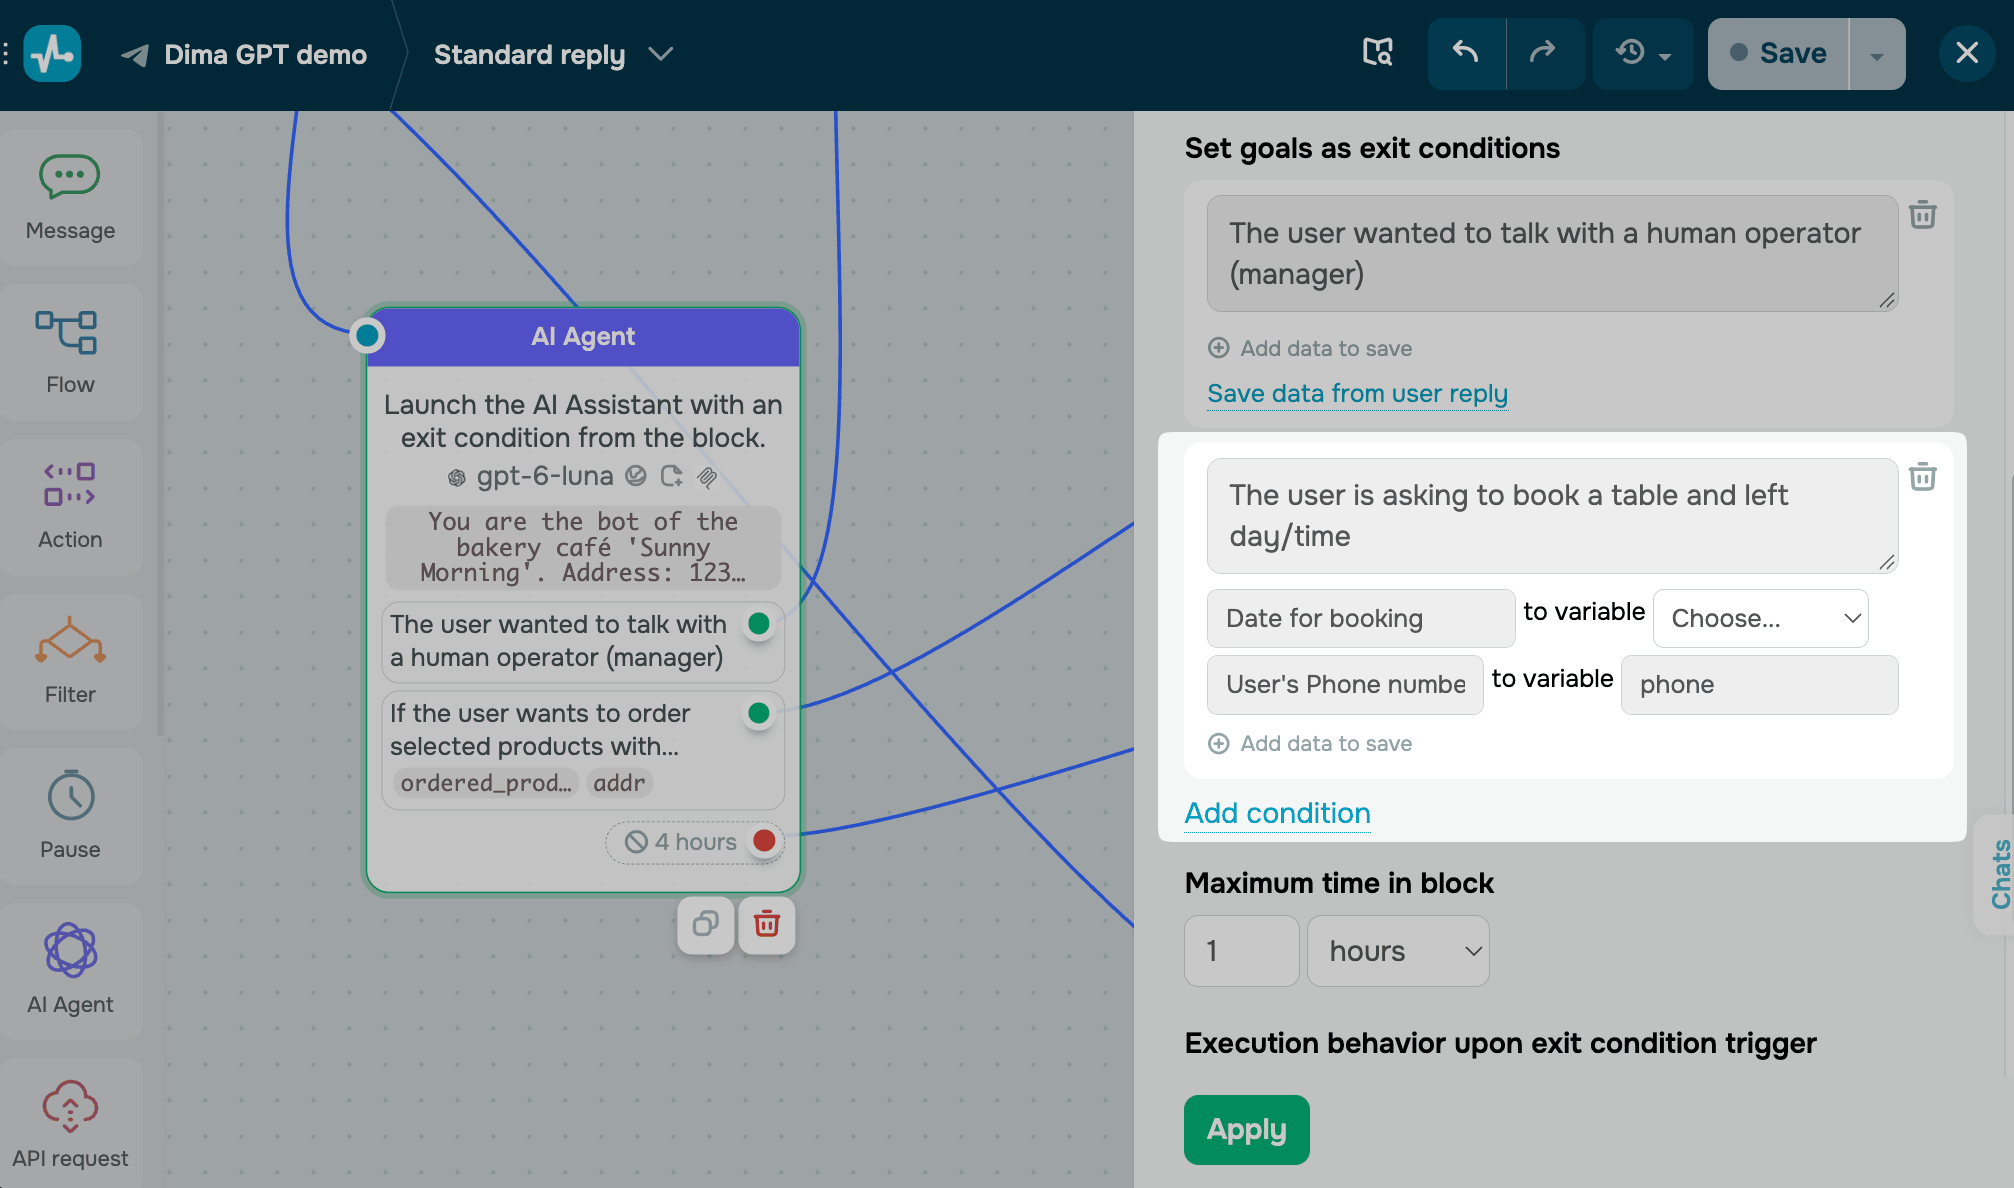
In Maximum time in block, set how long the subscriber can stay in the element. The maximum is 24 hours.
In Execution behavior upon exit condition trigger, decide if your AI agent replies to the subscriber when a goal is reached or if the flow continues without a reply. Read more: The AI Agent element in chatbots.
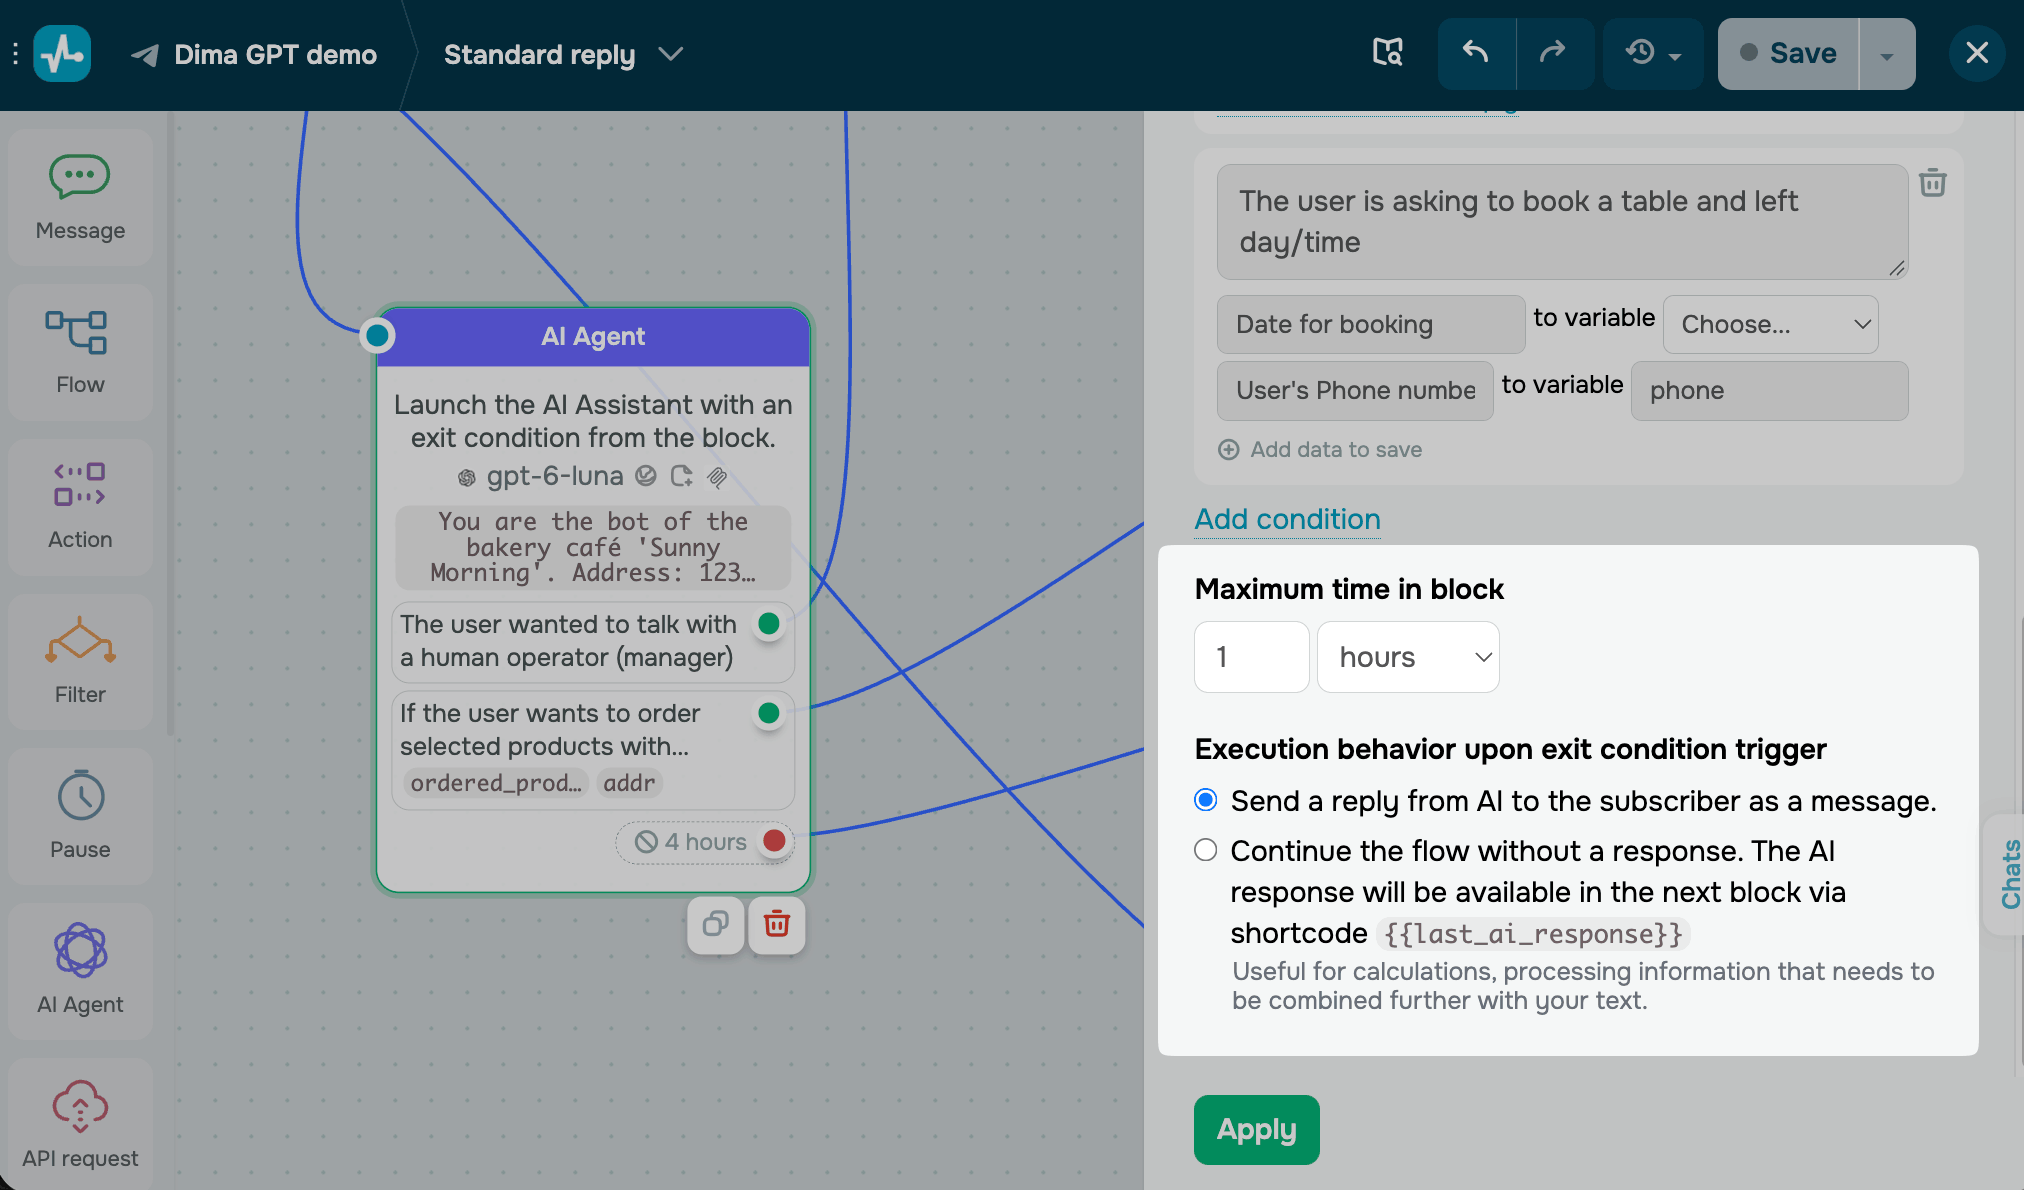
Click Apply. To test your AI agent, click Save and send to yourself in the upper right corner of the builder.
Troubleshoot AI agent issues
If your AI agents don't work as expected, one of these is the likely cause:
| The AI doesn't reply to chatbot subscribers | Go to Bot settings > Integrations, click AI models, and set the Limiting AI bot triggering to one contact field to a value above 0. With a limit of 0, your AI agent can’t reply in this chatbot. Read more: Connect AI models to your chatbot. |
| AI suggestions in Chats or flow generation don't work | Add your API key to Account settings > AI tools. A key entered in an AI agent or element doesn’t apply to these features. |
The Saving data from reply not set warning appears |
In the element, find each detail set to Set in flow builder and choose a variable for it from the Choose list. Then, click Apply. |
| Web search, MCP servers, or file search don’t work | Open your AI agent and make sure Reasoning is set to Low or higher. The agent can’t use tools at lower levels. |
| You’ve reached the limit of saved AI agents | You can have up to three saved AI agents. Delete an agent you don’t need, or use one of your existing agents and add an exit condition in the element for flow-specific goals. |
| A team member can't edit AI agents | Make sure your team member’s user role includes permission to edit flows. |
 Last Updated: 05.11.2026



or