Add an MCP server
MCP (Model Context Protocol) is a standard that links AI with external tools. It expands the model’s features by integrating it with third-party systems and tools.
In this article, we will talk about how to add a new MCP server.
Select a chatbot and go to Bot settings > Integrations. In MCP servers, click Add to create a new connection.
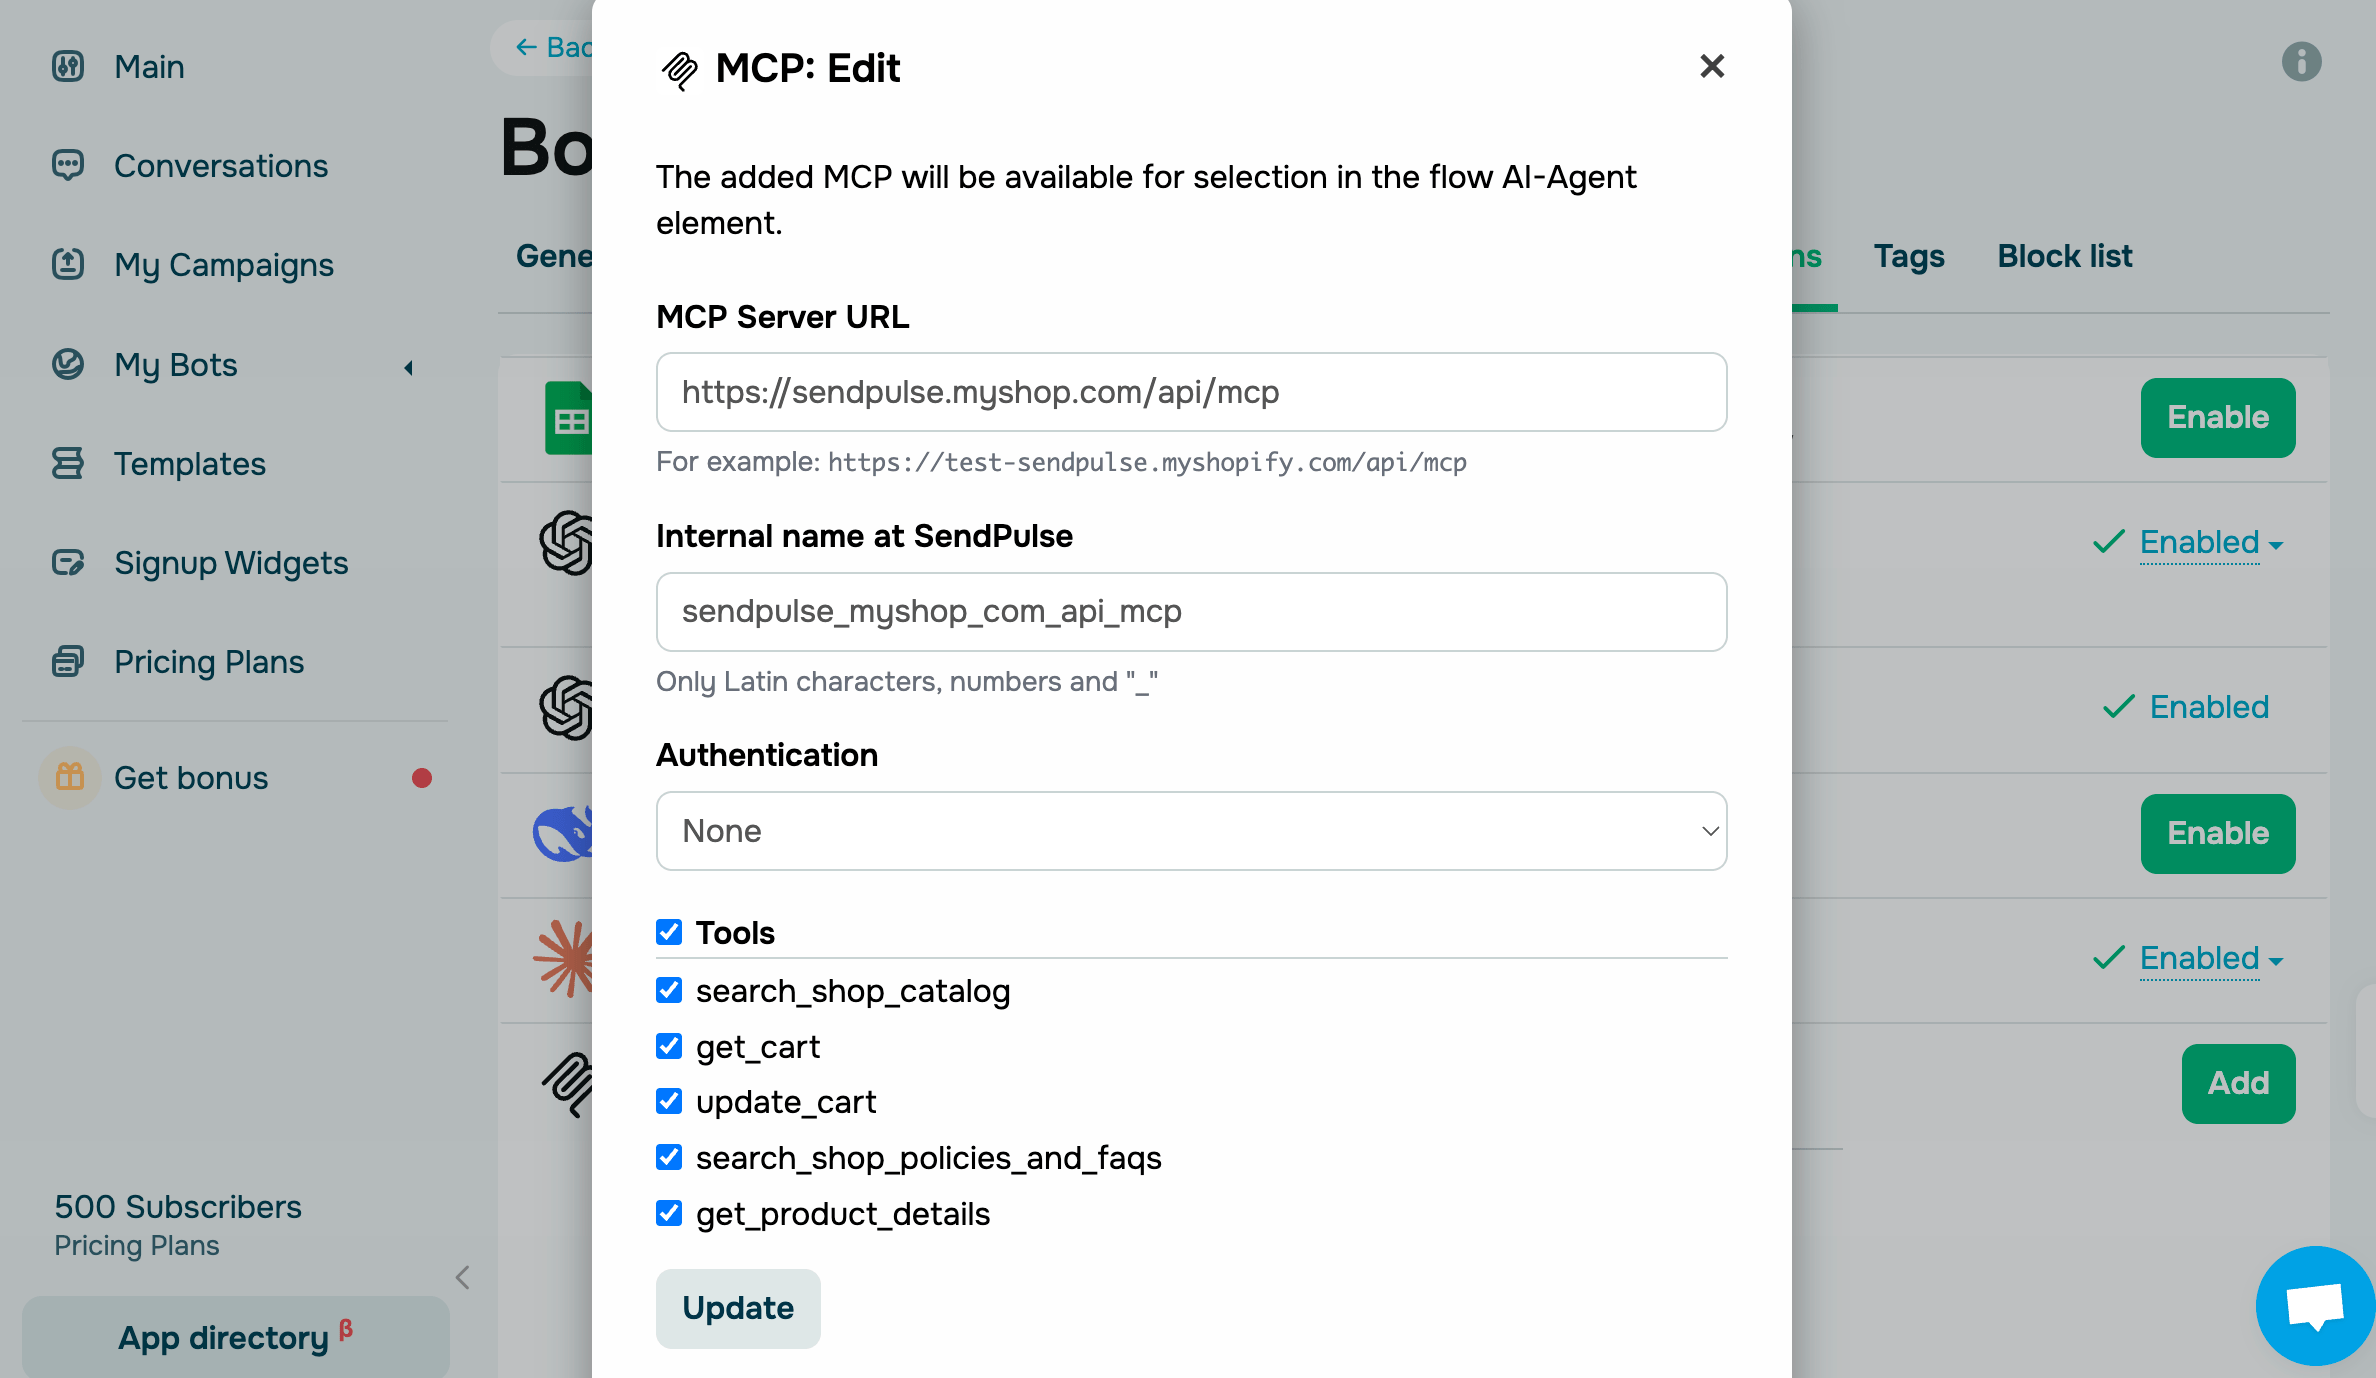
In the settings, fill in the following fields:
| MCP server URL | Paste the MCP server link the AI should interact with, such as https://mcp.example.com. It can be your store backend, CRM system, or any other API that supports the Model Context Protocol. |
| Internal name in SendPulse | Enter an internal connection name. This name appears only in your SendPulse account. |
| Authorization |
Select an authentication method if the MCP server requires it:
If the MCP server does not require authentication, leave None selected. |
To see all available commands and manage access, click Get tools. If the request succeeds, select which commands to use. For a store, this could involve actions that retrieve their product catalog or add items to users’ carts through live chat. For SendPulse, it may involve actions like fetching account data or sending messages.
Click Connect.
Once saved, this connection becomes available for selection and configuration in the AI Agent element.
Last Updated: 18.11.2025
or