Create and integrate an OpenAI Assistant with a SendPulse-powered chatbot
You can create a custom AI Assistant based on OpenAI's GPT models and integrate it with SendPulse-powered chatbots to handle various tasks.
Your Assistant can process chatbot requests and reply to users based on preset instructions, conversation context, or analysis of uploaded files. Beyond that, it can also do the following:
- Handle customer inquiries 24/7, offer personalized recommendations, and assist with customer support.
- Draft job descriptions, conduct initial candidate screenings, and create training materials, workshops, or courses for staff.
- Assist in developing marketing strategies, analyze financial data, and generate reports.
- Write texts, create content for social media, and carry out other tasks.
In this article, we will overview how to create and integrate an AI assistant with a SendPulse-powered chatbot.
Set up an OpenAI Assistant
To create an Assistant, sign up or log in to OpenAI.
Create an Assistant
Go to Dashboard > Assistants and click Create.

Name your Assistant and define its instructions. Your instructions can look like this: "A bot that answers questions about our products, helps place orders, collects contact information, and communicates in a friendly manner."

You can use the built-in AI editor to modify your instructions if necessary.
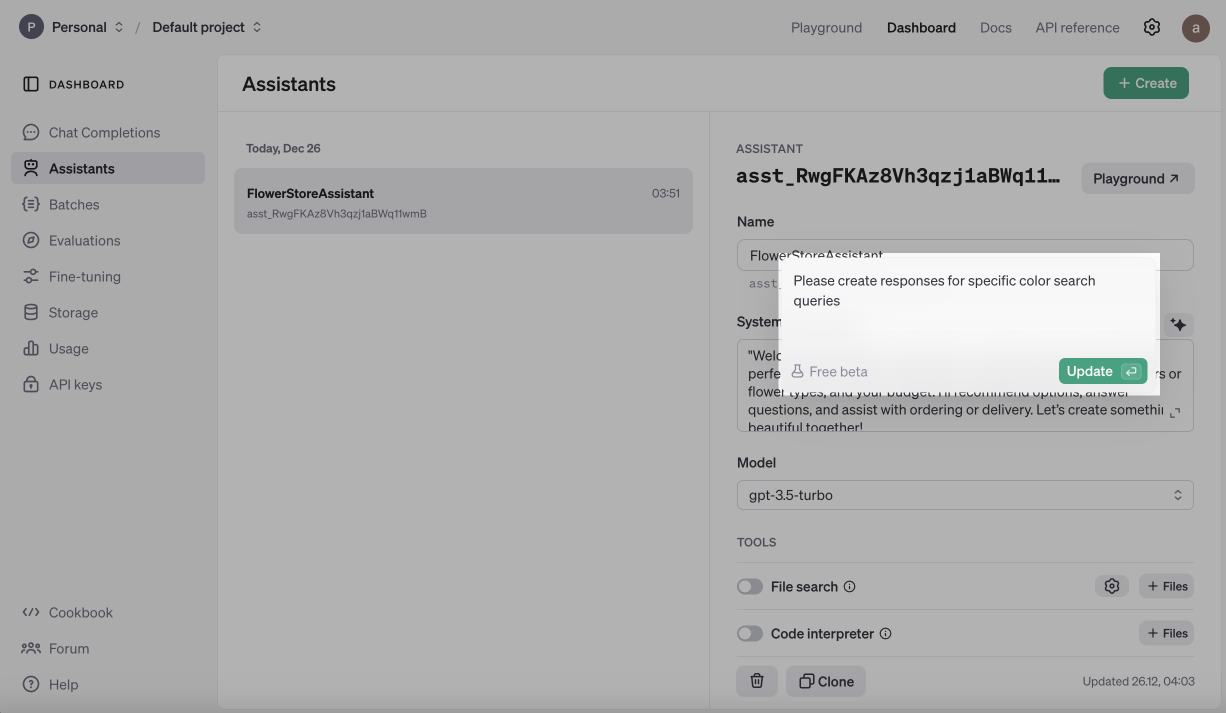
Select a GPT model from the list.

Configure Assistant responses
You can upload files with information that your Assistant will use to generate responses, including FAQs, your company description, or other key data. OpenAI automatically analyzes these documents and uses keyword searches to create replies to users' messages.
Your Assistant can also analyze and generate code, create charts, and invoke custom functions through integrations with external APIs. You can insert pre-written code for these functions or have your Assistant generate it.

Select a response format and adjust the Temperature and Top P settings.
Temperature determines the model's creativity. A low value (for example, 0.2) makes results more precise, while a high value (for example, 1) makes them more creative.
Top P controls how many word options the model considers to predict the next word. For example, 0.5 limits choices to the top 50% most likely options, while 0.9 expands it to 90%.
It’s generally recommended to adjust only one of these settings at a time.

You can test your Assistant’s performance in Playground.
Generate an API key
Go to the API Keys tab and click Create new secret key.
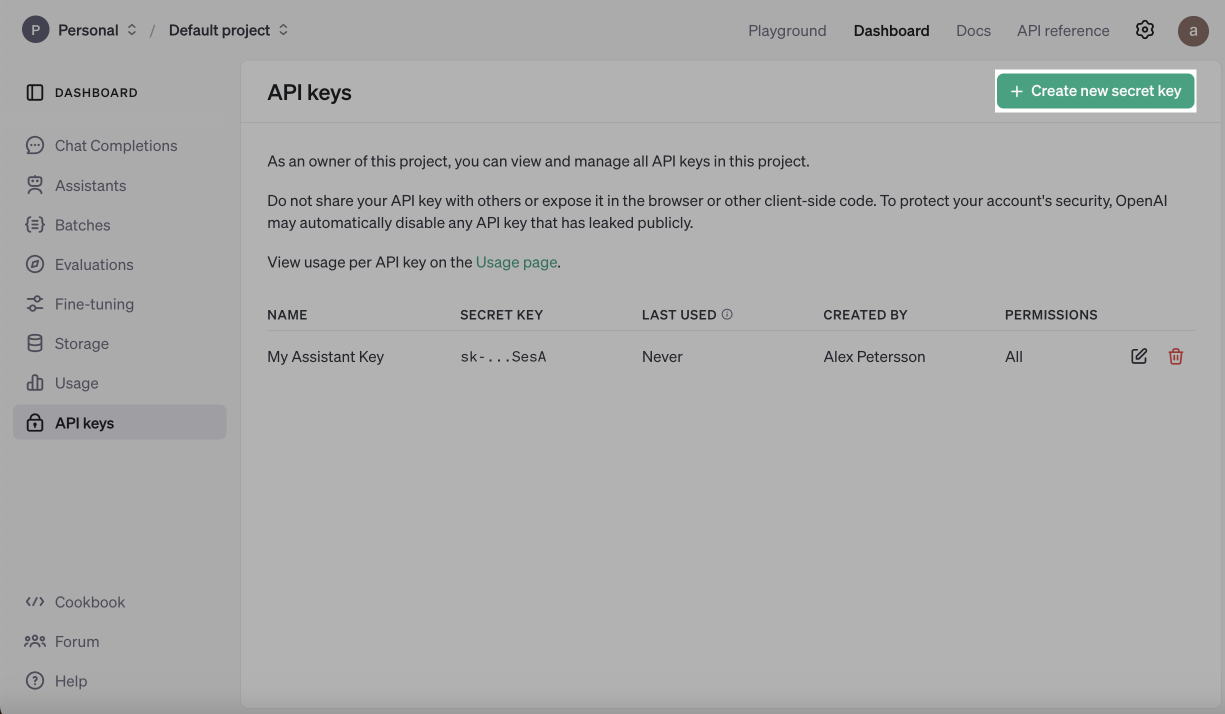
Copy and save the key. Once you close the modal window, you won’t be able to copy your key again. If you don’t copy it, you will need to generate and save a new one.
Connect the Assistant to a SendPulse-powered chatbot
Log in to your SendPulse account, then go to the Chatbots section. Select the chatbot you want to integrate with your Assistant. Go to the Bot Variables tab in the settings to add global variables that will maintain the same value across all flow elements where they are used.
Create the $OPENAI_KEY global variable of the string type. This variable will store your OpenAI API key. Paste the copied key into the variable’s value field, and save your changes.

Create the $OPENAI_ASSISTANT_ID global variable of the string type. This variable will determine which Assistant to send requests to.
To find the Assistant ID, go to your Assistant's page in OpenAI, then copy the string of characters above its name. Paste the ID into the variable’s value field, and save your changes.
Create and configure the Assistant flow
To simplify the process, you can use the ready-made Assistant flow. Go to the Templates section in your SendPulse account, find the OpenAI Assistants template, copy it to your chatbot, review, and edit the flow in the builder to customize the Assistant.

The template includes prompts with a list of variables you need to create. You can create variables in the Audience tab of your bot or directly within flow elements.
request |
Stores the user’s request. |
thread_id |
Stores the ID of the conversation session between the user and your Assistant to preserve context. Add this variable to the response field, and make sure to update the Filter element as per the template. |
thread_message_id |
Stores the ID of a specific flow message. |
thread_run_id |
Retains the ongoing run ID to get a response from your Assistant, maintaining the current context. |
thread_run_status |
Saves the run status, such as In progress, Completed, or Error. |
Save your flow and test the integration. Responses may take around 20 seconds, as the OpenAI Assistant API requires time to process requests.
Link the flow to a trigger or another flow using the Flow element so that it runs based on your scenario.
Last Updated: 27.12.2024
or