Create a task
To achieve your project’s goals, you can divide all the work you have to do into specific steps and create tasks for each of them. In the task card, specify the action that needs to be performed, requirements and expected results, assignees, deadlines, and other useful information.
In this article, we'll show you how to create, configure, and assign a task.
Create a task
Go to the CRM section in the My tasks tab, select the board, and click Create task.

Enter a task name. You can enter up to 120 characters, numbers and letters.
Set a task status
Select where on the task board to place your task.
Read more: Task statuses.
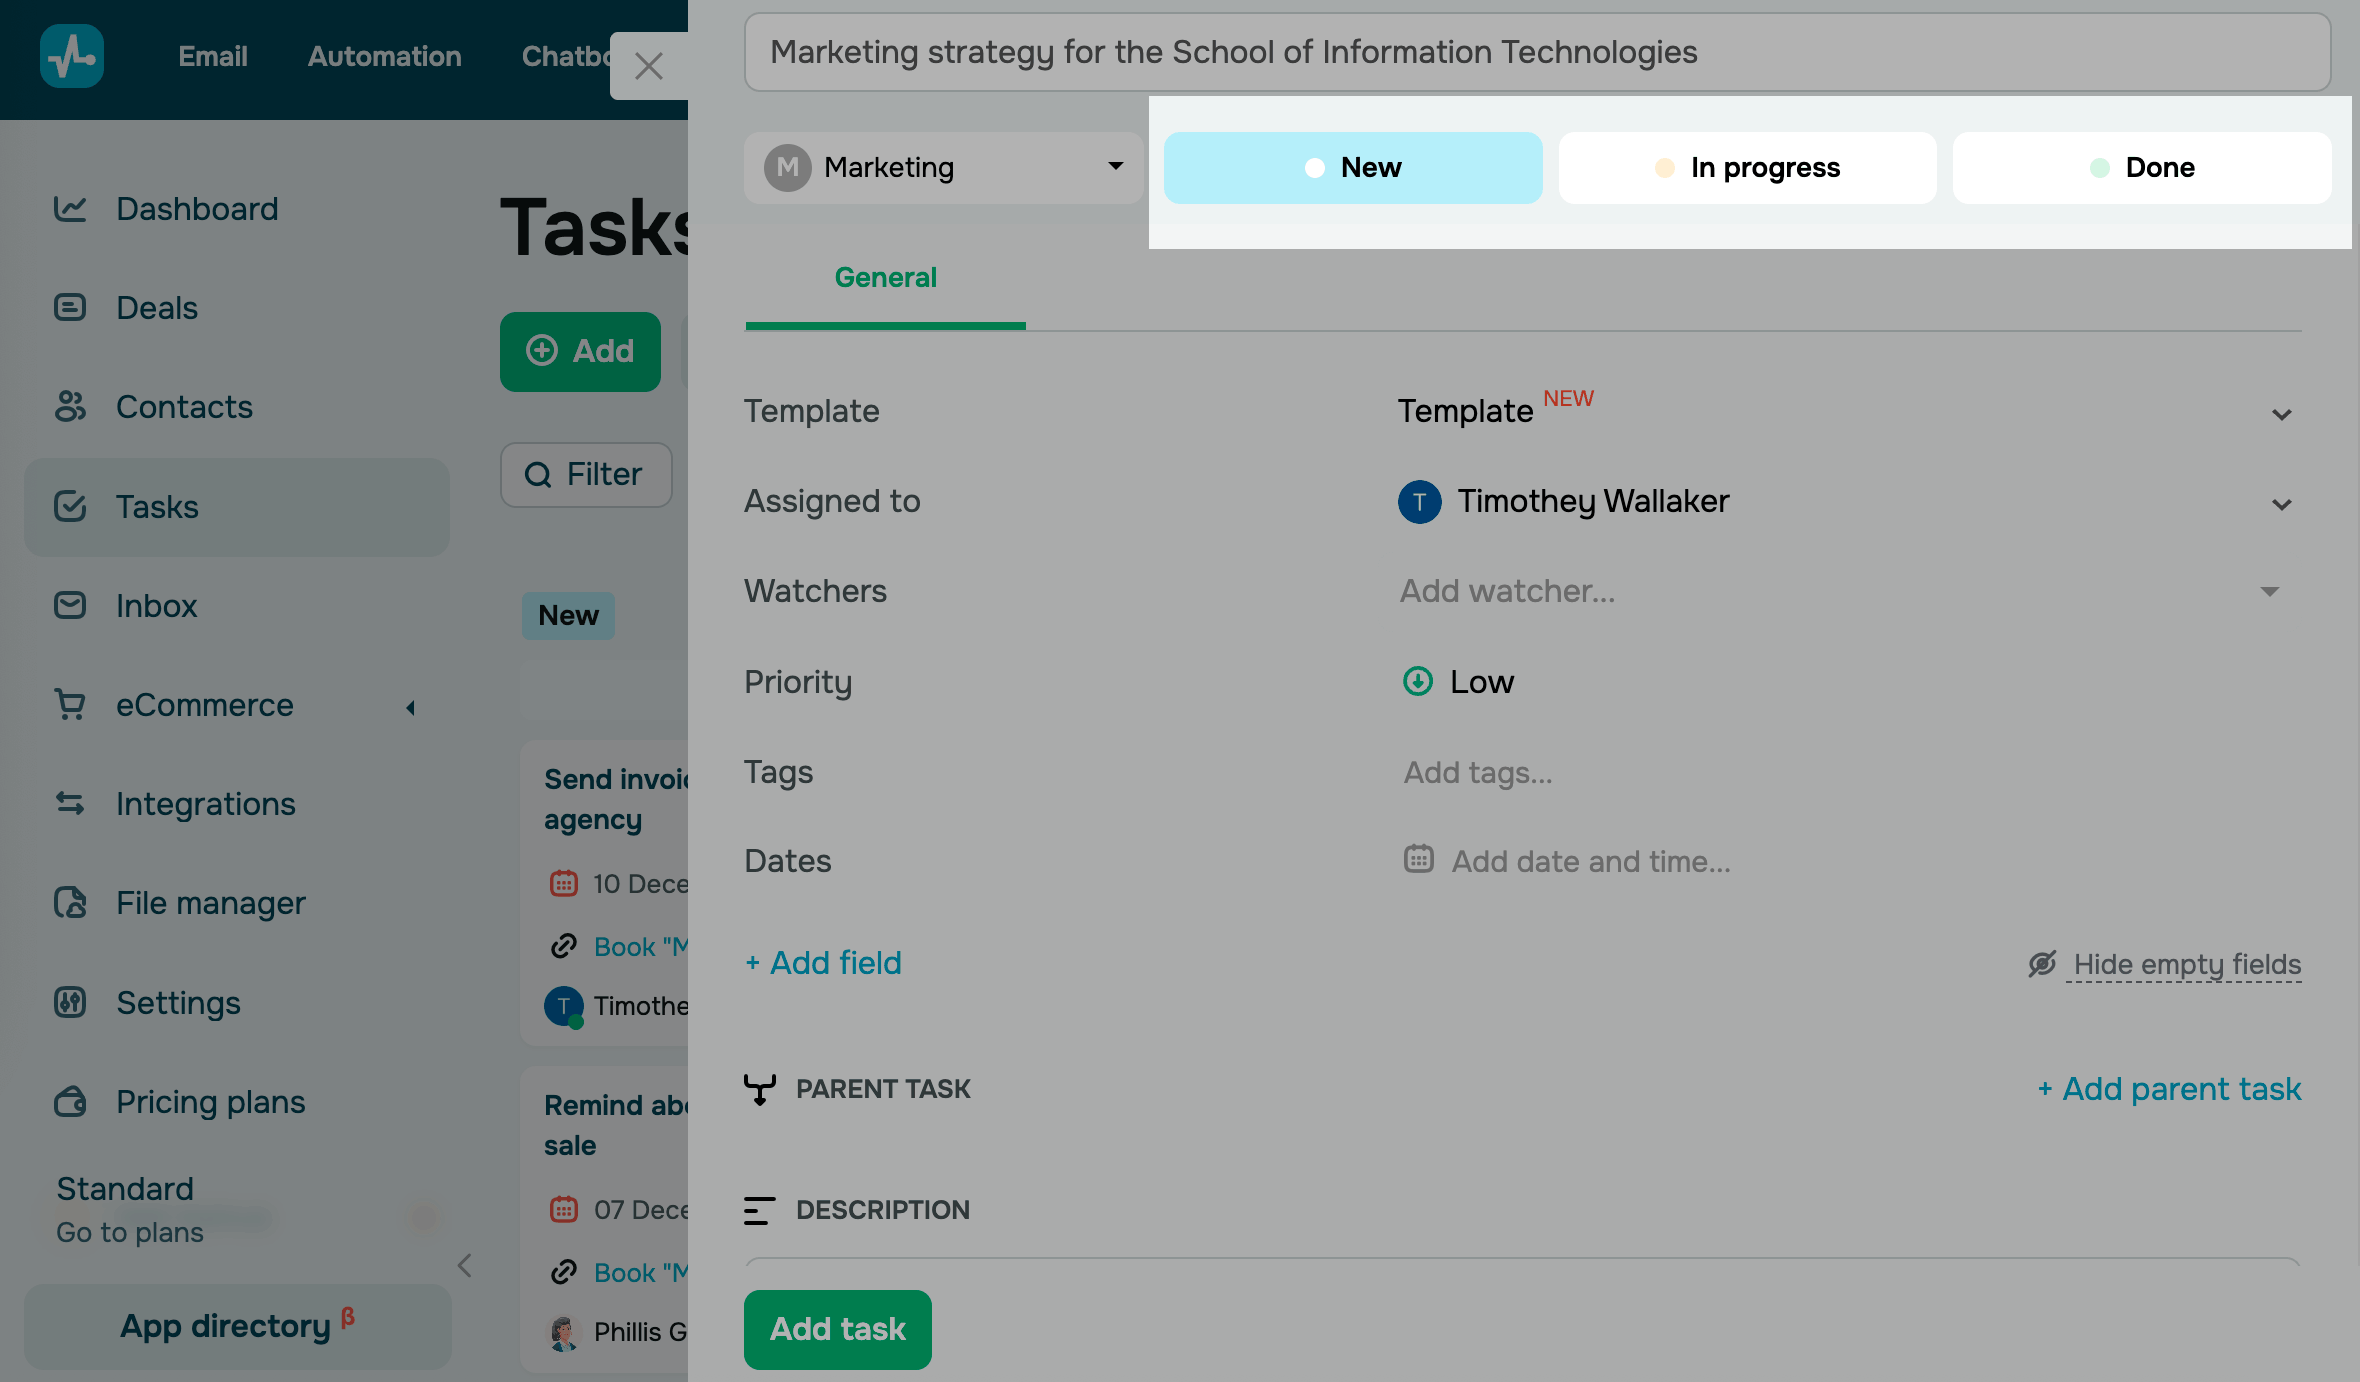
Select members
Add your team members who will work on the task:
| Responsible | This user is assigned to complete the task |
| Watcher | This user monitors the task progress |
Task members will receive emails about task events.
Read also: Manage a team.
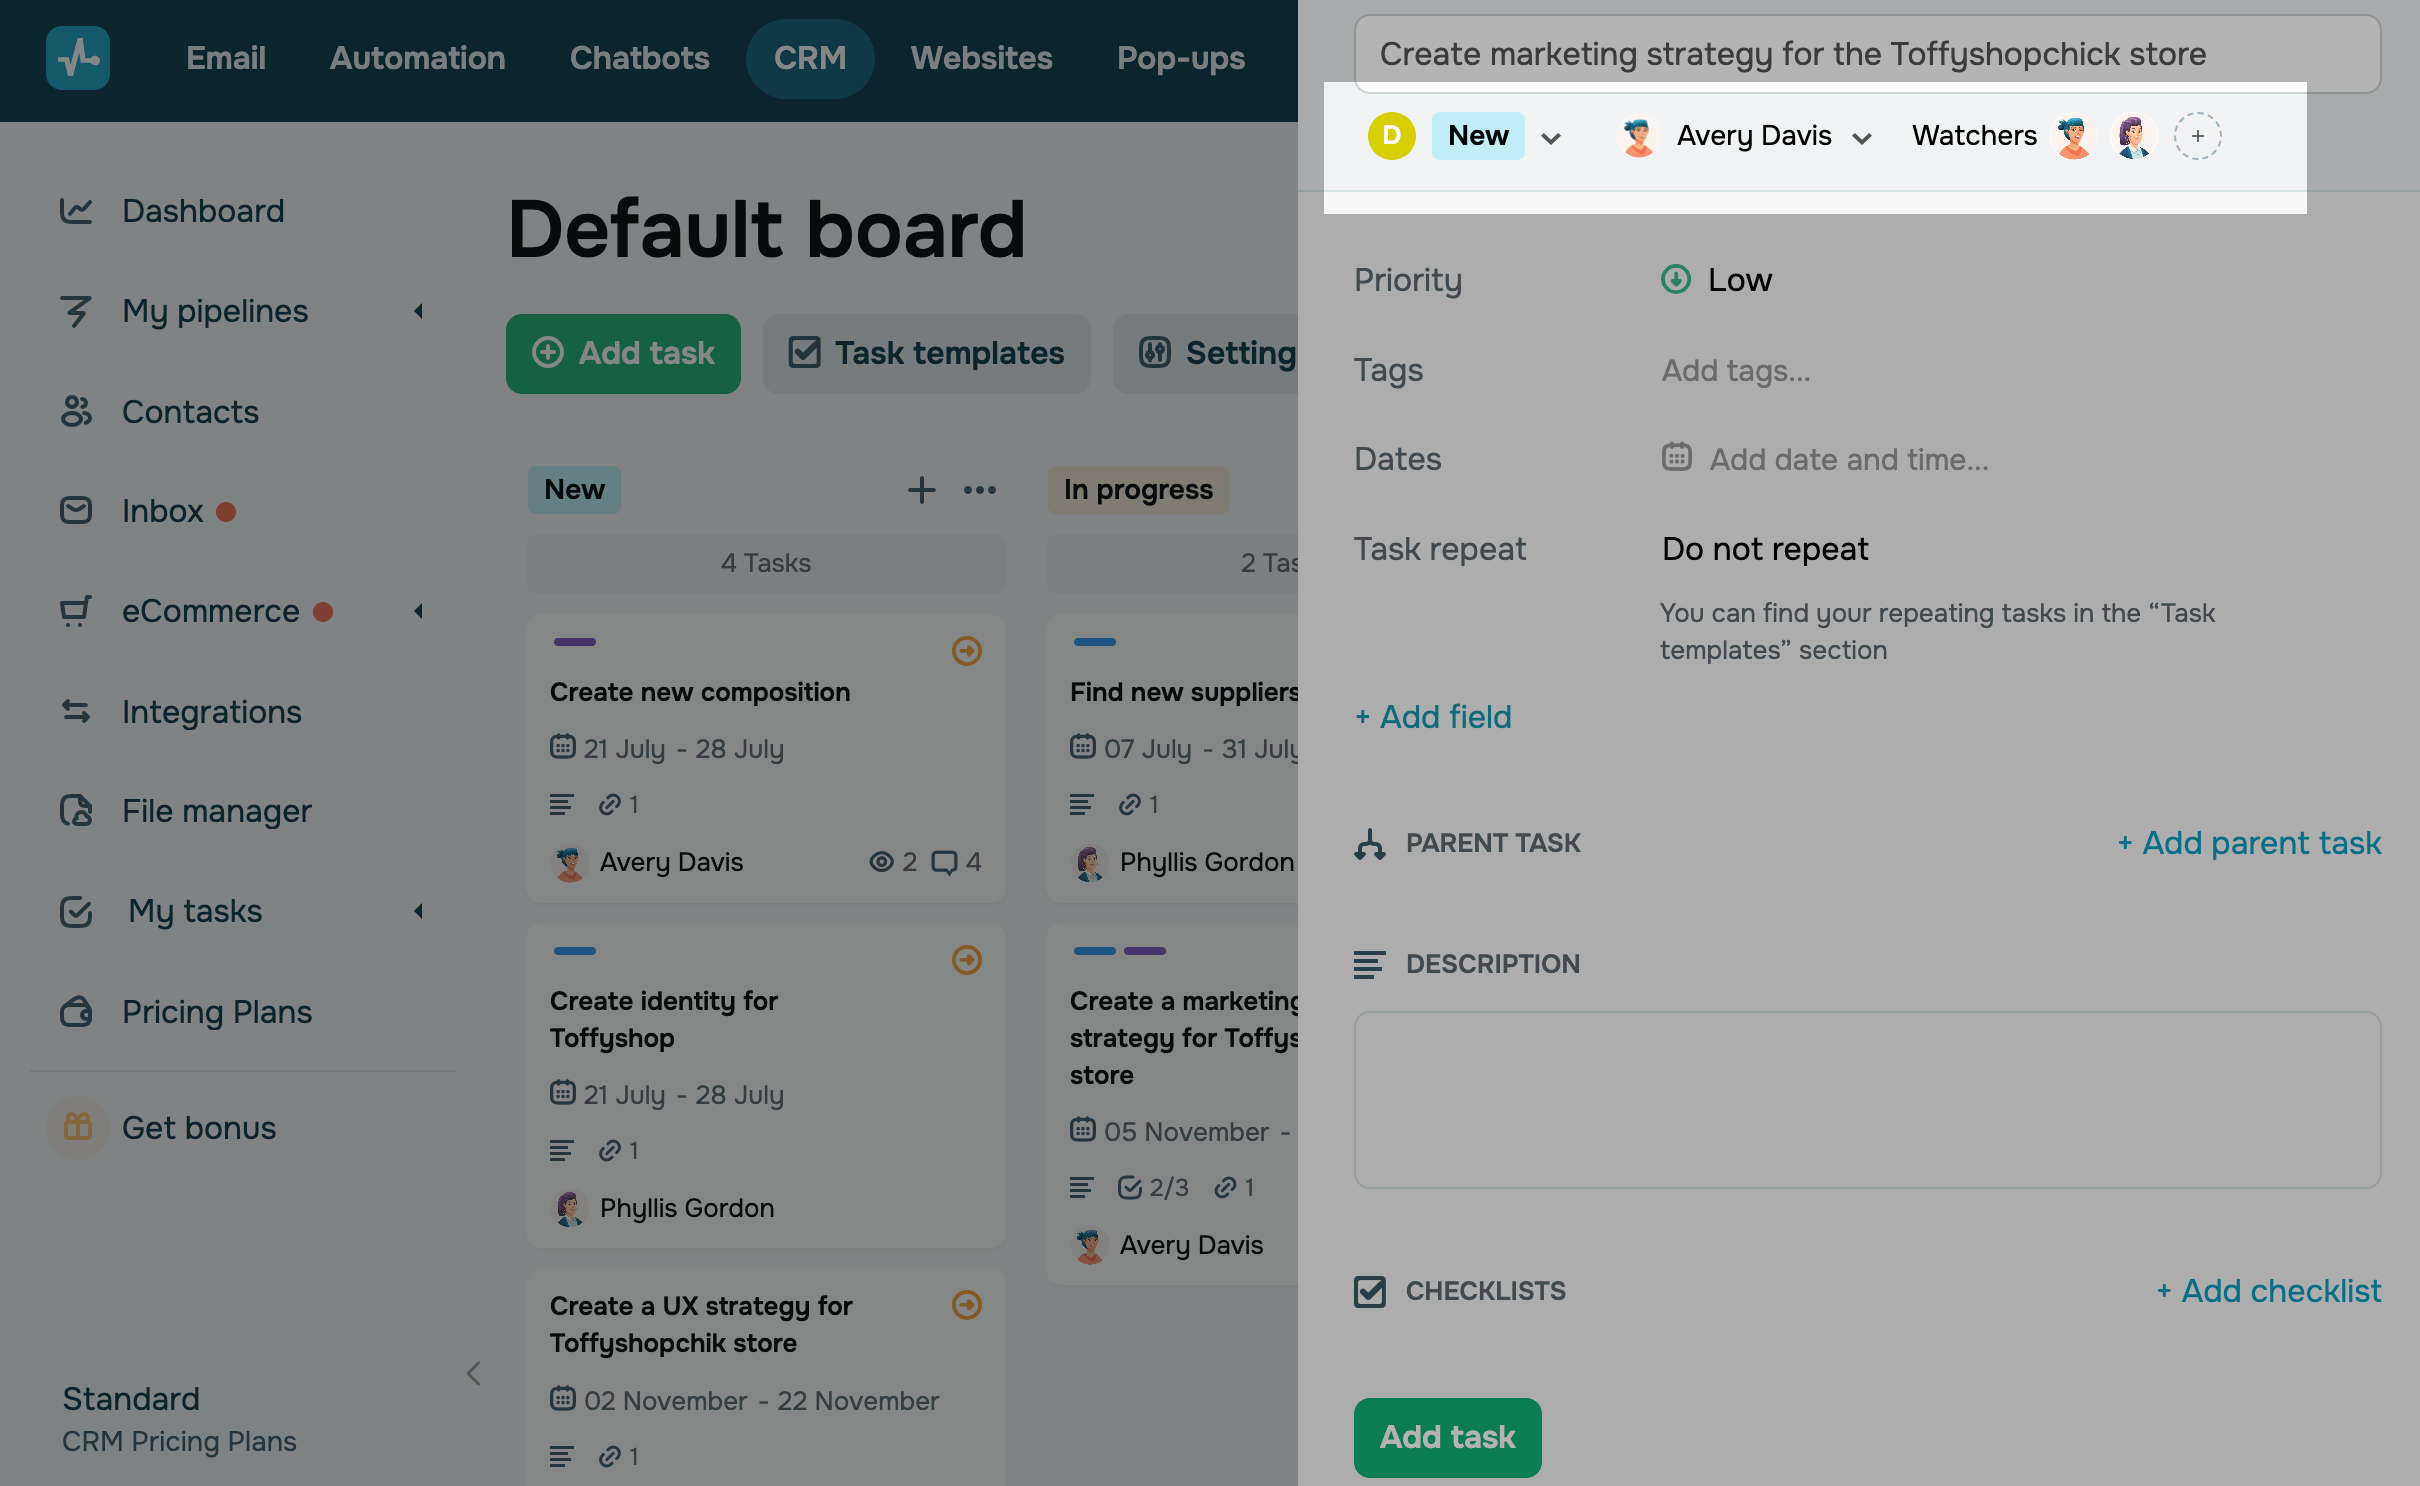
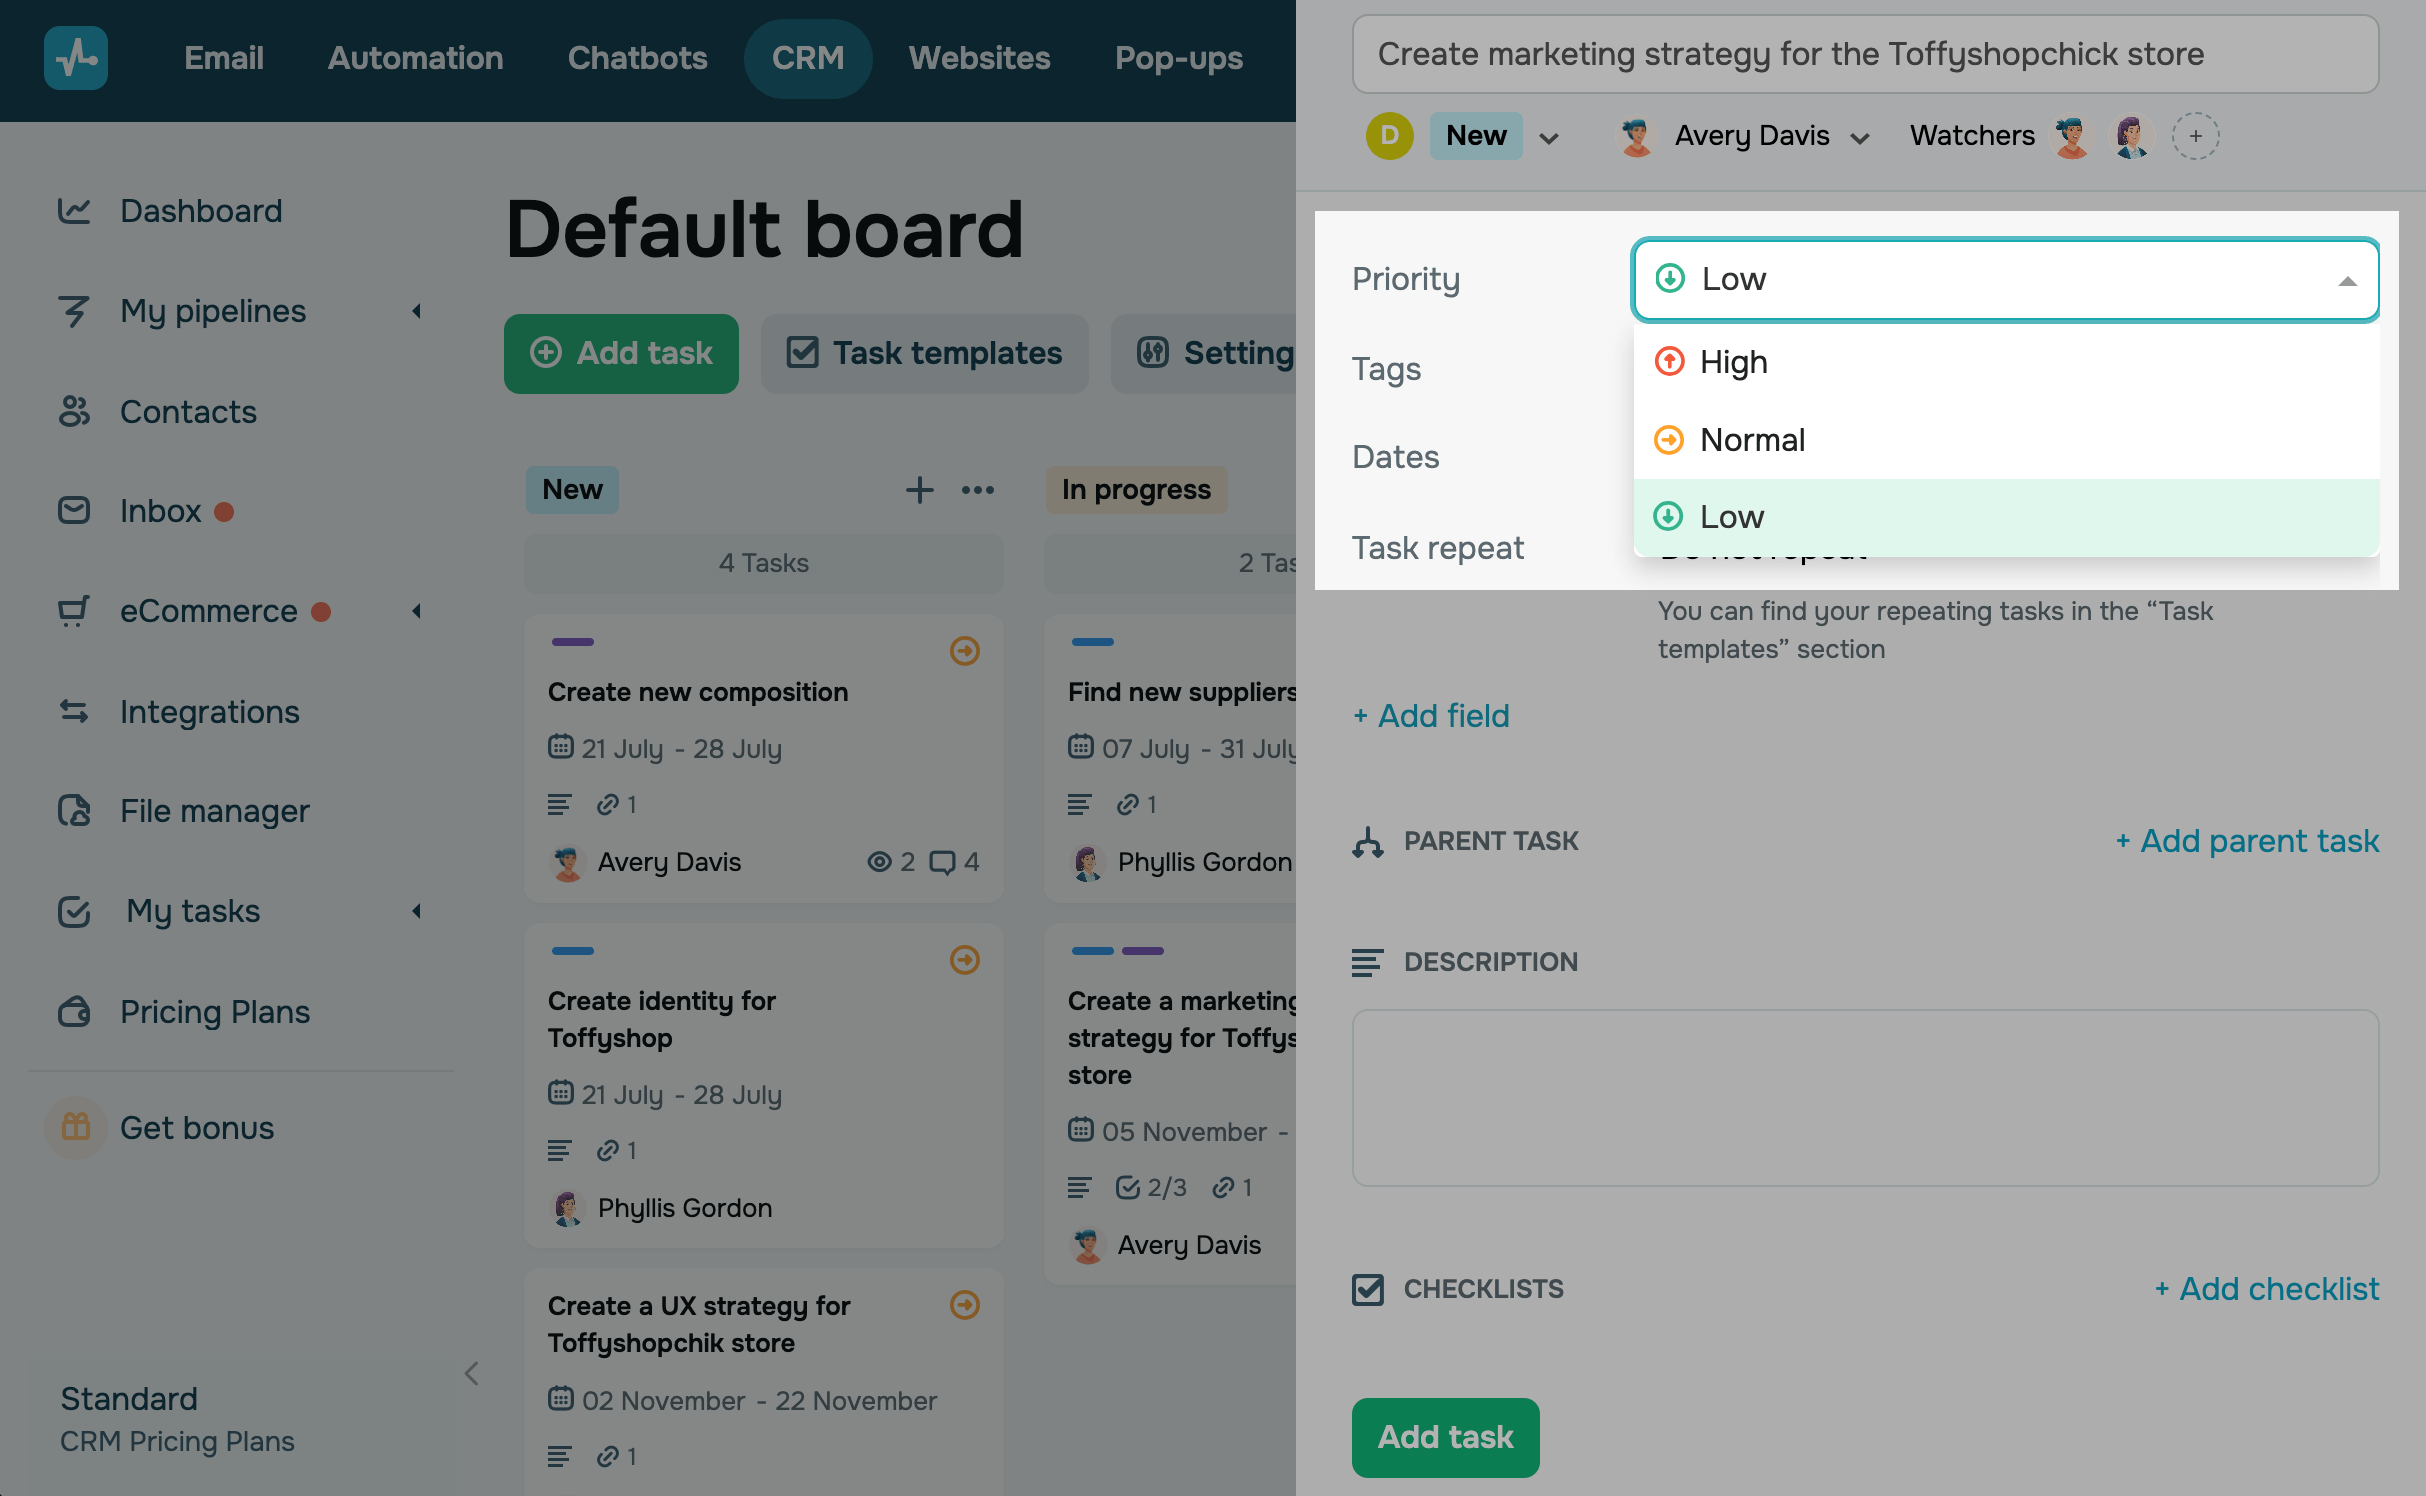
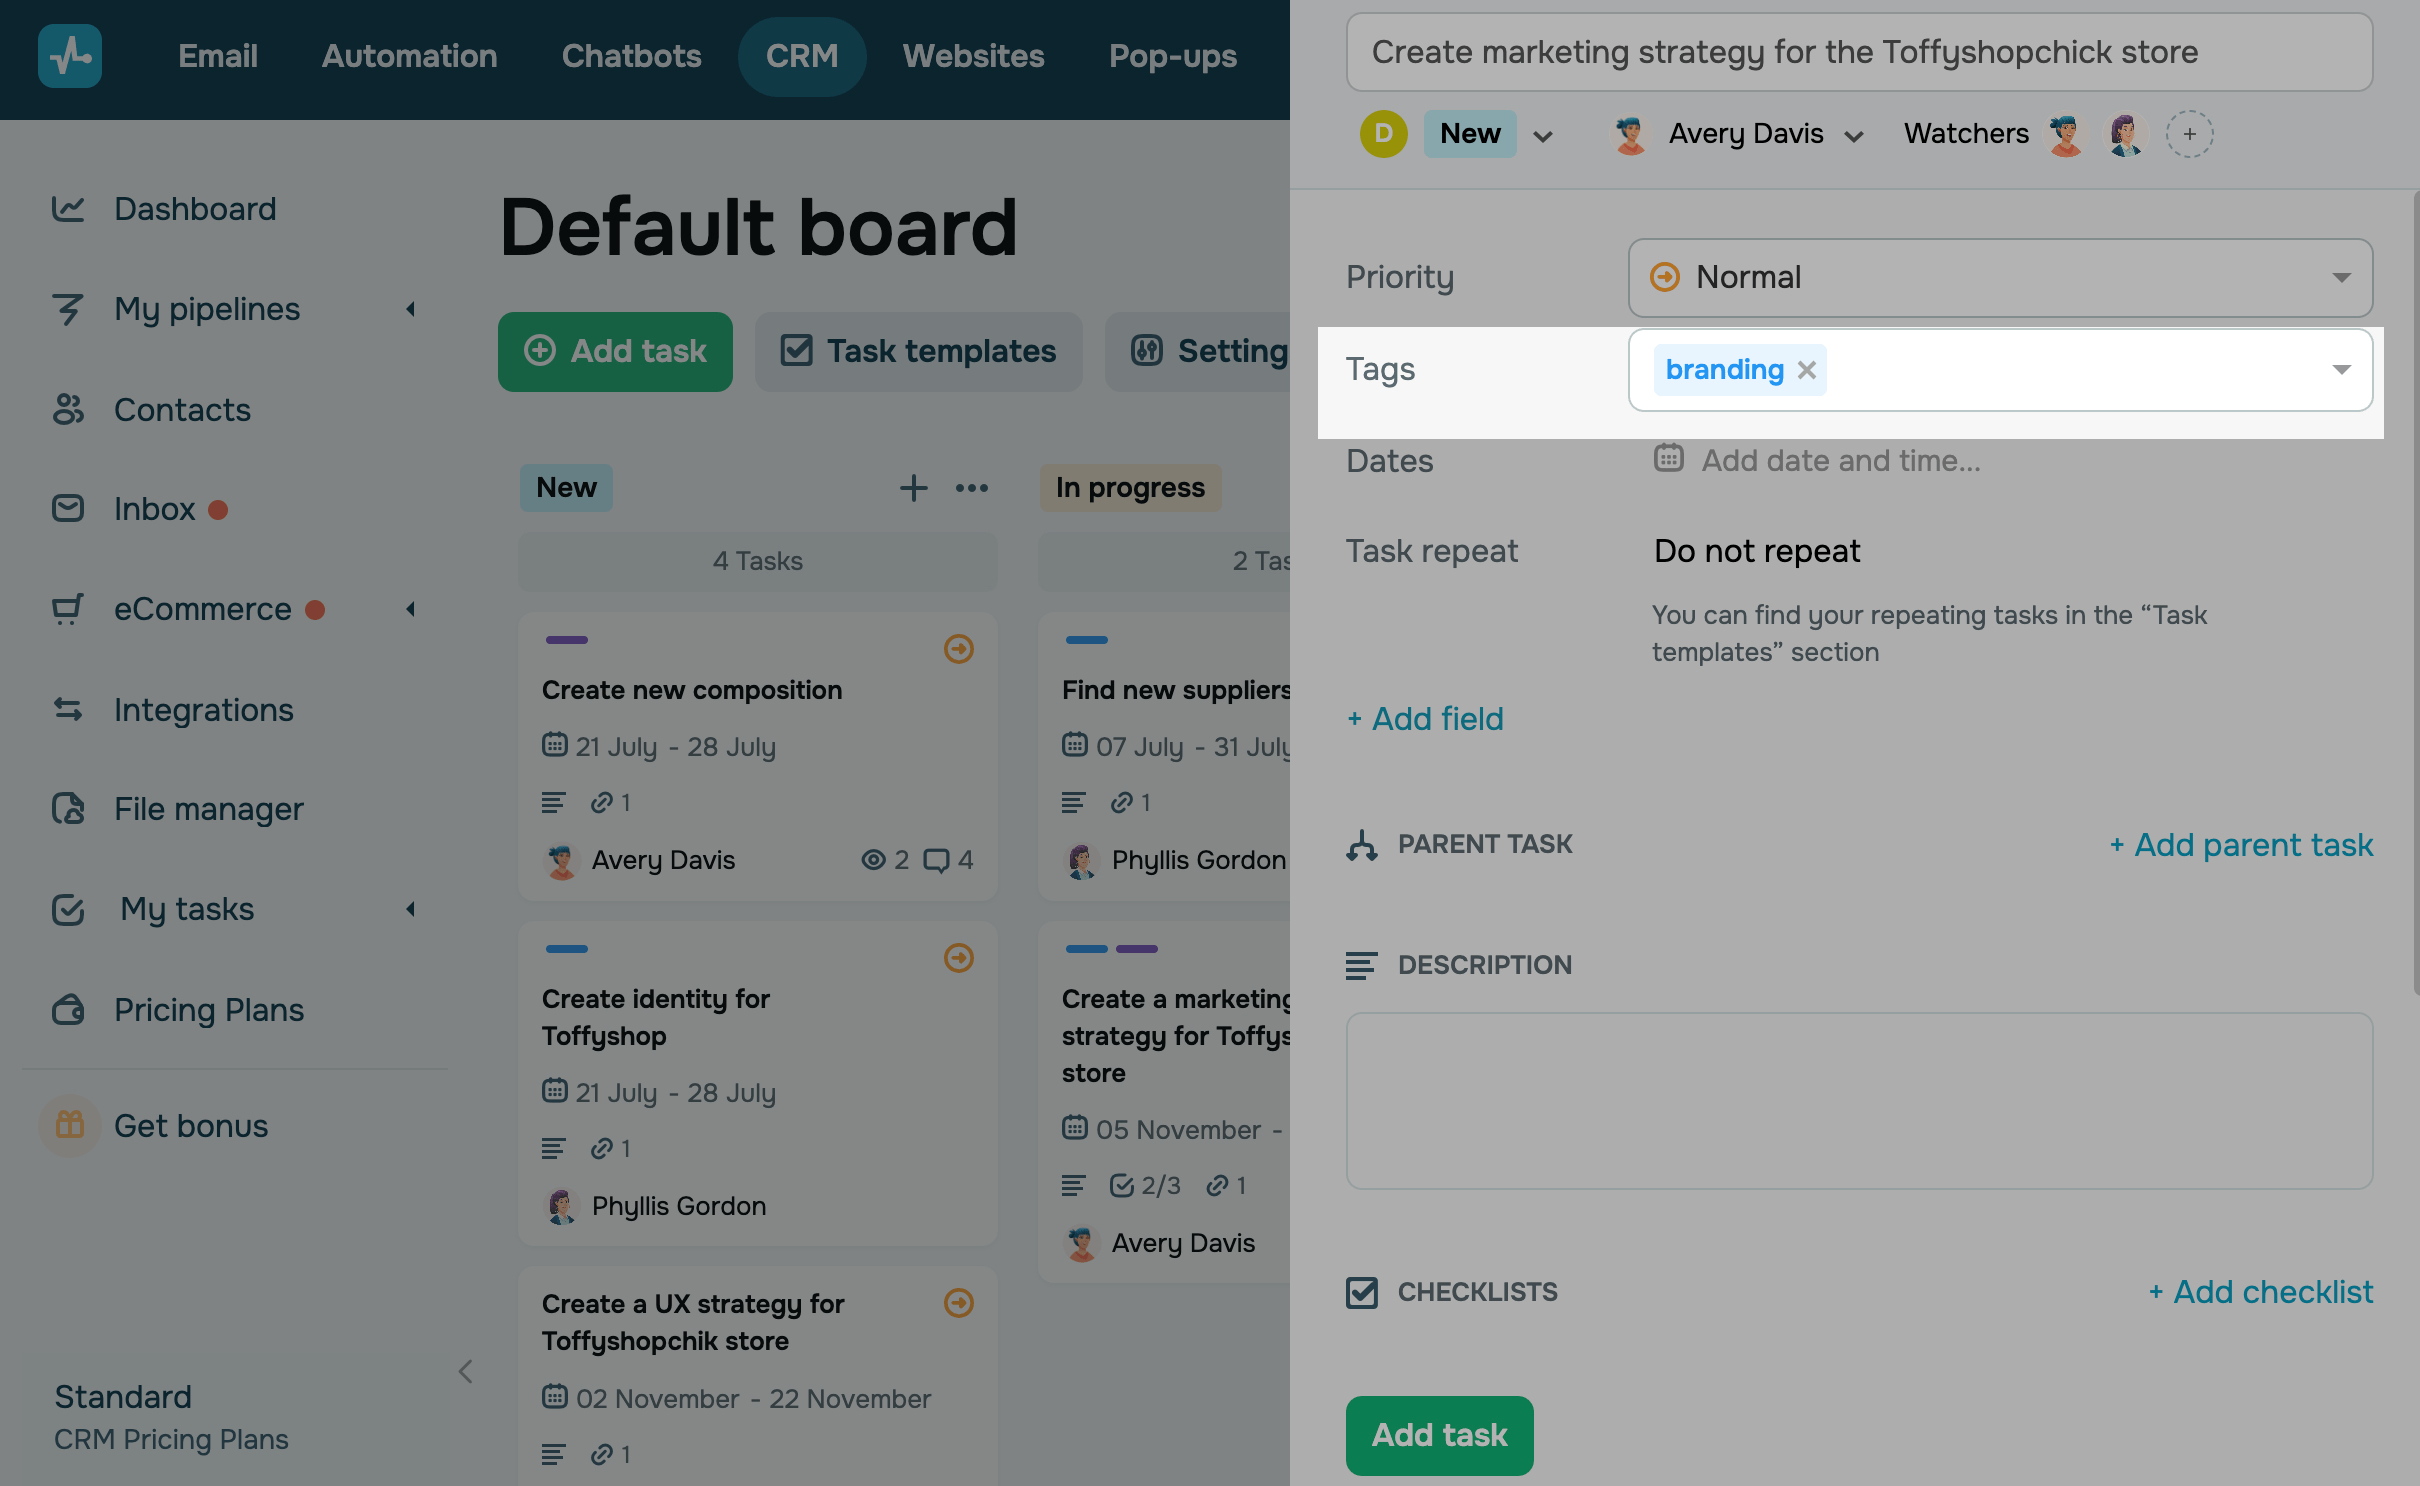
Set priority
You can select the task priority: low (green), medium (yellow), and high (red).
Higher priority tasks are those that need to be completed first.
Assign tags
You can also add tags to sort tasks by specific tags.
The list of tags is the same for the Contacts and Tasks sections in CRM. If you edit a tag in one section, it changes in another.
Read more: How to manage task attributes.
To create a new tag, enter your text in the field.
Set dates
Select your task start date. If your task has a deadline, activate the Due date option, and select the date and time by which your assignee needs to complete the task.

You can also set a task reminder, so you don't miss a deadline. To do this, click the Reminder field, and choose when to send a reminder. A notification will be sent to all task members’ email addresses they specified during registration.
You can automatically set a completion date for a task based on its status settings.
Read more: Automated task completion.
Schedule a task repeat
If you need to assign the same task regularly, you can set it on repeat. In the Repeat task section, you can choose to repeat your task daily, weekly, monthly, and yearly. A duplicate task will appear on your board when the selected date and time comes.

Add a field
You can also add custom task attributes to include additional data in any format.
For example, you can add such fields as Impact, Goal, Budget, Requirements, Risks, etc.
Read more: How to manage task attributes: Fields.

Enter a field name, and select the field type: string, number, date, link, and list.
To edit the field name or delete it, go to the Board Settings > Fields tab.
To edit the value of a field, click on it.
Add a parent task
To organize your work on a large project, break your tasks into subtasks and checklists:
| Parent task | The main task in the hierarchy. It is considered completed when all the subtasks are done. |
| Subtask | A task that needs to be done to complete the parent task. |
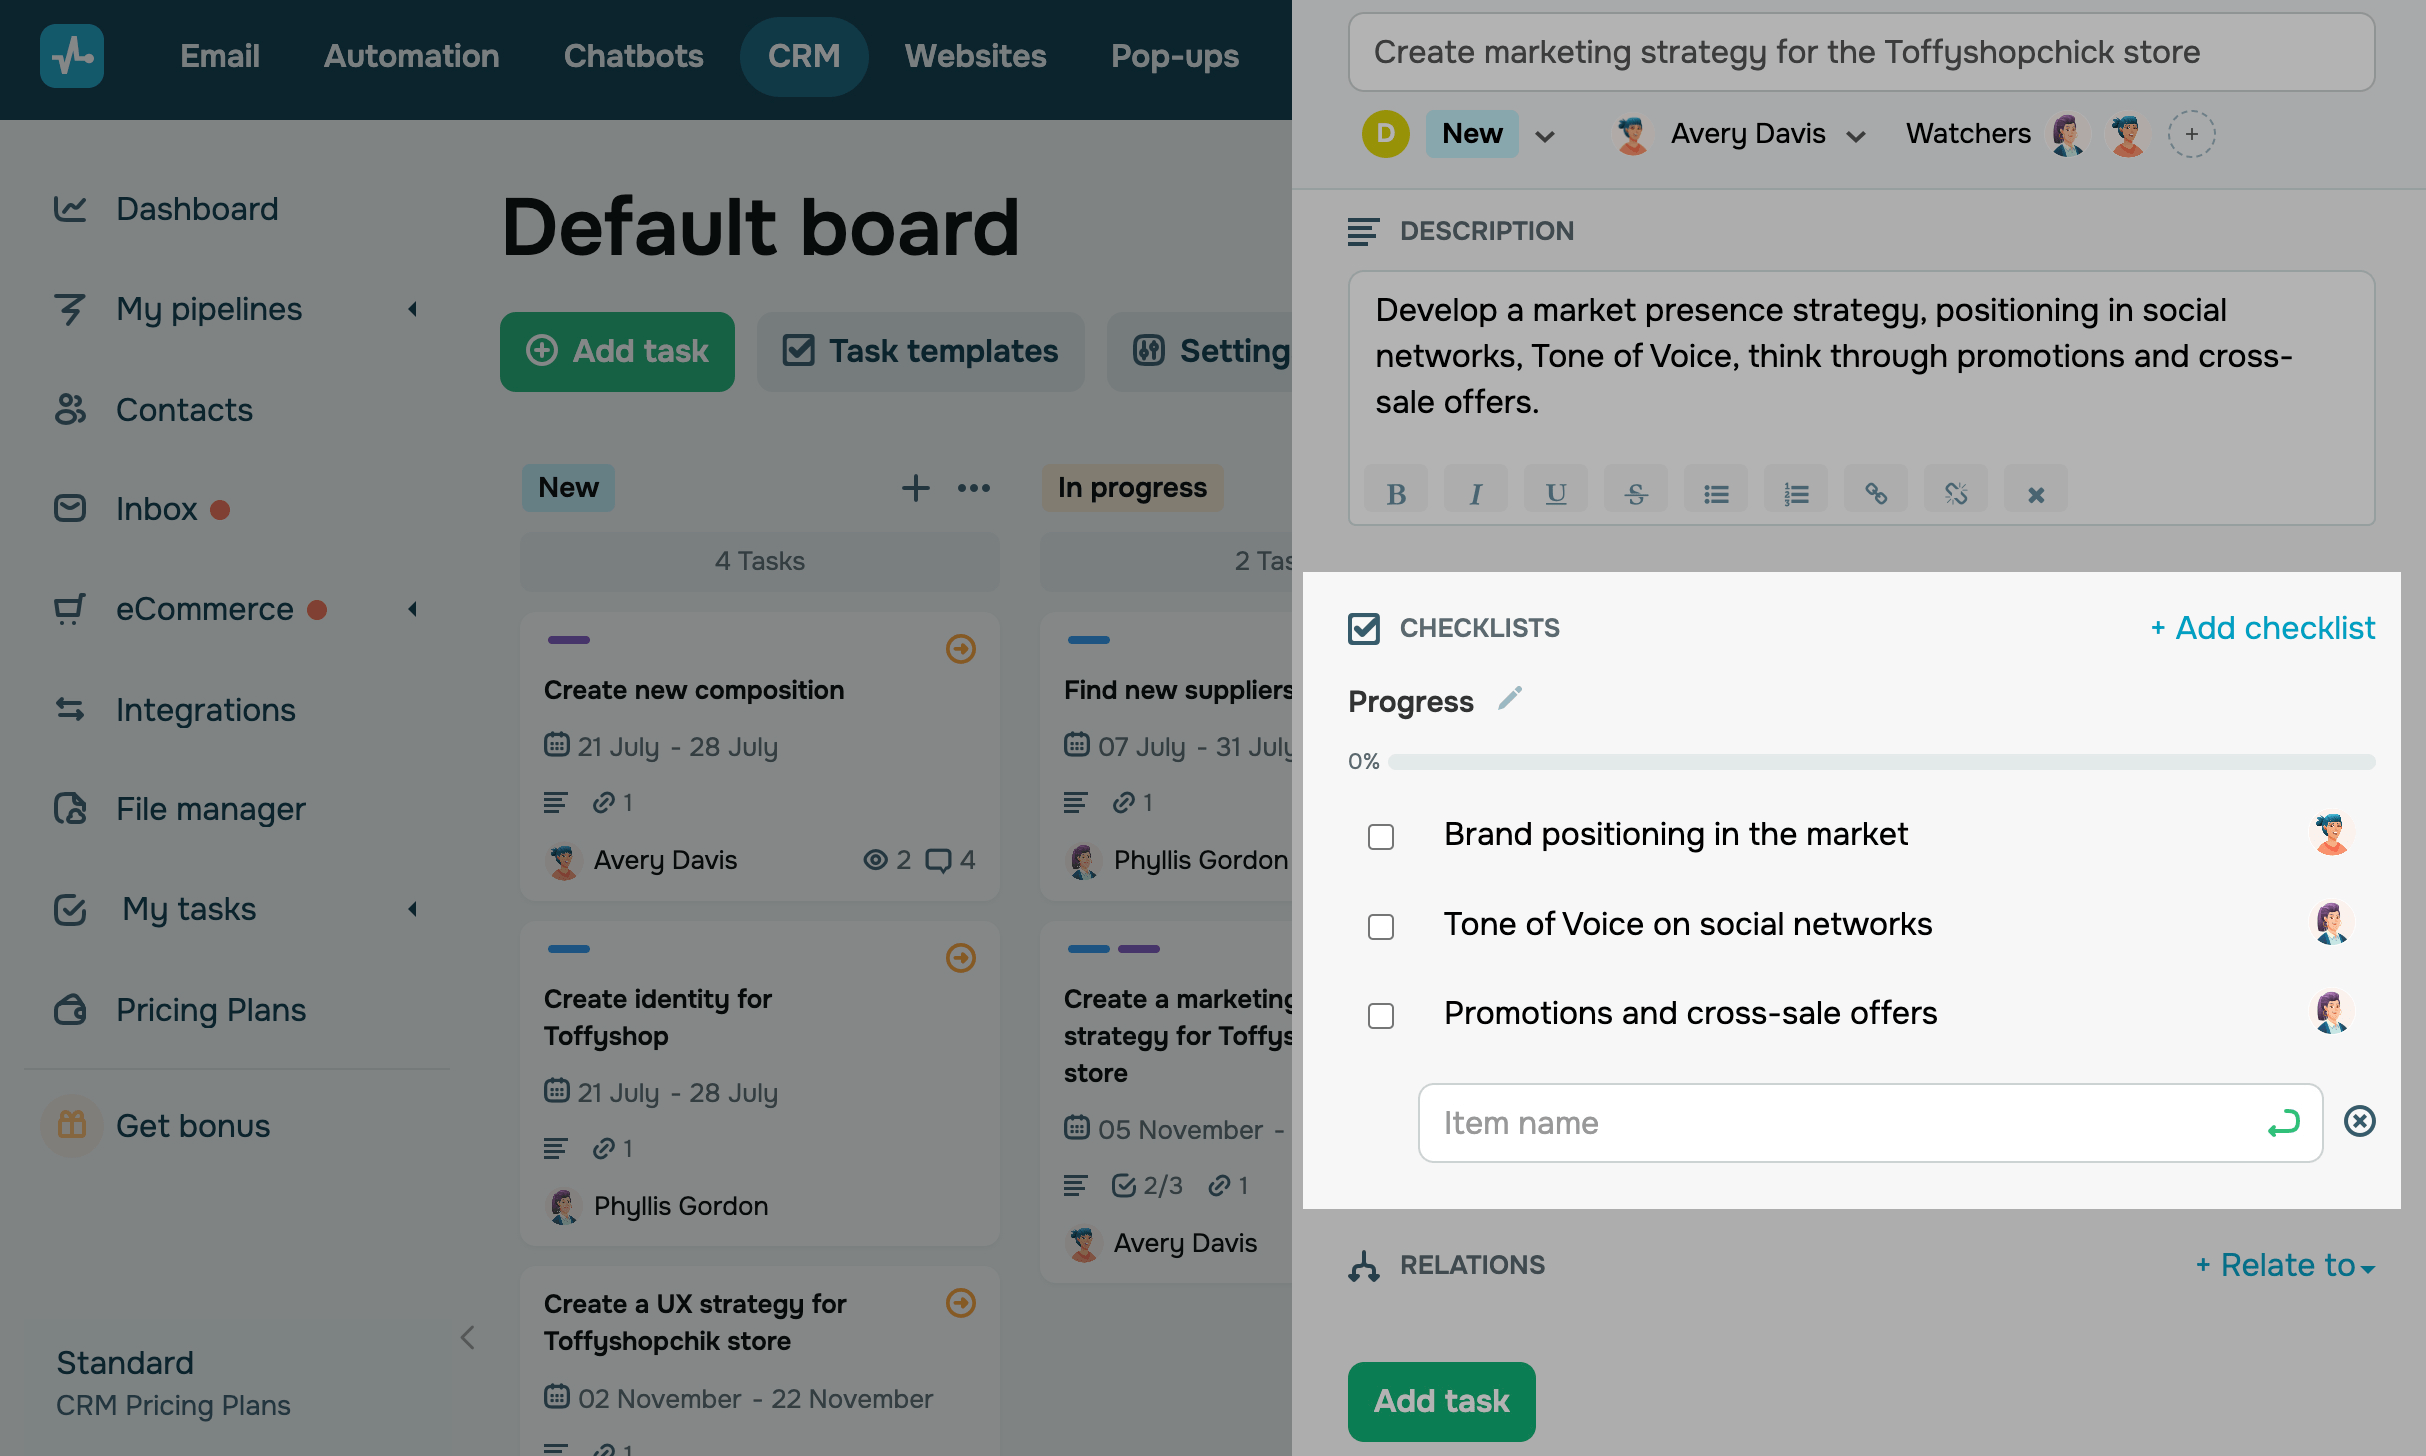
For example, we have the "Developing a marketing strategy for a store" parent task. To finish it, we need to complete additional tasks: “Brand positioning in the market,” “Social media tone of voice,” and “Promotions and cross-sale offers.” You can add another subtask for each promotion or offer to the "Promotions and cross-sale offers" task.
Each subtask will have the same set of fields as the parent task, but it will have its own description and assignee.
You can also add subtasks only after you create your first task. You can open the created task and add a subtask to the extended task card.

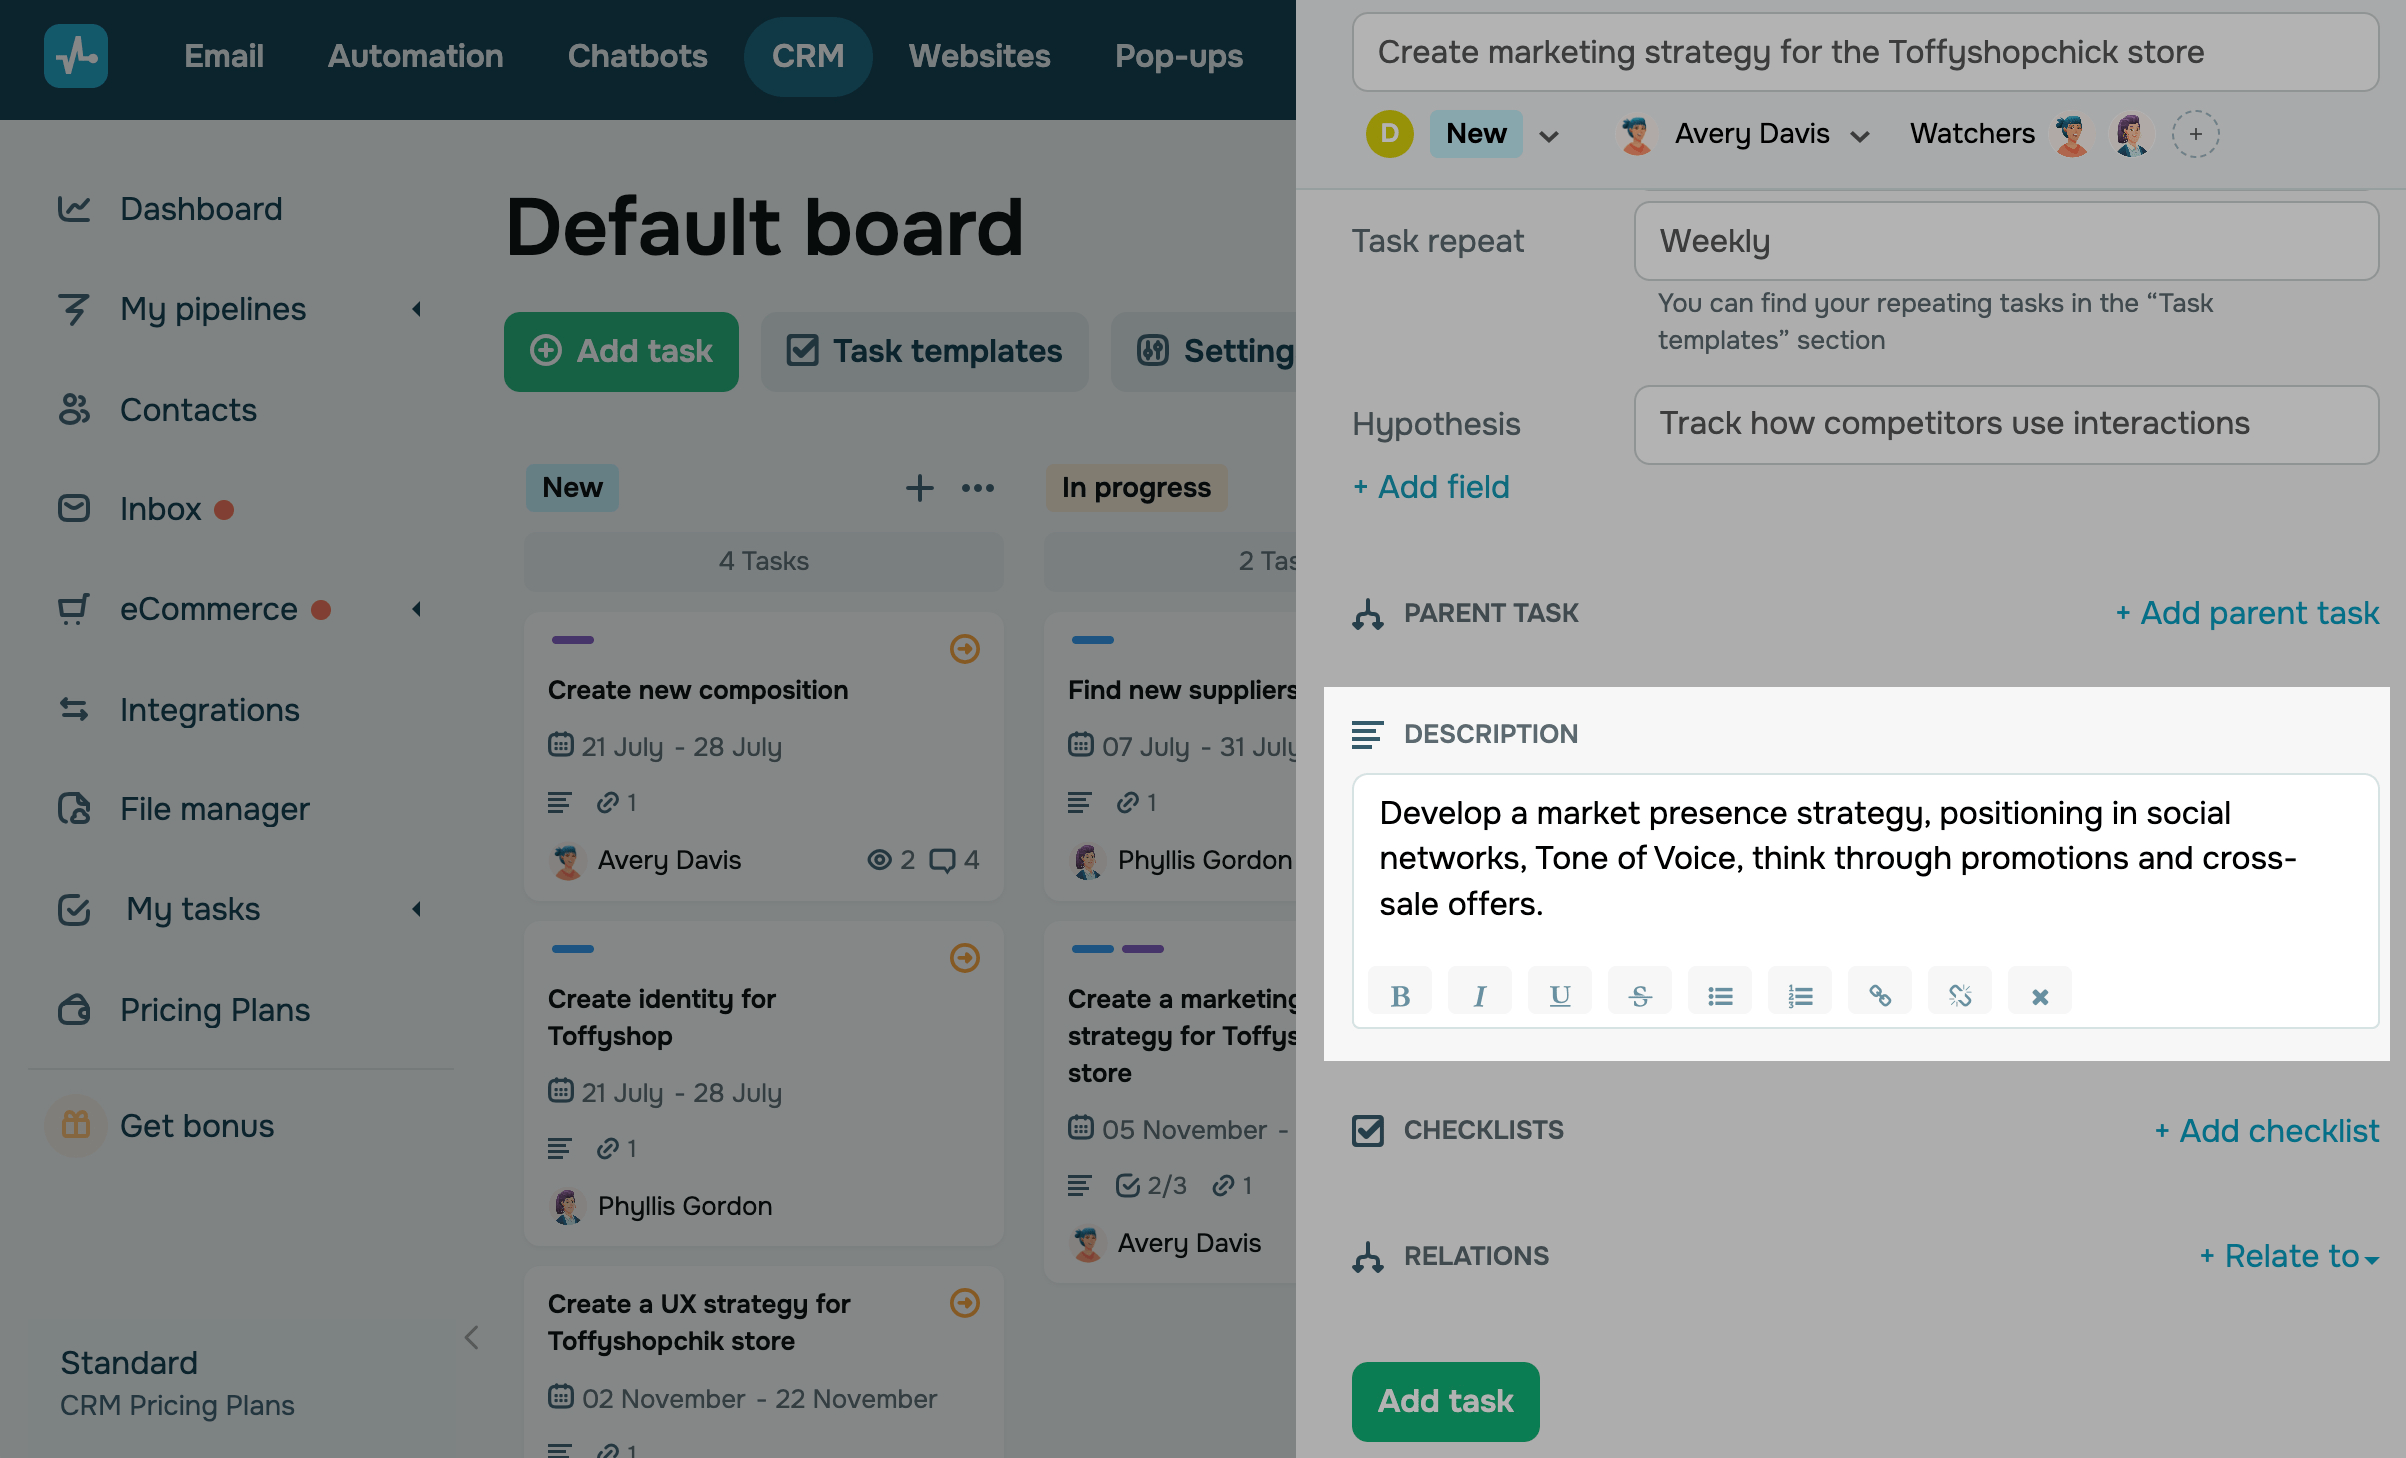
Add a description
You can also enter a task description to add more task details.
To change the text formatting, select the text, and highlight in bold and italic, strikethrough, underline, and add a list or link.
Add a checklist
You can also use checklists to mark the task actions or requirements that have already been completed.
When the assignee completes the step described in the checklist and checks it off, the overall checklist progress will change.
Click Add checklist, and enter the checklist name and the name of each item.
Add related items
You can also link a task with another task, deal, or contact to transfer certain information.
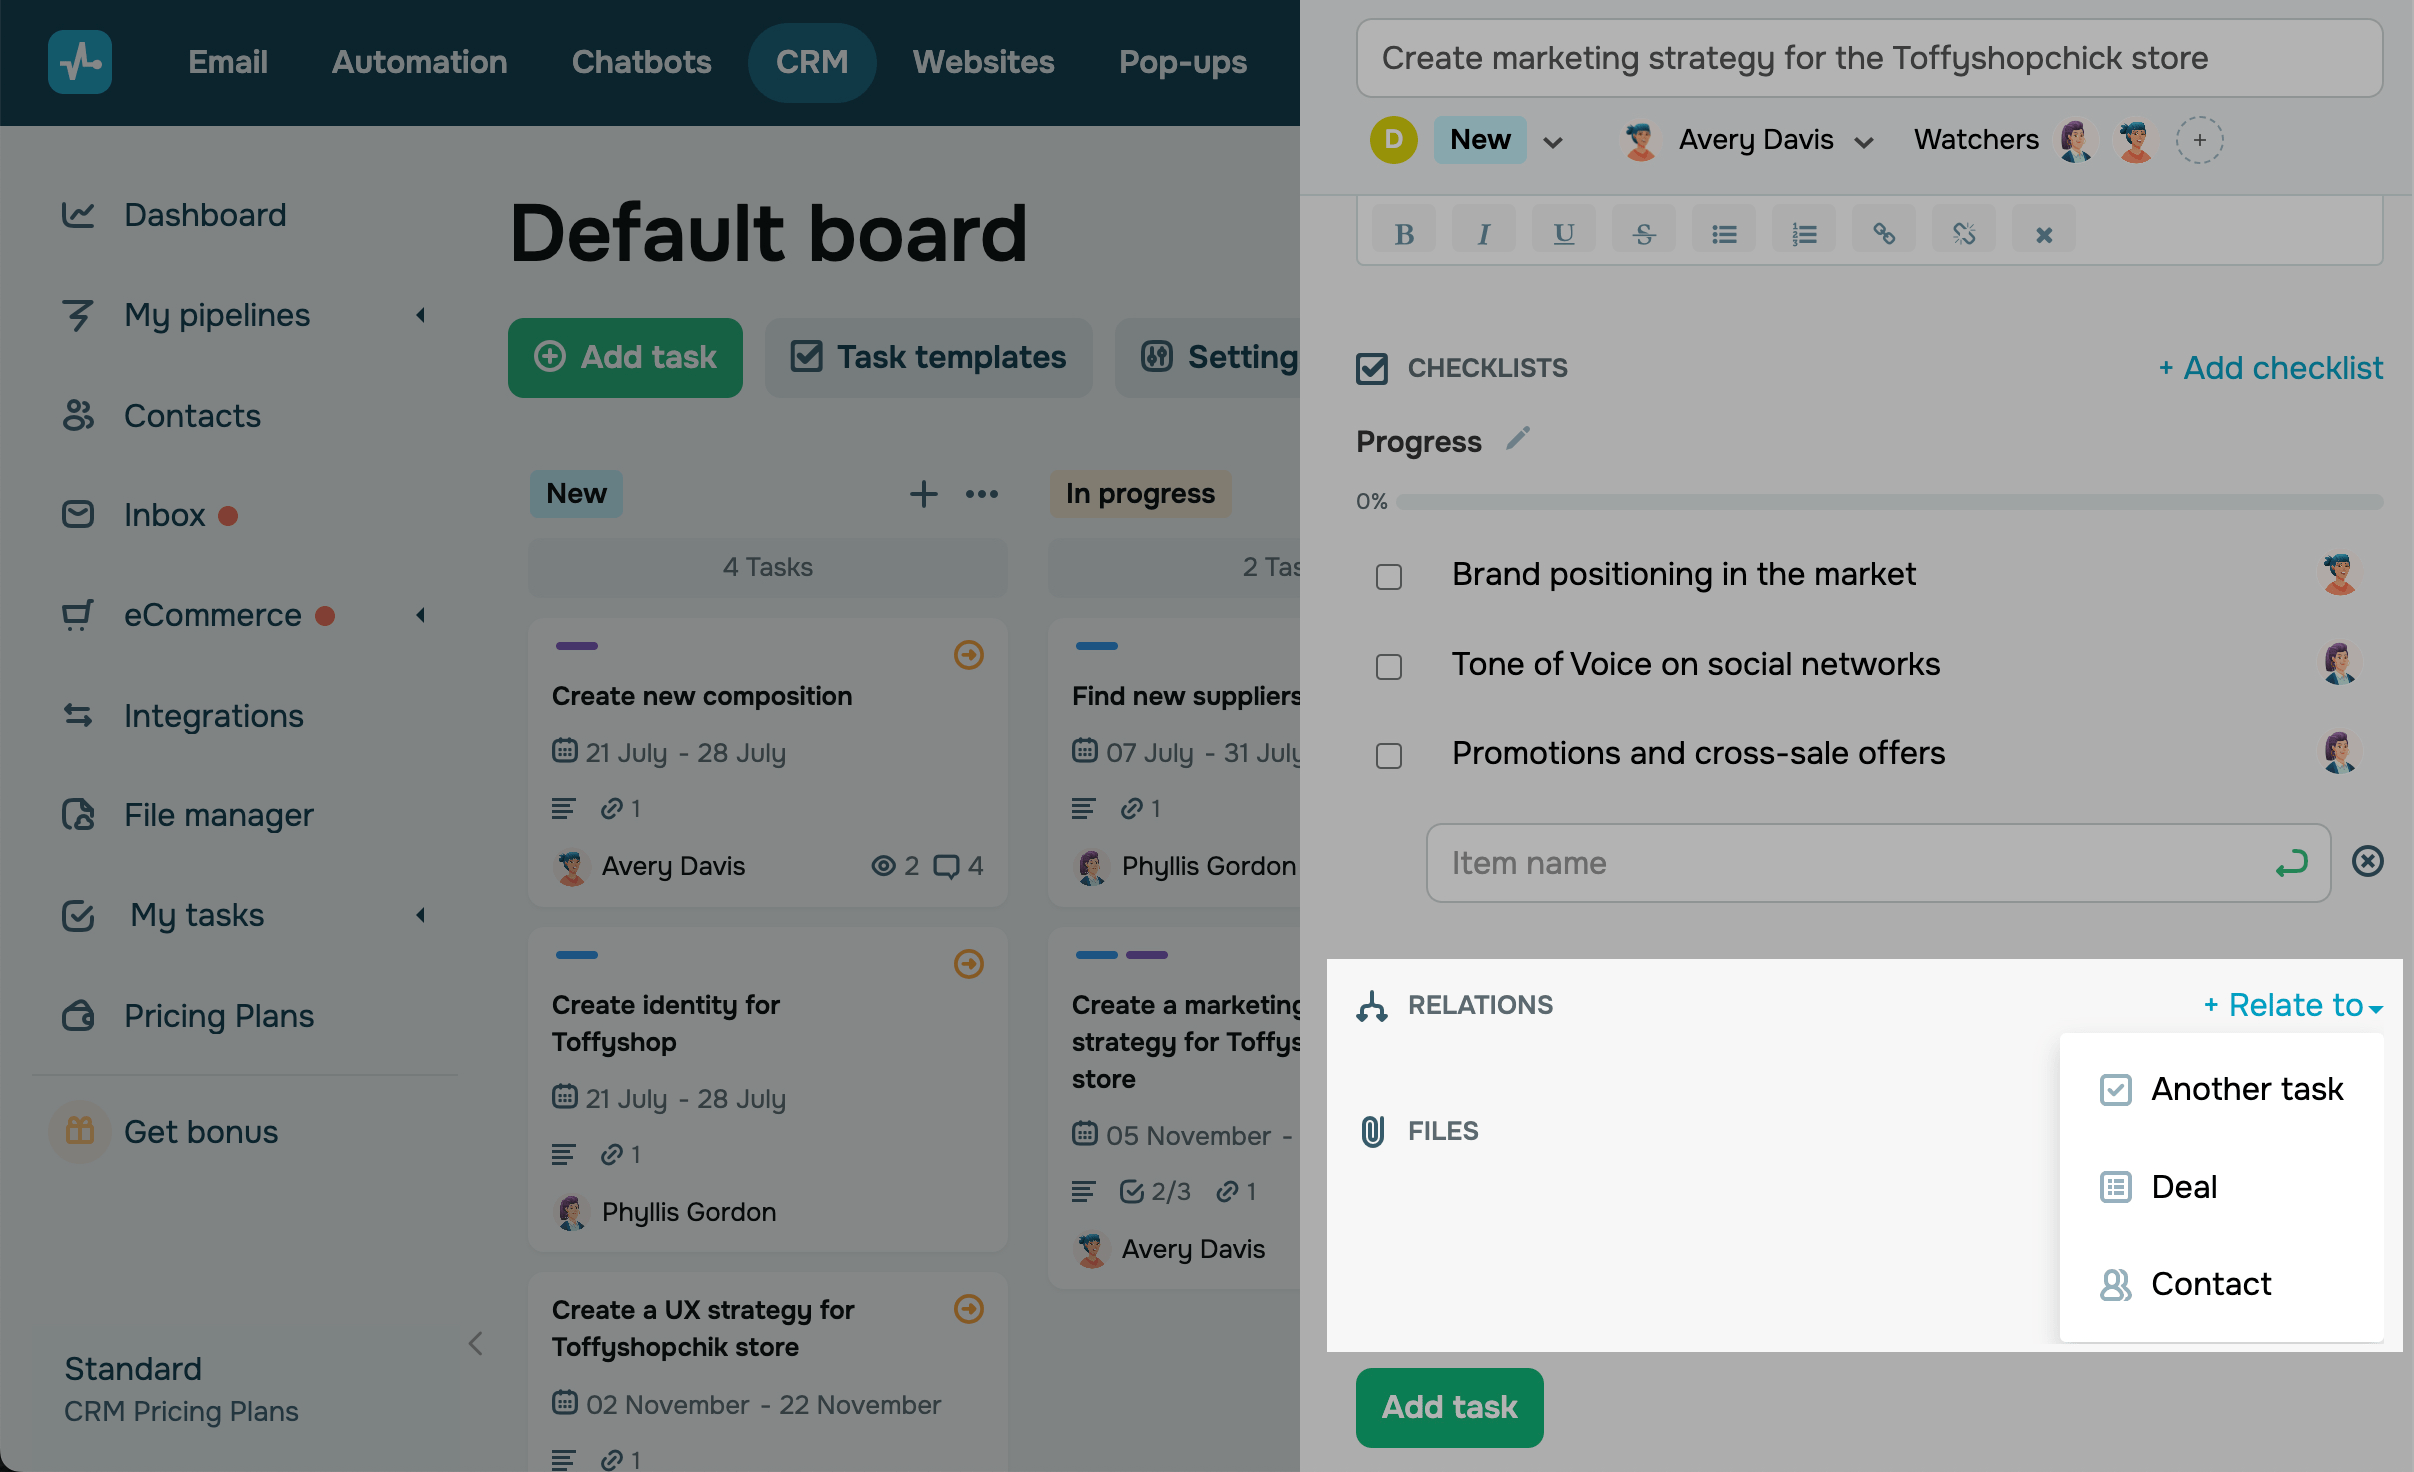
Relate to another task
Unlike a subtask, a related task is independent of the parent task and can be performed simultaneously or in any other order.
You can also link tasks of the same type so that the assigned person can see the progress of a similar task.
Relate to a deal
If you work with a customer in a CRM pipeline, you can link your task to this deal to access your deal information quickly.
Relate to a contact
If you have already added a contact to CRM manually or via integration, you can link your contacts to access their information or contact them quickly.
To find the task, deal, or contact, select an option. Start typing a name in the search field, and select a search result you need.
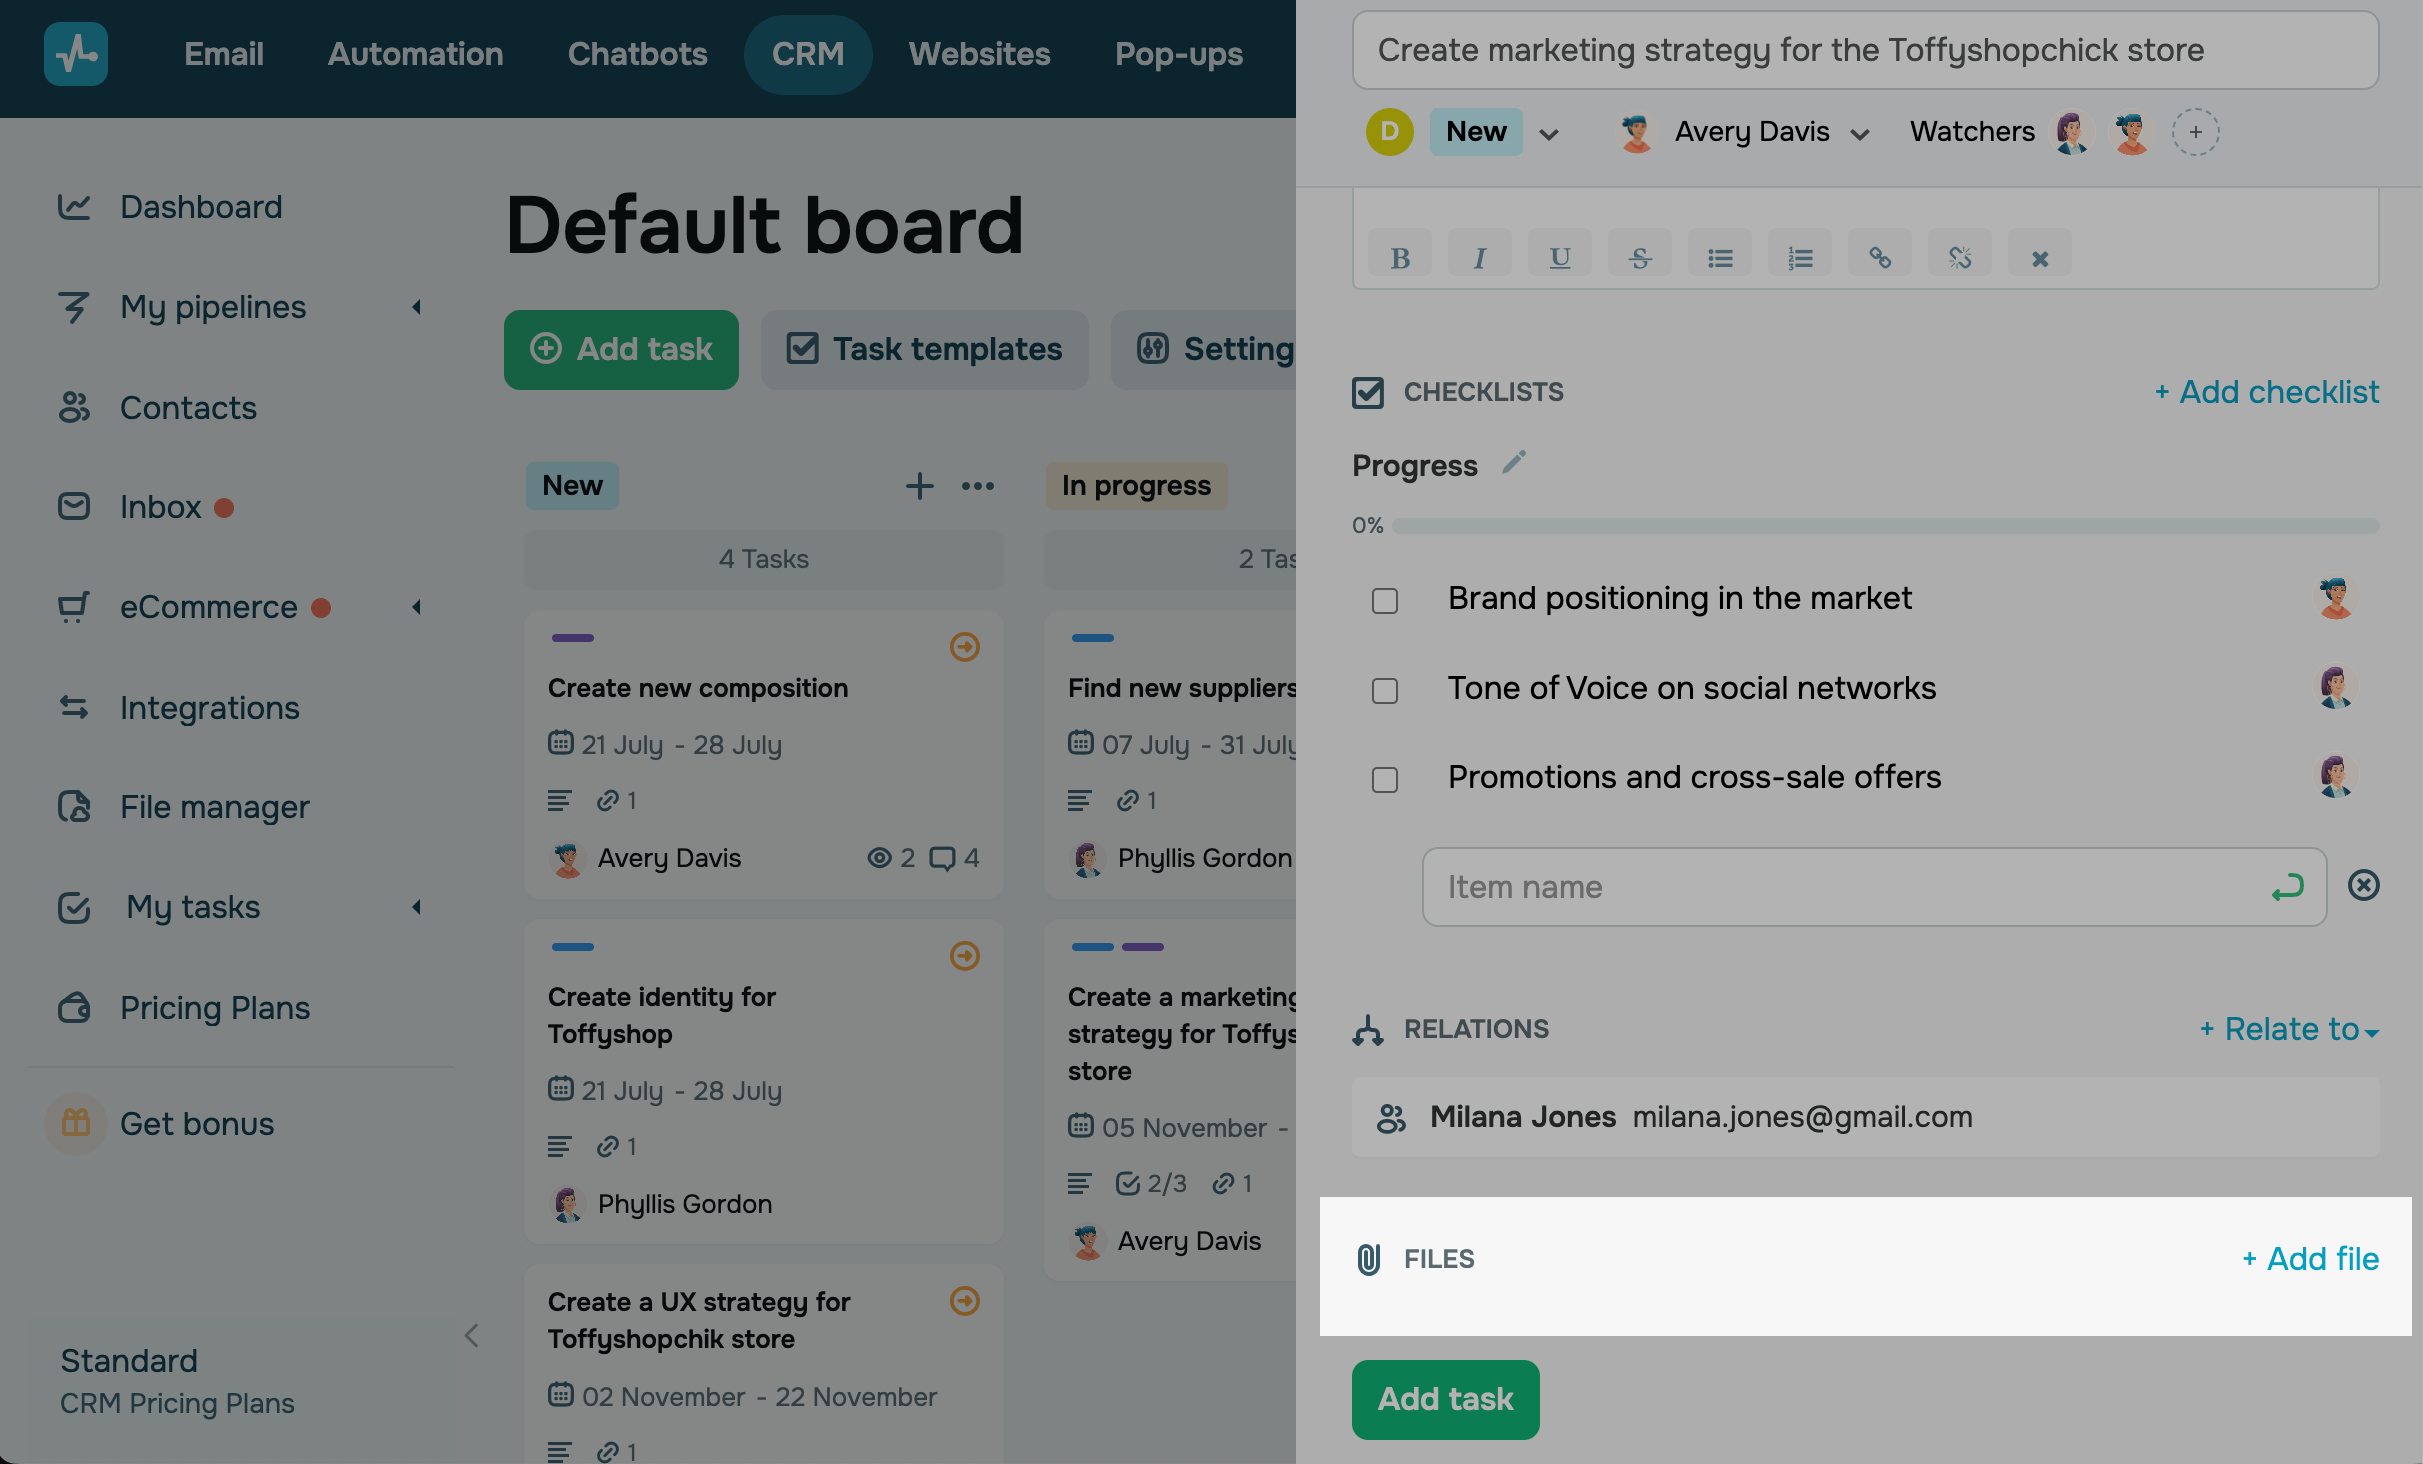
Add a file
You can attach files to a task to share them with all its members. Click + Add File, choose a file from your account storage, or upload a new file from your device.
All services share the same file storage. You can add a file of any extension except executable.
The maximum file size the free plan allows is 1GB. Your file storage capacity is not defined by services but is set based on the storage capacity of the largest pricing plan among all services. To increase your storage capacity, upgrade your pricing plan. Read more: How to work with the file manager.
Once you fill in the fields, click Add Task. Your task will then appear on the task list, allowing your team members to update and link it to contact and deal cards.
Last Updated: 11.03.2025
or