Send a welcome email
Email marketers send a welcome email automatically after a user fills in and confirms the subscription form. Welcome emails show new subscribers that the company cares and wants to engage them to take part in communication.
Step 1: Go to Automations
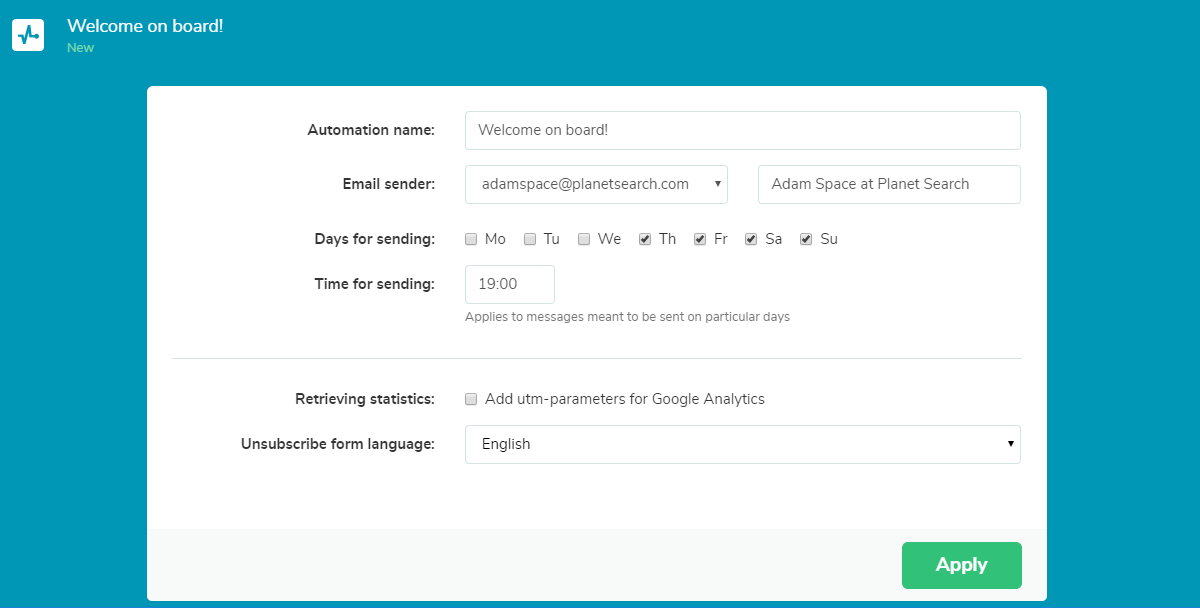
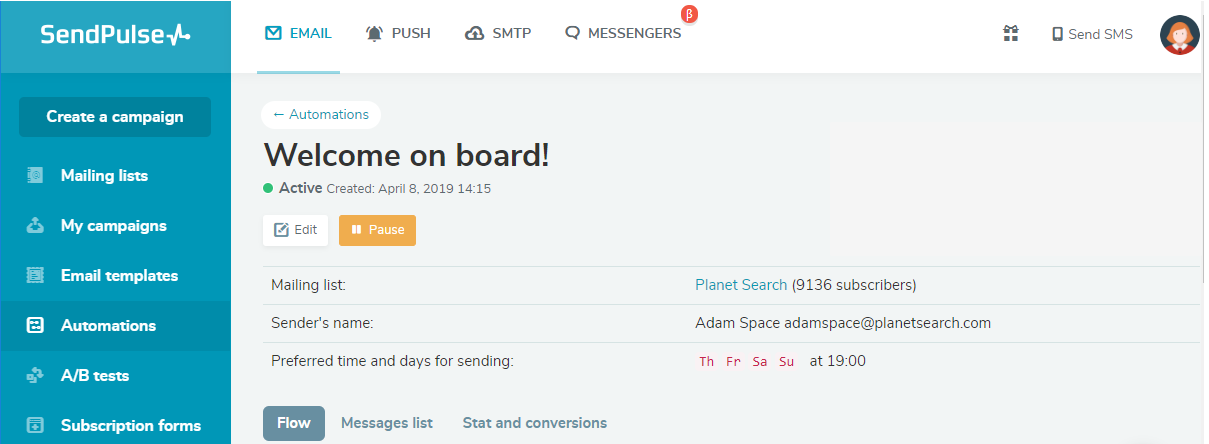
Open the “Automations” tab in your account. If you don’t have an account, register here. Create a new automation flow and name it. Choose an email sender and type in the sender’s name. Choose the best days and time to send emails.
Step 2: Create the Trigger Event
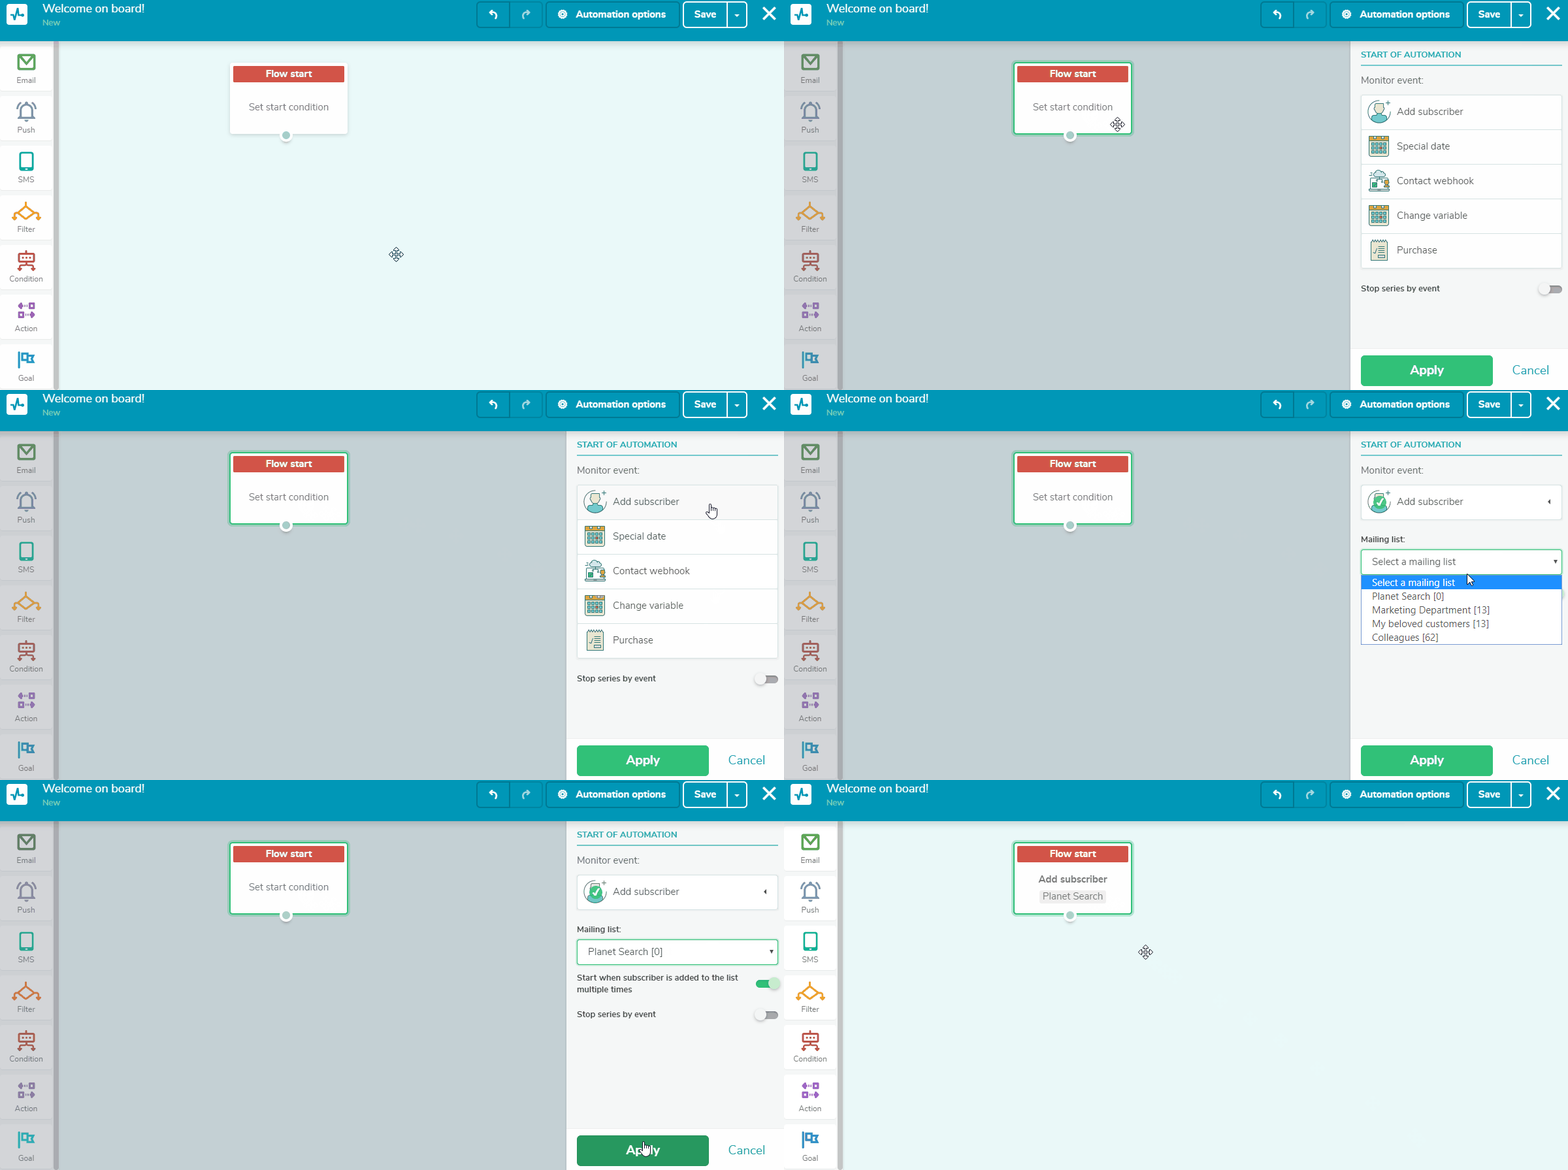
Click on “Flow start” and choose an event trigger on the right-hand side. For welcome emails, it should be “Add subscriber.” Then select a mailing list. Subscribers that joined a particular mailing list, automatically trigger the email flow, started by the welcome email.
Step 3: Create Your Welcome Email Template
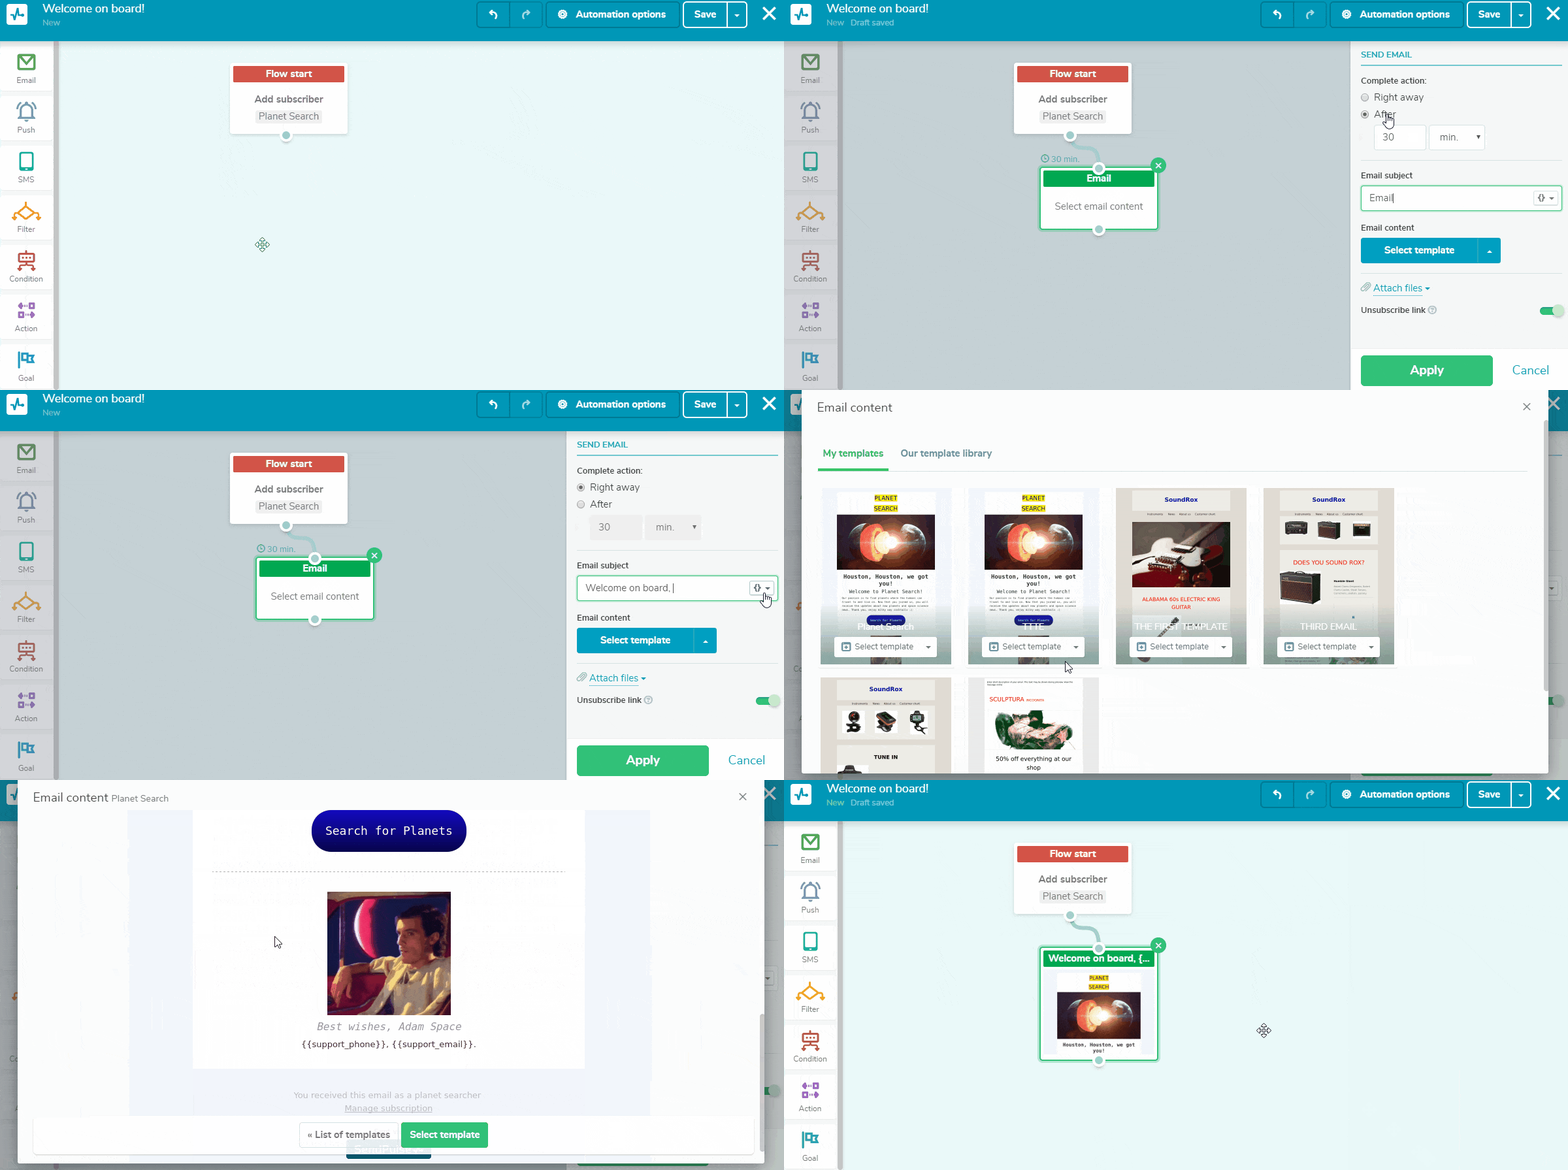
Go to “My templates." Create a new template from scratch or use one from our pre-designed templates. With the help of our convenient drag-and-drop editor, create a welcome email to appeal to your audience.
Step 4: Add More Emails for an Extended Onboarding Email Campaign
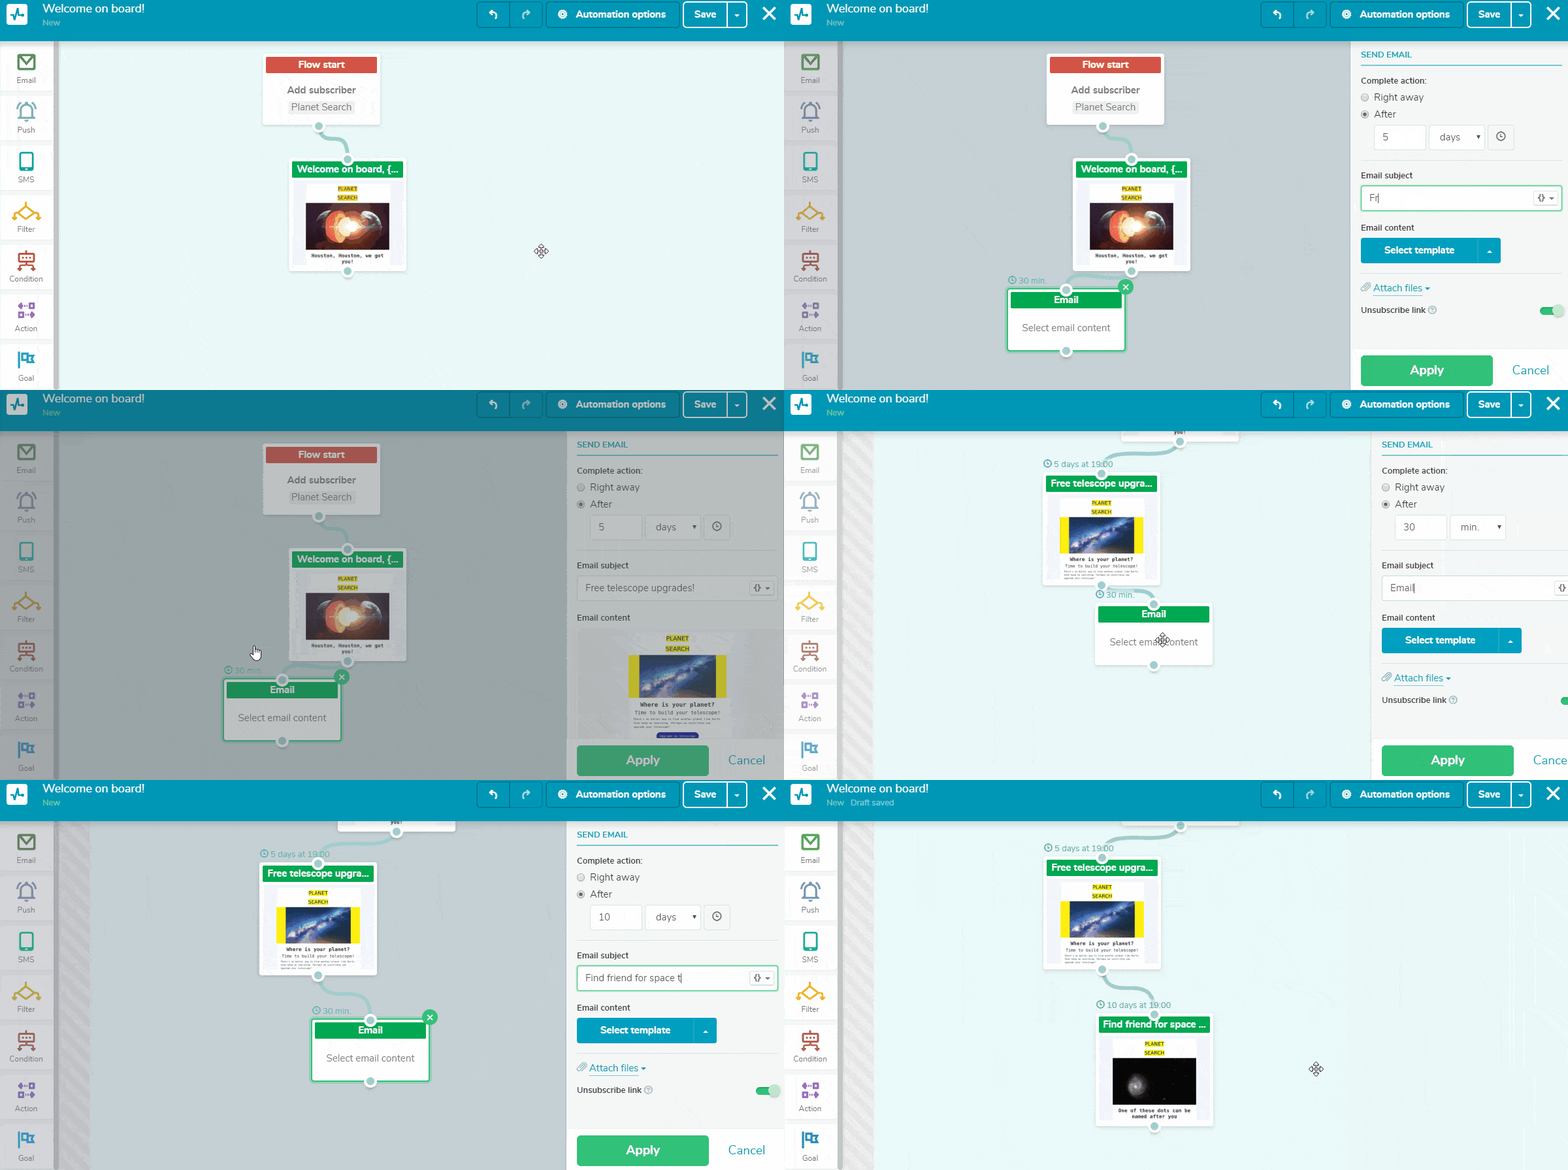
To achieve better results, you can add more emails in the flow like in the previous step. Provide your new subscribers with engaging information, which shows that the users won’t regret it. With a thought-out approach, people will actively participate in your email marketing.
Step 5: Launch Your Email Flow
Click on “Save and launch” in the right upper corner. You will see the statistics on each email in the flow.
Last Updated: 22.02.2023
or