Subscription flow trigger
Once you create and set up your chatbot, you can start configuring its flows. Every chatbot includes a welcome flow that runs when a user sends their first message or uses the /start command.
In this article, we will talk about how to personalize your welcome flow.
Flow configuration
Go to your chatbot and open Bot Structure > Triggers.
Once you create a chatbot, you will see its standard flows in the Triggers and Flows tabs within the System flows folder. You cannot delete or move these flows, and you cannot move custom flows into this folder.
Click Welcome message > Edit flow.
You can view and edit this flow in the flow builder just like any other flow you create.
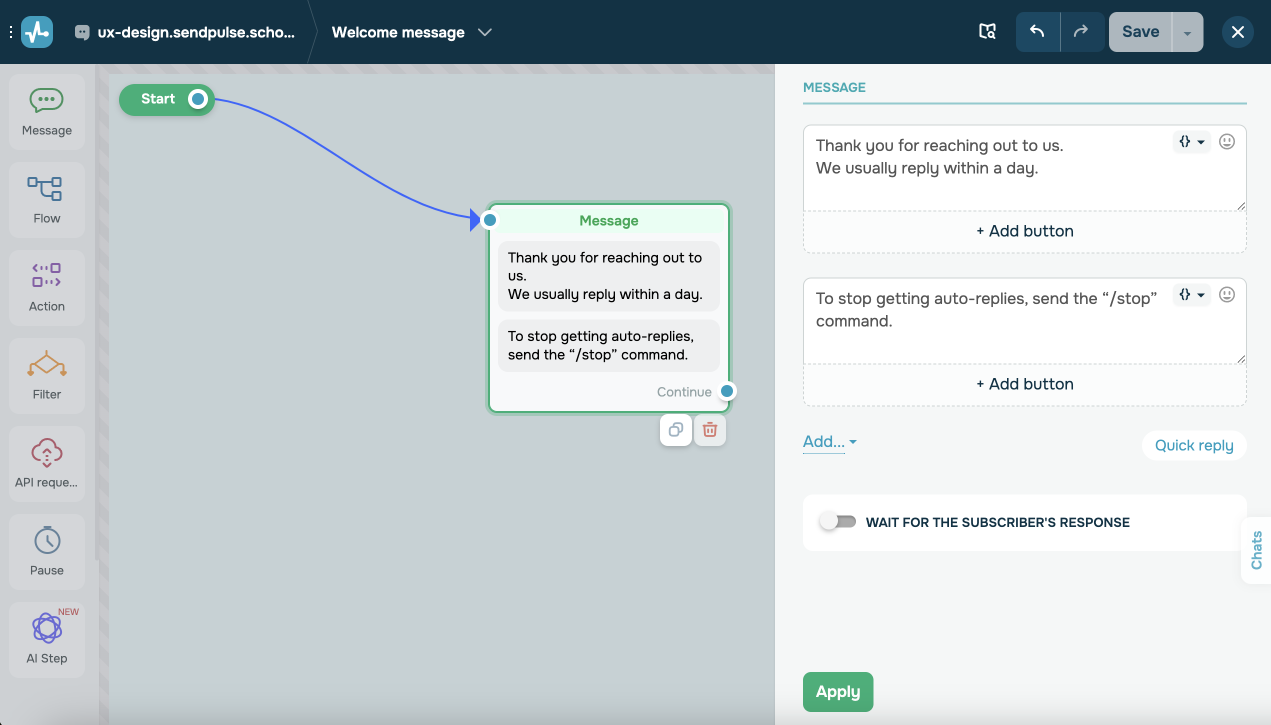
Add more elements to customize the Welcome message flow and create a unique and personalized user experience from the first user interaction.
Personalization tips
List available chatbot commands
To help users interact with your chatbot more effectively, include a short description of the available commands or keywords. This can be a list of phrases that trigger specific actions or responses:
product list— view products in stock.delivery— get delivery information.support— contact a team member.
In SendPulse’s chatbot builder, add the Message element with this list. You can also create a menu to make these options more accessible. This menu will appear in the chat window and allow users to quickly select a command.
Add a newsletter signup option or promo link
Encourage users to subscribe to your newsletter or receive a bonus, such as a discount or a gift. You can do this by adding a button to your welcome message.
In the Message element, add a button of the Continue flow or URL type that leads to a flow or website page. For example, a button labeled "Get Discount" can trigger a flow where users type in their email addresses to get a promo code.
Use tags
Tags allow you to segment your audience and send targeted messages based on users’ interests or behavior. Assigning tags to new subscribers helps with in-depth analysis and personalized campaigns.
To give you an idea, you can create and maintain a multilingual chatbot using tags. To do this, add buttons with language options to your first message.
Next, add the Action element and select the Assign tag action. Type in a tag name, for example, Mexico_subscriber. This will help you easily identify users’ locations and interact with them accordingly.
Last Updated: 28.05.2025
or