Create posts in a Telegram channel or group via your SendPulse chatbot
The SendPulse chatbot builder allows you to not only create a Telegram chatbot with auto-replies but also сreate useful posts and send campaigns to your channel or group using the bot. You can create scheduled posts or send them right away, design your campaigns, and add buttons with links, images, and files.
In this article, we'll look at how to add a chatbot as a channel or group admin and send a campaign using it.
How to add your chatbot to a Telegram channel
The process of adding a chatbot as an admin is the same for private and public channels.
Learn more: Telegram group and channel types.
To add a chatbot to a channel as an admin, go to your channel settings. In the mobile app, click on the channel icon in the top right corner, and click Administrators. In the desktop app, click on the three dots in the top right corner, and select Manage Channel > Administrators.
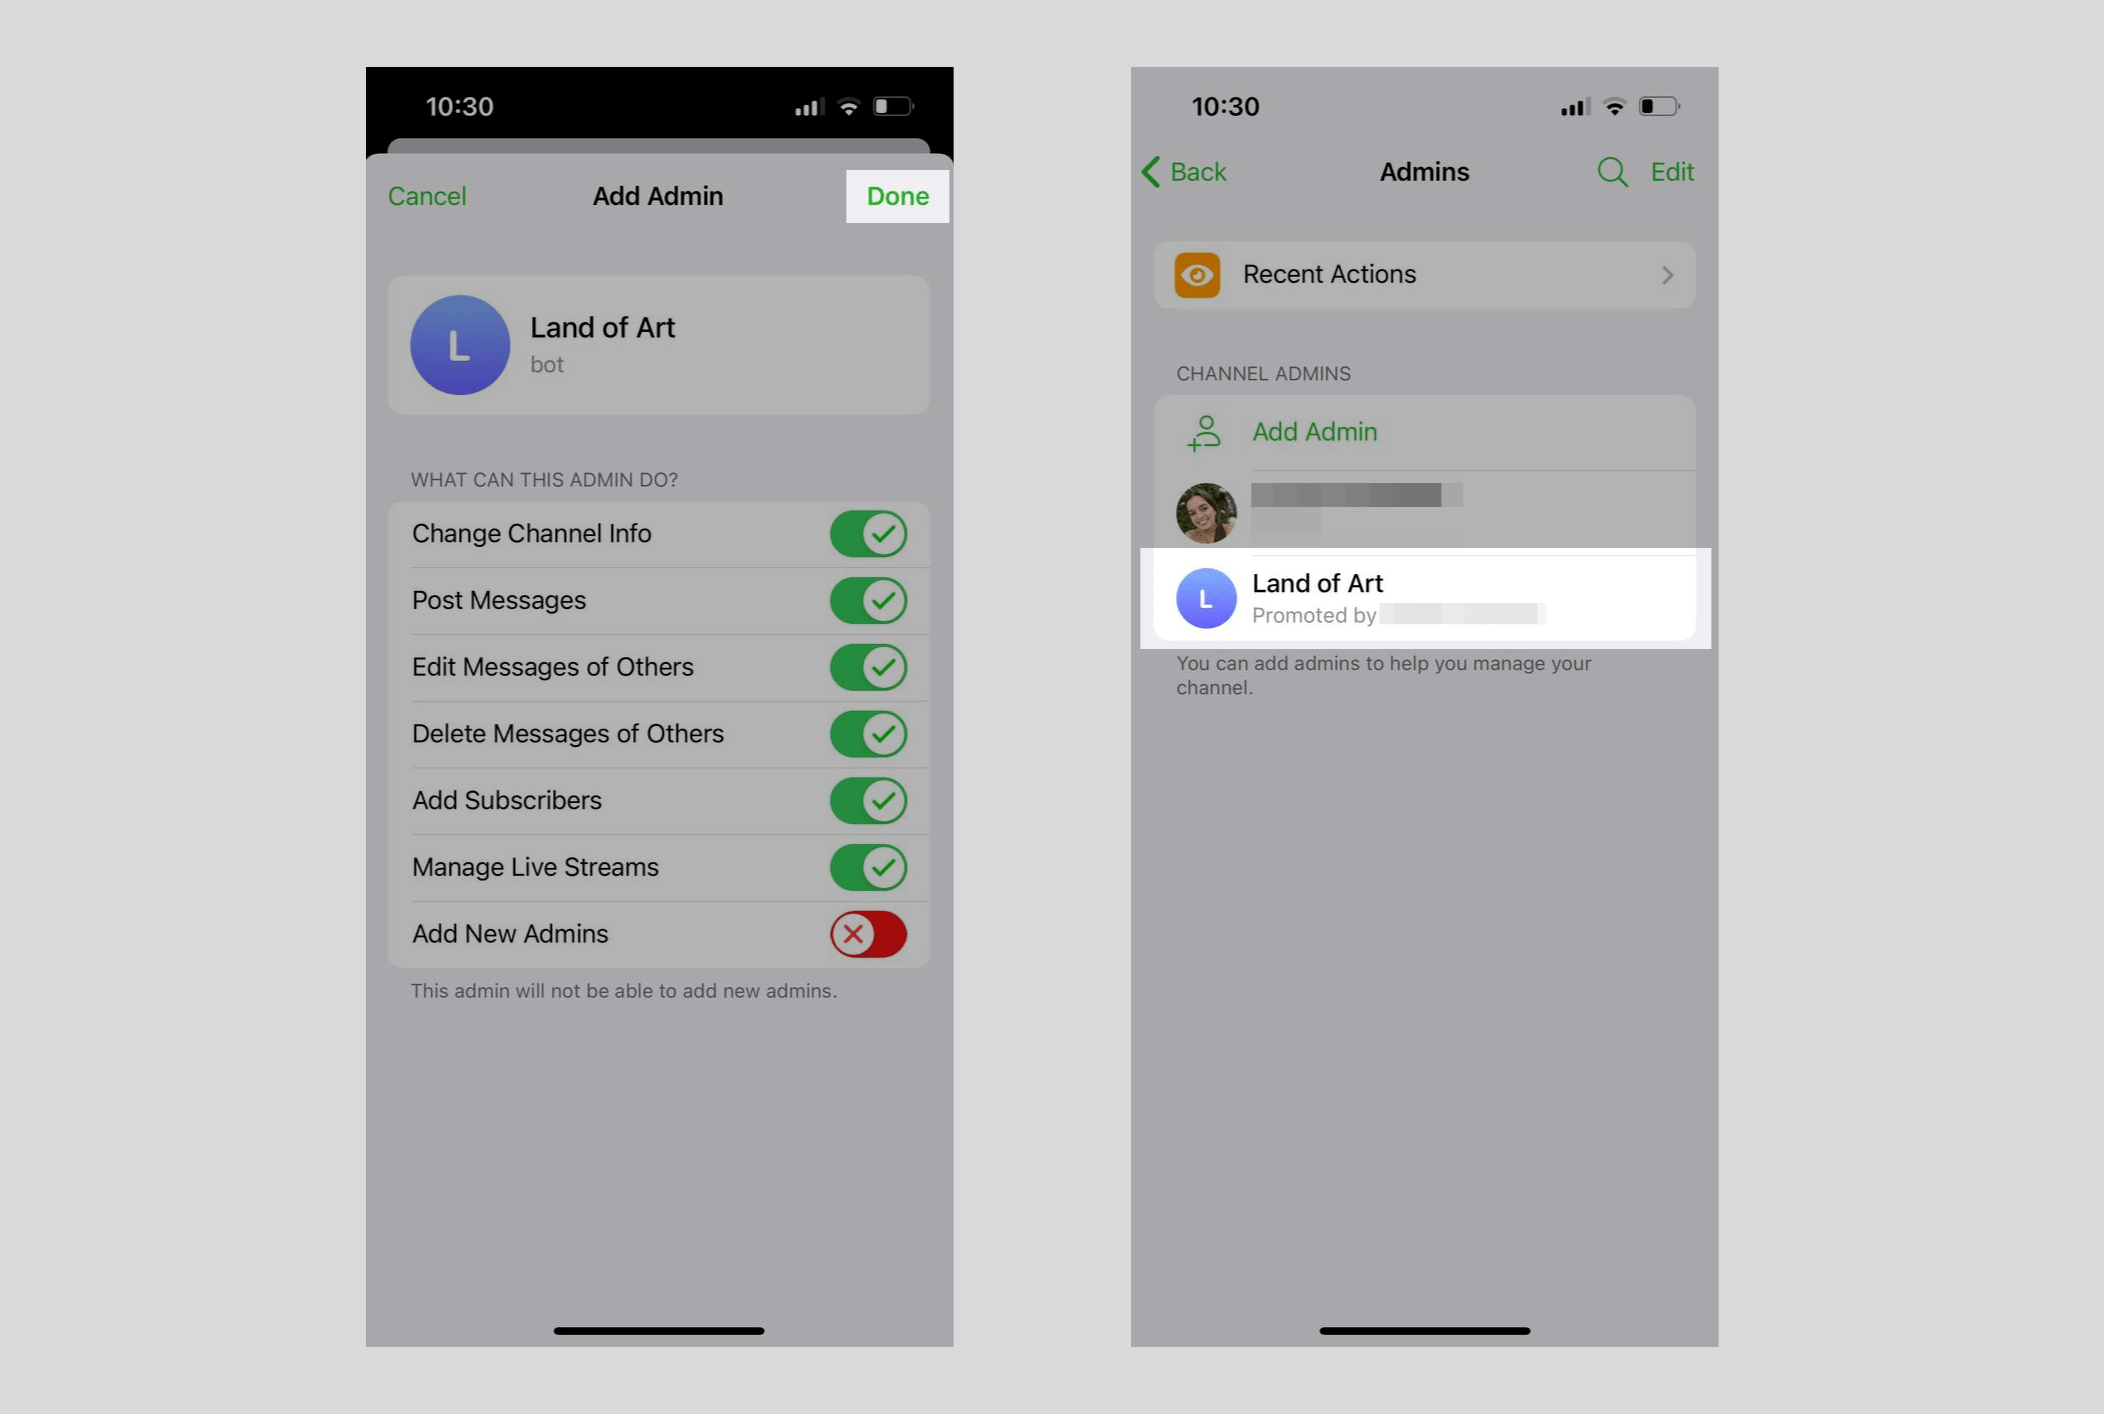
Click Add Admin. In the search box, enter the name or username of your chatbot, and click on it.

Set the permissions for your chatbot, and click Done. Your chatbot will be included in the list of channel admins.
How to add your chatbot to a Telegram group
You can add your chatbot to your group as an admin via the SendPulse settings or manually.
You can add a SendPulse-powered OpenAI bot, make it an admin, and grant permissions for it to assign other admins. You will be able to trigger this bot using @mentions, /commands, keywords, and OpenAI requests if this integration is enabled.
Read also: How to connect ChatGPT from OpenAI to your chatbot.
Via settings
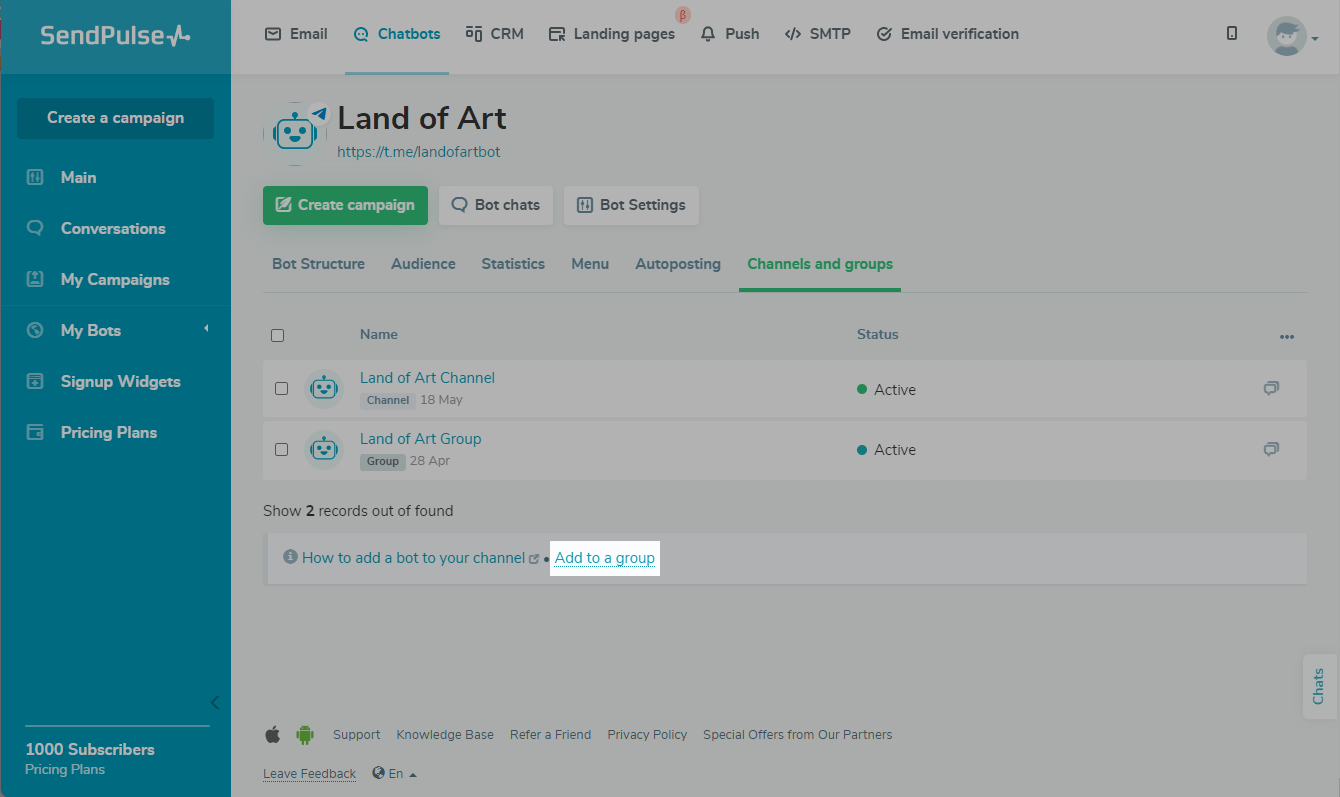
To add your chatbot to a group as an admin, go to the Channels and groups tab on the chatbot management page, and click Add to a group.
When a bot is added to public groups, it recognizes which group member has contacted it. Based on this, your flow script will be launched. The information about who used the bot in the group will be displayed in the chat.
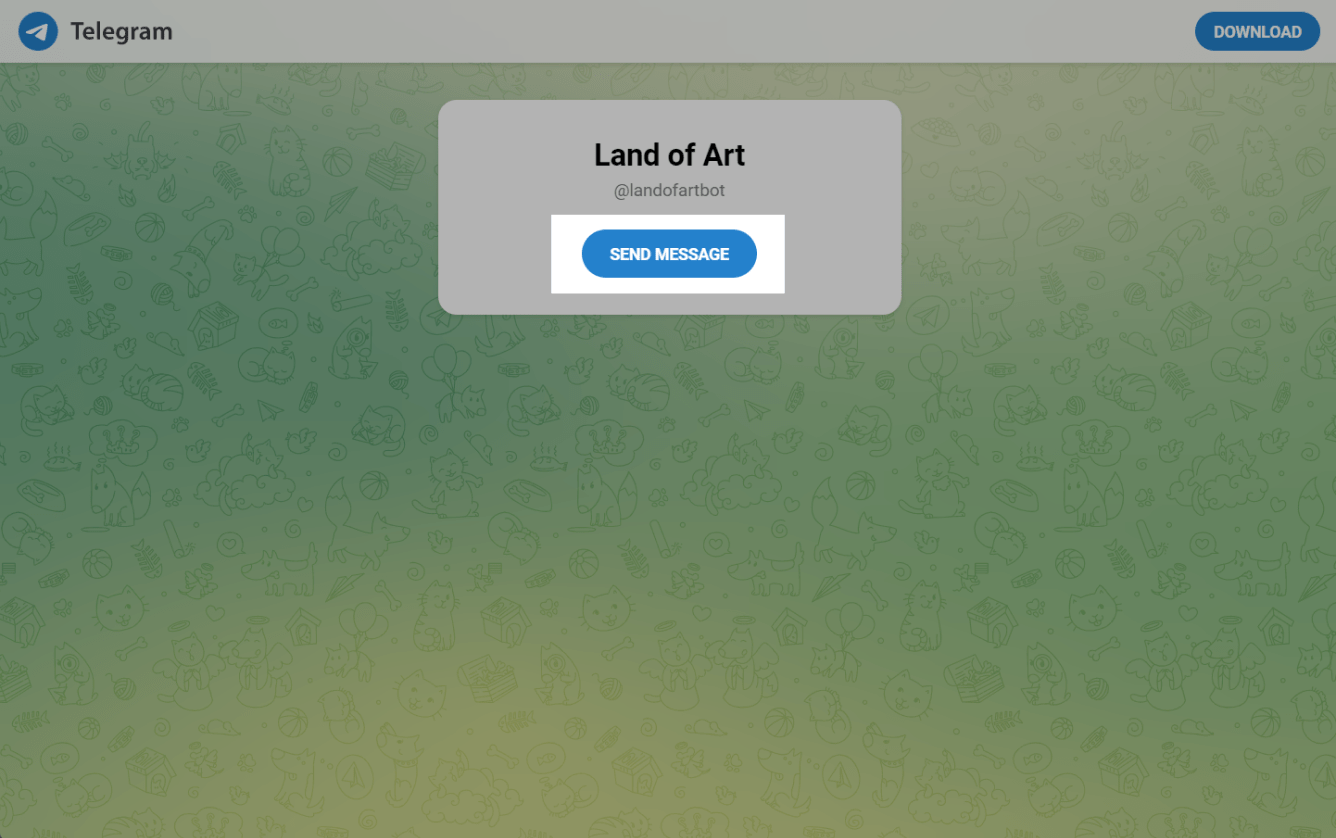
In the next window, click Send message.
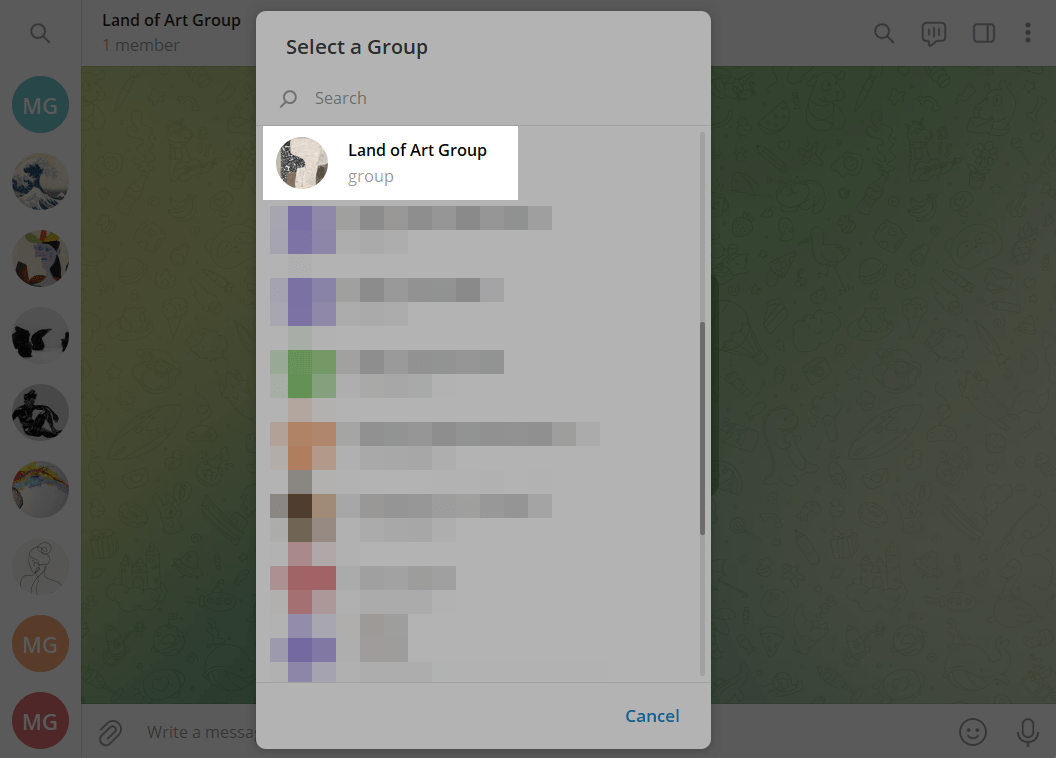
Next, go to the Telegram app. In the search bar, enter the name of your group, and click on it.
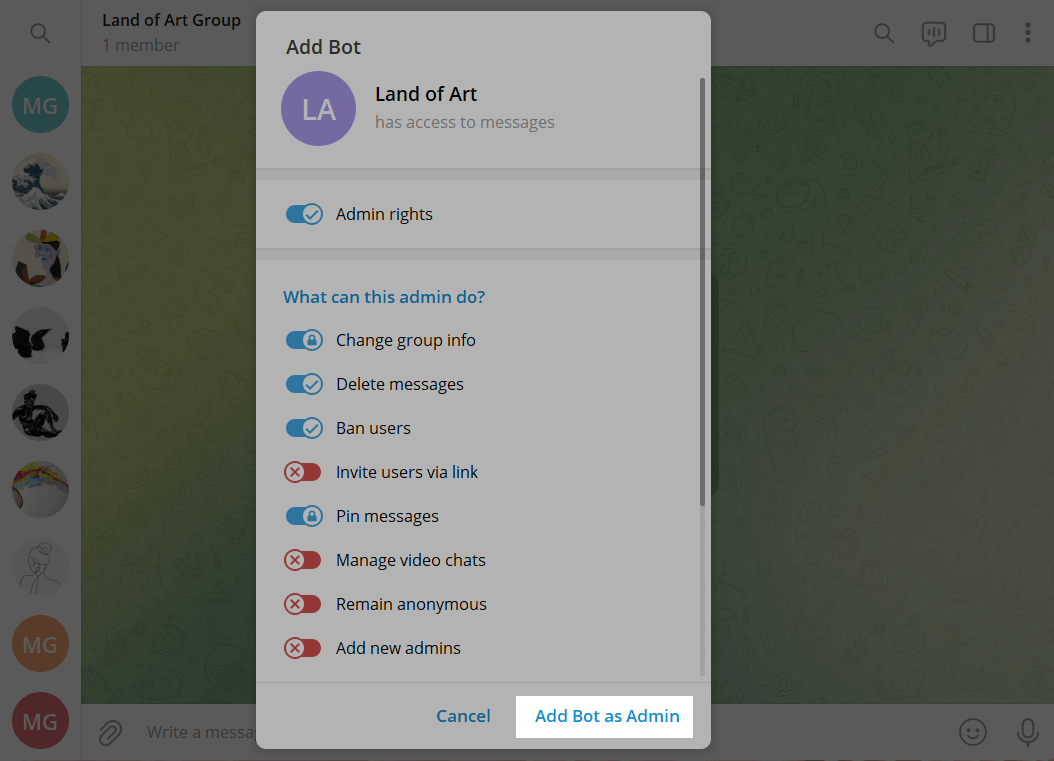
Set the permissions for your chatbot, and click Add Bot as Admin.
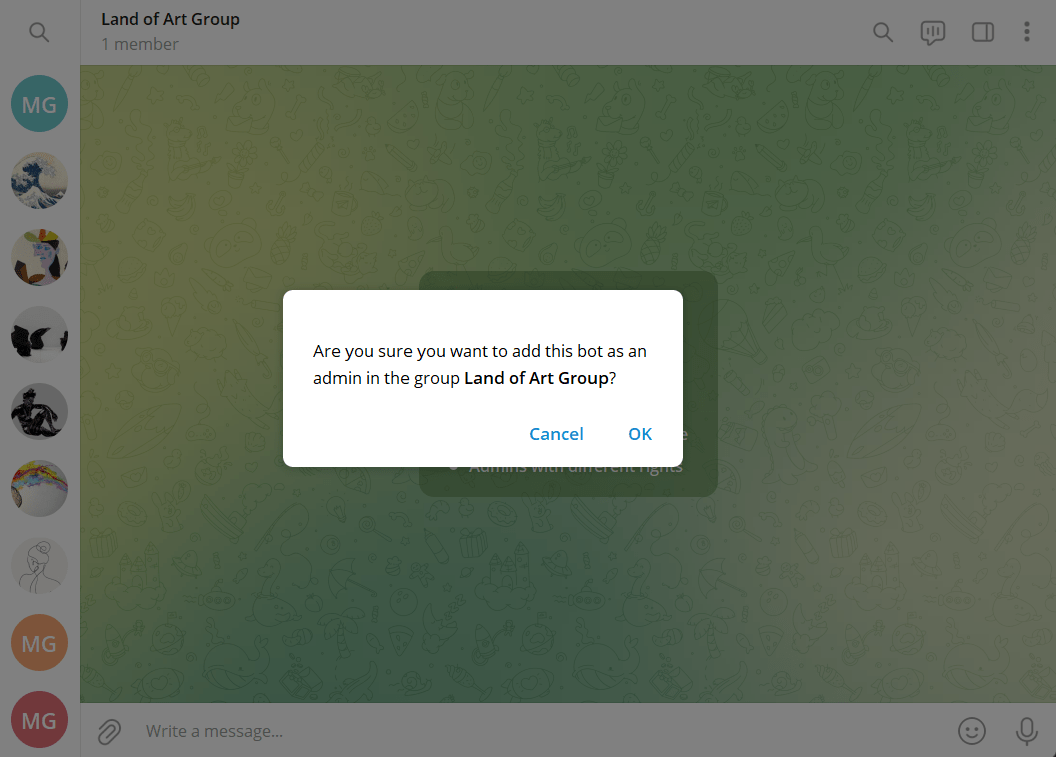
In the next window, confirm that you want to add your chatbot as a group admin.
Manually
The process of adding a chatbot as an admin is different for private and public groups, as well as private groups with enabled chat history.
Adding your chatbot to a private group
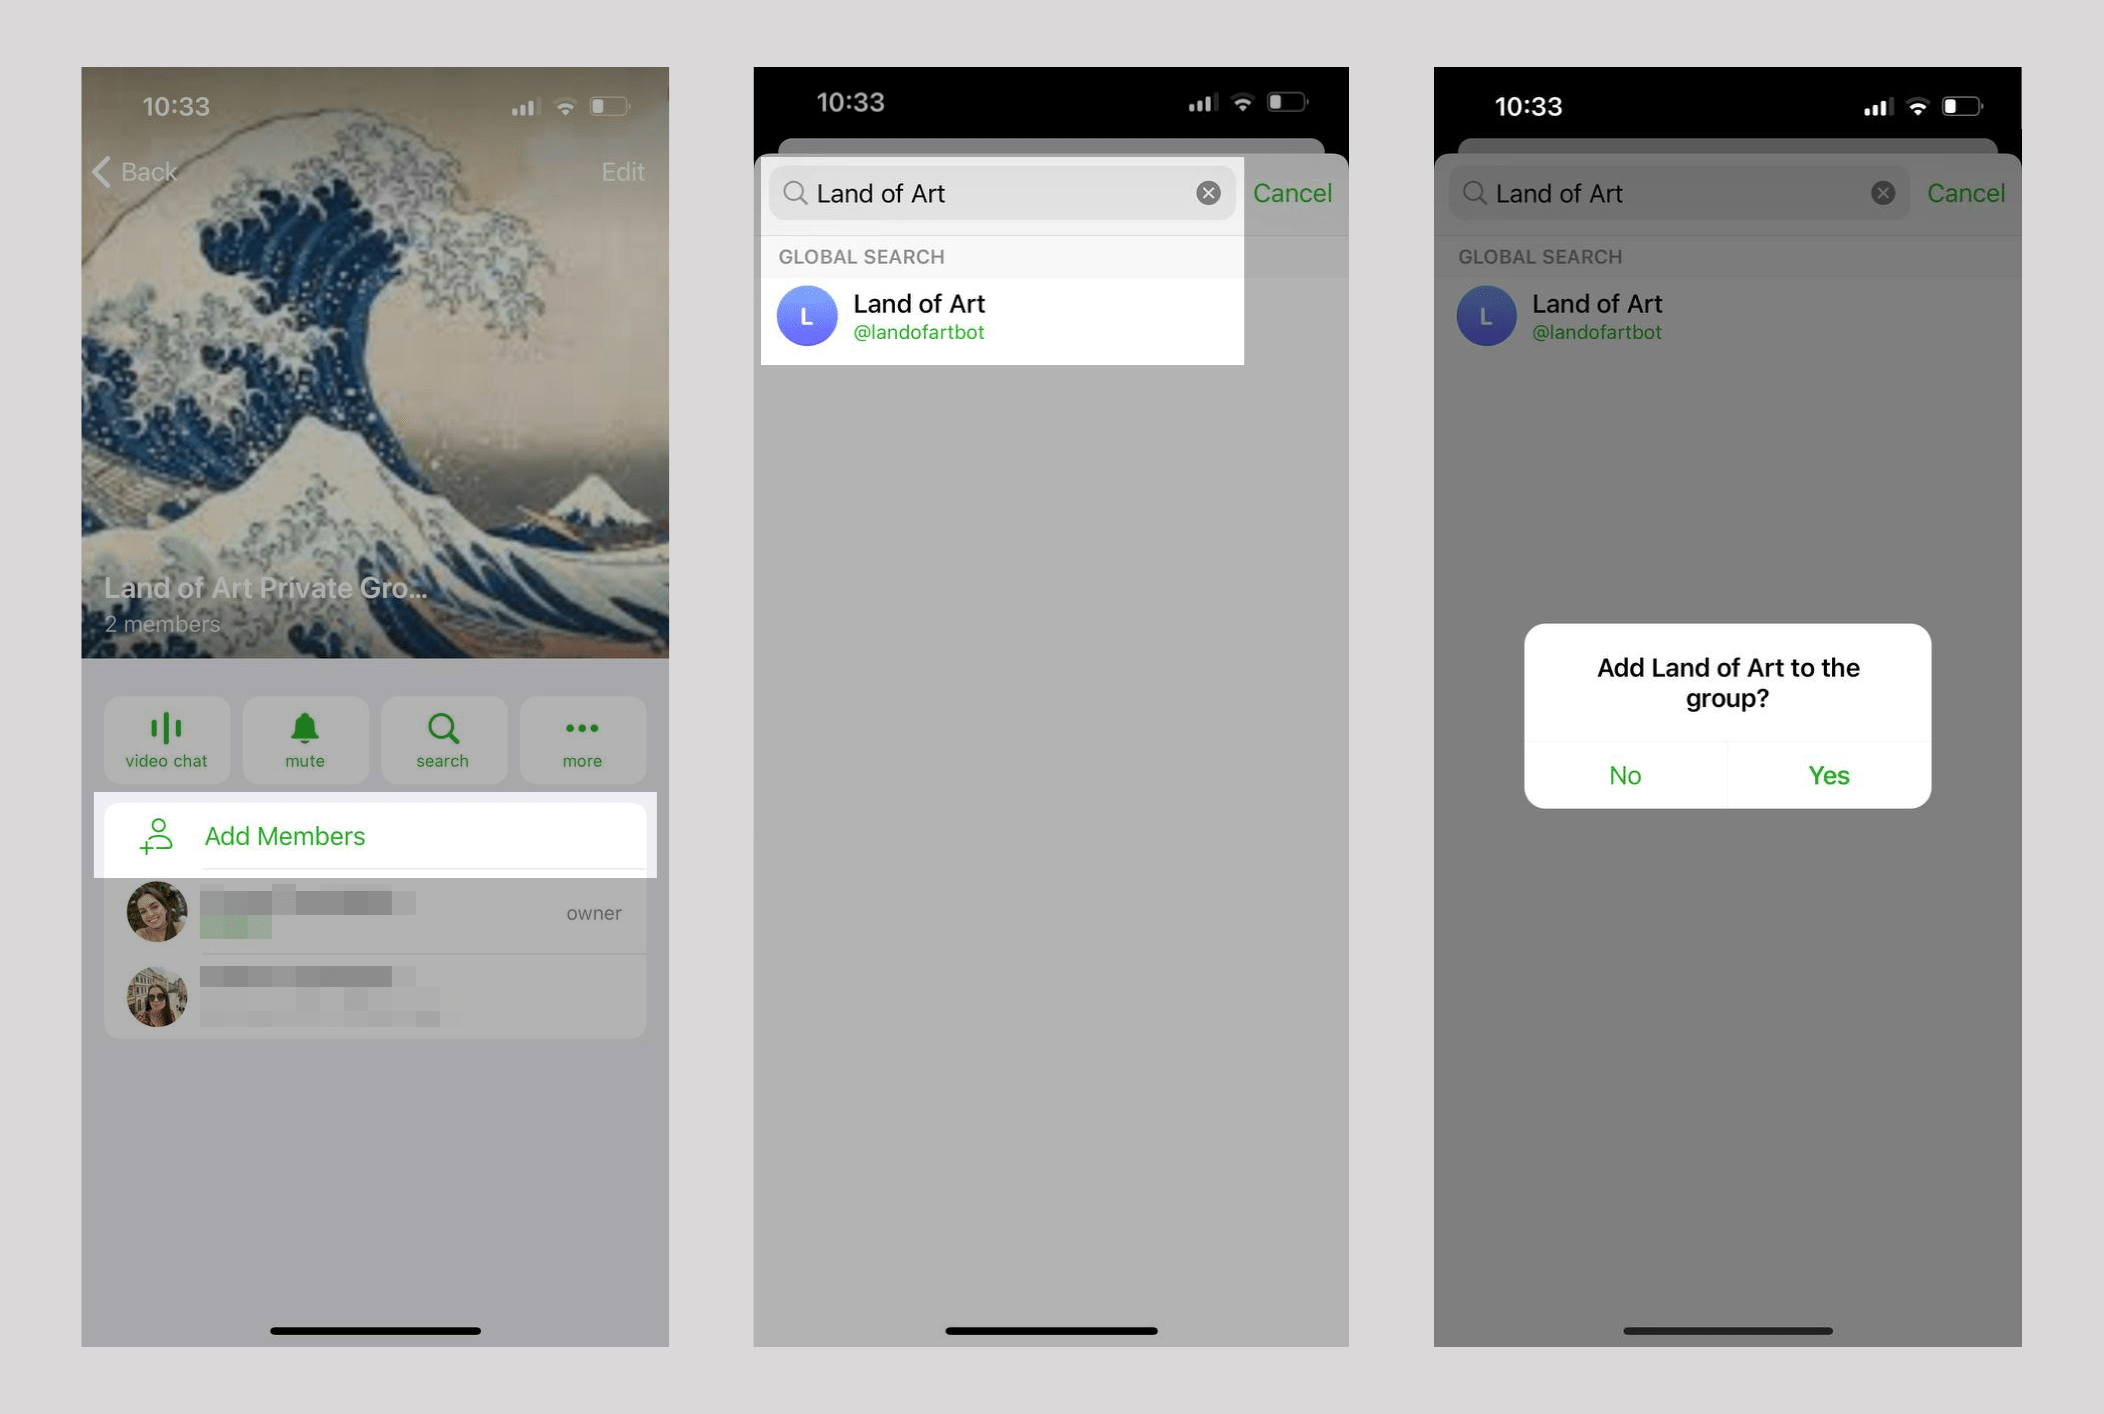
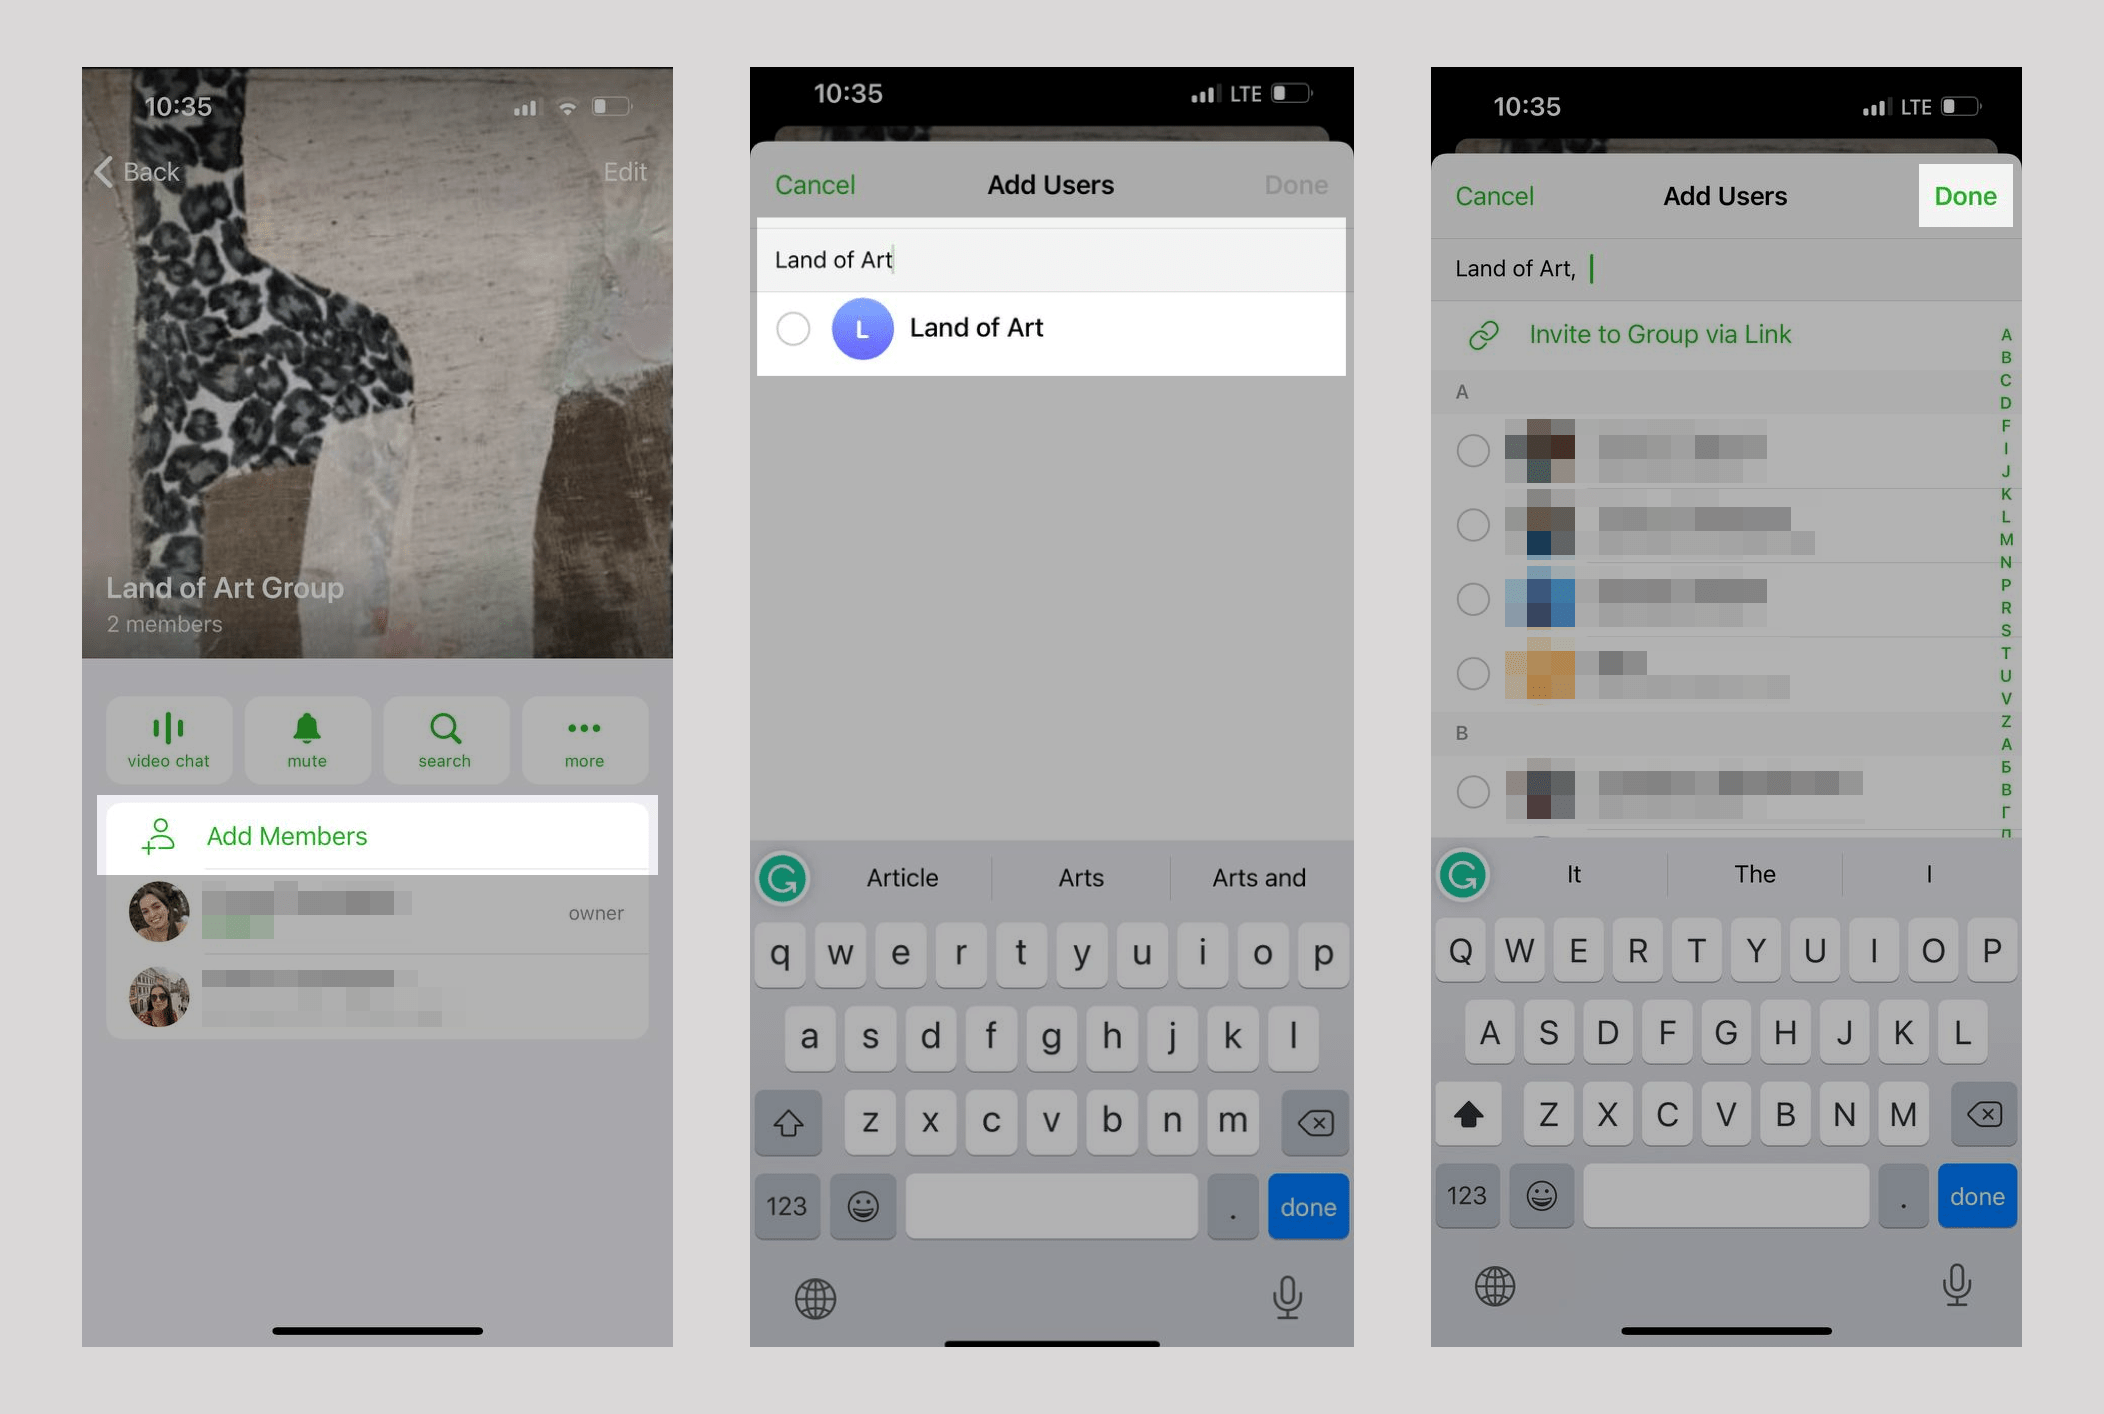
To add a chatbot to a private group as an admin, go to your group settings. In the mobile app, click on the group icon in the top right corner, and click Add Members. In the desktop app, click on the three dots in the top right corner, and select Manage group > Administrators > Add Administrator.
In the search box, enter the name or username of your chatbot, and click on it. In the next window, click Yes.
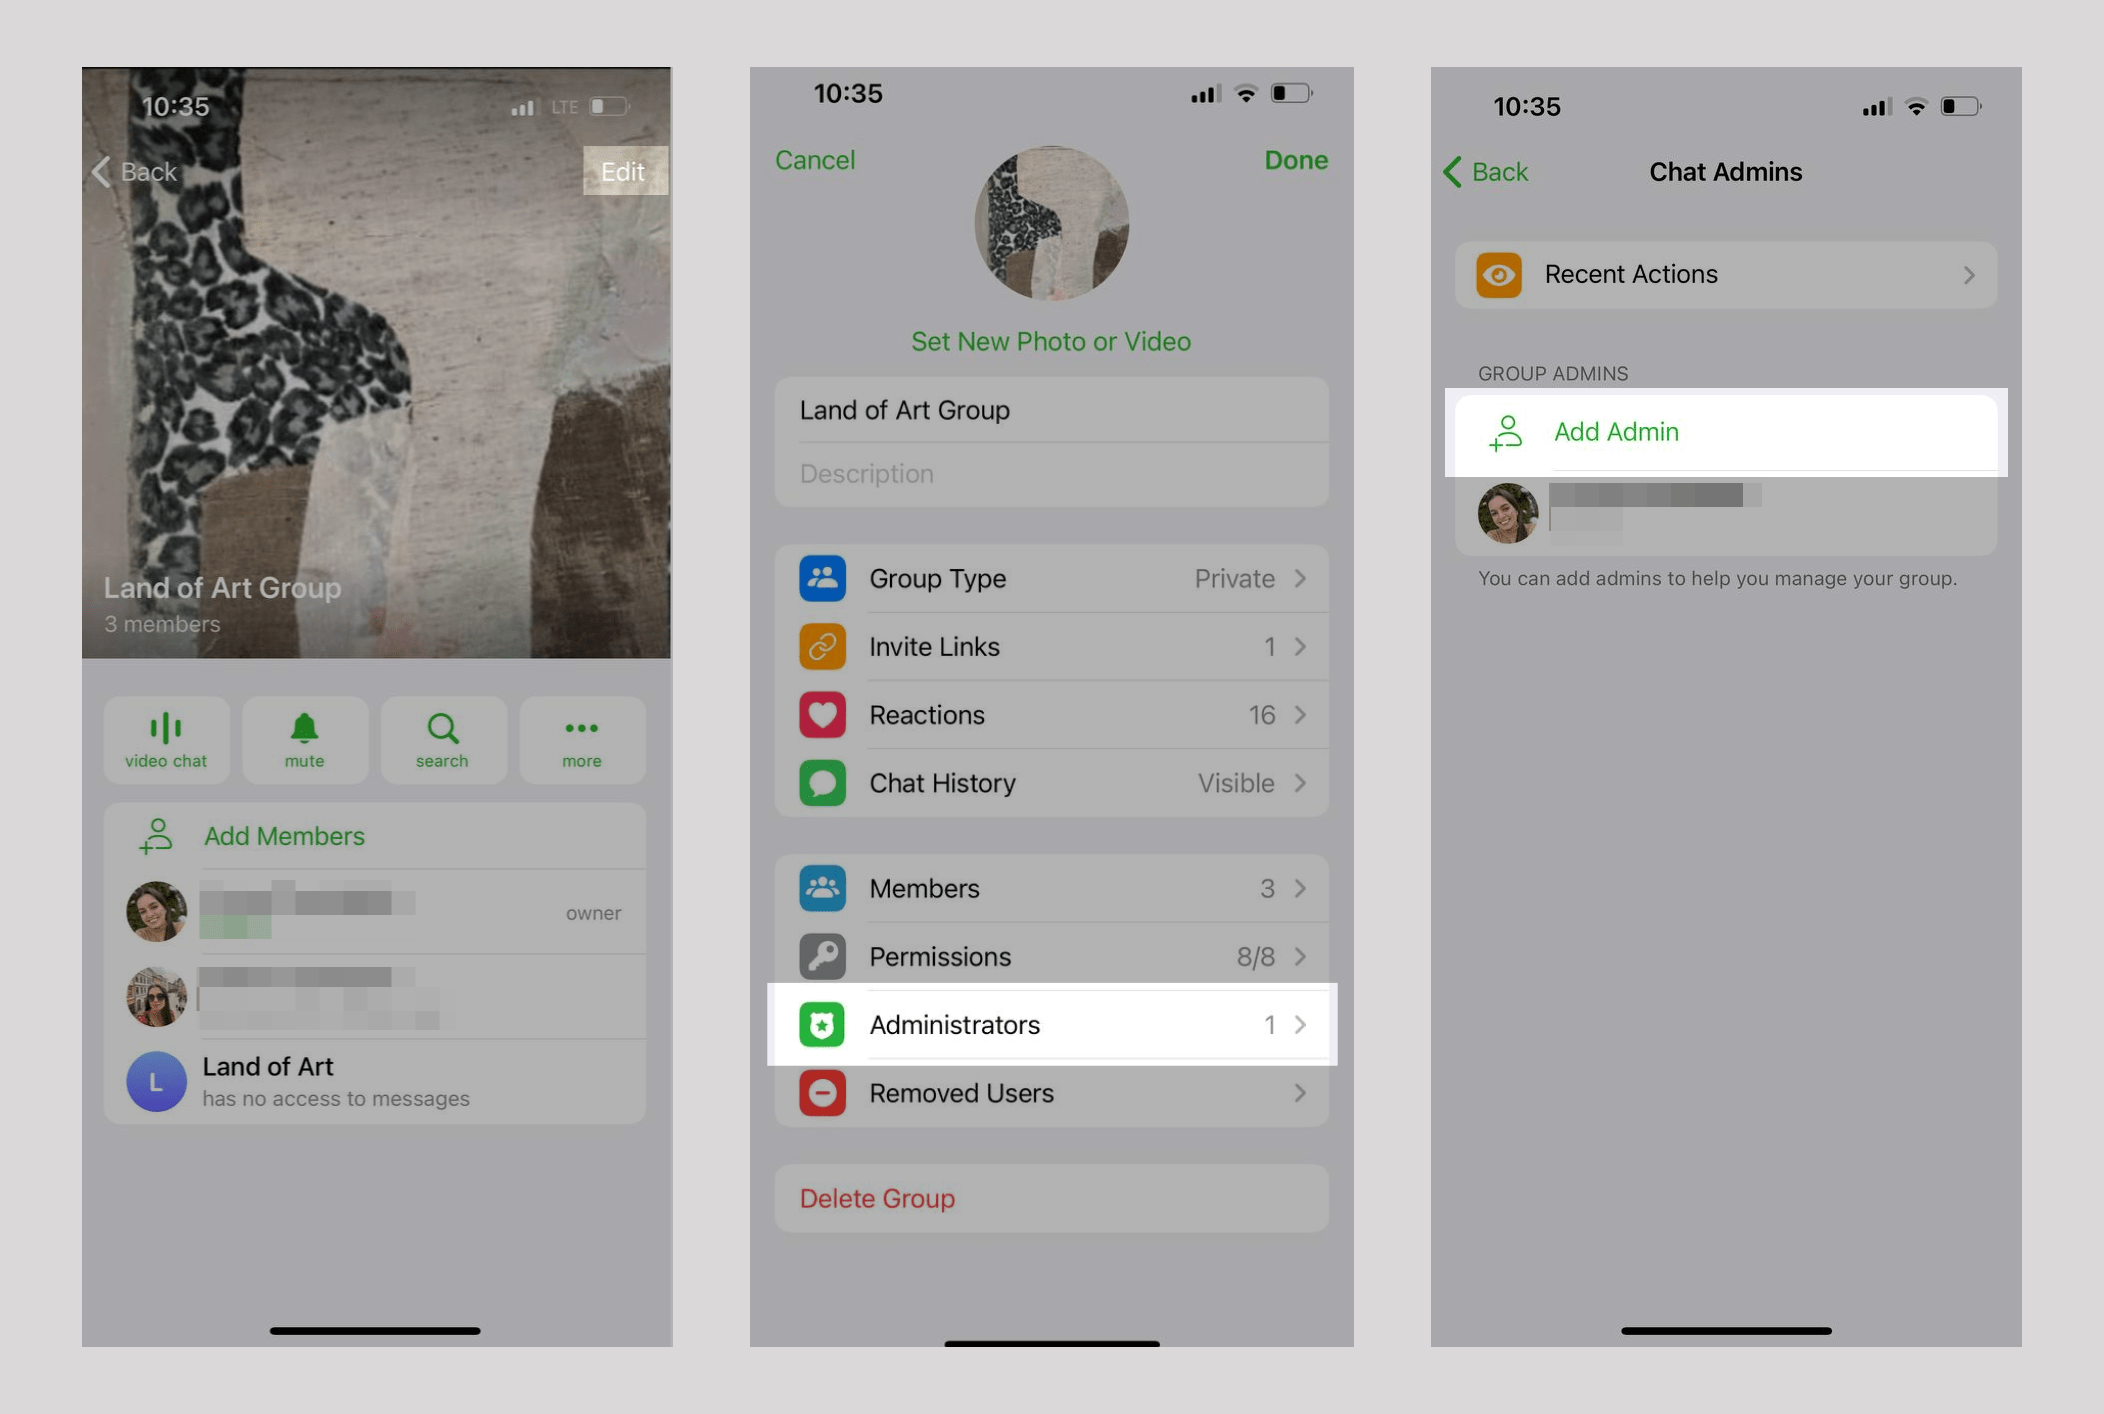
Next, go to your group settings, and click Edit. Go to the Administrators menu, and click Add Admin.
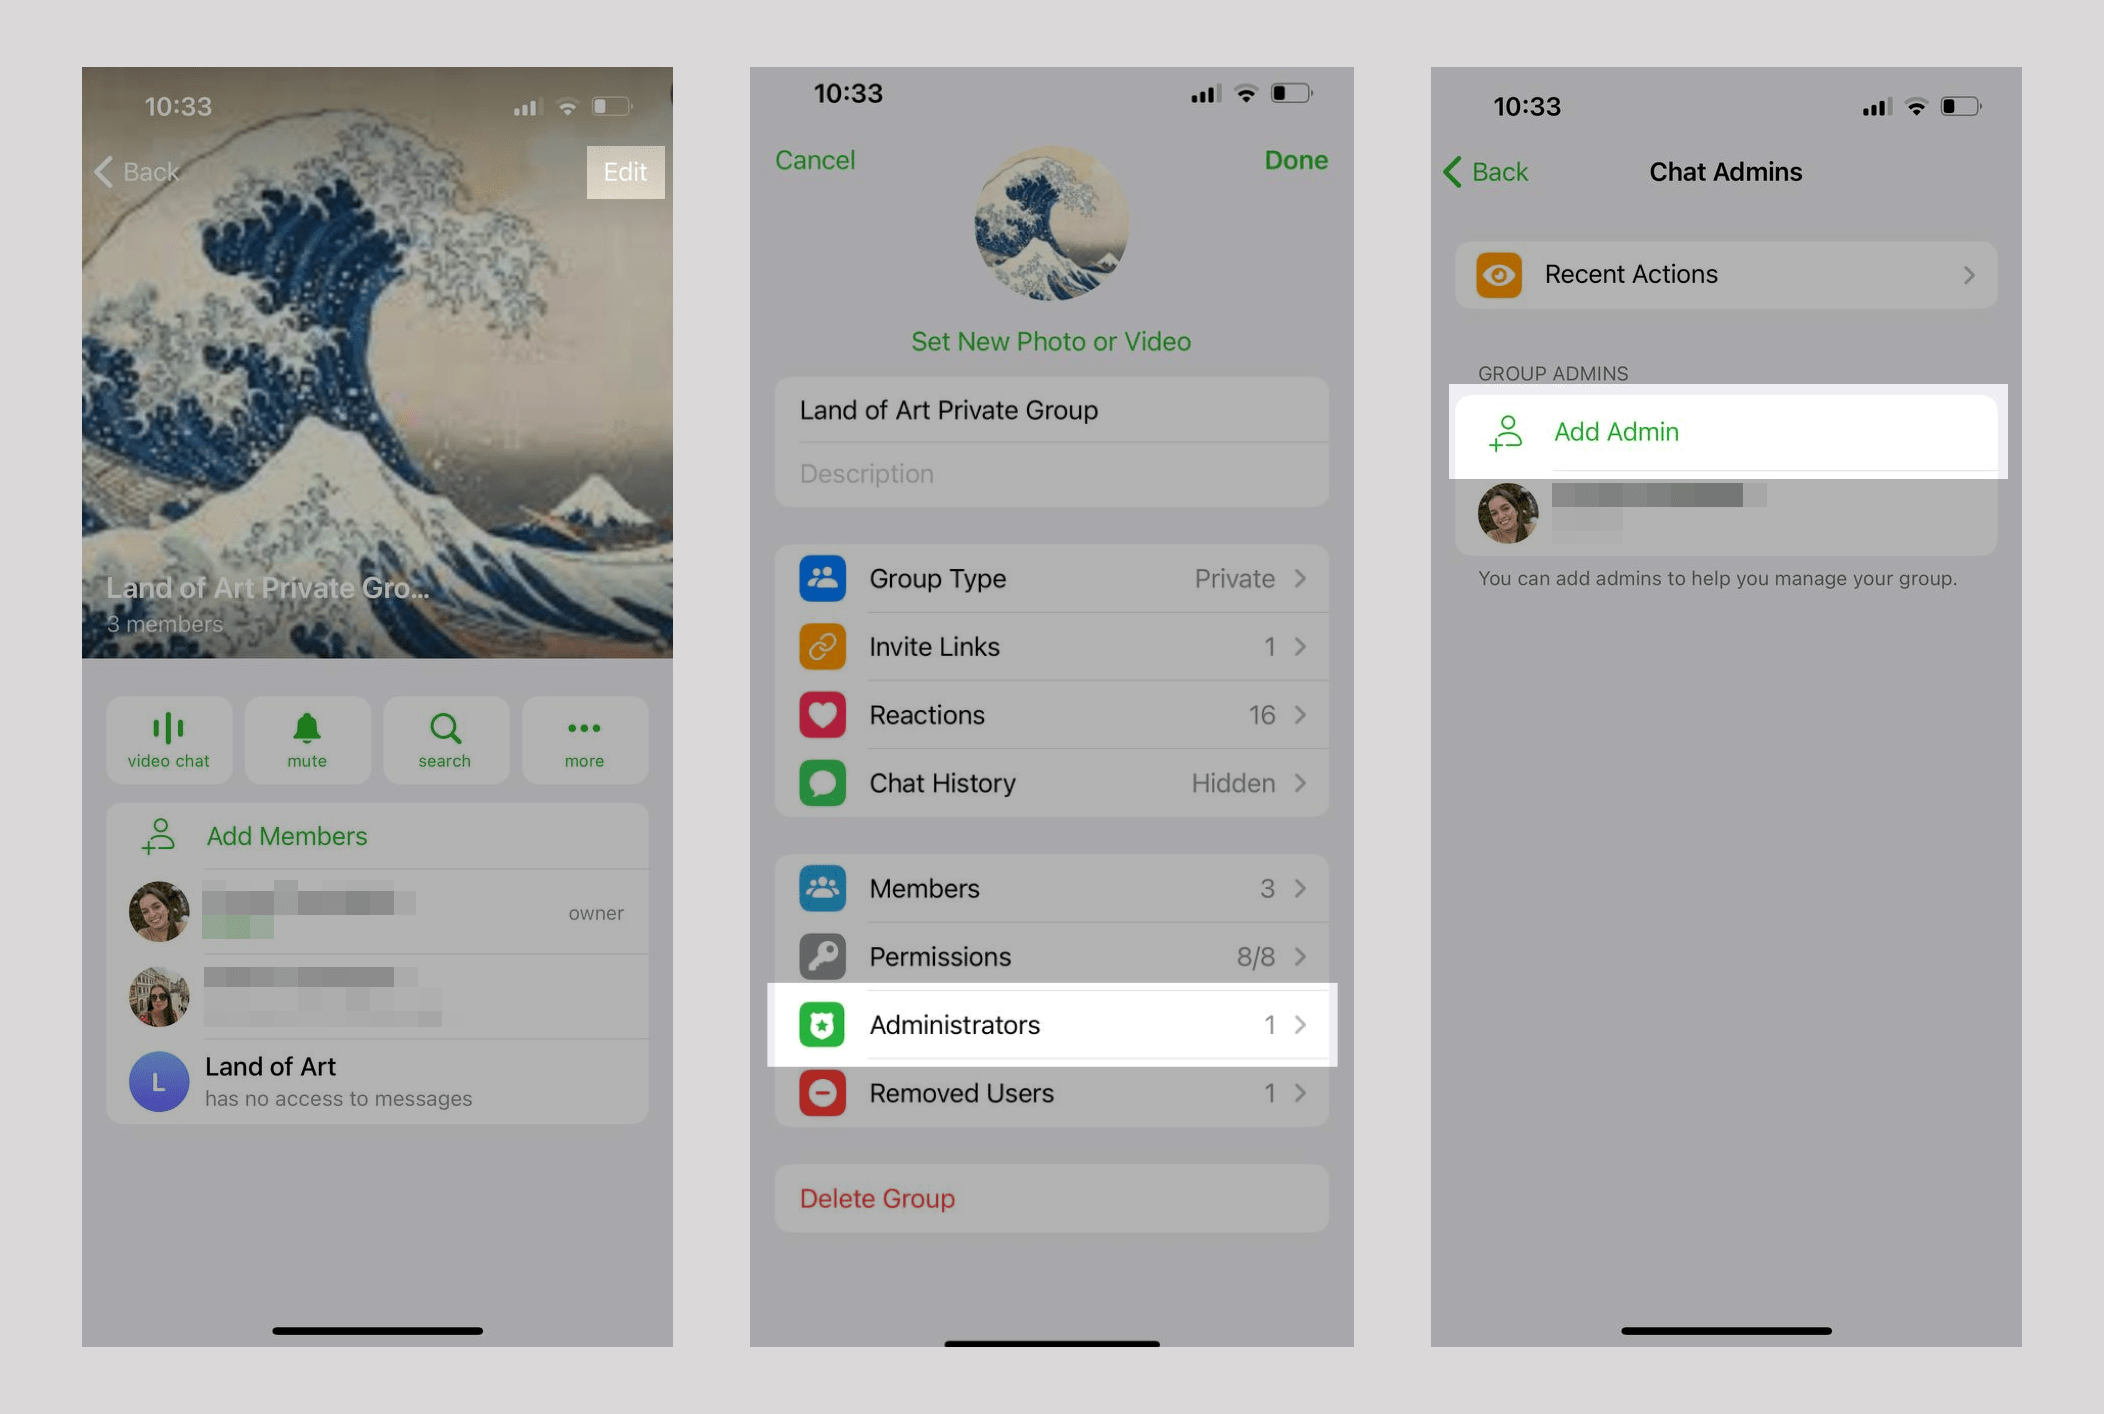
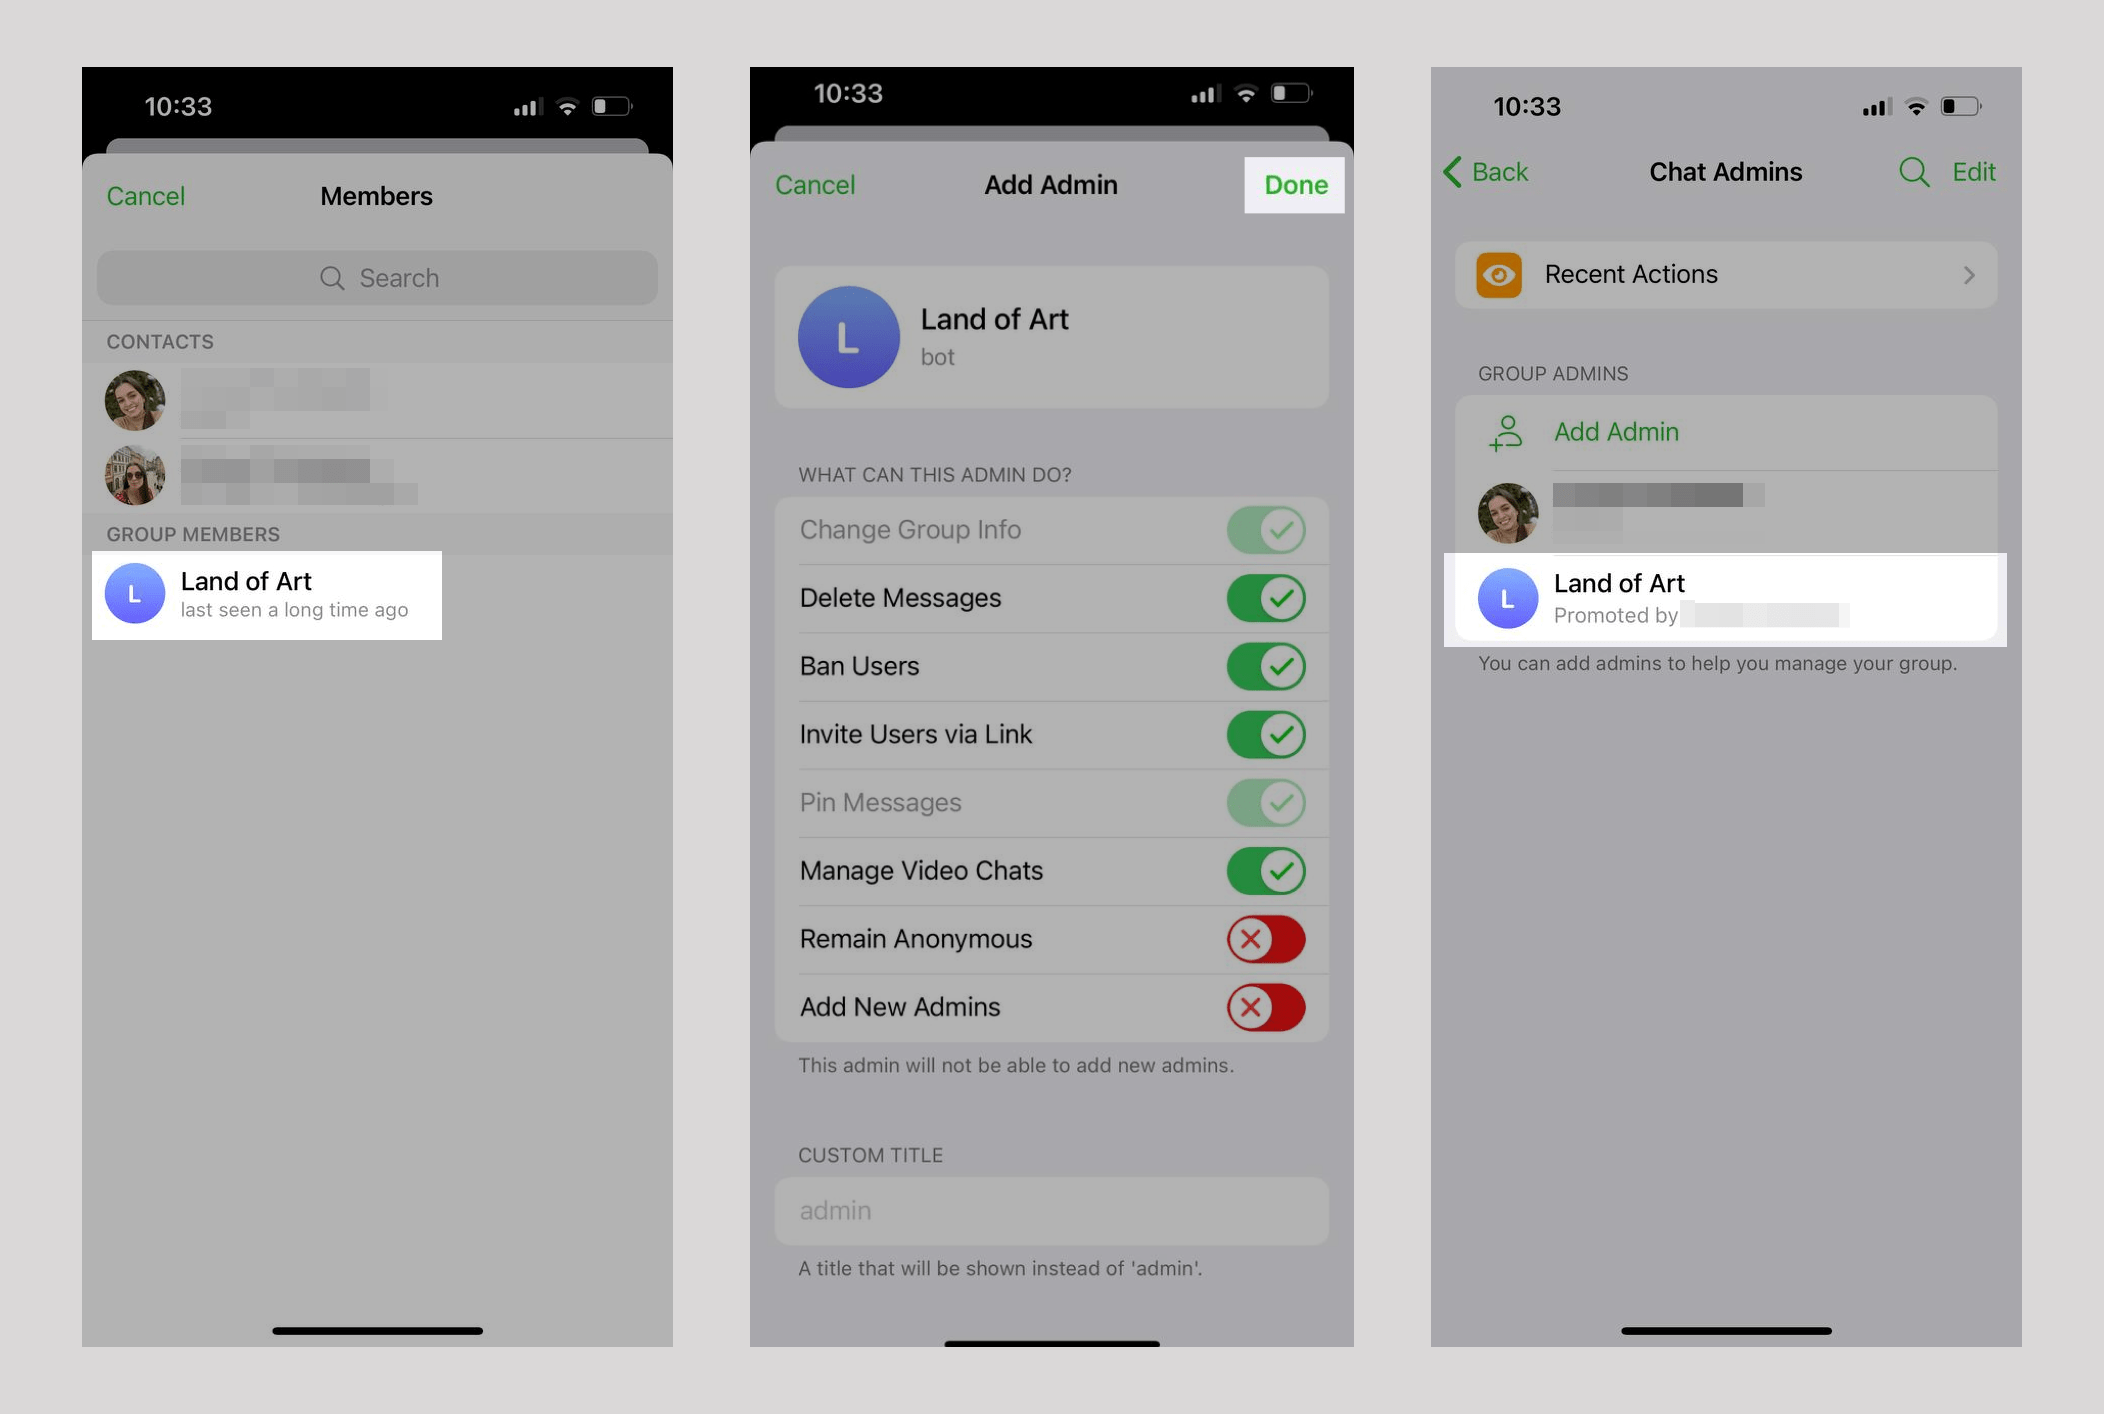
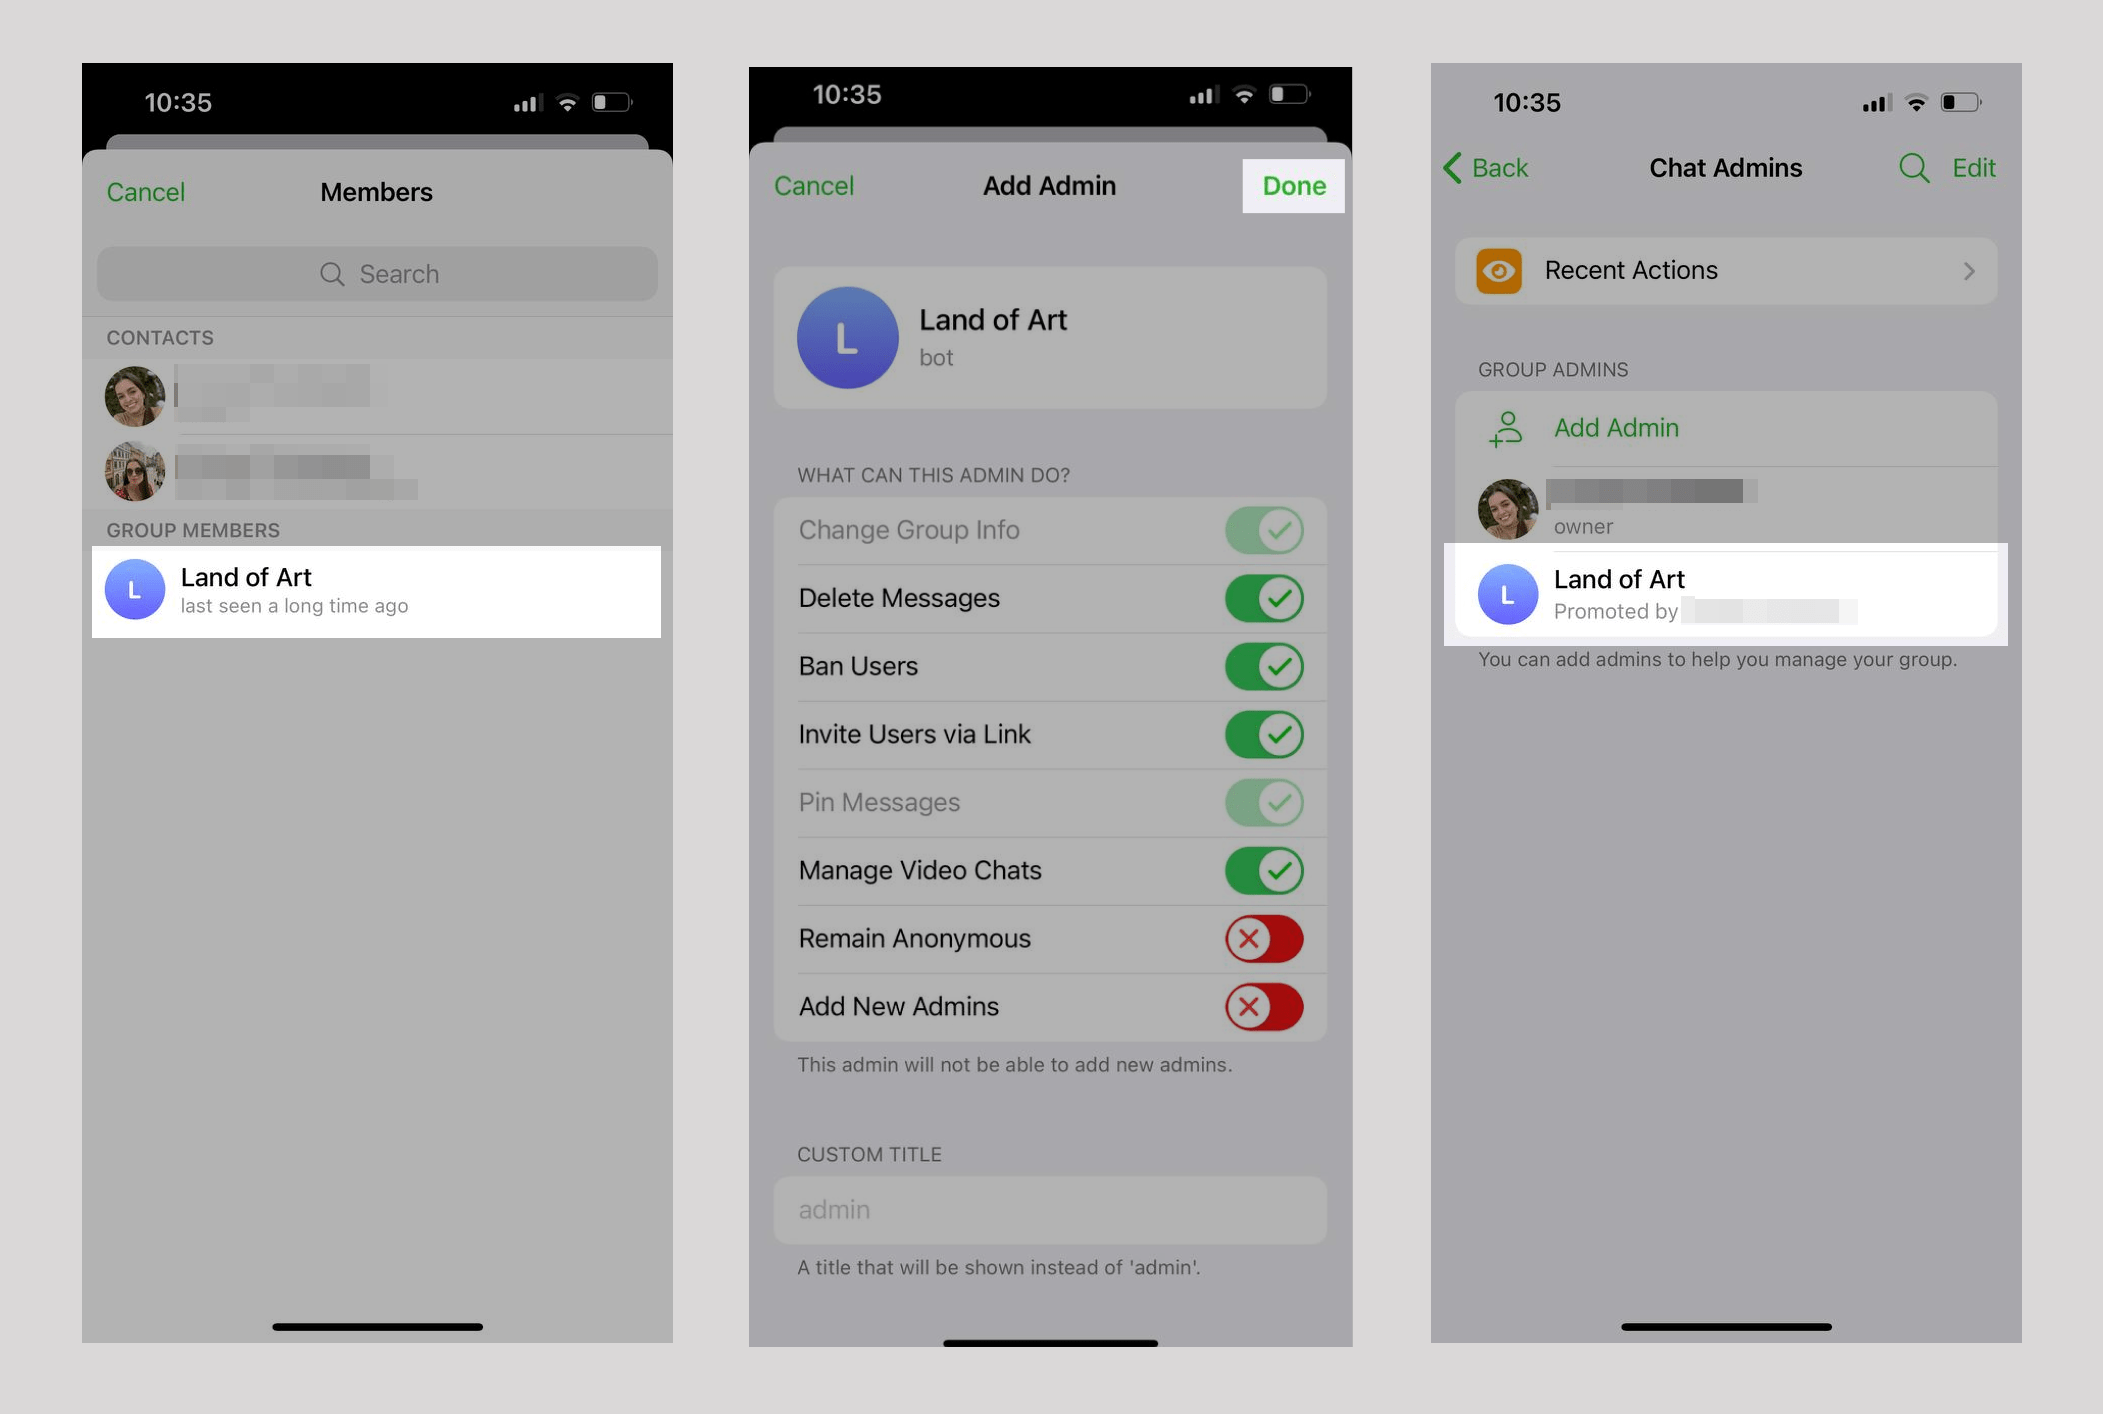
In the search box, enter the name or username of your chatbot, or select it from the list of group members. Set the permissions for your chatbot, and click Done. Your chatbot will be included in the list of group admins.
Adding your chatbot to a public group or private group with enabled chat history
To add a chatbot to a public group or private group with enabled chat history as an admin, go to your group settings. In the mobile app, click on the group icon in the top right corner, and click Add Members. In the desktop app, click on the three dots in the top right corner, and select Manage group > Administrators > Add Administrator.
In the search box, enter the name or username of your chatbot, and click on it. Click Done.
Next, go to your group settings, and click Edit. Go to the Administrators menu, and click Add Admin.
In the search box, enter the name or username of your chatbot, or select it from the list of group members. Set the permissions for your chatbot, and click Done. Your chatbot will be included in the list of group admins.
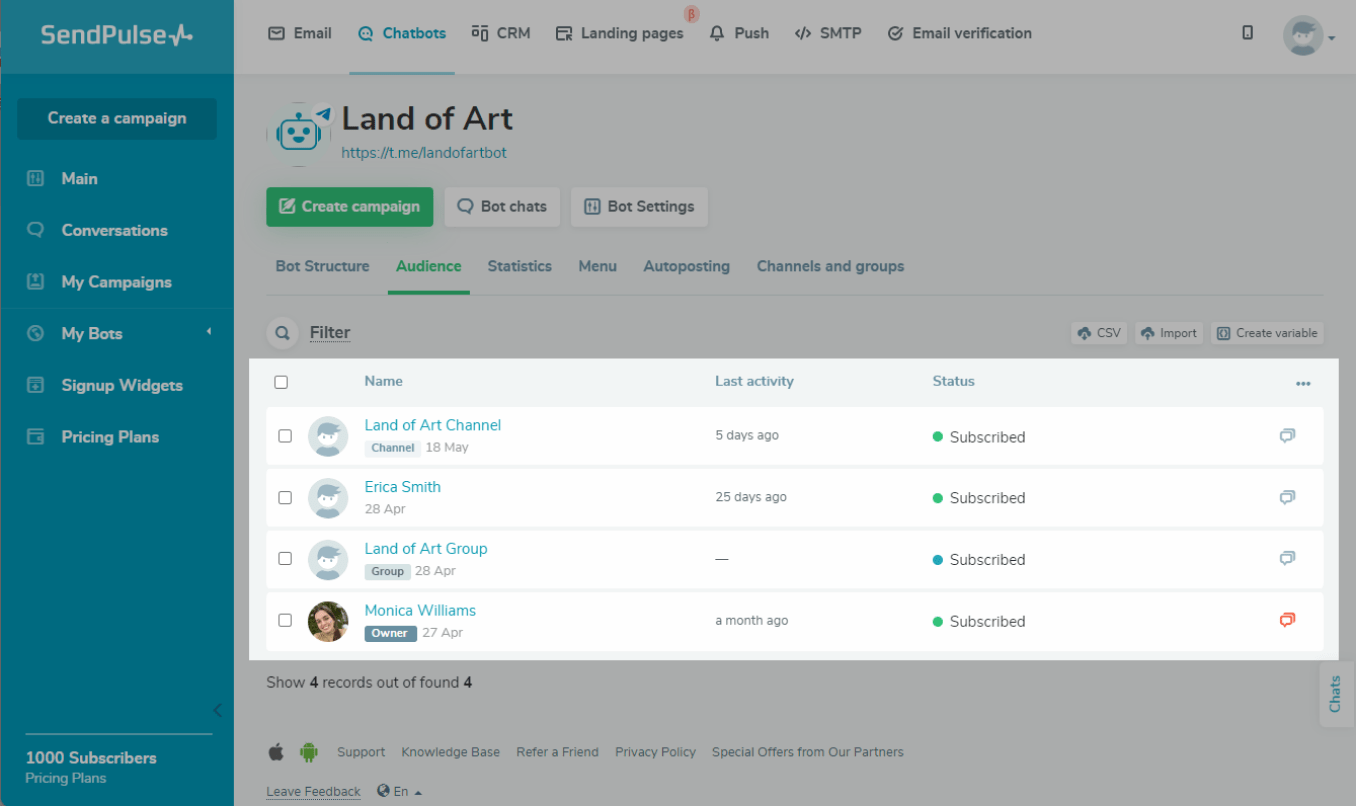
How to find a channel or group in your chatbot audience
In the Audience tab, you can check if your channel and group have been added as your bot's subscribers.
The channel or group will be added as your bot subscriber in the SendPulse account when this channel or group has more than one subscriber and after the admin sends a message to it.
How to view a channel or group where your chatbot is an admin
To view the groups and channels where your chatbot is an admin, go to the Channels and groups tab on the chatbot management page.
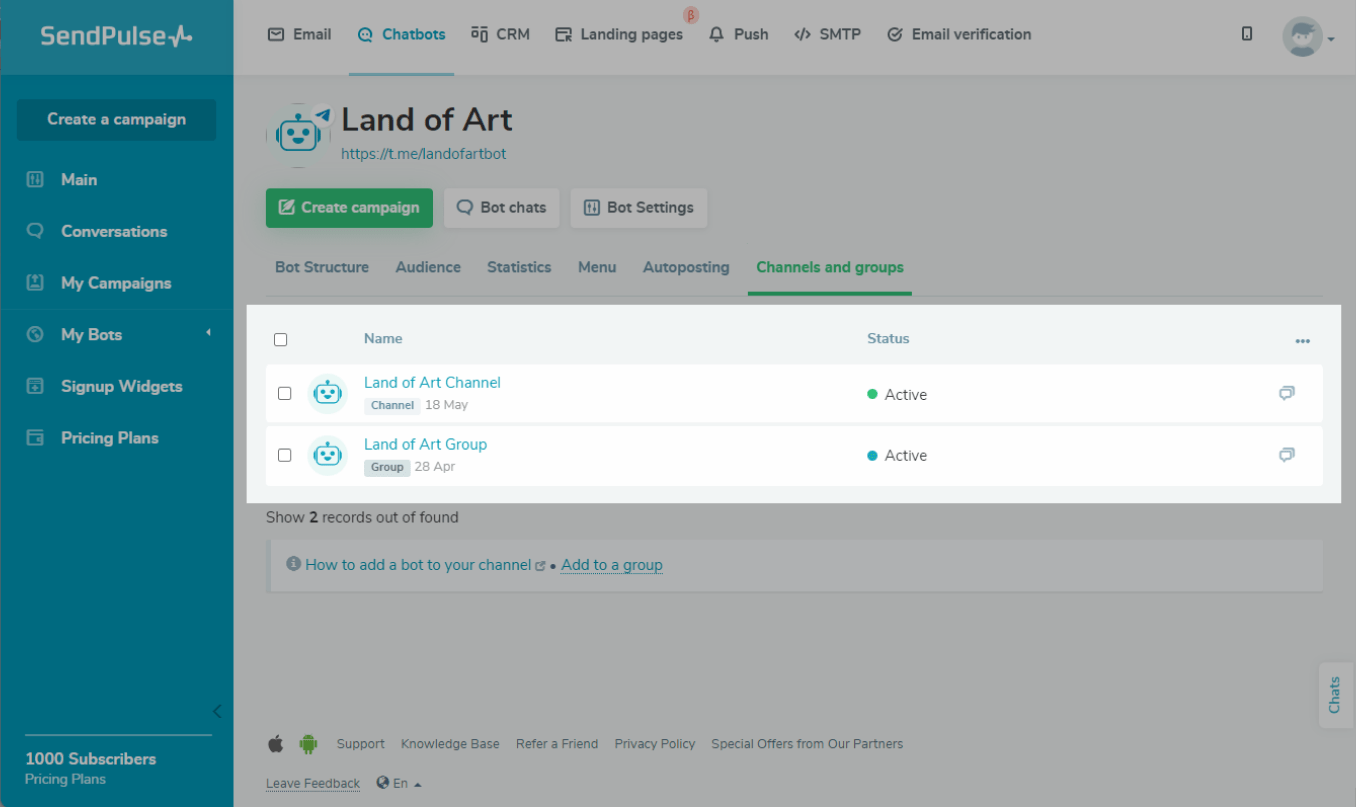
You can also view the number of subscribers and copy the share link or invite link in a chat with your group or channel.
Learn more: Number of subscribers and subscription link.
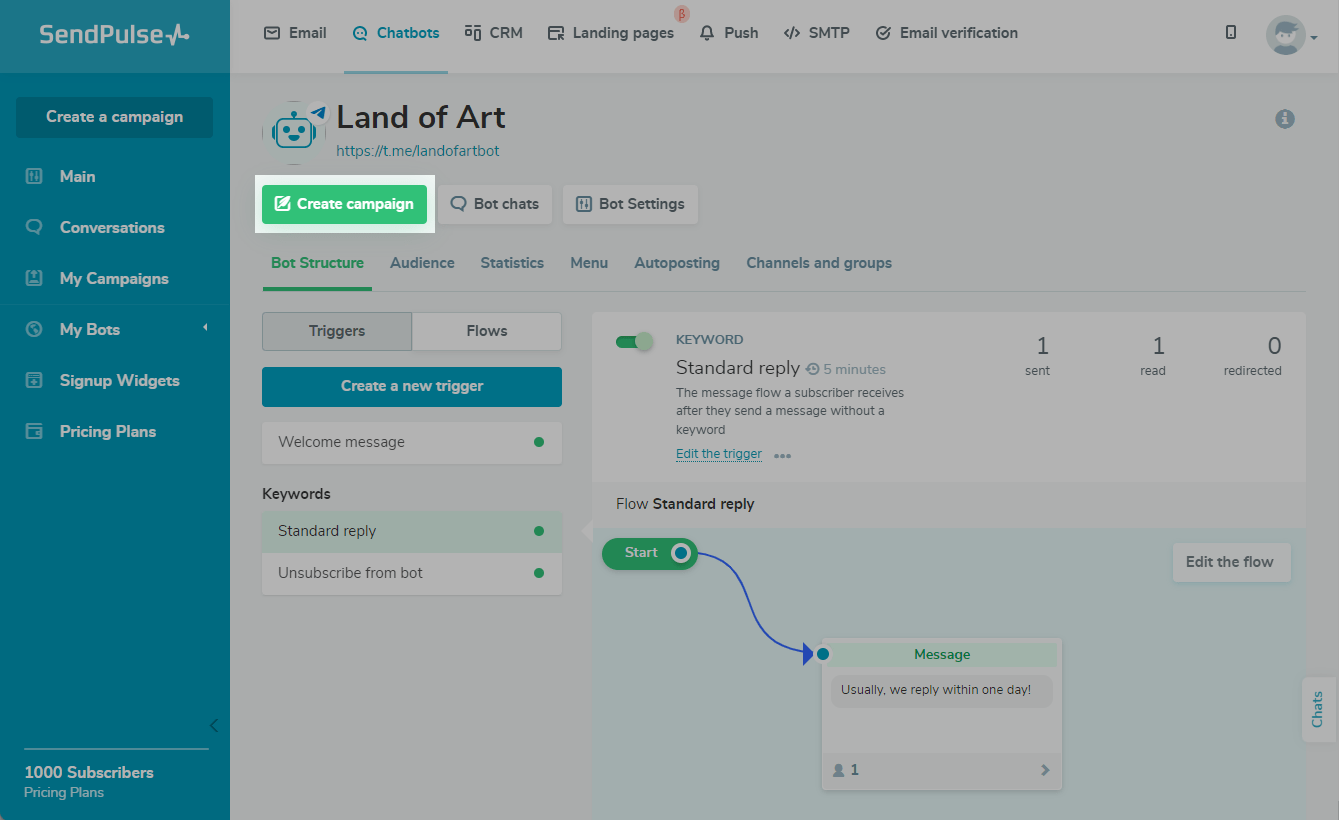
How to send a campaign to a channel or group
Go to the Chatbots section, and click Create campaign.
You can send a campaign to a channel or group only on a paid pricing plan.
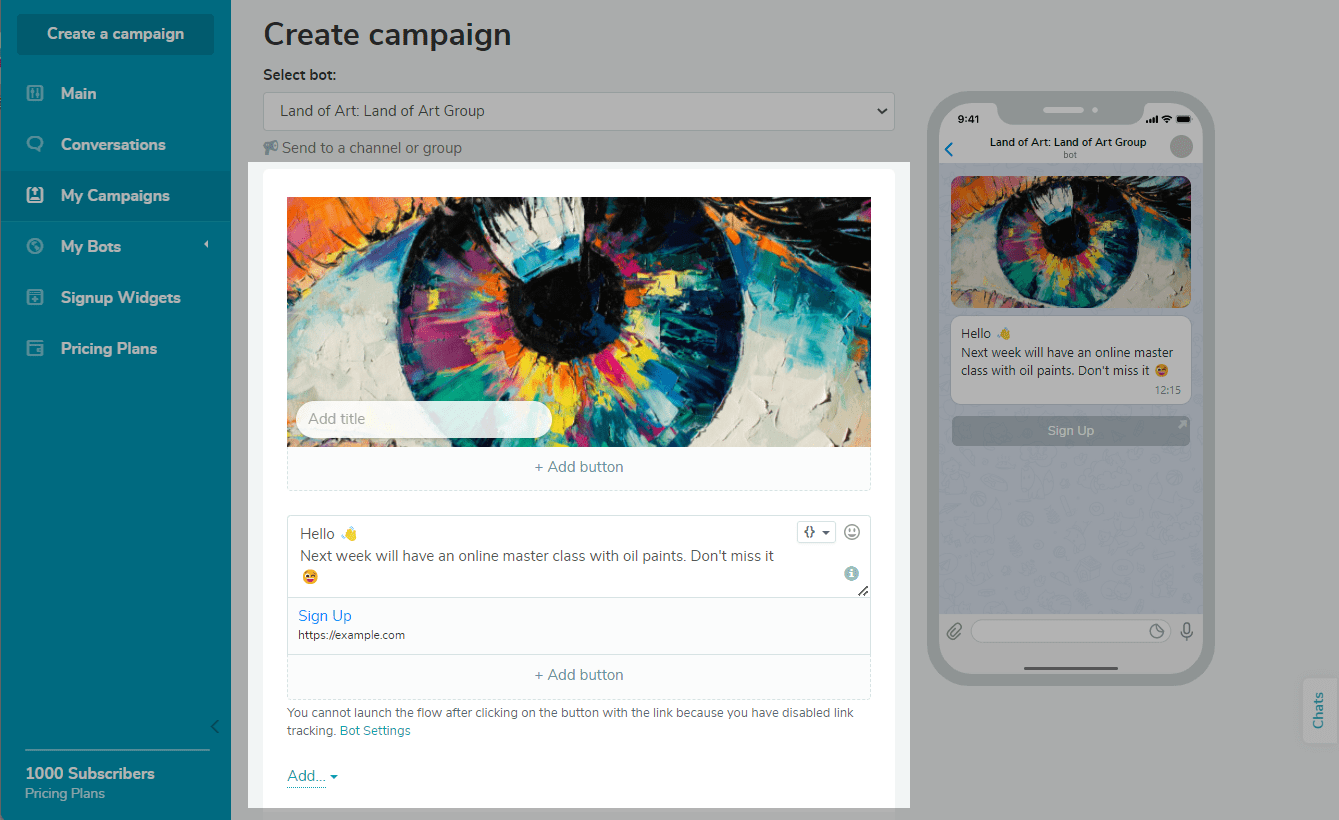
Select the group or channel where your chatbot is an admin from the drop-down list.
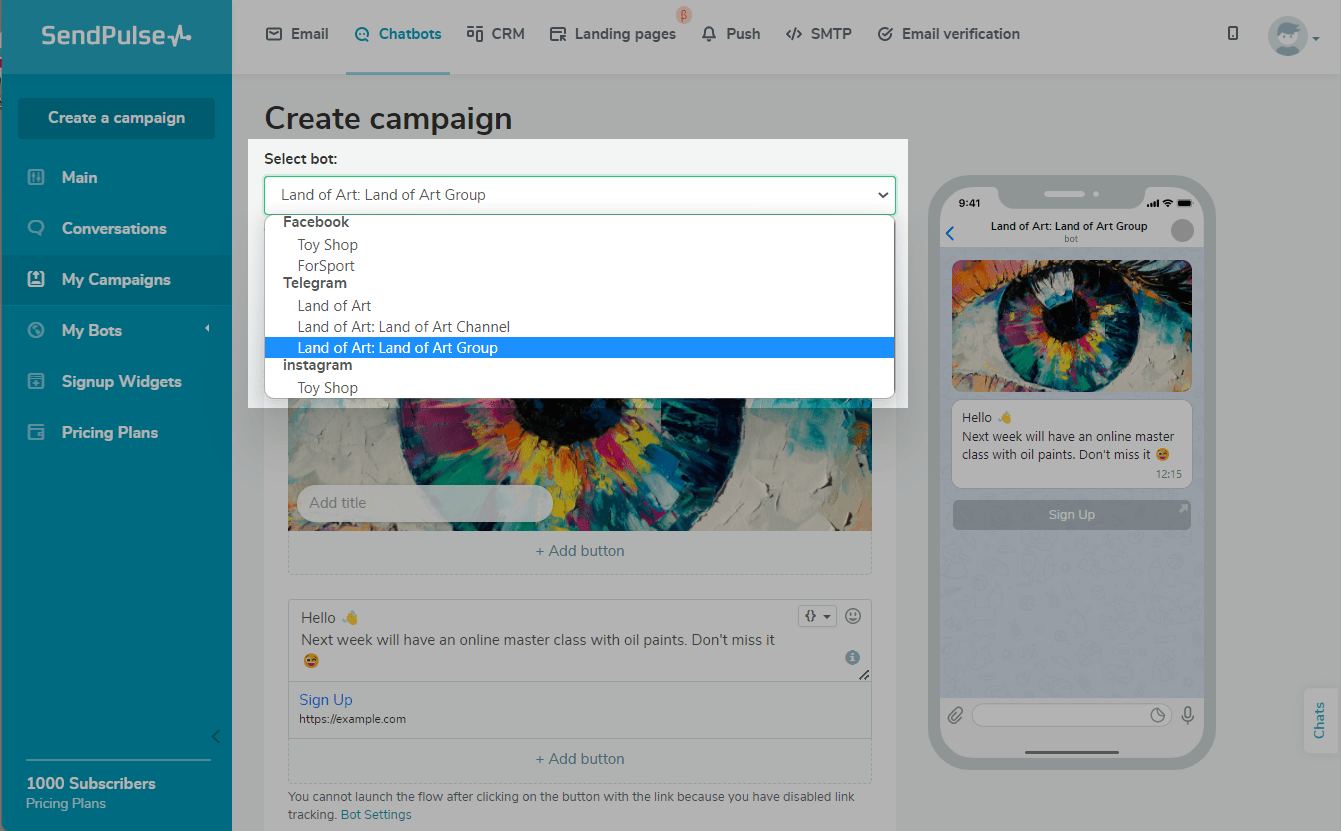
Enter your message text, and add variables and emoji. You can also add buttons, images, files, audio, video, and text.
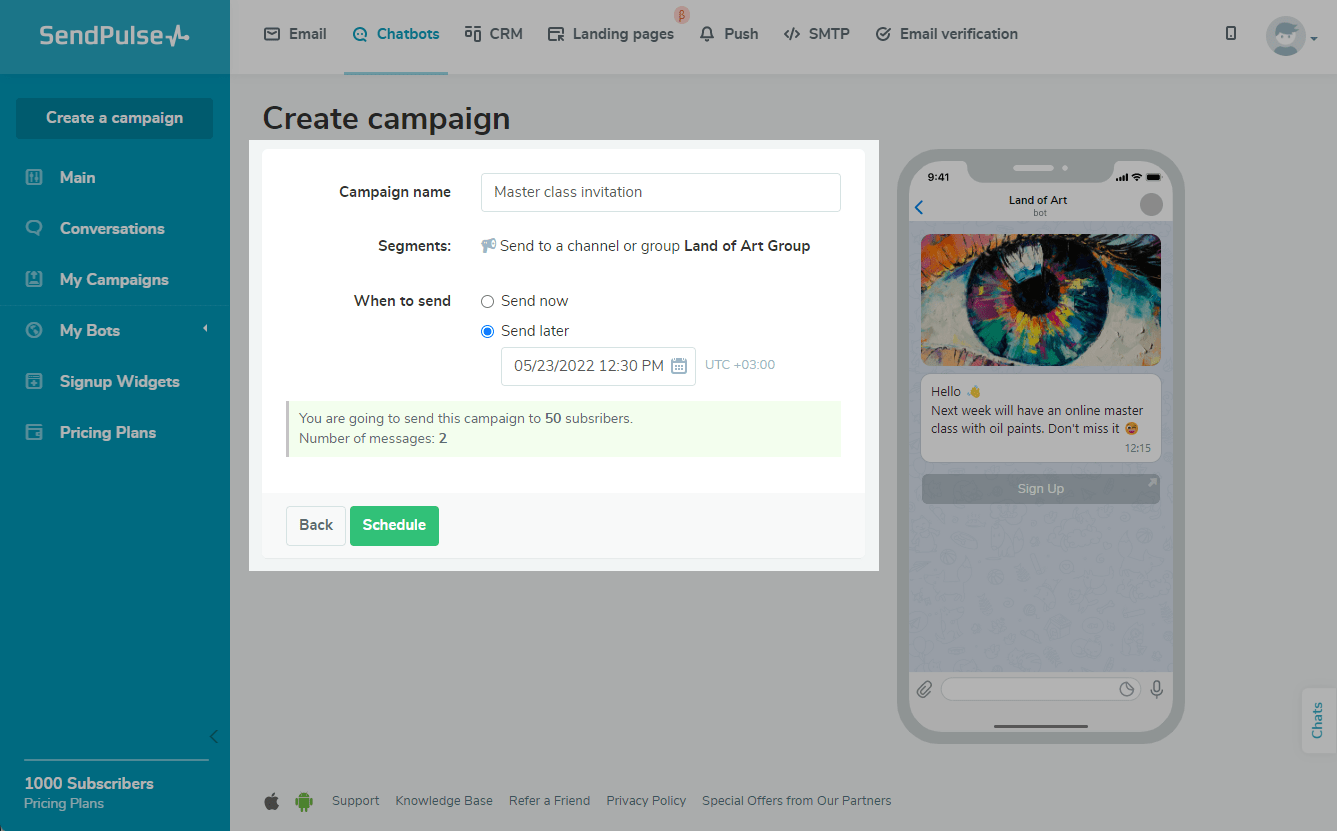
Enter your campaign name, and select the sending time. For the Send later option, specify your sending date and time.
Your current number of channel or group members to whom the campaign will be sent is displayed here.
Learn more: How to create a Telegram chatbot campaign.
How to send a message to new group members
You can send a private message to a new group or channel member under two conditions:
- The user is already subscribed to your bot.
- The user is not yet subscribed to your bot, but you have a private group or channel and the Request admin approval setting is enabled for invitation links.
Go to your Telegram chatbot, and click Create a new trigger in the list of triggers on the left.
Select the Join a Telegram group or channel checkbox in the trigger settings, and choose the group or channel with your chatbot.
Read more: How to set up Telegram chatbot flow triggers.

Last Updated: 27.12.2024
or