Create a pricing plan
SendPulse uses pricing plans to manage course payments. These plans offer flexible options, which means you can adjust the price, levels of access to course content, and types of feedback students receive.
For example, you can offer a basic plan with just video lessons and a higher-tier plan that includes homework review. This setup helps you assess demand, optimize pricing, and tailor your offer to different student needs.
Let’s talk about how to create a pricing plan and set up content access levels.
Add a pricing plan
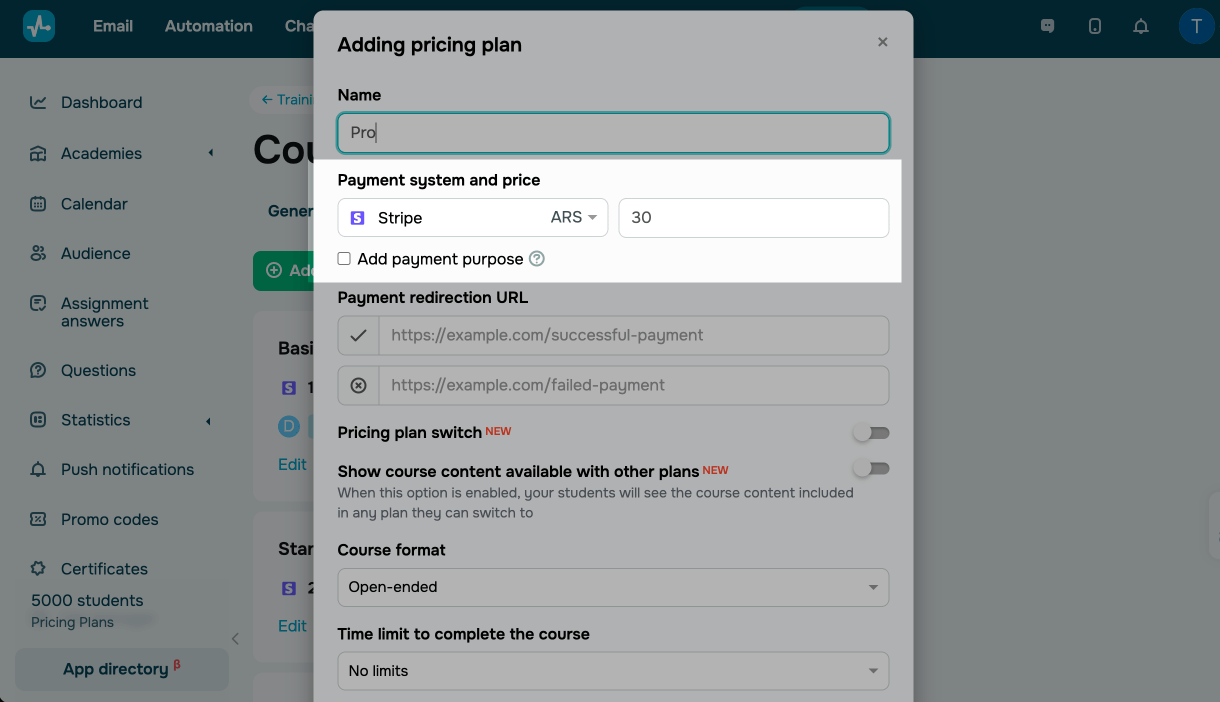
Go to the Settings tab > Pricing plans and click Add pricing plan.
Add a pricing plan name that will be visible to instructors and students.
Add a payment method
Choose a connected payment method. Set a course price using your selected currency.
Select the Add payment purpose checkbox and type in relevant information. It will be sent to your payment system for bookkeeping.
You can view and add payment methods in Account settings > Accept payments. If the payment system set in the pricing plan settings is removed from your account, the course will switch to a free pricing plan.
Read more: Accept Payments.
In the Payment redirection URL field paste the links to pages shown after successful and unsuccessful payments. Students will be redirected to these pages from the payment system.
Add a plan upgrade option
Use this option to let students upgrade their plan while taking your course. For example, they can unlock extra modules or access advanced content from a higher-tier plan. To add this option to a lesson, use the Plan element or a Button.
Turn on the Pricing plan switch toggle. Choose plans students can upgrade from and set the upgrade price.
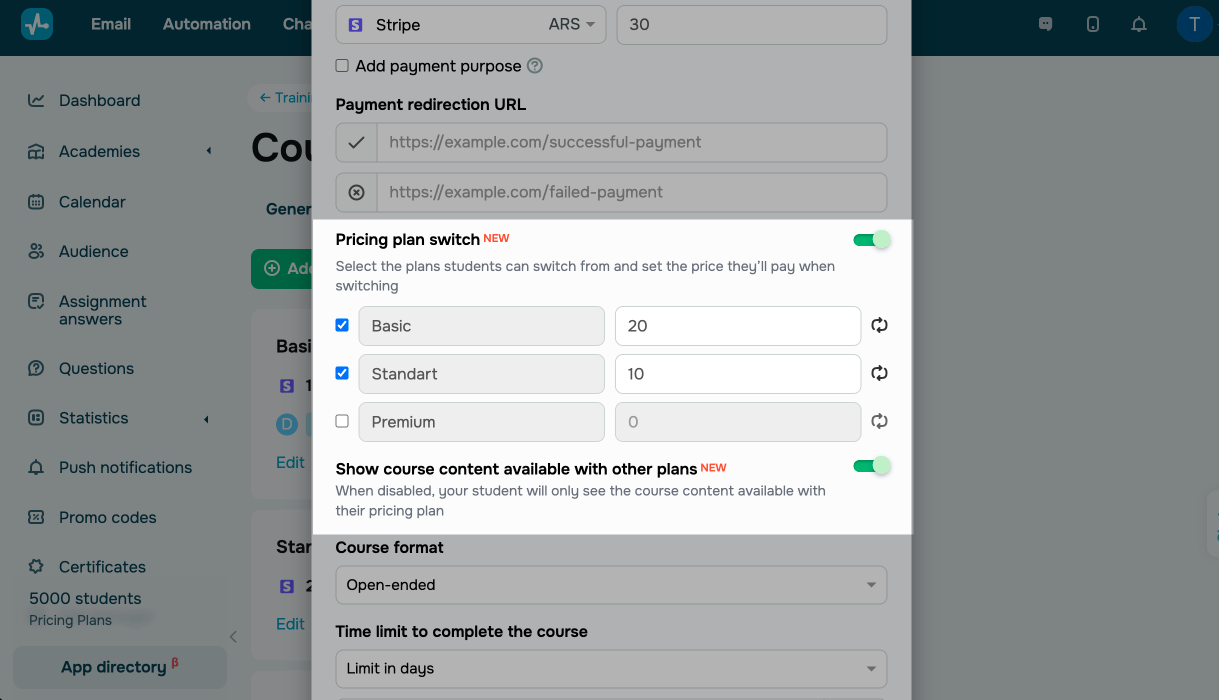
If you want to help students compare plans and make an informed choice, turn on the Show course content available with other plans toggle.
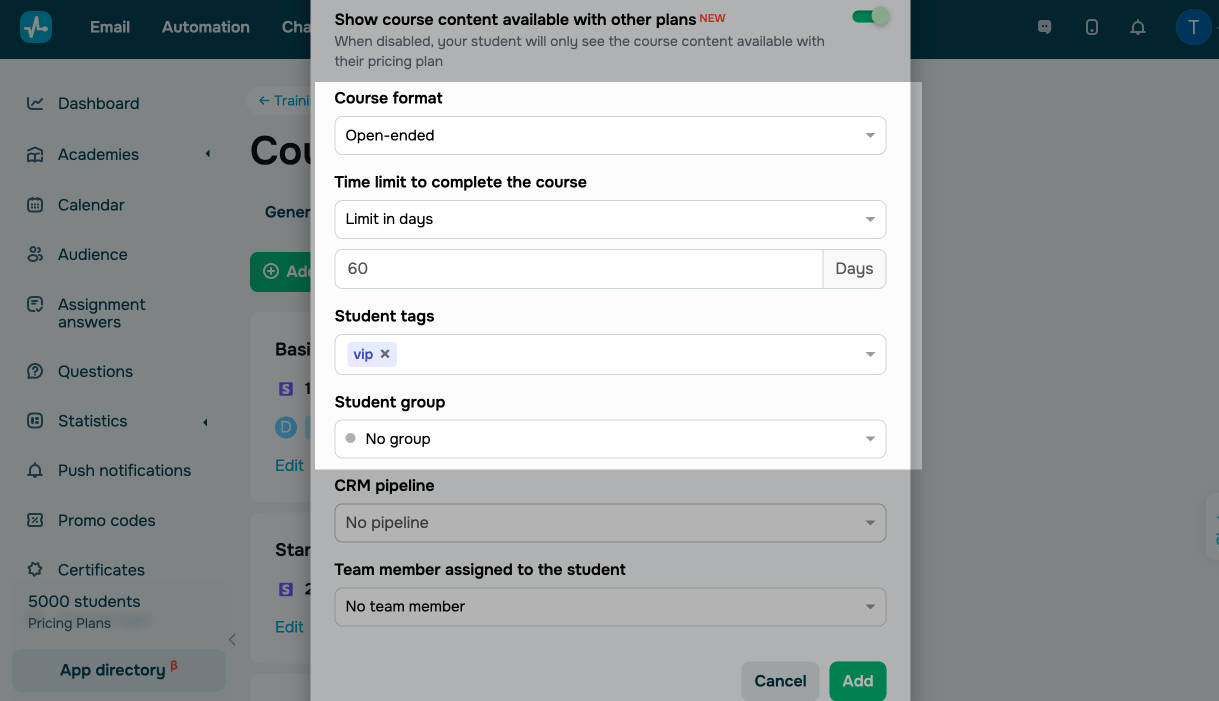
Adjust course settings and student information
Set your course completion requirements and add relevant student information:
| Course format | Select a course format:
Open-ended — students can take your course anytime. Specific dates — students can only take your course during a specific timeframe. Set the start and end date and time of your course. Select a time zone. Students will not be able to access your lessons and tests before and after these dates. Before your course starts, students will only see its description and program. Scheduled course openings and closings will appear in the Calendar tab of instructor and student accounts. |
| Time limit to complete the course | Select a course completion limit:
No limits — students have unlimited time to complete their course. Limit in days — students have a fixed number of days to complete their course. If you select this option, add the number of days during which students should complete their course from the moment of registration. The real-time countdown starts when a student enrolls in your course (for new students) or right after you save these settings (for existing students). You can limit students’ course access time from 1 to 999 calendar days. |
| Student tags | Select a student tag you’ve previously created in the CRM section and other courses. |
| Student group | Select a student group in this course that will be assigned to your student once they pay. |
Save data to the CRM system
Configure the CRM system to create a deal when a student pays for your course:
| CRM pipeline | Select a pipeline, stage, and assigned team member to create deals after student payments. |
| Deal name | Add a deal name. You can set a name for all course-related deals or a dynamic one using your linked variables: {course_name}, {date}, {time}, {first_name}, {last_name}. |
| Team member assigned to the student | Assign an instructor to students without creating a group. |
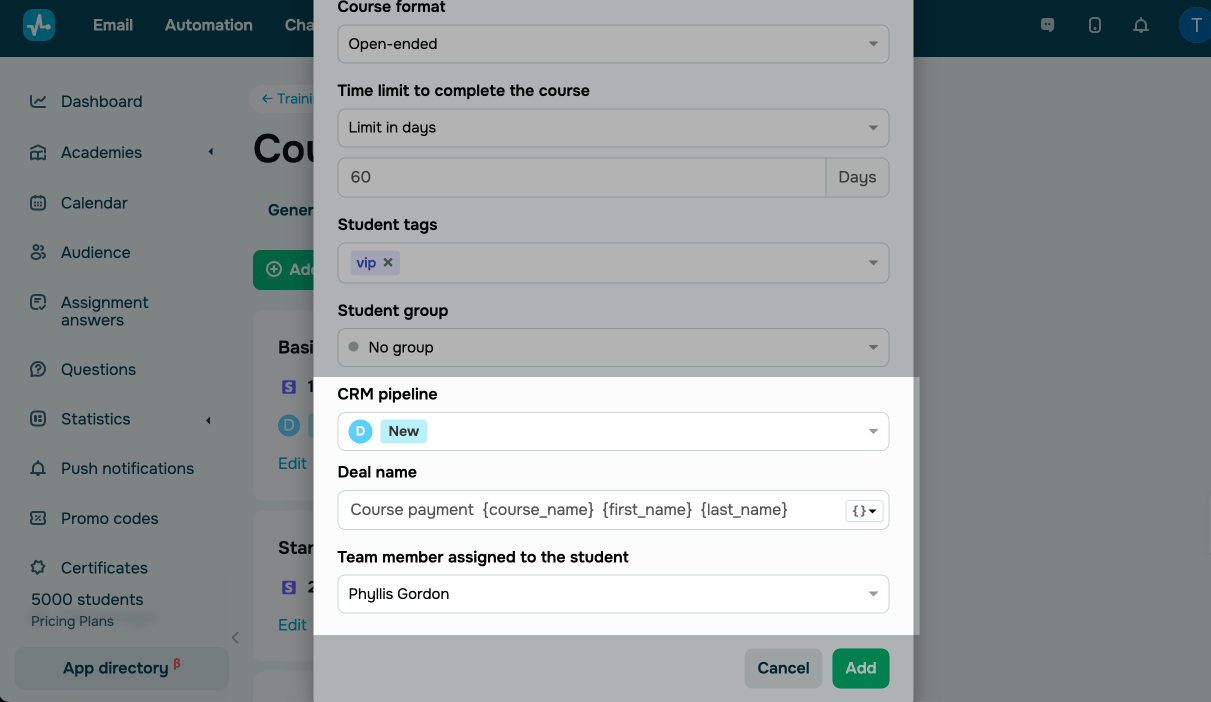
Click Add.
Activate your pricing plan
To make a pricing plan available to students, turn on its toggle.
Courses created before May 28, 2025, cannot be changed to free or paid once activated.

Customize course access settings
Give students access to course content based on their pricing plan. Extra features in higher-tier plans will encourage students to upgrade. To give you an idea, you can offer personalized support or exclusive content on your premium plan.
In the Course access tab, set content access rights in each pricing plan.
| Student account | Students will have access to the Question tab, where they can view answers to their questions about your course. However, they will not be able to ask questions within individual lessons.
This setup allows you to offer personalized support exclusively within paid pricing plans. Students who switch to plans that no longer include this feature can still view their previous questions and instructors’ answers in the Questions tab. However, they won’t be able to ask new questions. |
| Course content |
Students will have access to all course sections, lessons, tests, and certificates. Once you revoke access to content, student progress will be reset and cannot be recovered. The system will delete submitted assignments, test results, and certificates. Even if you restore content access, your student will need to take the course again from the beginning. |

Click Save.
Last Updated: 23.06.2025
or