Course actions
With the help of the Action element, you can make the contact undergo different processes when they get to the element.
To identify a contact in the service, you need the email or phone variable.
Unsubscribed contacts can go through all flow elements except the Email element. When the system verifies email addresses, it processes the following types of unsubscriptions: Unsubscribe from the entire service, Unsubscribe from a category, and Unsubscribe from a specific flow.
If you use the Launch for mailing list option, contacts who unsubscribed from all campaigns will not be added to your flow start, and contacts who unsubscribed from this category or this flow will go further down your flow, skipping the Email elements.
Add element
Drag the Action element, and select one of the following actions from the Email category.
You can also rename your element to distinguish it from others, or add a comment for your team. Click Element name and enter up to 253 characters in the field. Once you save the settings, the new name will appear in a pop-up window when hovering over the element in the builder.
Select an action
Choose what to do with contact data.
You can select only an active course in the Action element.
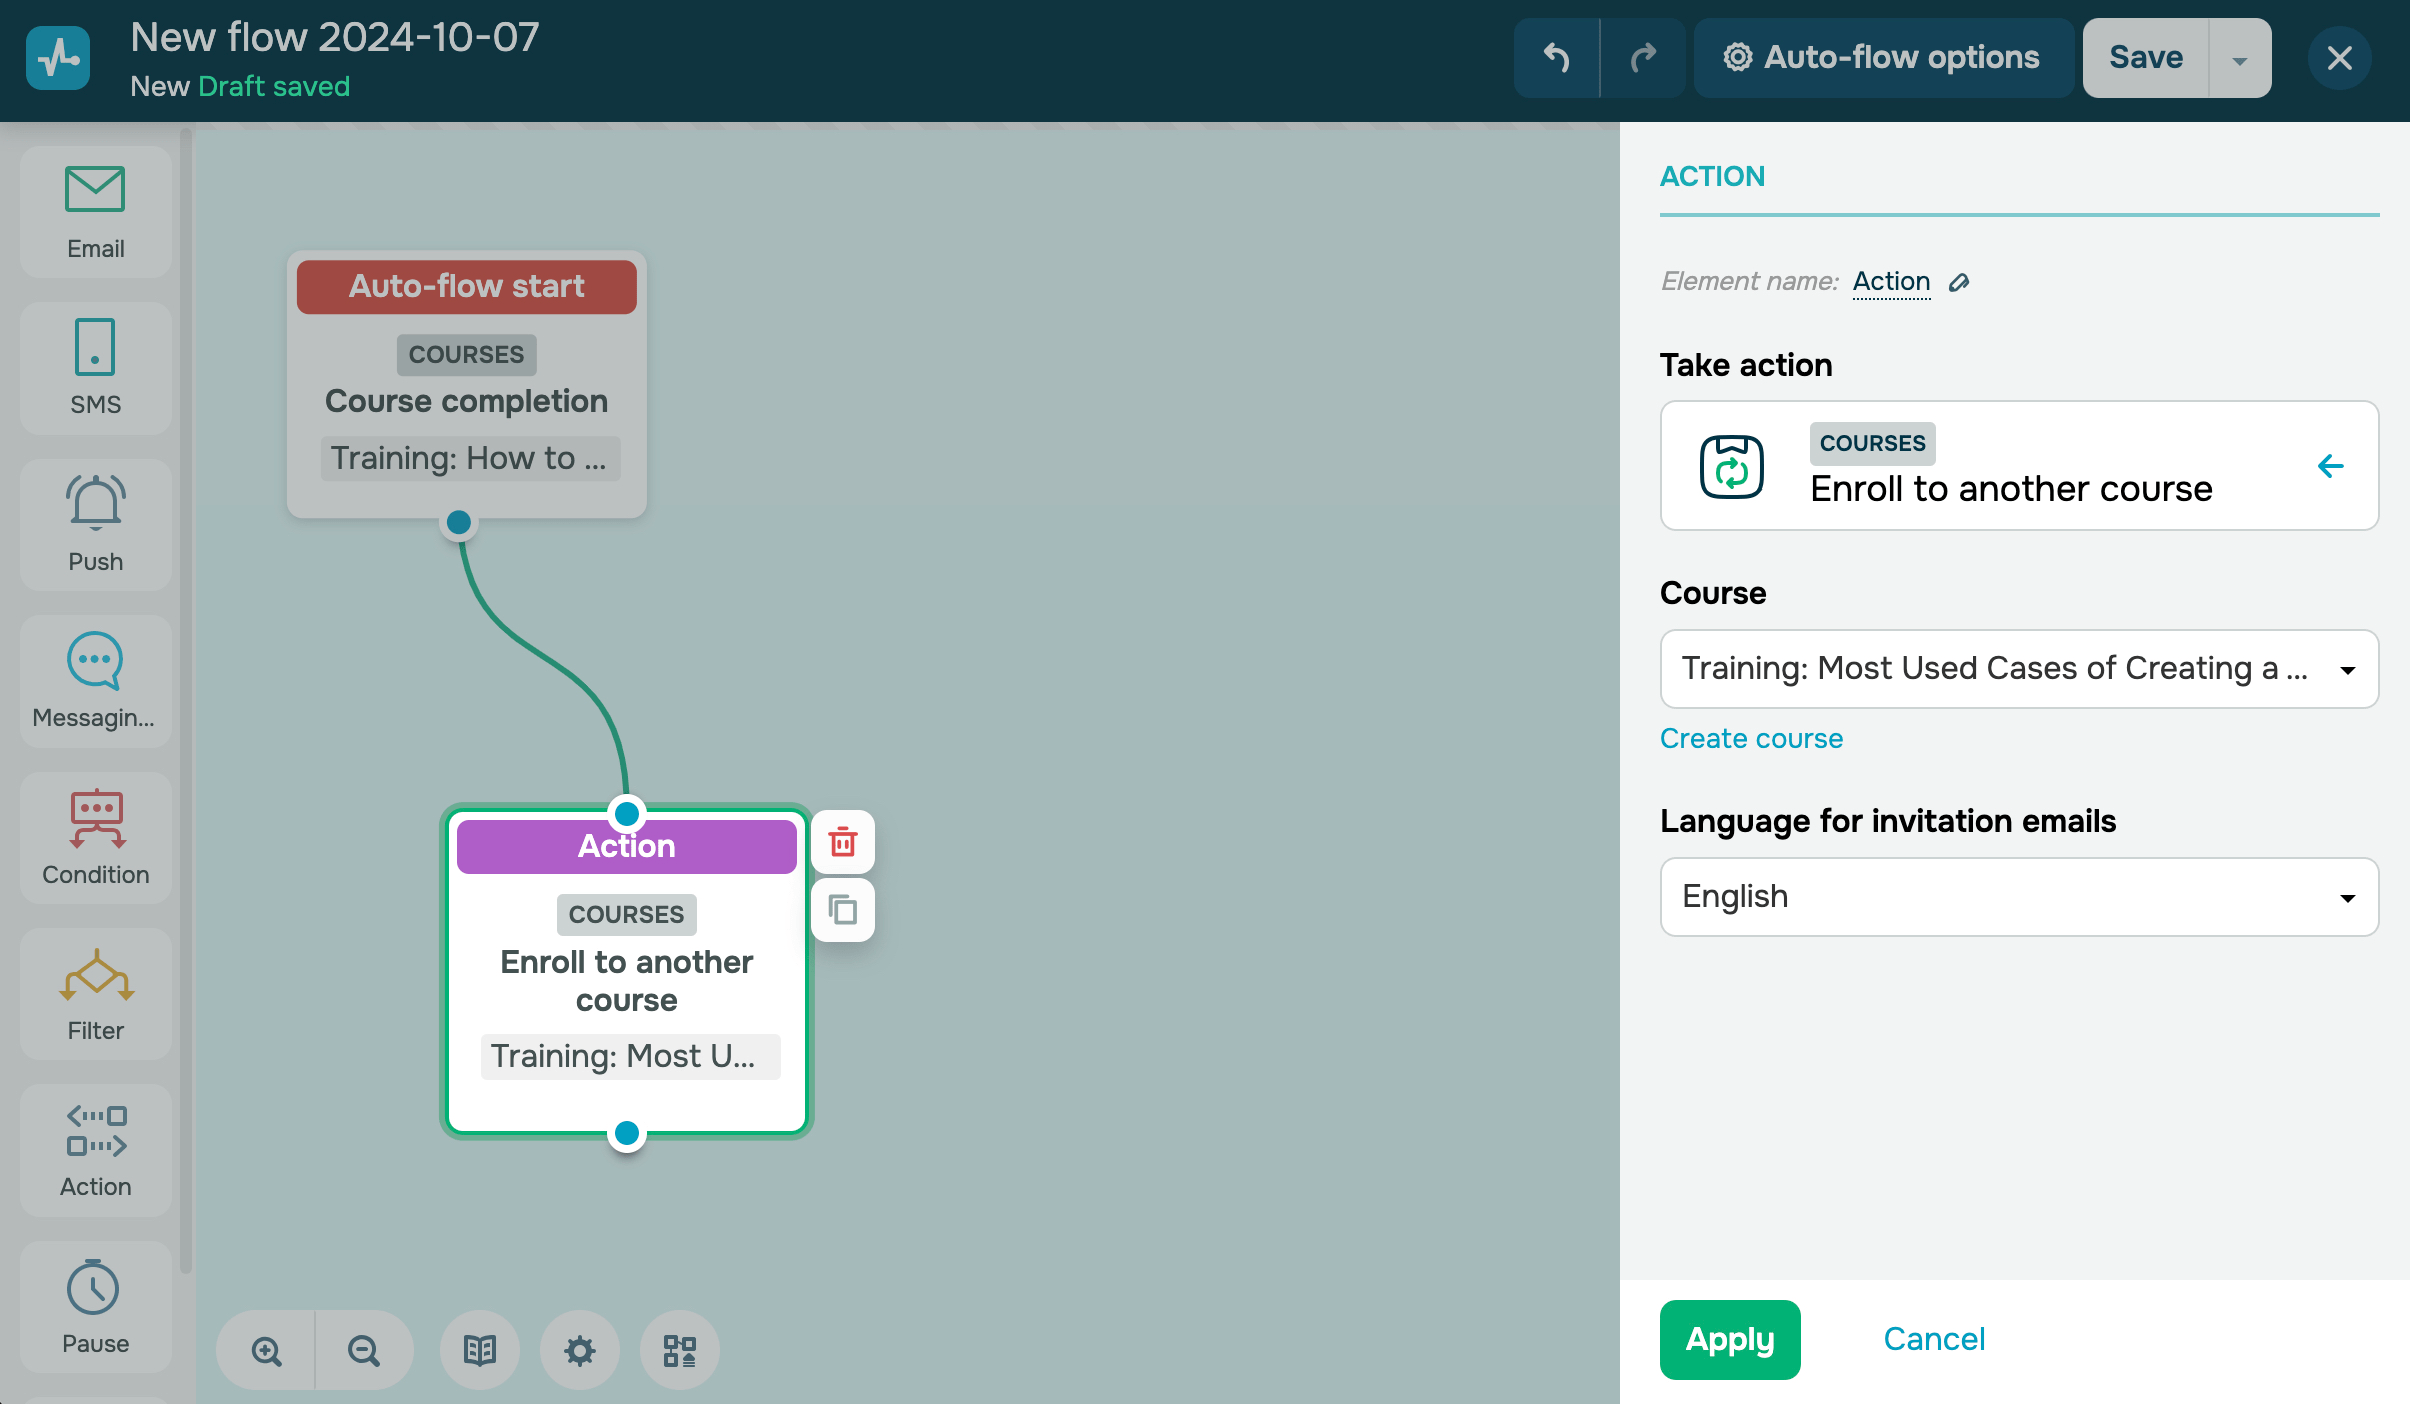
Enroll in another course
Enrolls students in the course. If a student is enrolled in other courses, they will be automatically enrolled in the one you select. This course will be displayed in the list of courses in students’ accounts.
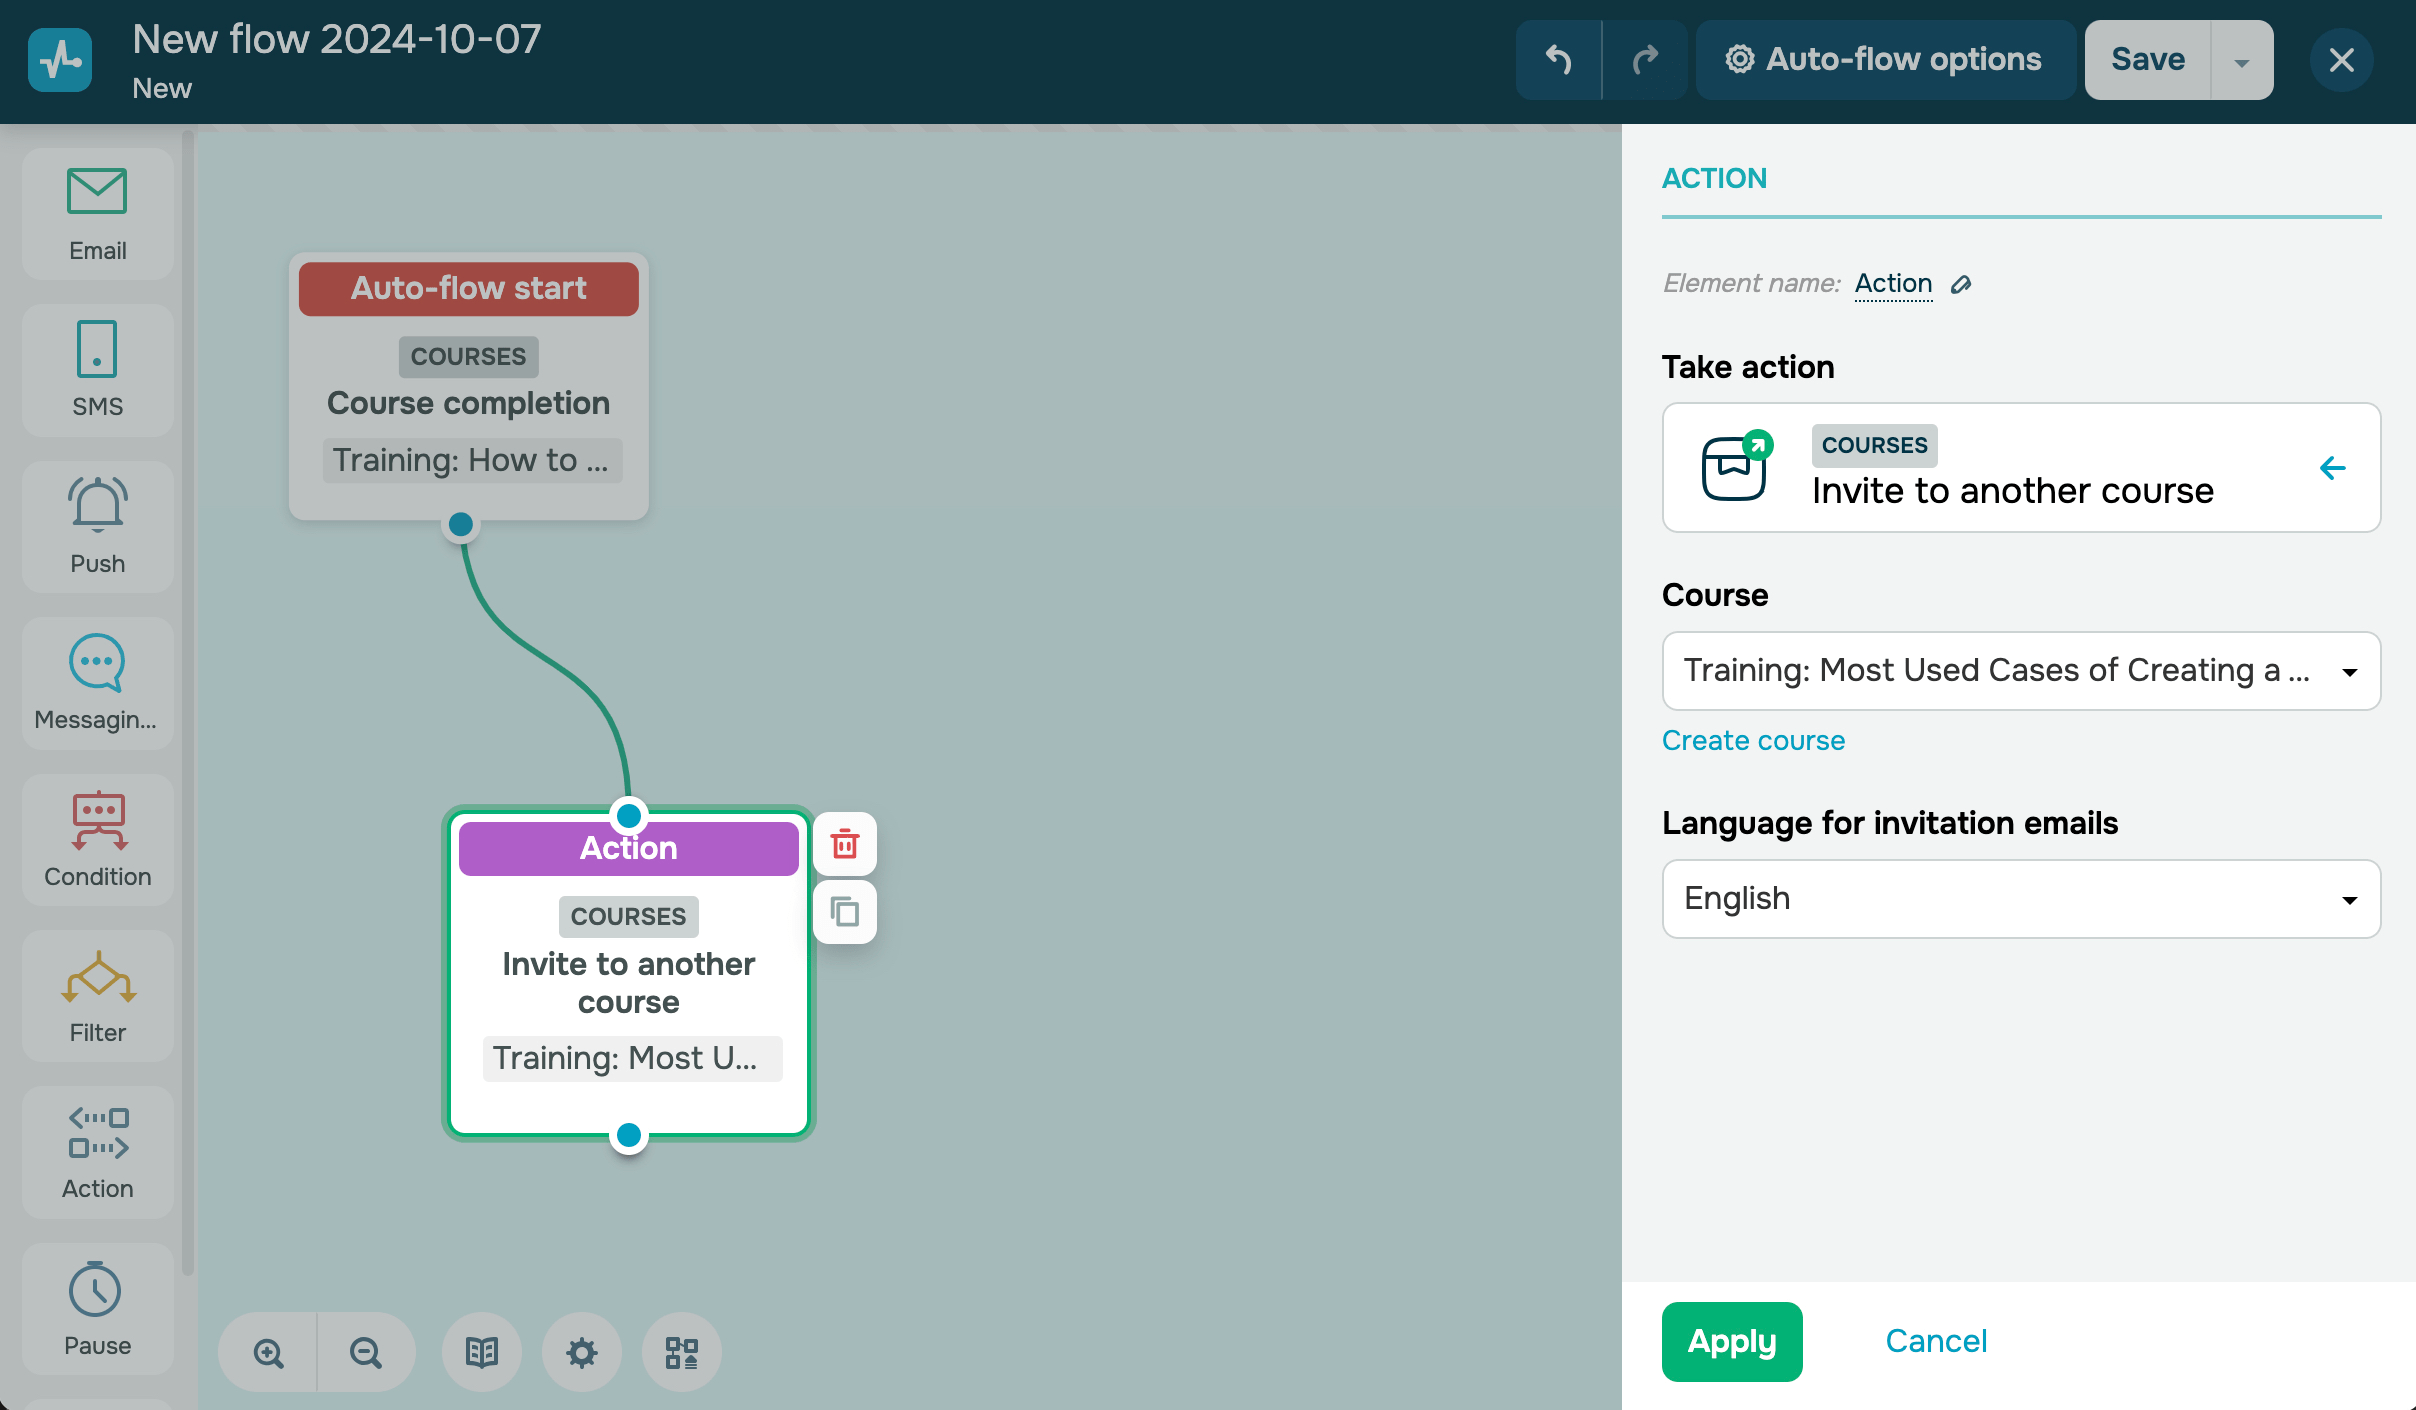
Invite to another course
Sends a student an invitation to join a course. After the student confirms your invitation, they can enroll in your course and start studying.
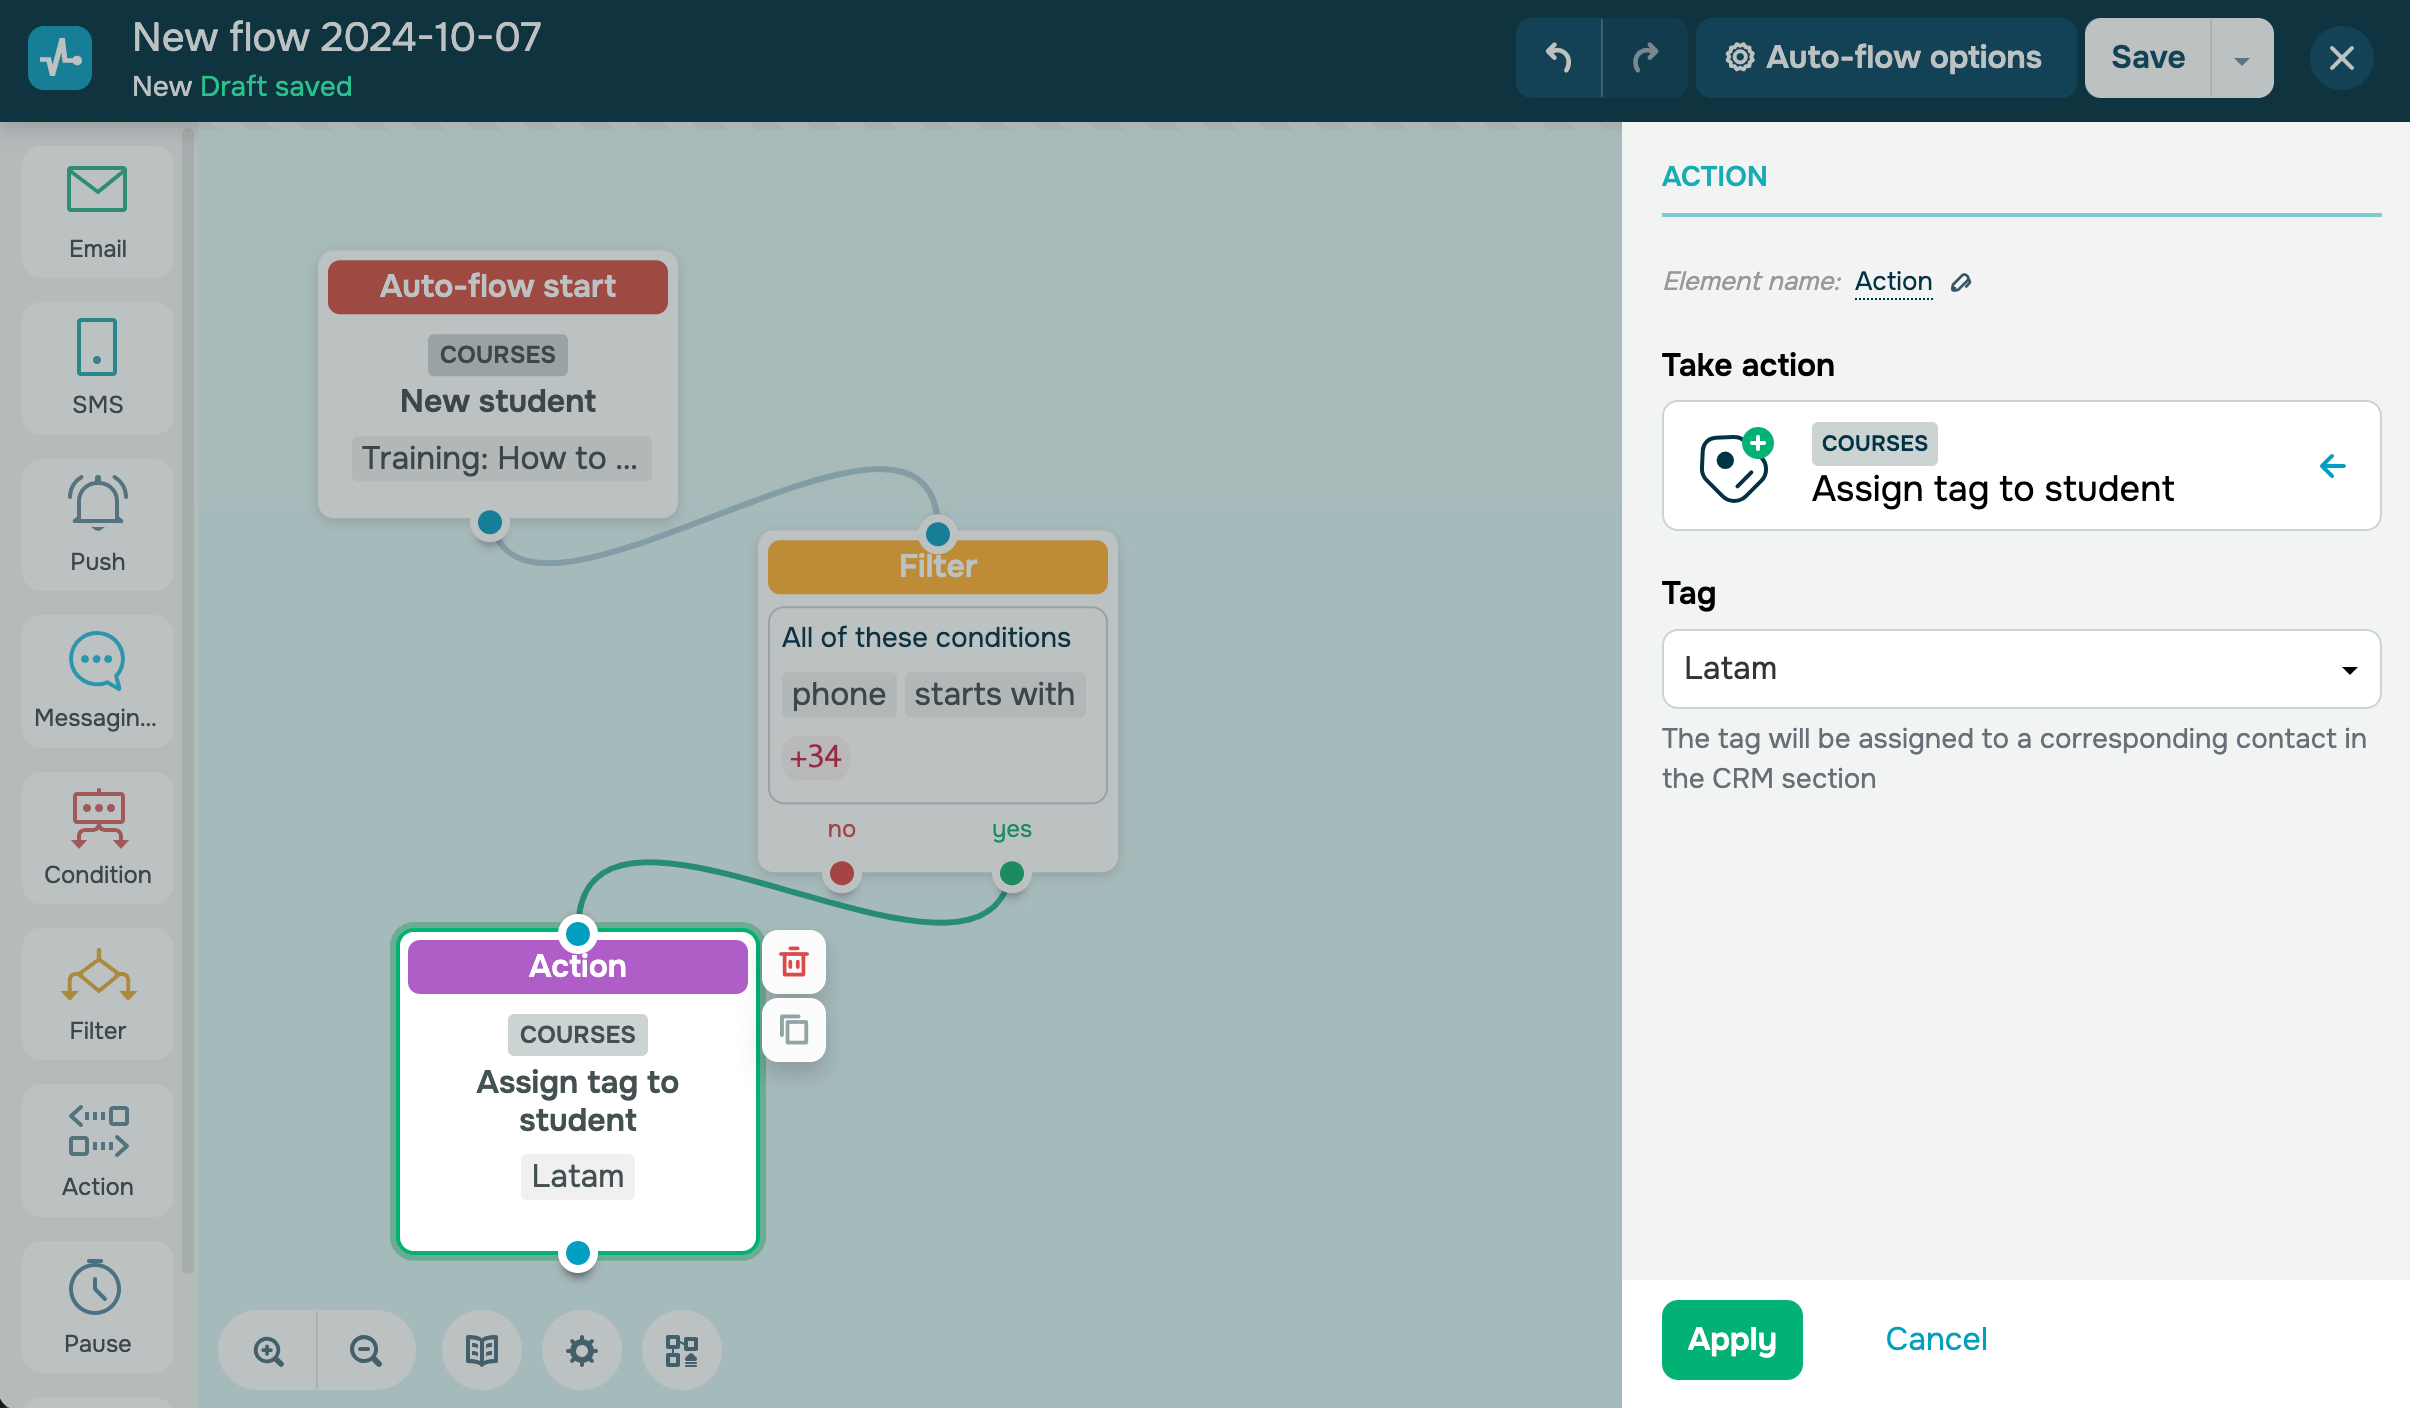
Assign tag to student
Adds a tag to a contact in CRM and a student in Courses. For example, when a student goes through a specific branch of your scenario, you can assign a tag to segment contacts and personalize your communication with them.
If you want to assign a tag to a student, then your flow start element should be an Course trigger.
You can select an existing tag in CRM and Courses.
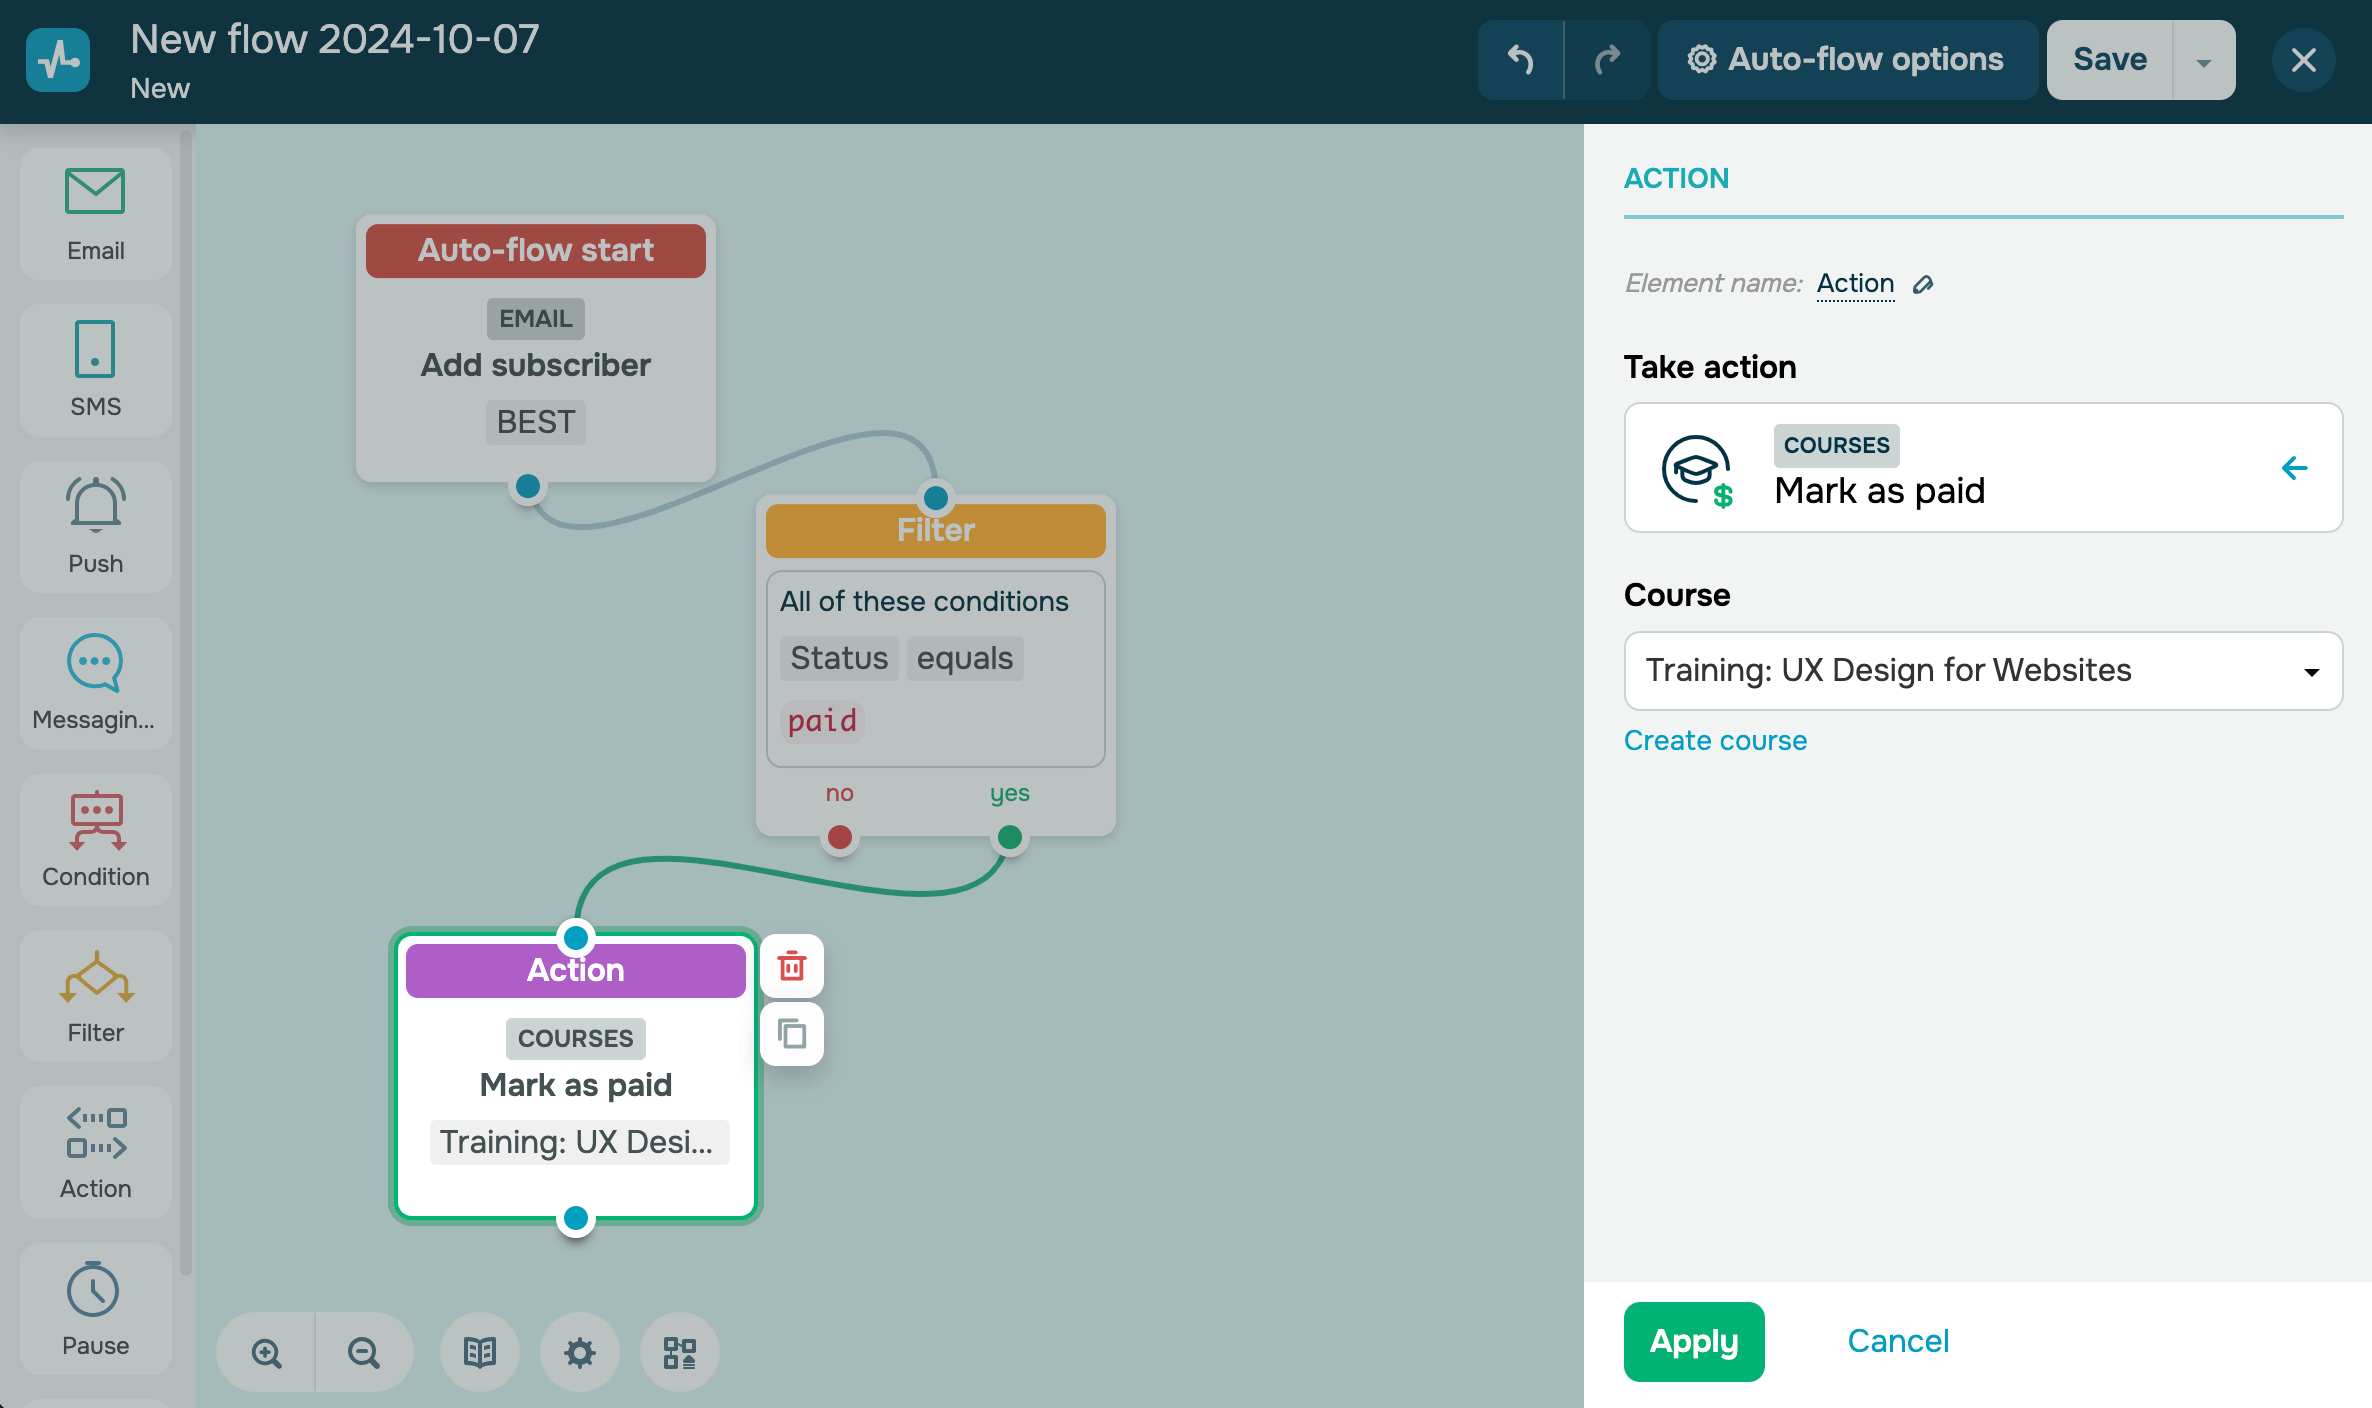
Mark as paid
Changes a payment status to Paid in the Students section. For example, if you received a payment not via a selected payment system or provided students with free course access, you can mark them as Paid to allow them to start taking your course.
You can select only a paid course. If you change a payment status manually, the flow with the Receive students’ payment trigger will not be launched.
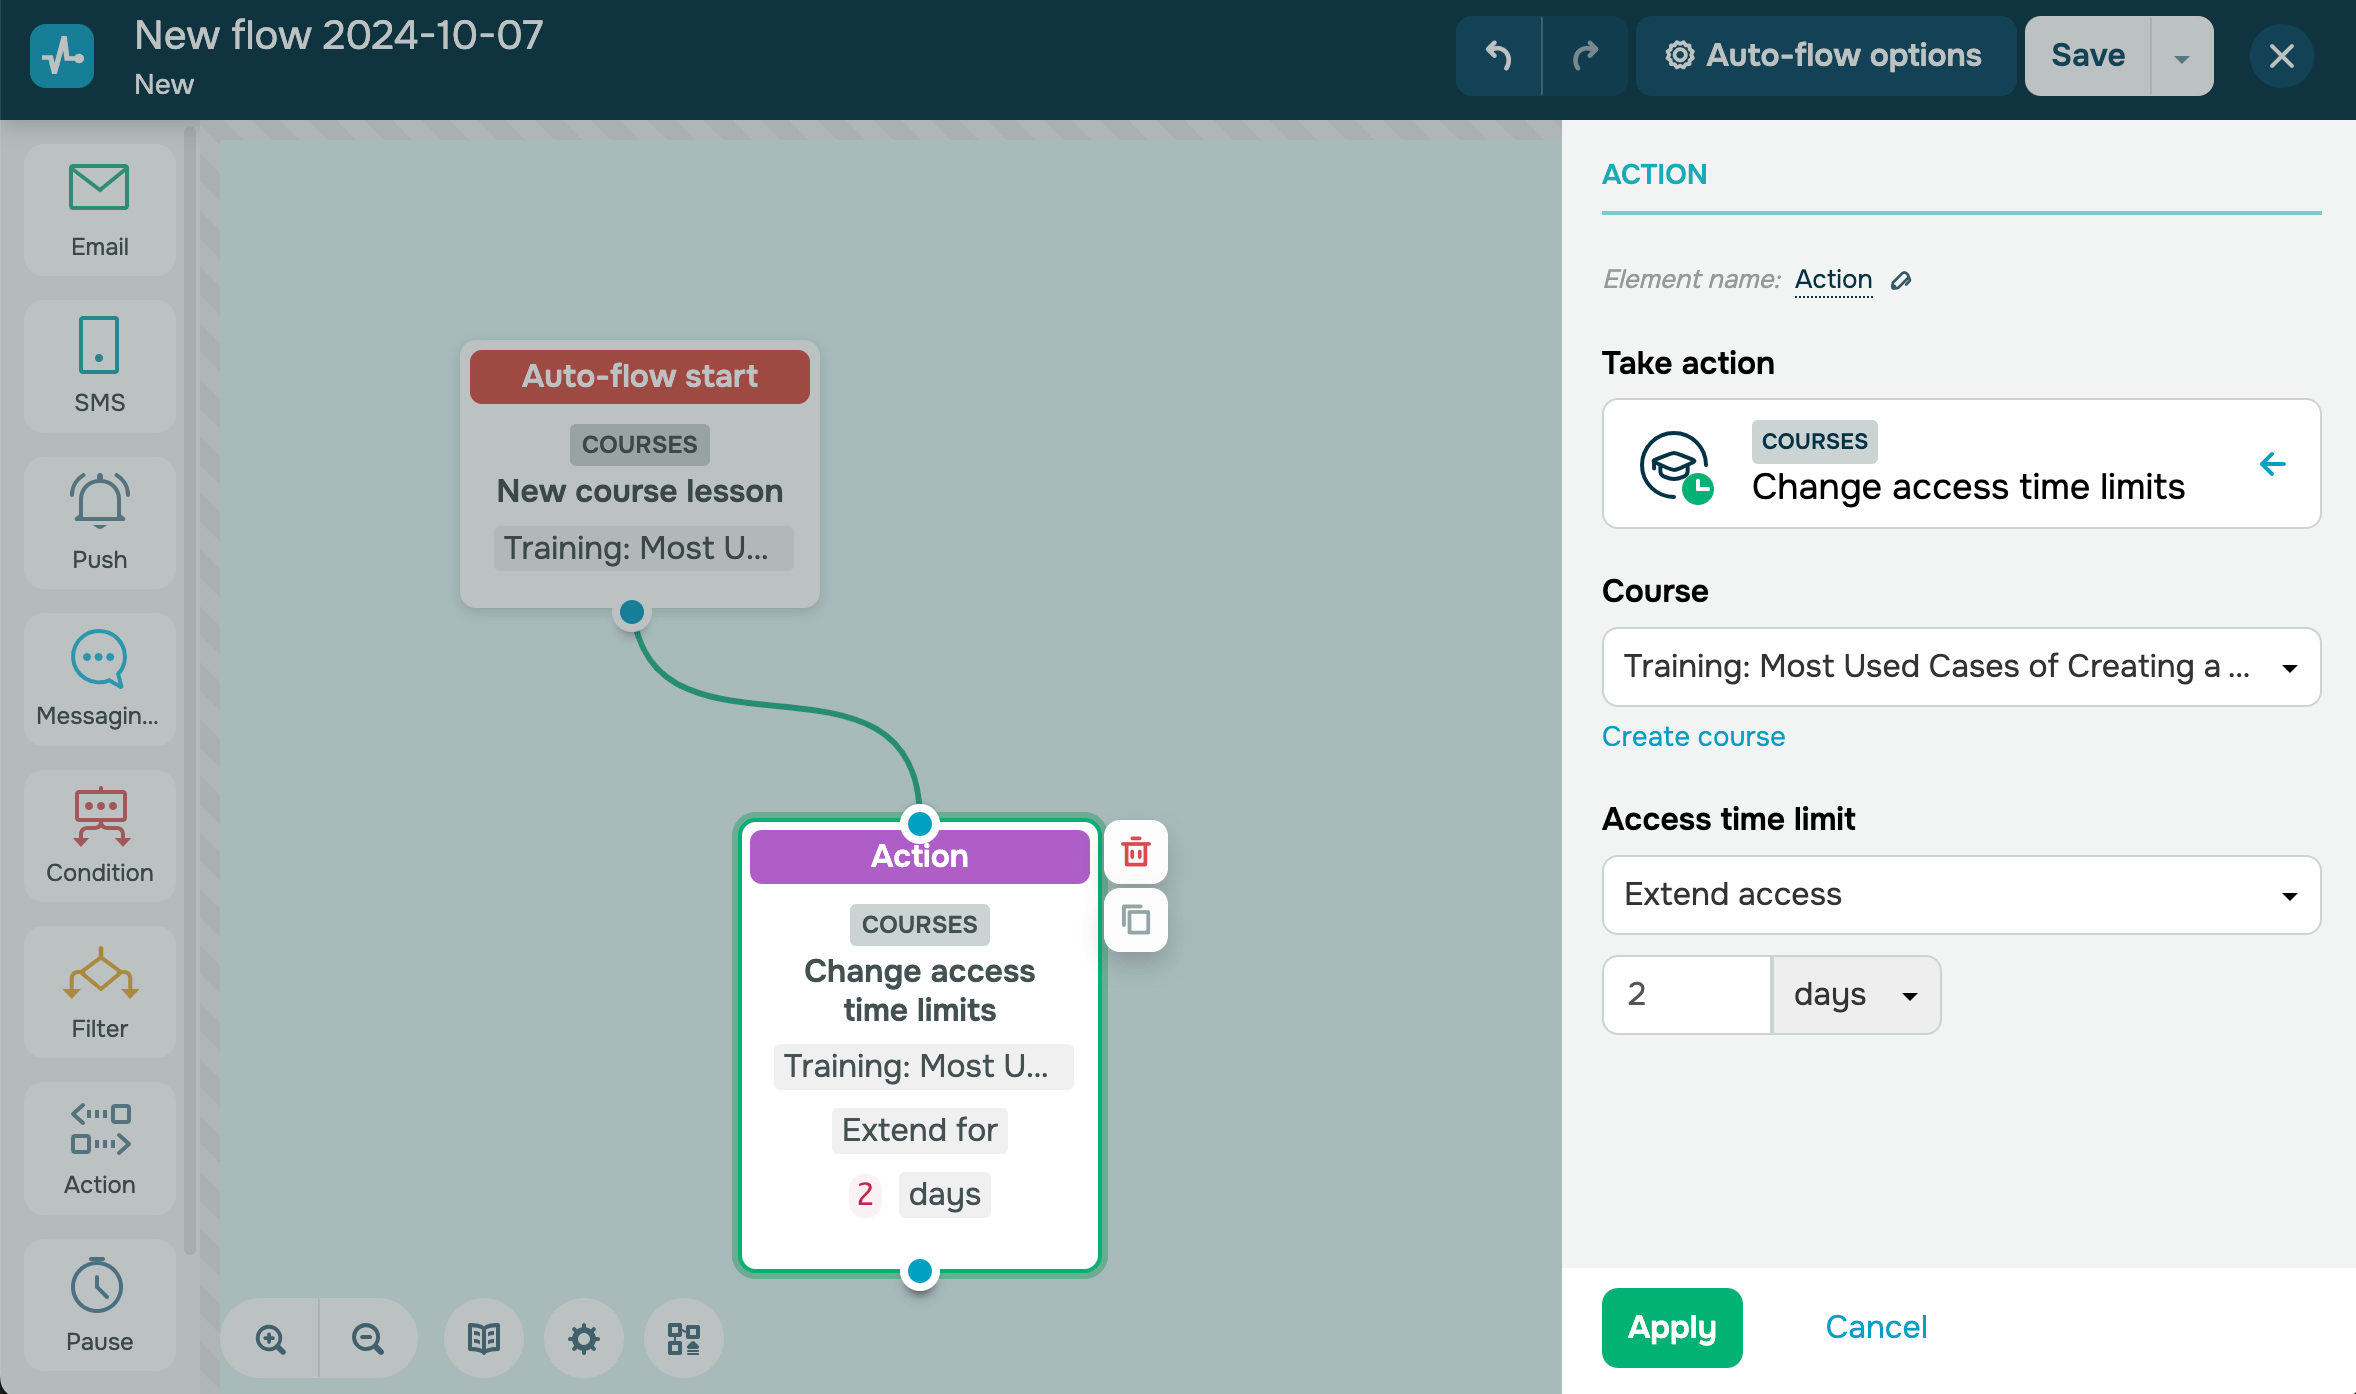
Change access time limits
Use this option to change a student’s course access limits. Select a course and a time period when students can complete it:
| No time limits | Removes course completion limits. Only the limits you set in your course settings will apply. |
| Until date | Requires students to complete your course until the date you select. Their course access will be removed after this date. |
| Extend access | Extends course completion limits. If you select this option, specify the extension period. |
| Close access | Removes course access.
In student accounts, users will be able to see your course in the list but won’t be able to view lessons, complete tasks, or interact with it in any way. If students have met course completion criteria and received a certificate, they will be able to download it. In instructor accounts, all course progress is saved, and access can be renewed. |
*You can limit a student's access to your course for up to 180 days, starting from when they reach your Action element.
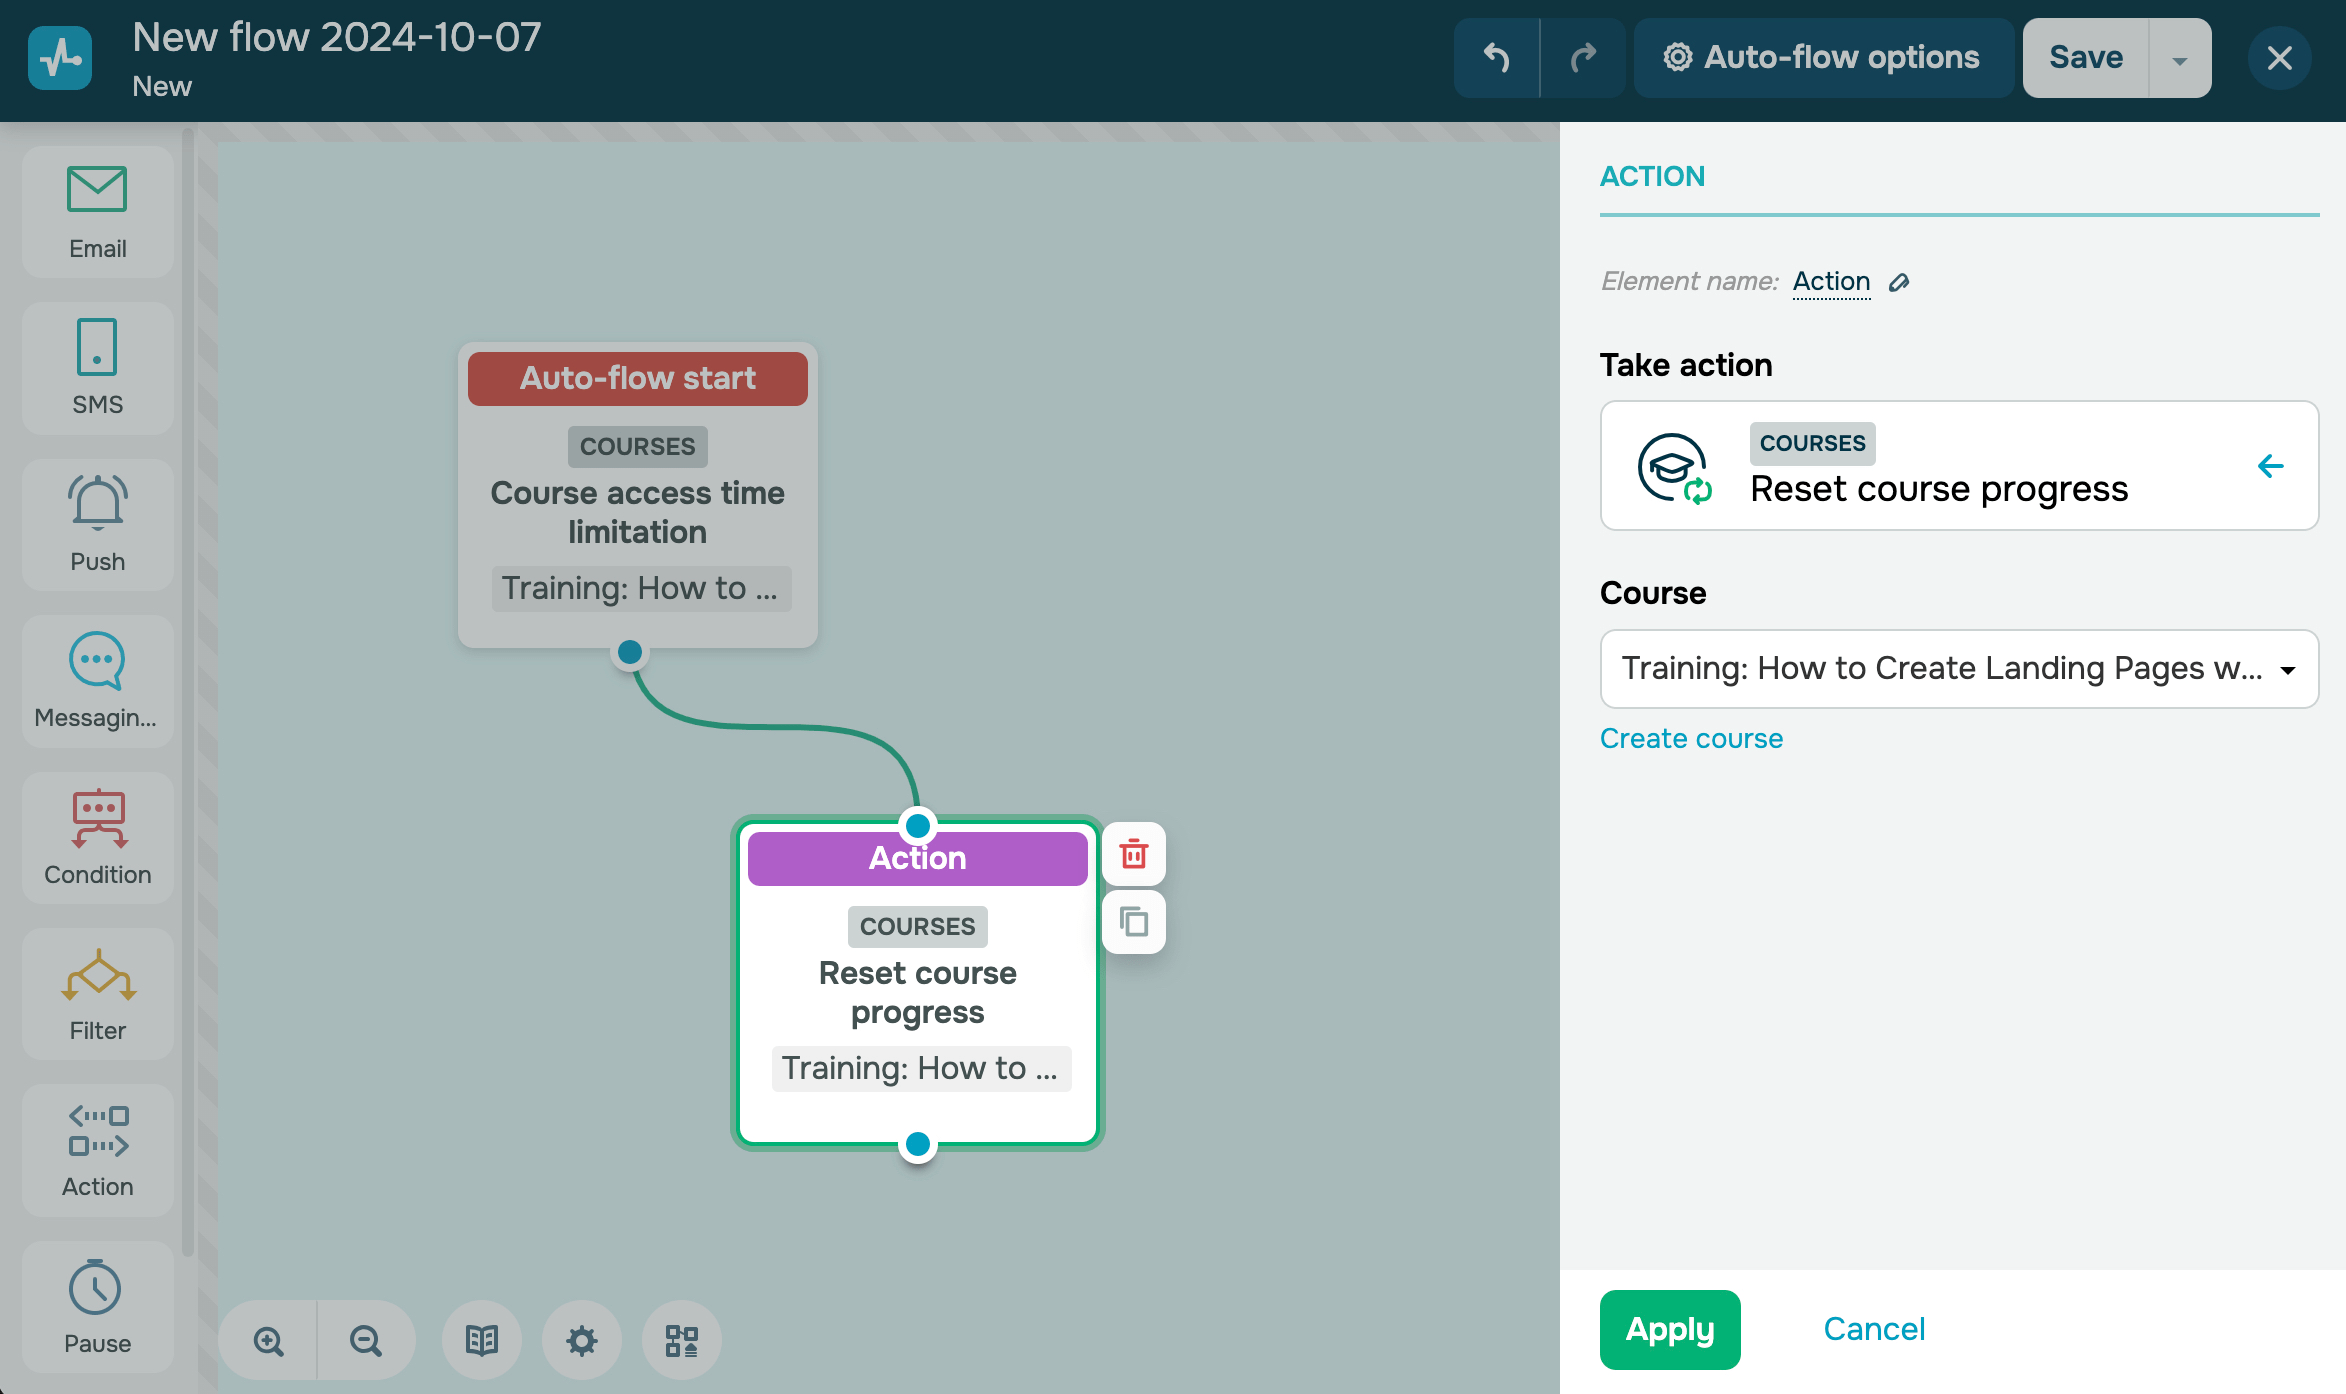
Reset course progress
Once you reset a student’s course progress, they will be removed from the Successfully completed course list, and their test scores and lesson completion progress will be erased.
This student's course limitations will align with your course settings even if they did not have access to it earlier. Paying students will move to the Paid status.
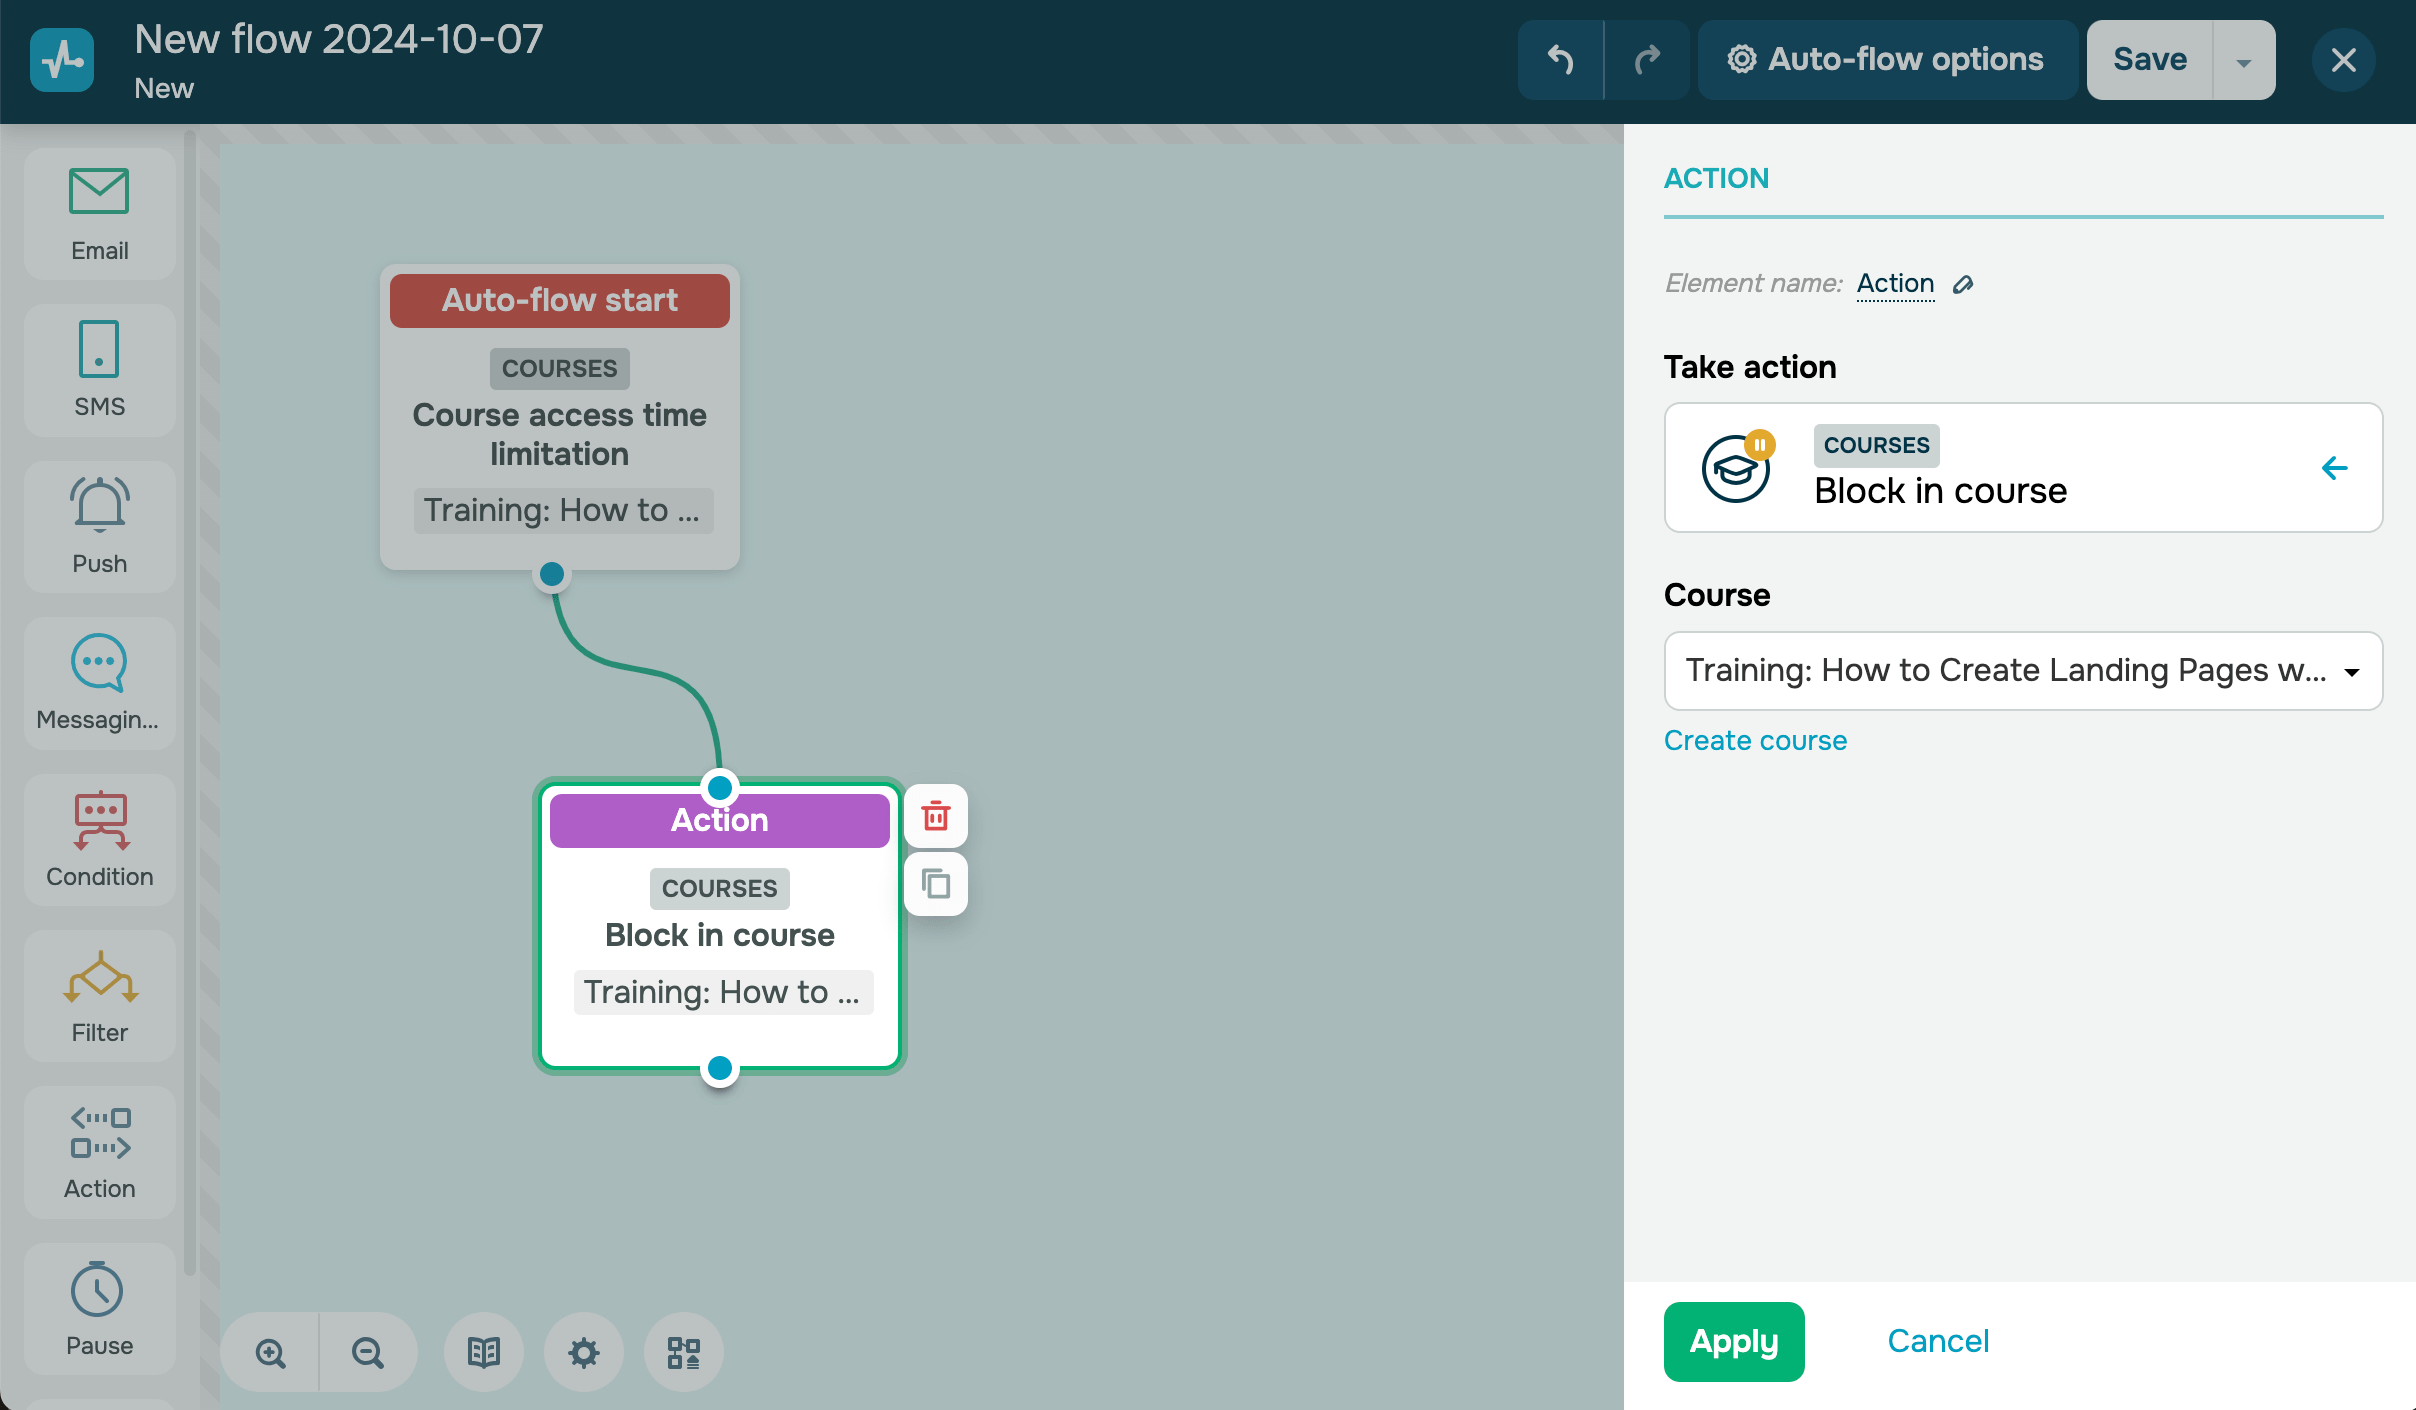
Block in course
Blocks a student in a course. A blocked student cannot register the second time using the same email address.
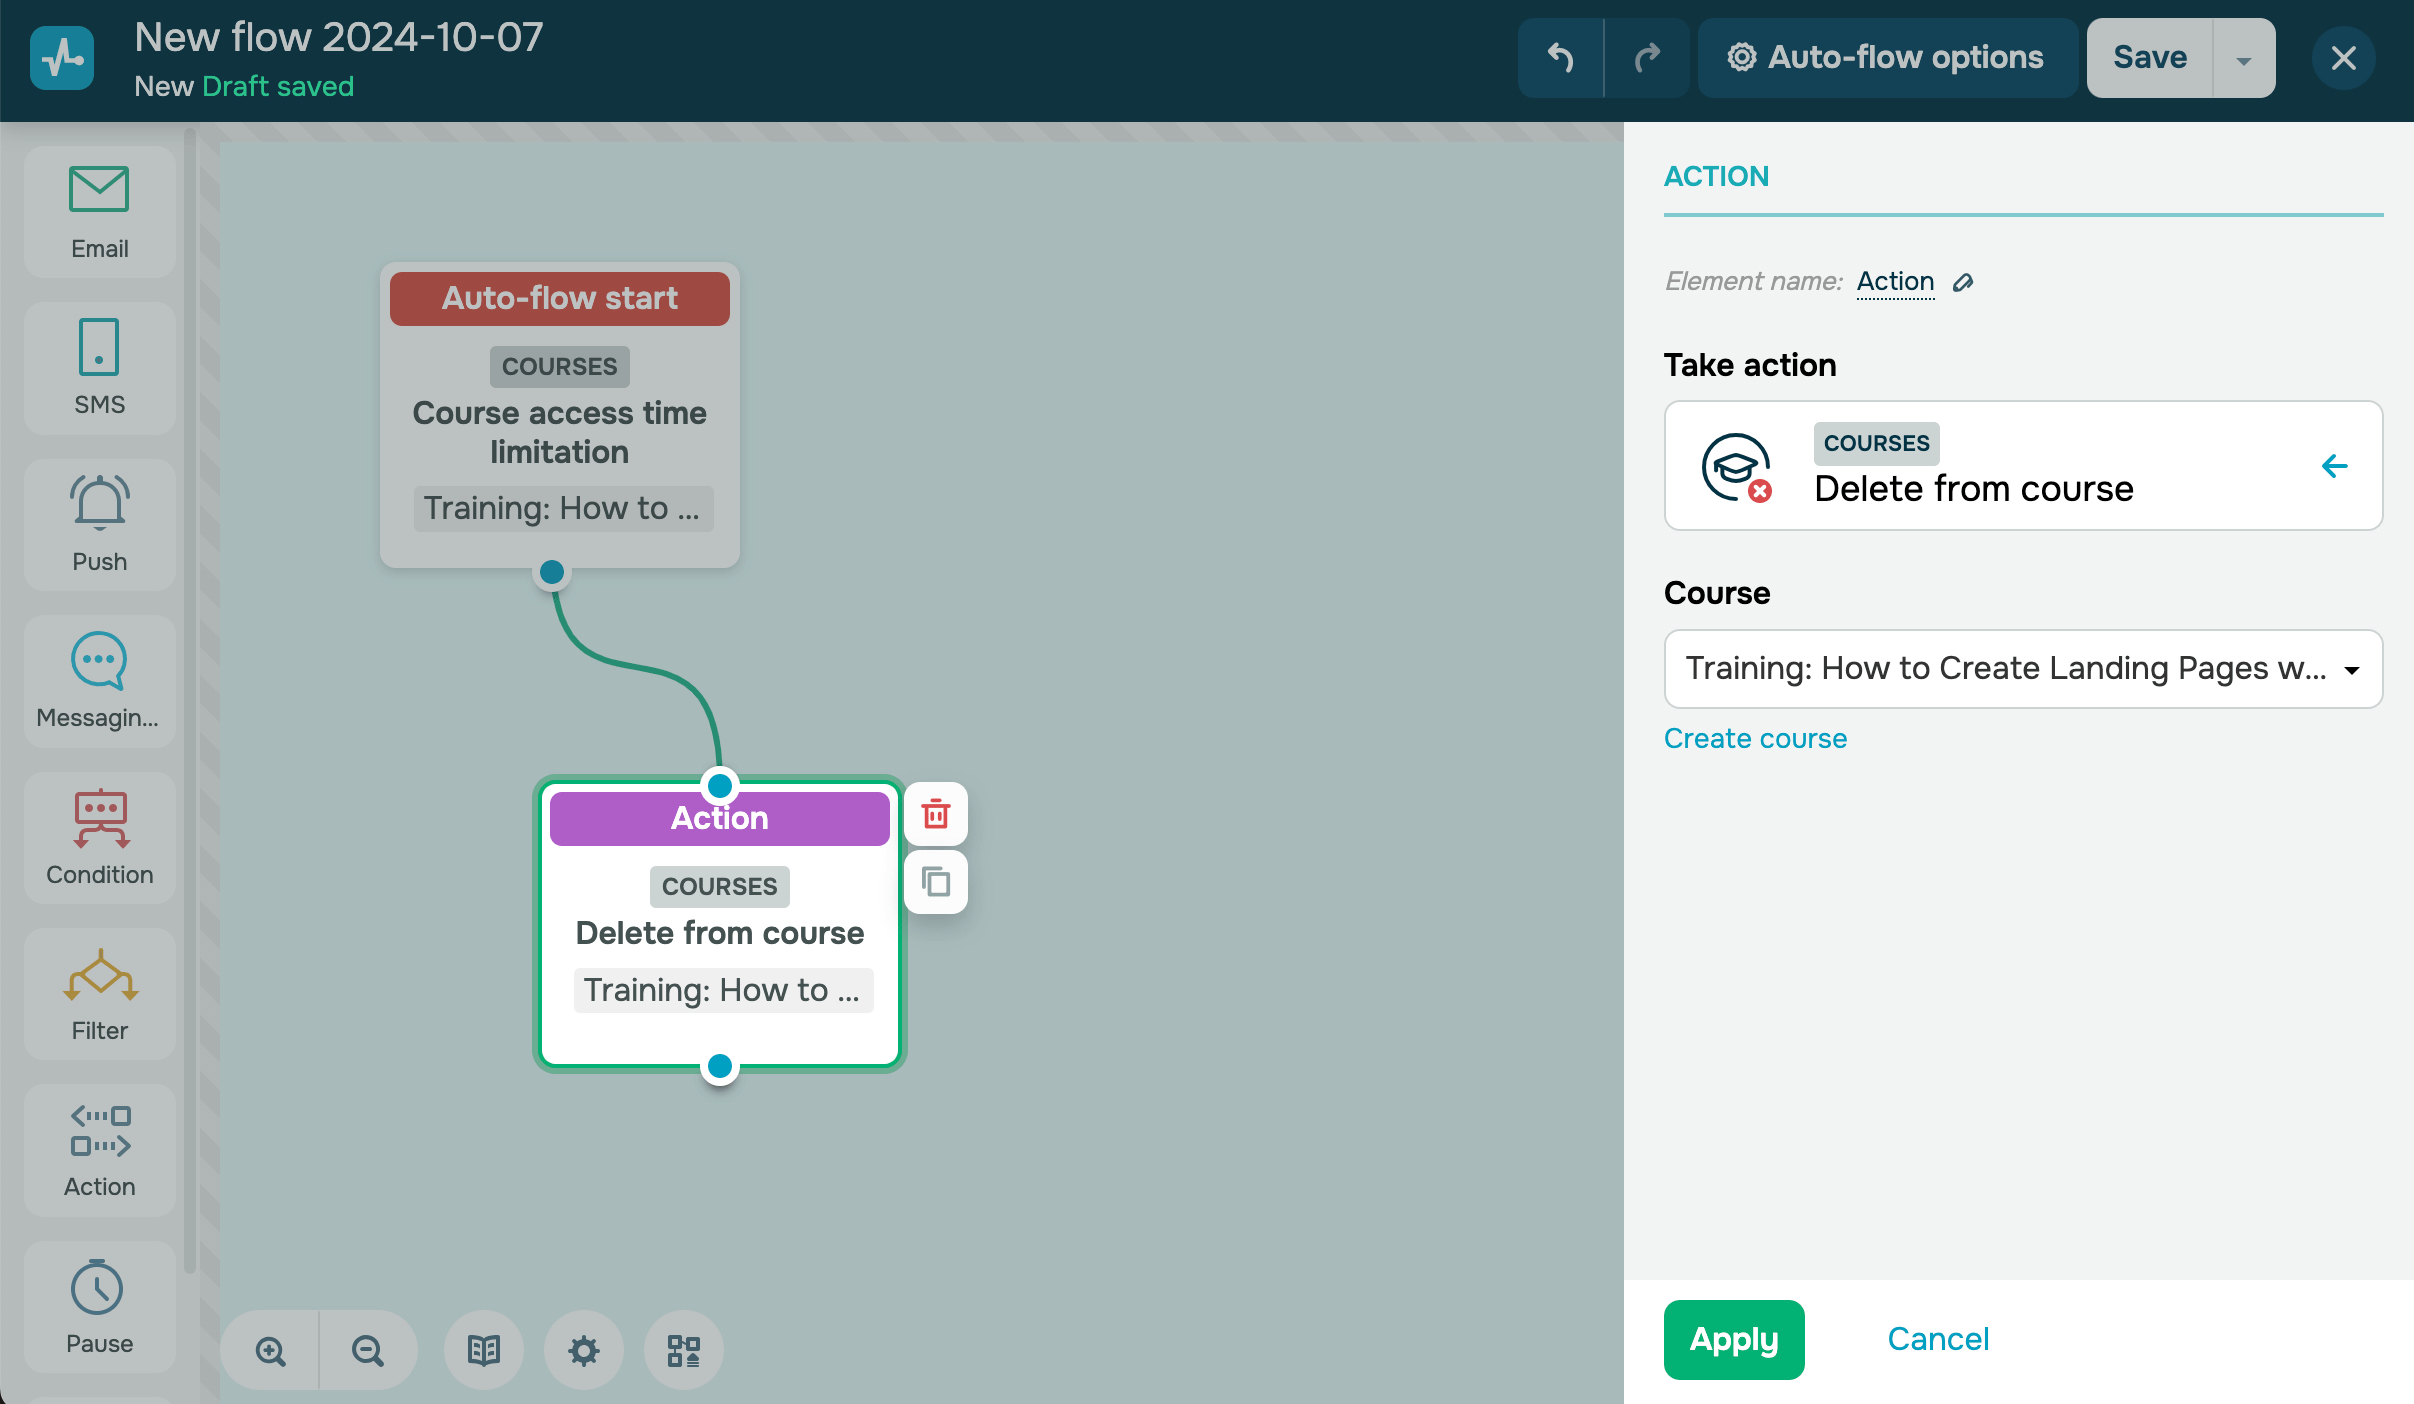
Delete from course
Deletes a student from a course. All student progress and data will be deleted.
Last Updated: 17.07.2025
or