Manage students
Once a student enrolls in your course, their data will be saved to Courses > the Students tab. You can edit their data or apply actions to one or multiple students.
You can use the Assign Tag, Delete, and Block actions in the Audience tab, as they apply to all courses in your account.
Manage one student’s data
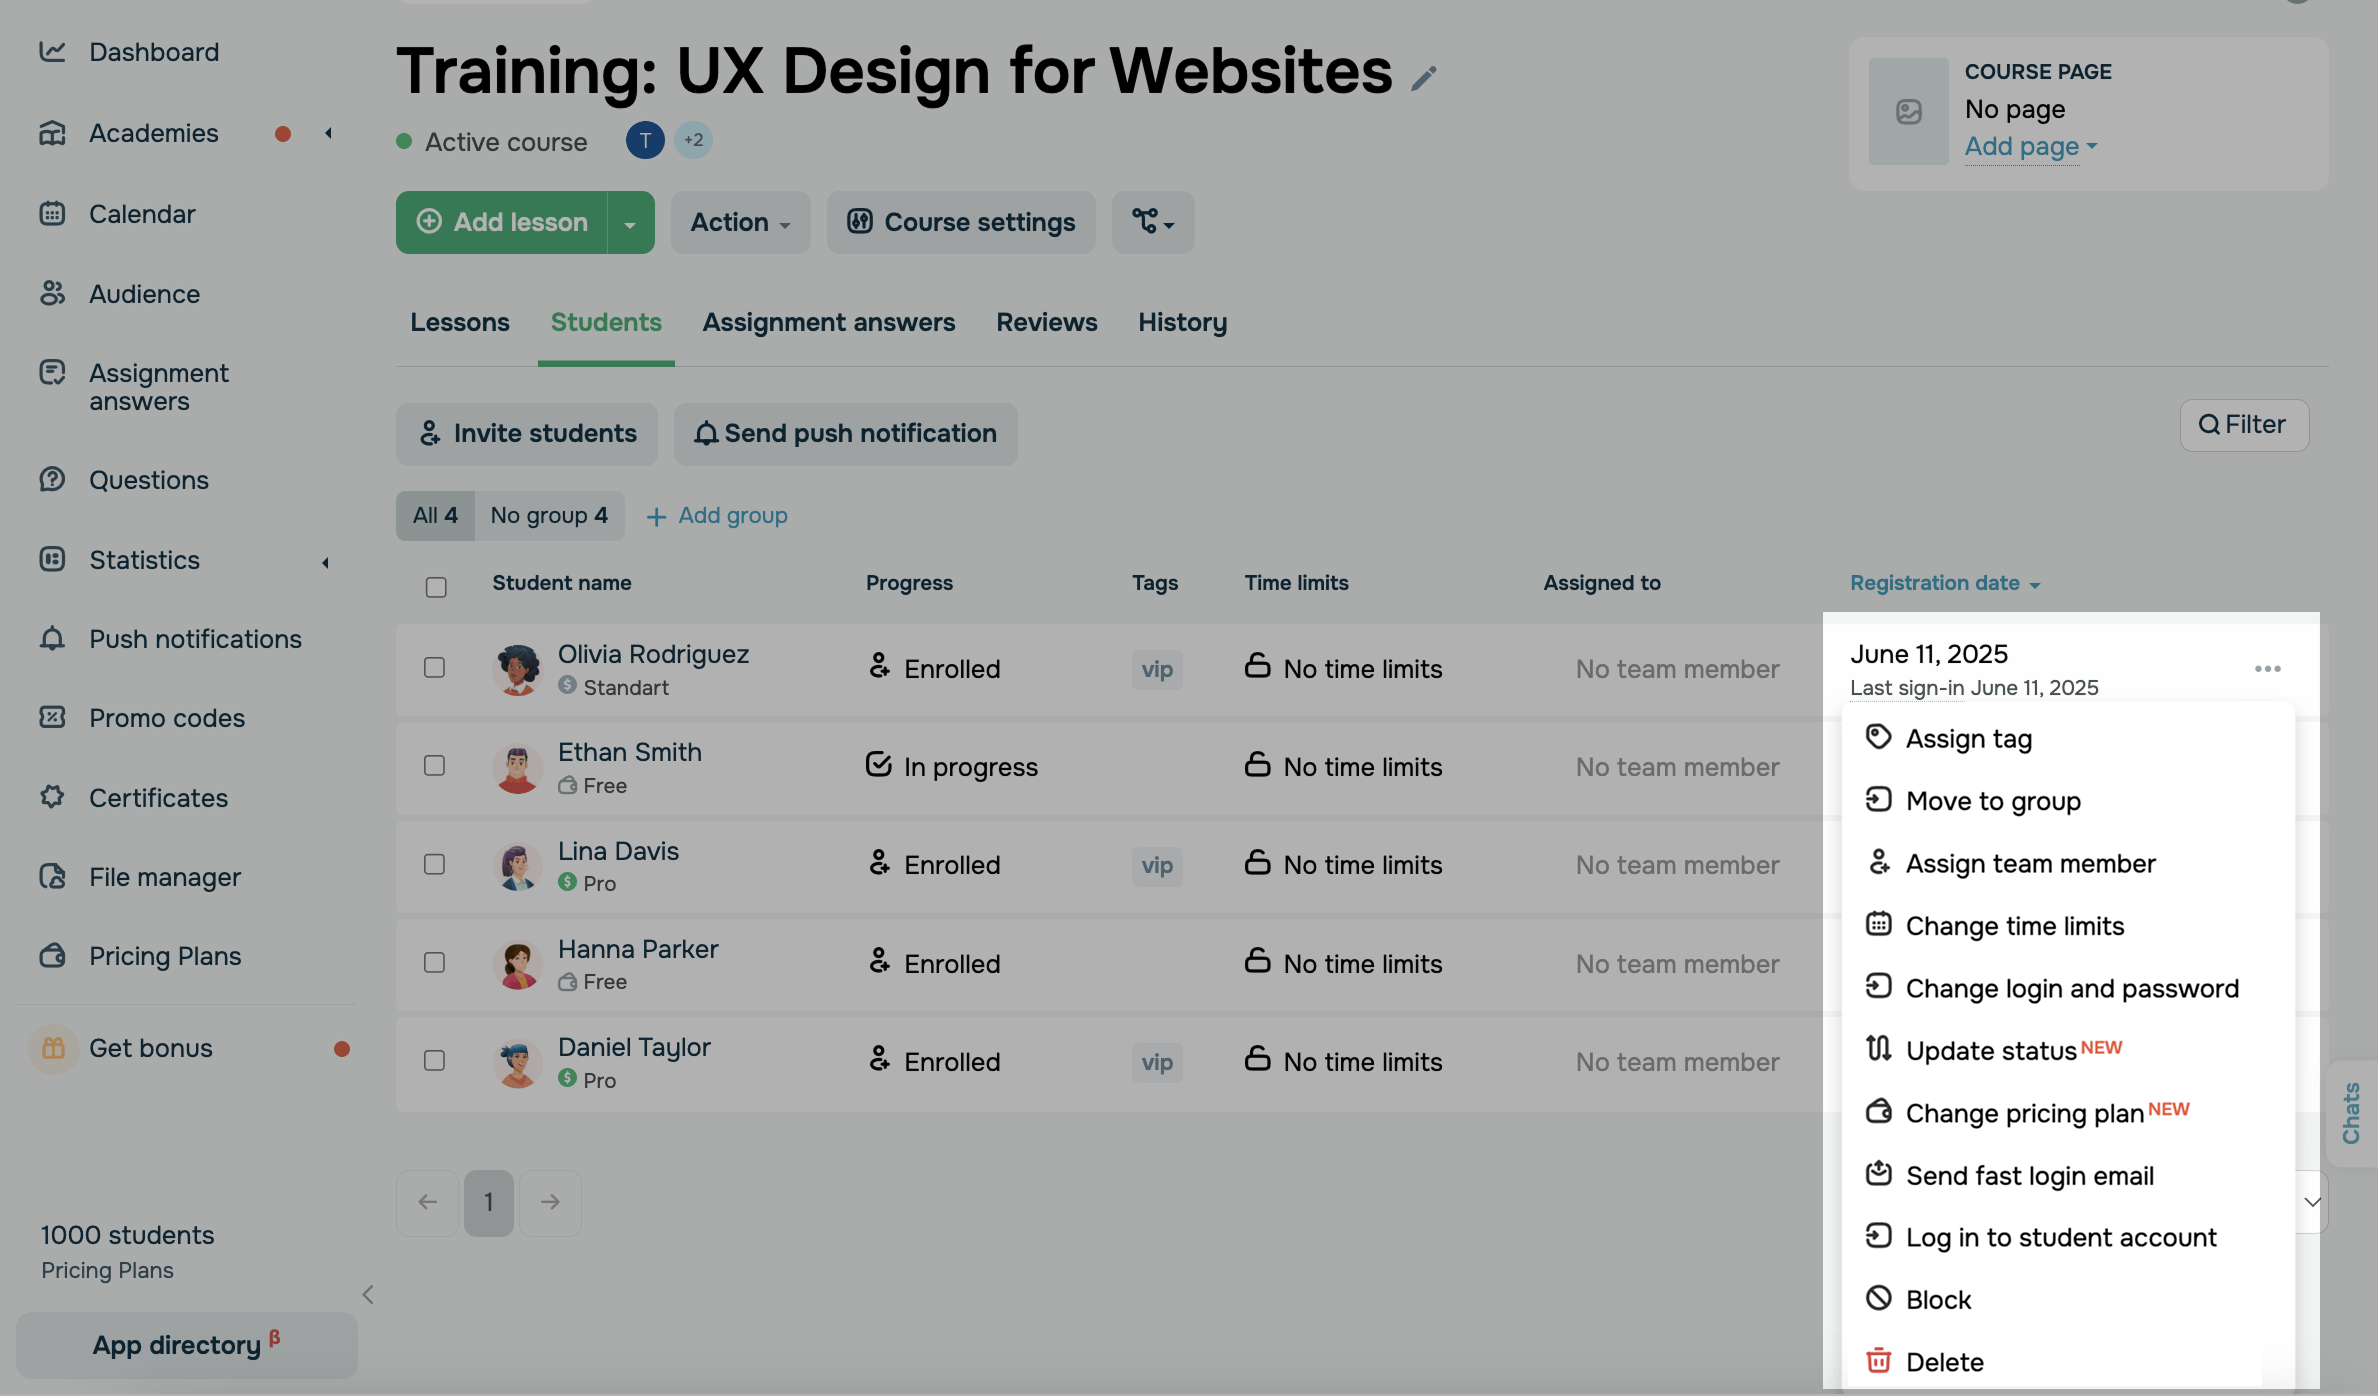
To apply an action to one student, click the three dots next to their name, and select an action from the dropdown menu. You can select from the following actions:
| Assign tag | Assign a tag to segment students. You can assign only existing CRM tags. |
| Move to group | Add a student to a group with an assigned instructor. |
| Assign team member | Assign an instructor to specific students without creating a group. |
| Change time limits* |
Limit a student’s access to your course. You can select from the following options: No limit: The student can take your course anytime. Limit until date: The student has to complete your course by the selected date. Close access: The student cannot take your course. Time limits apply only to your current course. Students can still take other courses if their access to them is not limited. |
| Change login and password | Changes a student's login and password and sends an email with new credentials. |
| Update status |
Updates a student’s status in your course. In the modal window, select a new status (previous or next). If a student completes your course and you change their status to a previous one (for example, To change a student’s progress, go to their card and update it manually. If a student doesn’t complete all lessons and you change their status to |
| Confirm payment | Set a student’s payment status to Paid, and grant access to your course. |
| Change pricing plan | Changes a student’s current pricing plan. If your course is paid, you can confirm the student’s payment manually or ask them to pay for the new plan.
You can also apply all settings from the new pricing plan to your student, including tags, groups, and more. |
| Send fast login email | Sends a student an email with a generated login link. |
| Log in to student account |
Generates a link to access a student account. Once an instructor logs in to a student’s account, the student will be automatically logged out. |
| Block* |
Remove a student’s access to their dashboard, and erase their progress in all of your courses. Blocked students will be excluded from your pricing plan count. They will not be able to access your existing courses or sign up for new ones. You can unblock them in the CRM section. |
| Delete* | Delete a student and all their progress. |
If you unblock a student, you will need to reenroll them in the Students tab, and they will need to complete your lessons and assignments again.
If you delete a student, they will still be able to sign up for your course again on your registration website and get started from the first lesson.
If you remove a student’s time limits, they will be able to continue learning from where they left off.
You can also view and edit student data (name, contacts, tags and more) in the student card.
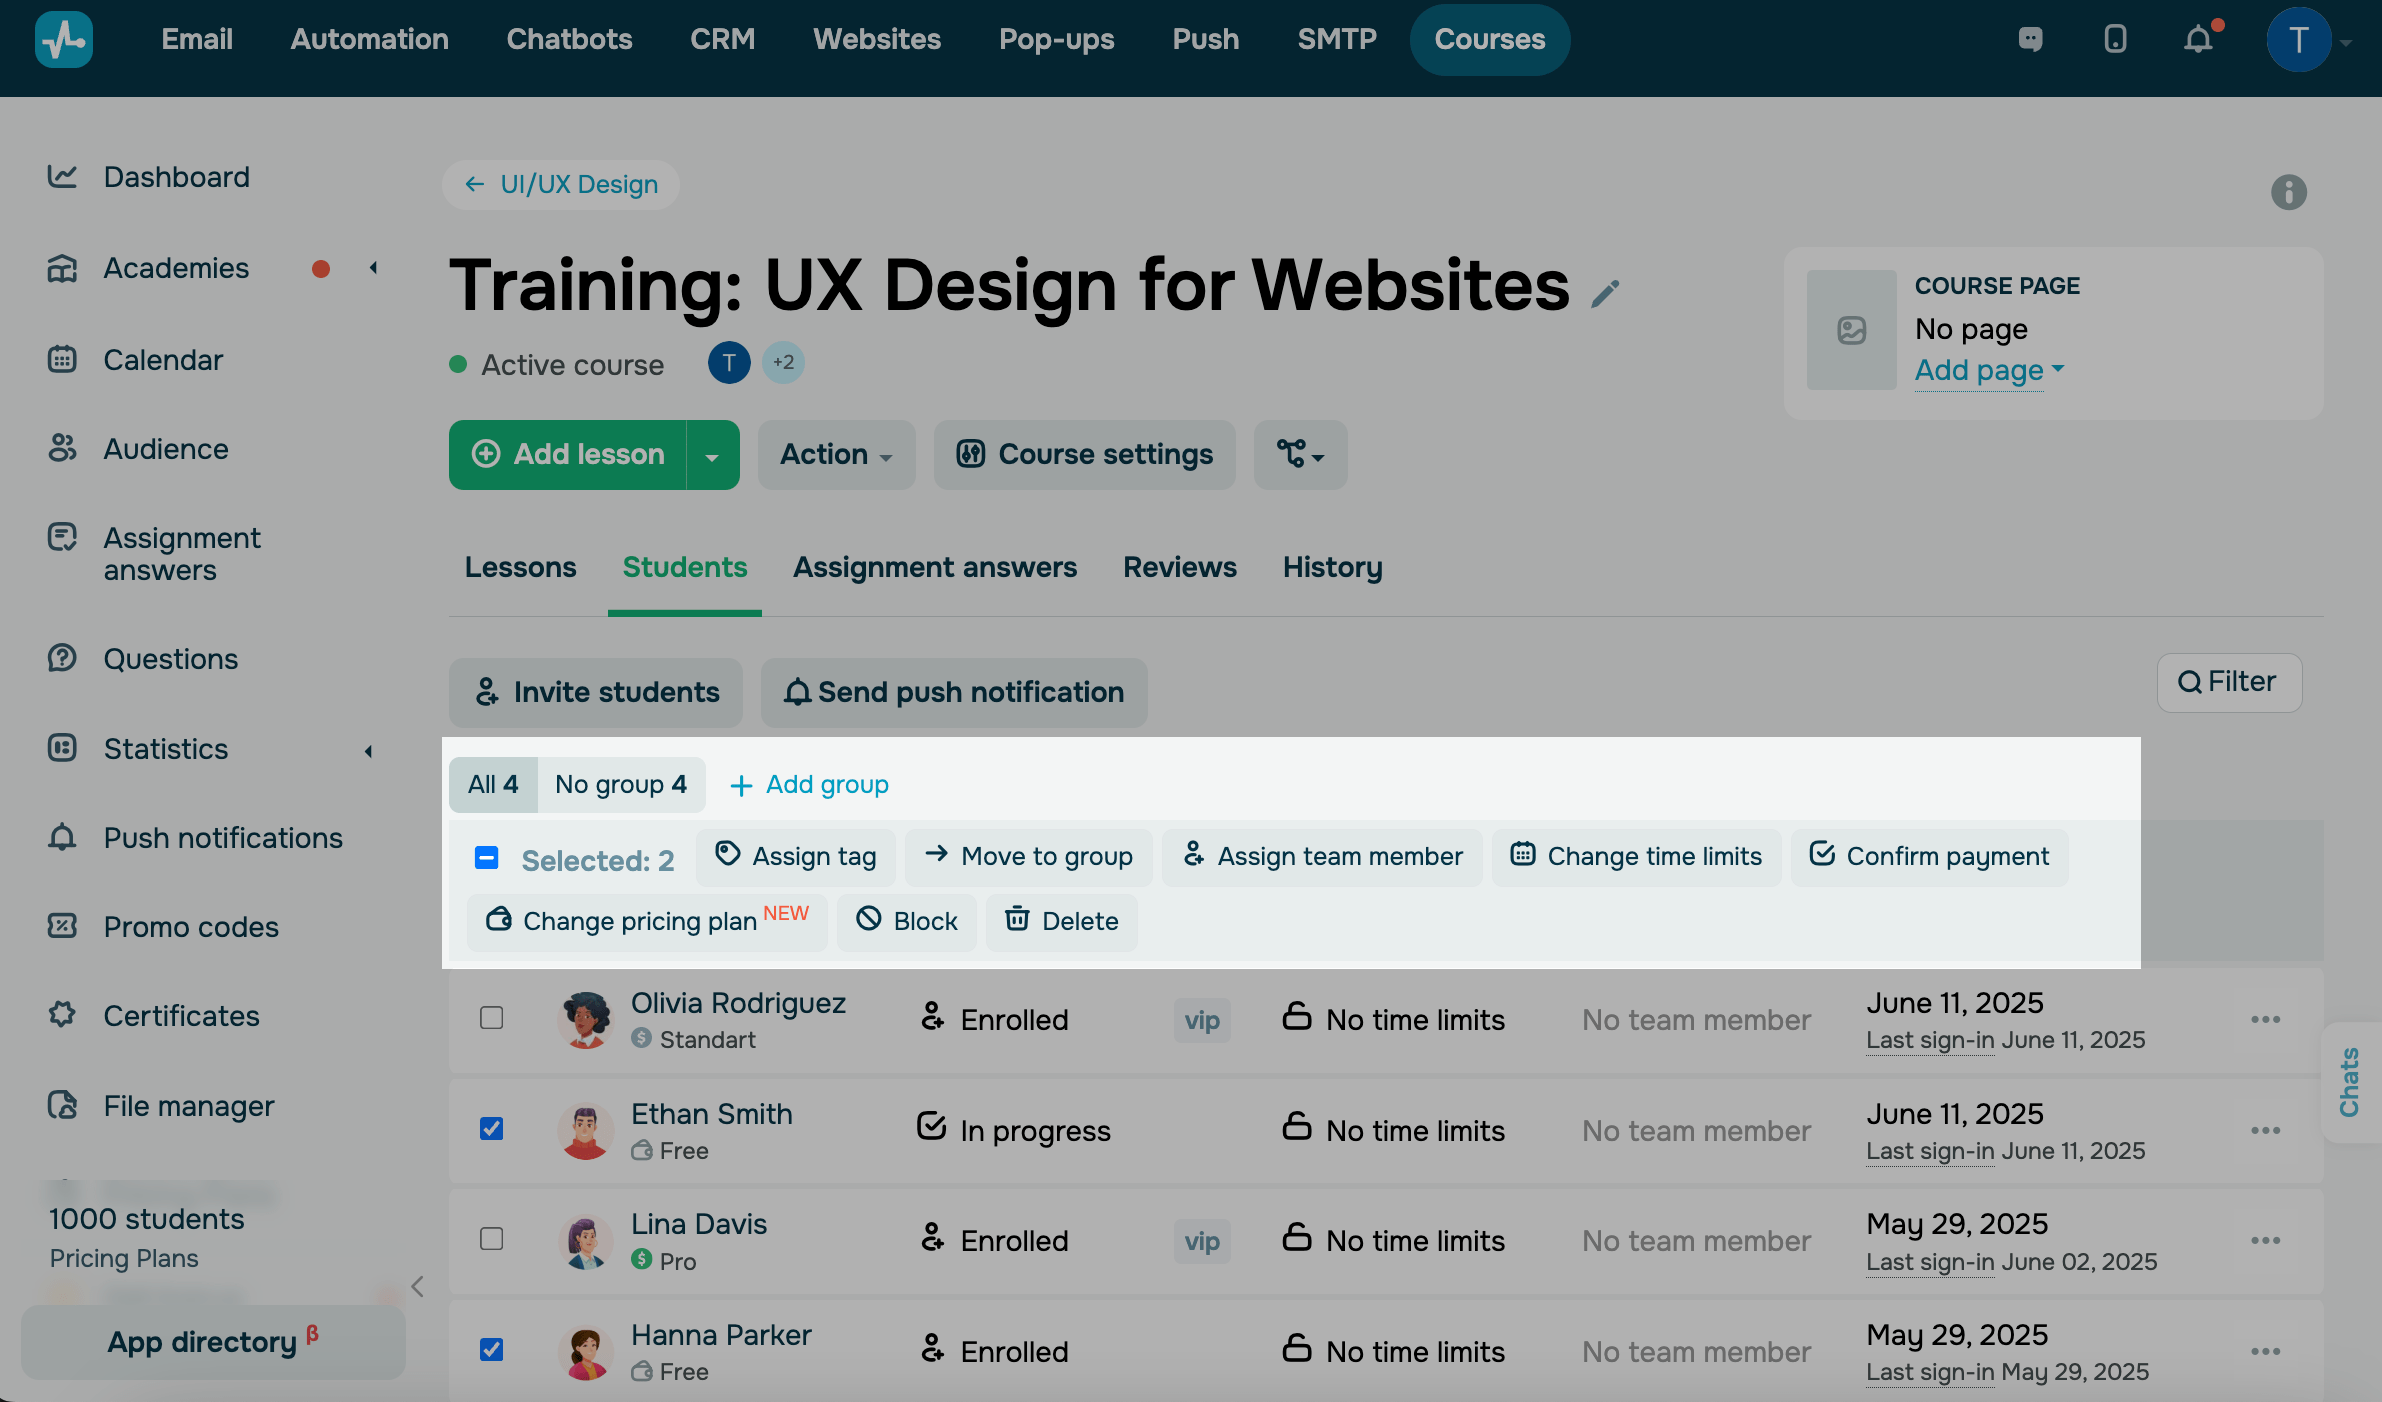
Manage multiple students’ data
To apply an action to multiple students, select the checkboxes next to them, and then select an action from the panel.
You can apply filter criteria to select a student segment.
Last Updated: 16.06.2025
or